╰┈➤ ✕ ❛ 𝗧𝟯; 𝗵𝗼𝘄 𝗶 𝗱𝗼 𝗲𝘆𝗲 𝗱𝗲𝘁𝗮𝗶𝗹𝘀 ❜

𝑯𝑼 𝑻𝑨𝑶. 👻 𝑇𝑈𝑇𝑂𝑅𝐼𝐴𝐿𝑆
》♦ ❛ 𝗵𝗼𝘄 𝗶 𝗱𝗼 𝗲𝘆𝗲 𝗱𝗲𝘁𝗮𝗶𝗹𝘀


(\__/)
(>'.'<)
(")_(")

⸝⸝ ʚ 🪓 ! ⌗ °• ━━━━━━━━━
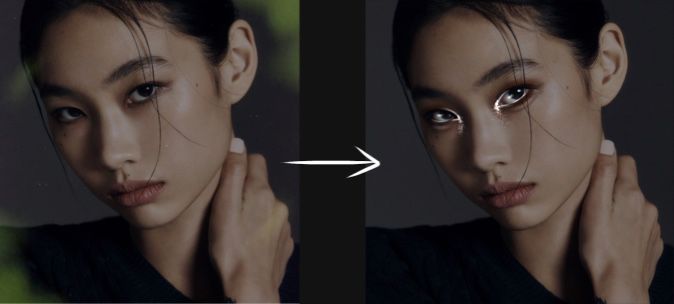
╰┈➤ this tutorial will be about how i highlight the eyes. this is just a basic tutorial! it is very important that you read the text under each photo!
first! create your canvas!
no idea how? refer to "the basics" chapter
⸝⸝ ʚ 🪓 ! ⌗ °• ━━━━━━━━━
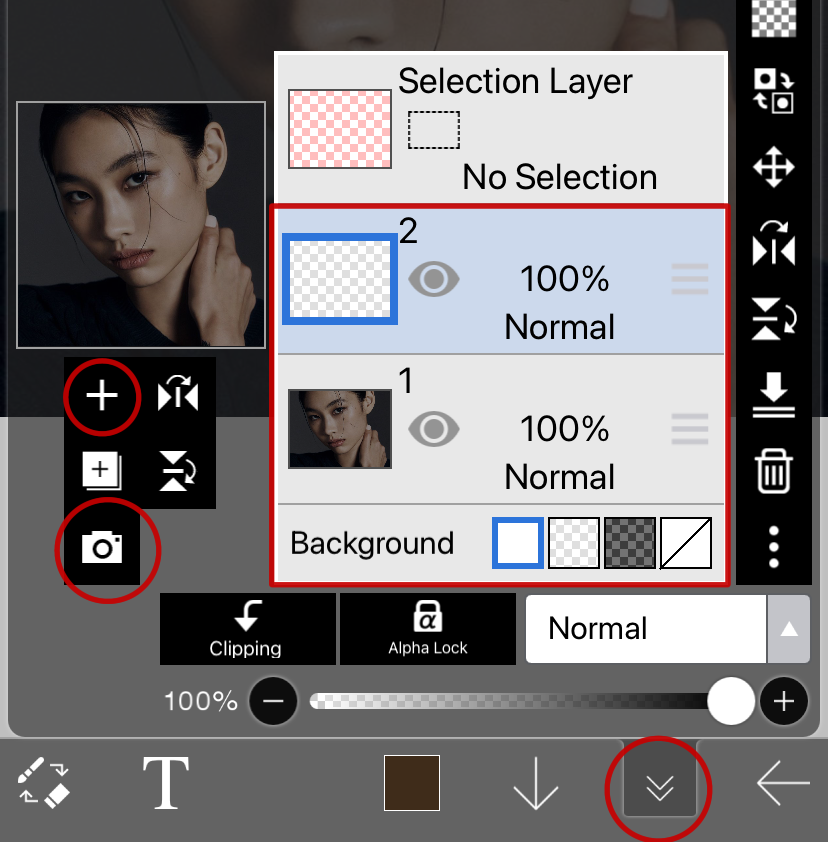
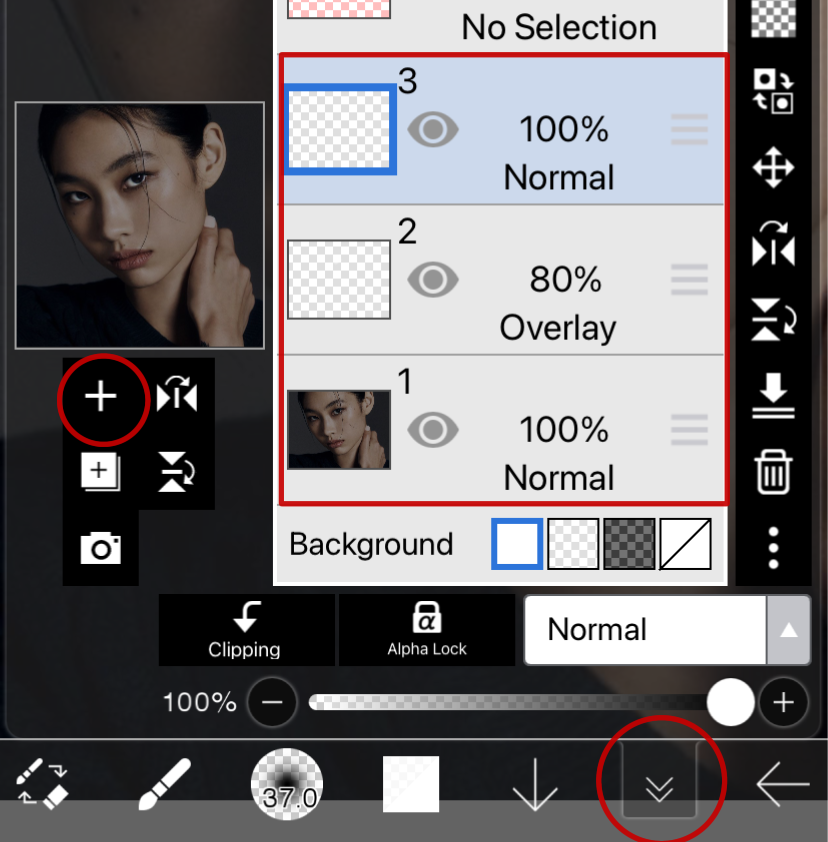
╰┈➤ to get started... 1. select the sixth icon on the bottom of the screen. 2. select the camera icon (circled above) and choose the photo you wish to use. you can pinch and pull to get the size of the image as you desire. 3. now that you have an image, select the + symbol to add a blank layer.
your screen should now look something similar to what is inside the red rectangle.
⸝⸝ ʚ 🪓 ! ⌗ °• ━━━━━━━━━
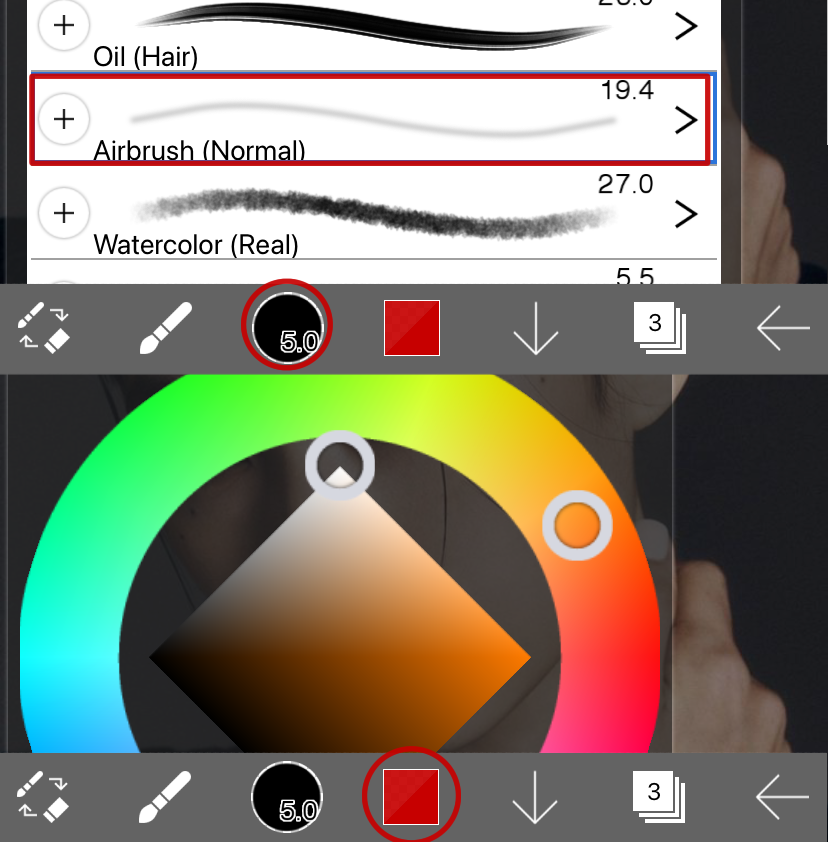
╰┈➤ 1. select the third icon. find the "airbrush (normal)" brush. exit out of that menu by tapping anywhere on your screen. 2. select the fourth icon. change the colour to white by using the colour selection. exit out of that menu by tapping anywhere on your screen.
⸝⸝ ʚ 🪓 ! ⌗ °• ━━━━━━━━━
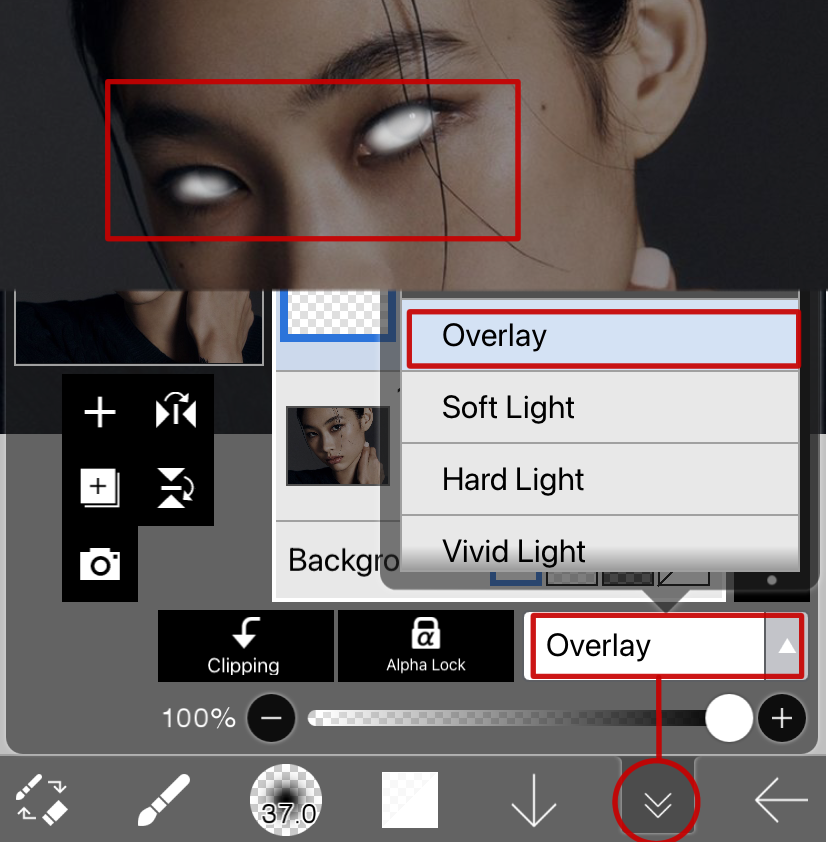
╰┈➤ now, on that blank layer, use the brush to cover the eyes in a similar way to the rectangled section in the photo above. once completed, click the 6th icon, click the white rectangle next to "alpha lock." it will open a layer style menu. click "overlay." you can change the opacity of the layer to what seems fit. i usually lower mine to around 80%
⸝⸝ ʚ 🪓 ! ⌗ °• ━━━━━━━━━
╰┈➤ next, click the layers icon to bring up the menu above. click the + so that you now have 3 layers: your image, an overlay layer, and the new layer. while you're still on that layers menu, repeat what we did to make the previous layer an overlay, but this time, select "add"
⸝⸝ ʚ 🪓 ! ⌗ °• ━━━━━━━━━
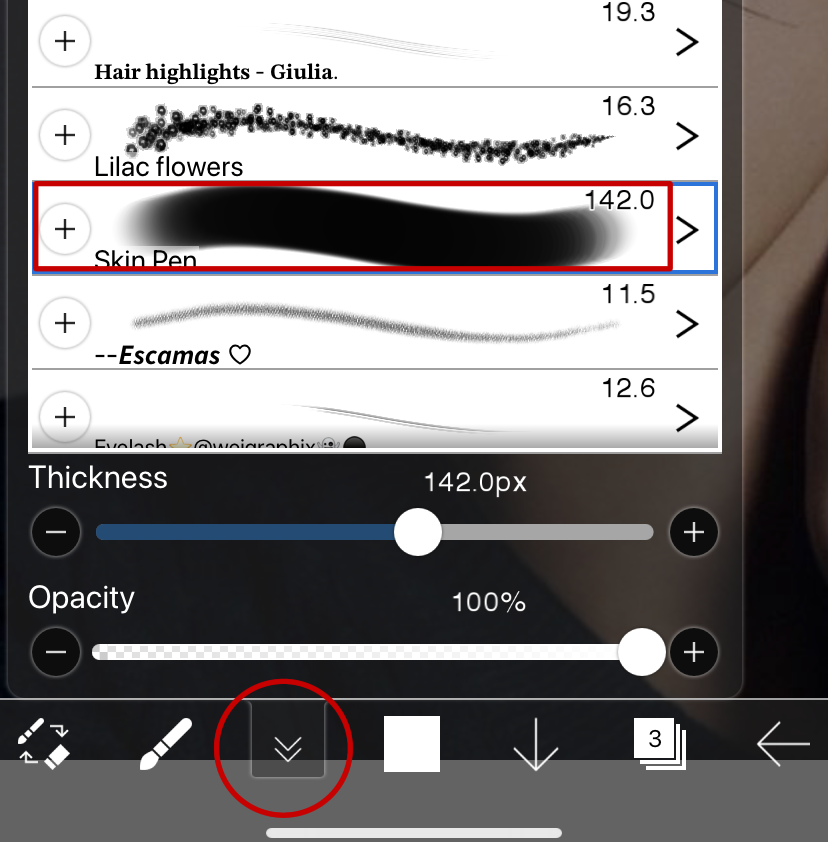
╰┈➤ go back to the brush menu and select "skin pen" ( to get this pen, go to the "brushes i use" chapter. you can download it in the "eye detail" brushes ).
make sure your stabiliser is on!
( if your unsure what this is, go
back to "the basics" chapter )
also, before i start drawing, i usually
have my brush opacity set around the
90-100 mark, but it is up to you! the size
and the brush opacity can be adjusted
to how you see fit.
⸝⸝ ʚ 🪓 ! ⌗ °• ━━━━━━━━━
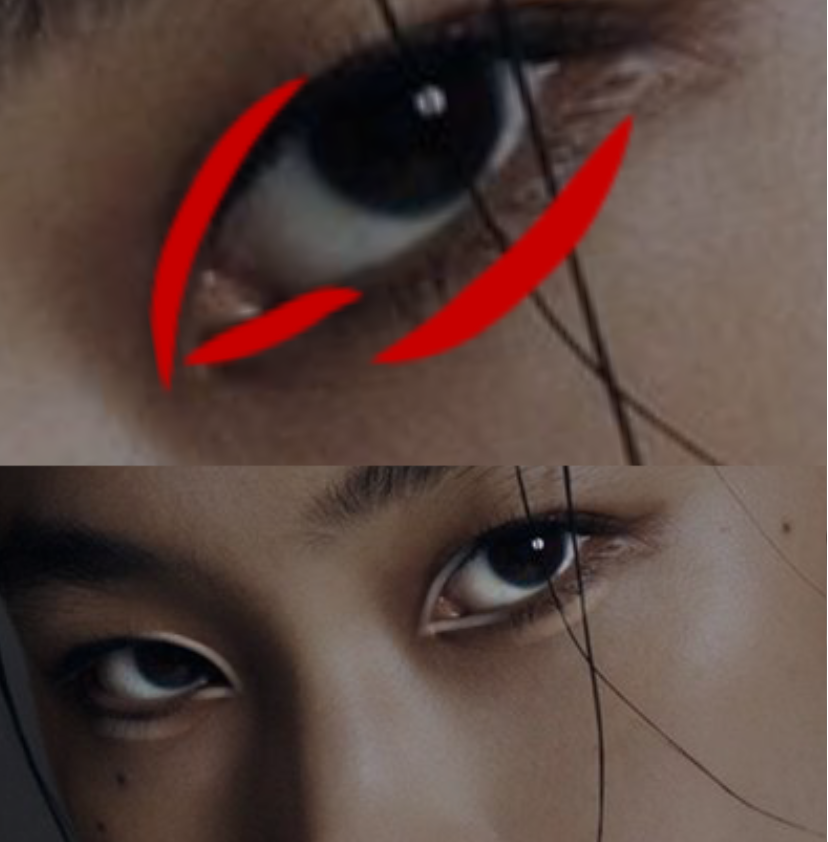
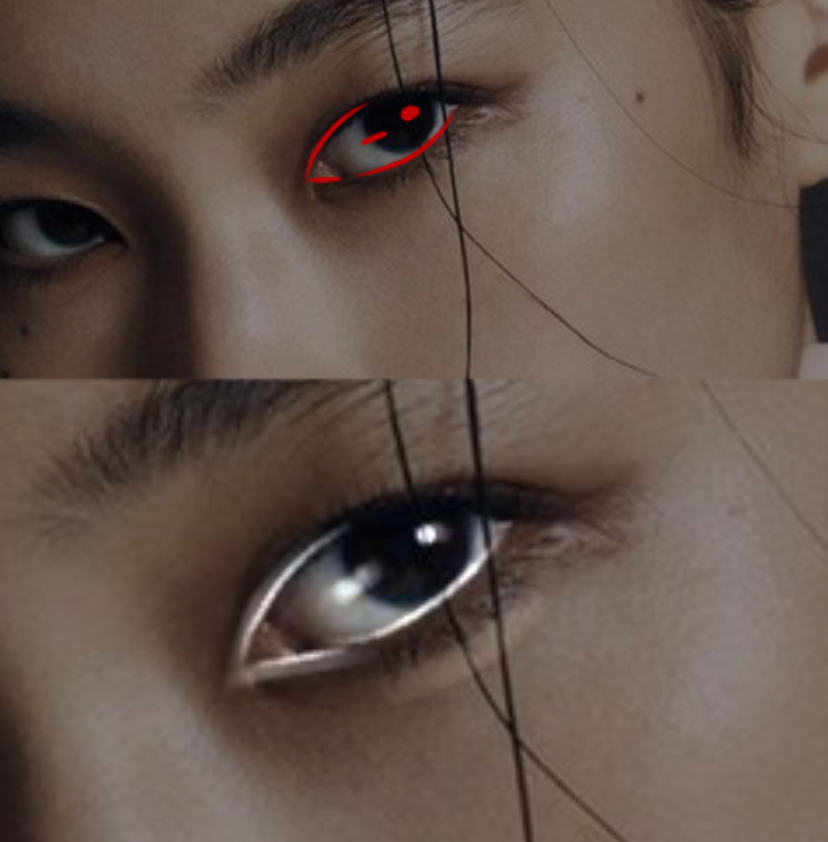
╰┈➤ follow the red guidelines to see where i place the brush strokes. for the stroke beneath the eye, the brush is usually set around the 50 opacity mark
next step: add another new layer, and
change the style of that layer to "add"
⸝⸝ ʚ 🪓 ! ⌗ °• ━━━━━━━━━
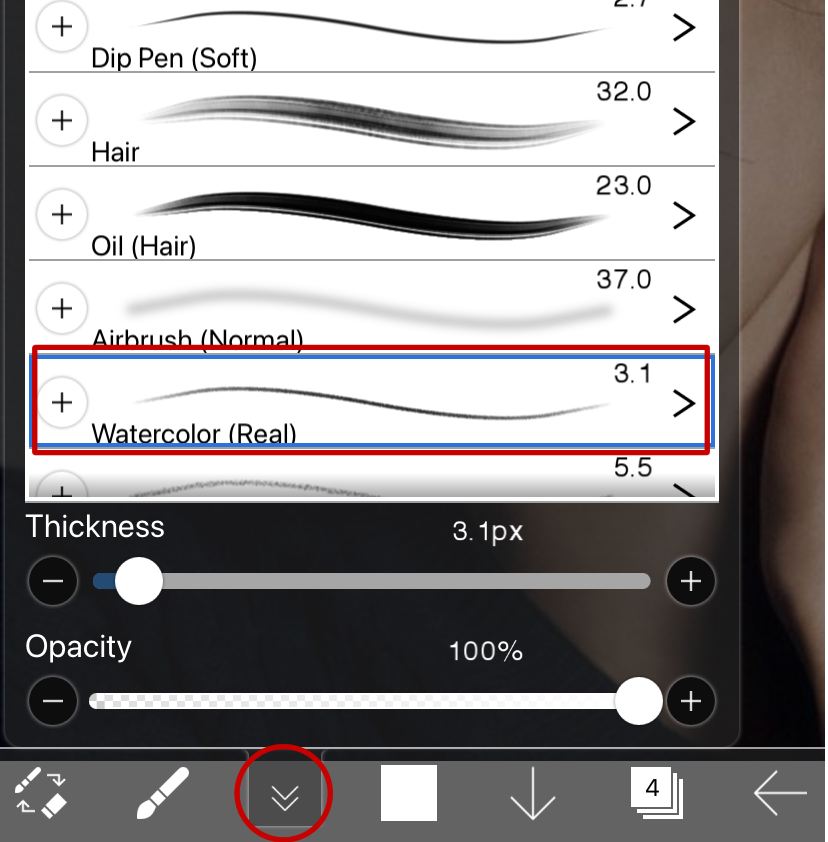
╰┈➤ select the third icon and change your brush to "watercolour (real)" this is a brush already provided to you by ibispaint x, but in case you can't find it, you can find it in the "brushes i use" section. i usually have this brush quite small, but once again, adjust the size and opacity to how you need.
⸝⸝ ʚ 🪓 ! ⌗ °• ━━━━━━━━━
╰┈➤ follow the red guidelines to see where i have placed the brushstrokes. i apply the highlight on the inner corner again, on the waterline, and to add shine on the eyeball.
next step: add another new layer, and
change the style of that layer to "overlay"
⸝⸝ ʚ 🪓 ! ⌗ °• ━━━━━━━━━
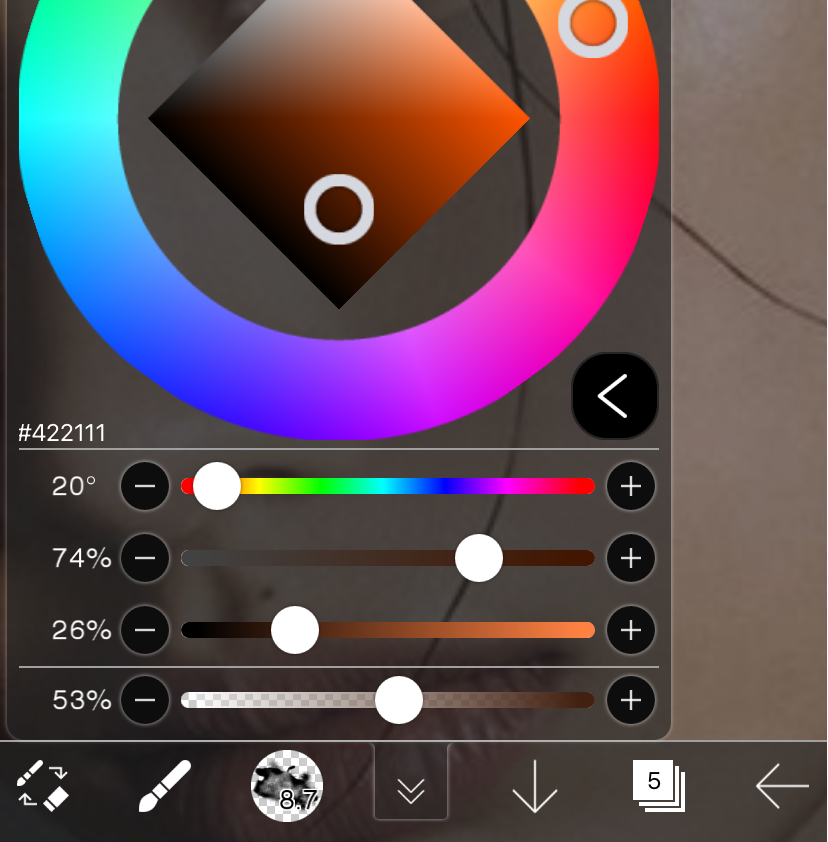
╰┈➤ go back to the colour menu and change the colour to any brownish. for this i used #422111
with opacity 60-80. go back to the brush menu and change the brush to "airbrush (normal)"
⸝⸝ ʚ 🪓 ! ⌗ °• ━━━━━━━━━
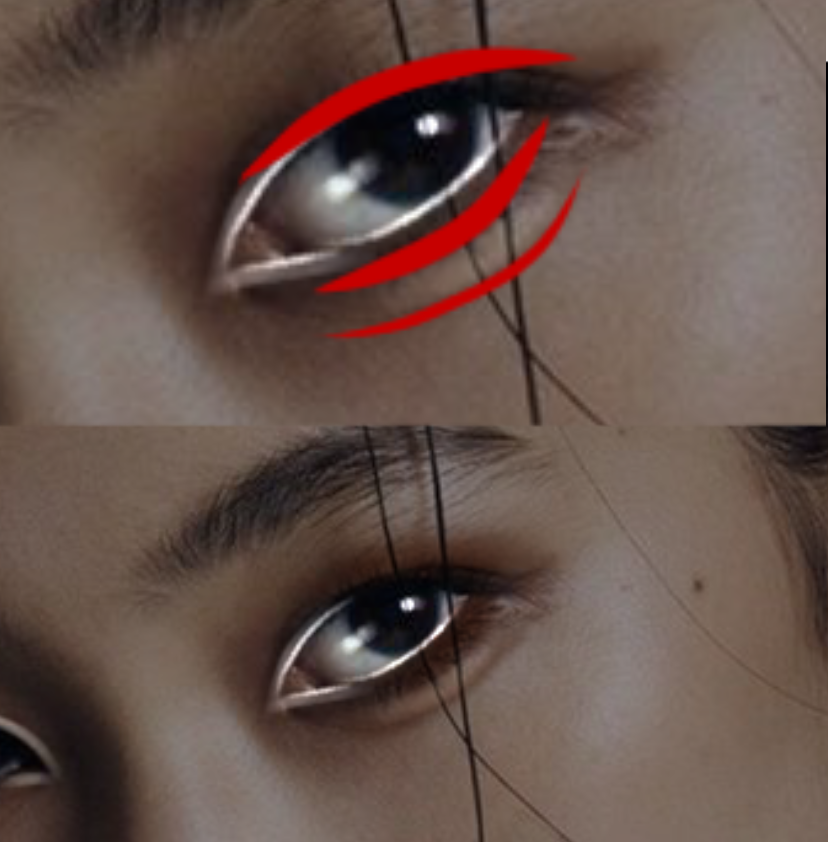
╰┈➤ follow the red guidelines to see where i place the brush strokes. your end result should look a little like the bottom image!
next step: add another new layer, and
change the style of that layer to "add"
next step: change the brush type to "FG highlight - add" (you can find this brush in the
"brushes i use" tutorial)
⸝⸝ ʚ 🪓 ! ⌗ °• ━━━━━━━━━
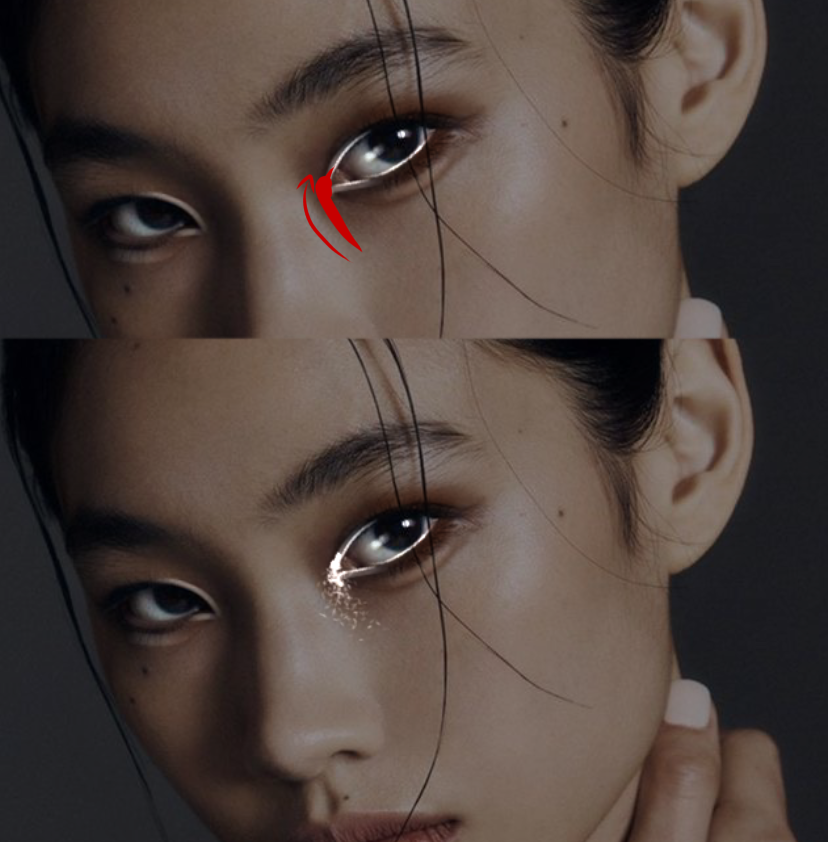
╰┈➤ this particular brush can be a little hard to use. follow the arrow in the placement of the red guidelines to get the effect in the image below the guidelines. remember, if it doesn't look right, you can always undo, and try again.
and... CONGRATS! you have successfully
done eye details the eternityei way
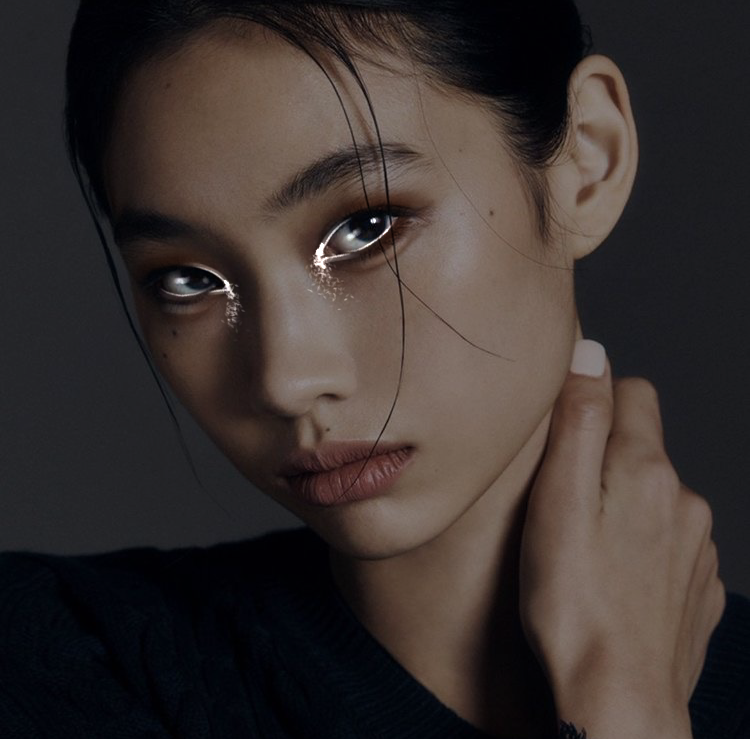
sometimes i will add extra highlights,
overlays and such on the eyes. i'll
add these on my pinterest:
@pestosalads
𝒕𝒉𝒂𝒕'𝒔 𝒂𝒍𝒍 𝒇𝒐𝒓 𝒏𝒐𝒘!
if you have any suggestions for tutorials, please leave them in the suggestion section on the introductory "tutorials" chapter

Bạn đang đọc truyện trên: AzTruyen.Top