⠀ how to displace text onto skin

since i suck at explaining things, here are a few of my covers from my cover shop where i've used this "technique," i guess you could call it?
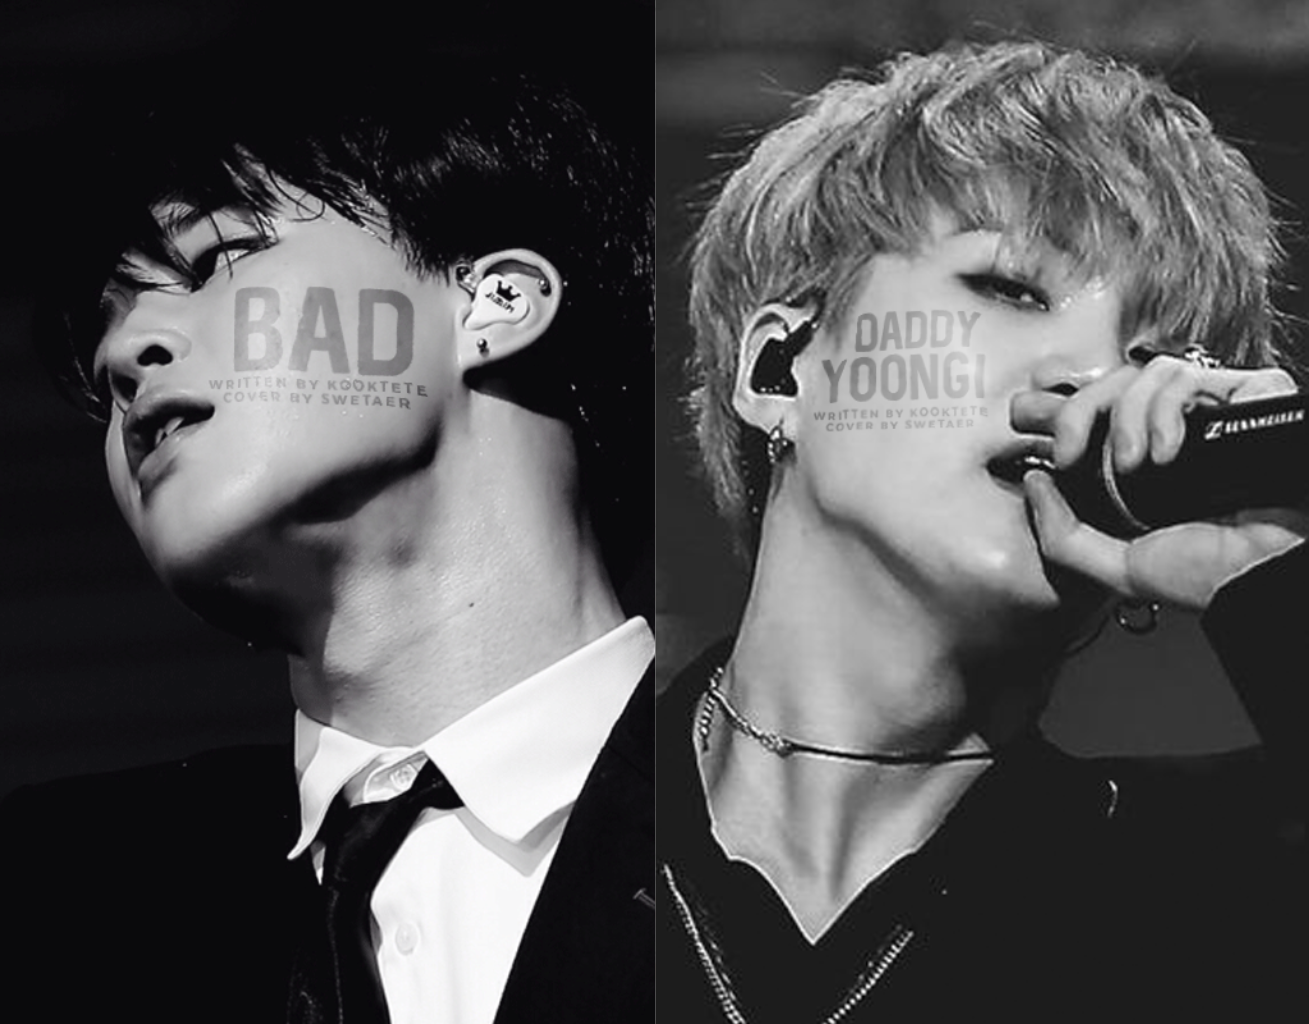
so if you look closely at the pictures above, you can see that the text is subtly sort of wrapped around the models' faces. the letters sort of conform to the curves and divots in their faces.
and now that i've finished terribly explaining what i'm talking about, let's get into the tutorial!
how to displace text。
to start, open up the image on which you'd like to use this method into photoshop.
then, head over to adjustments > hue/saturation and bring the saturation slide all the way over to the left (the grey/dark/black side) so that the image is now black and white.
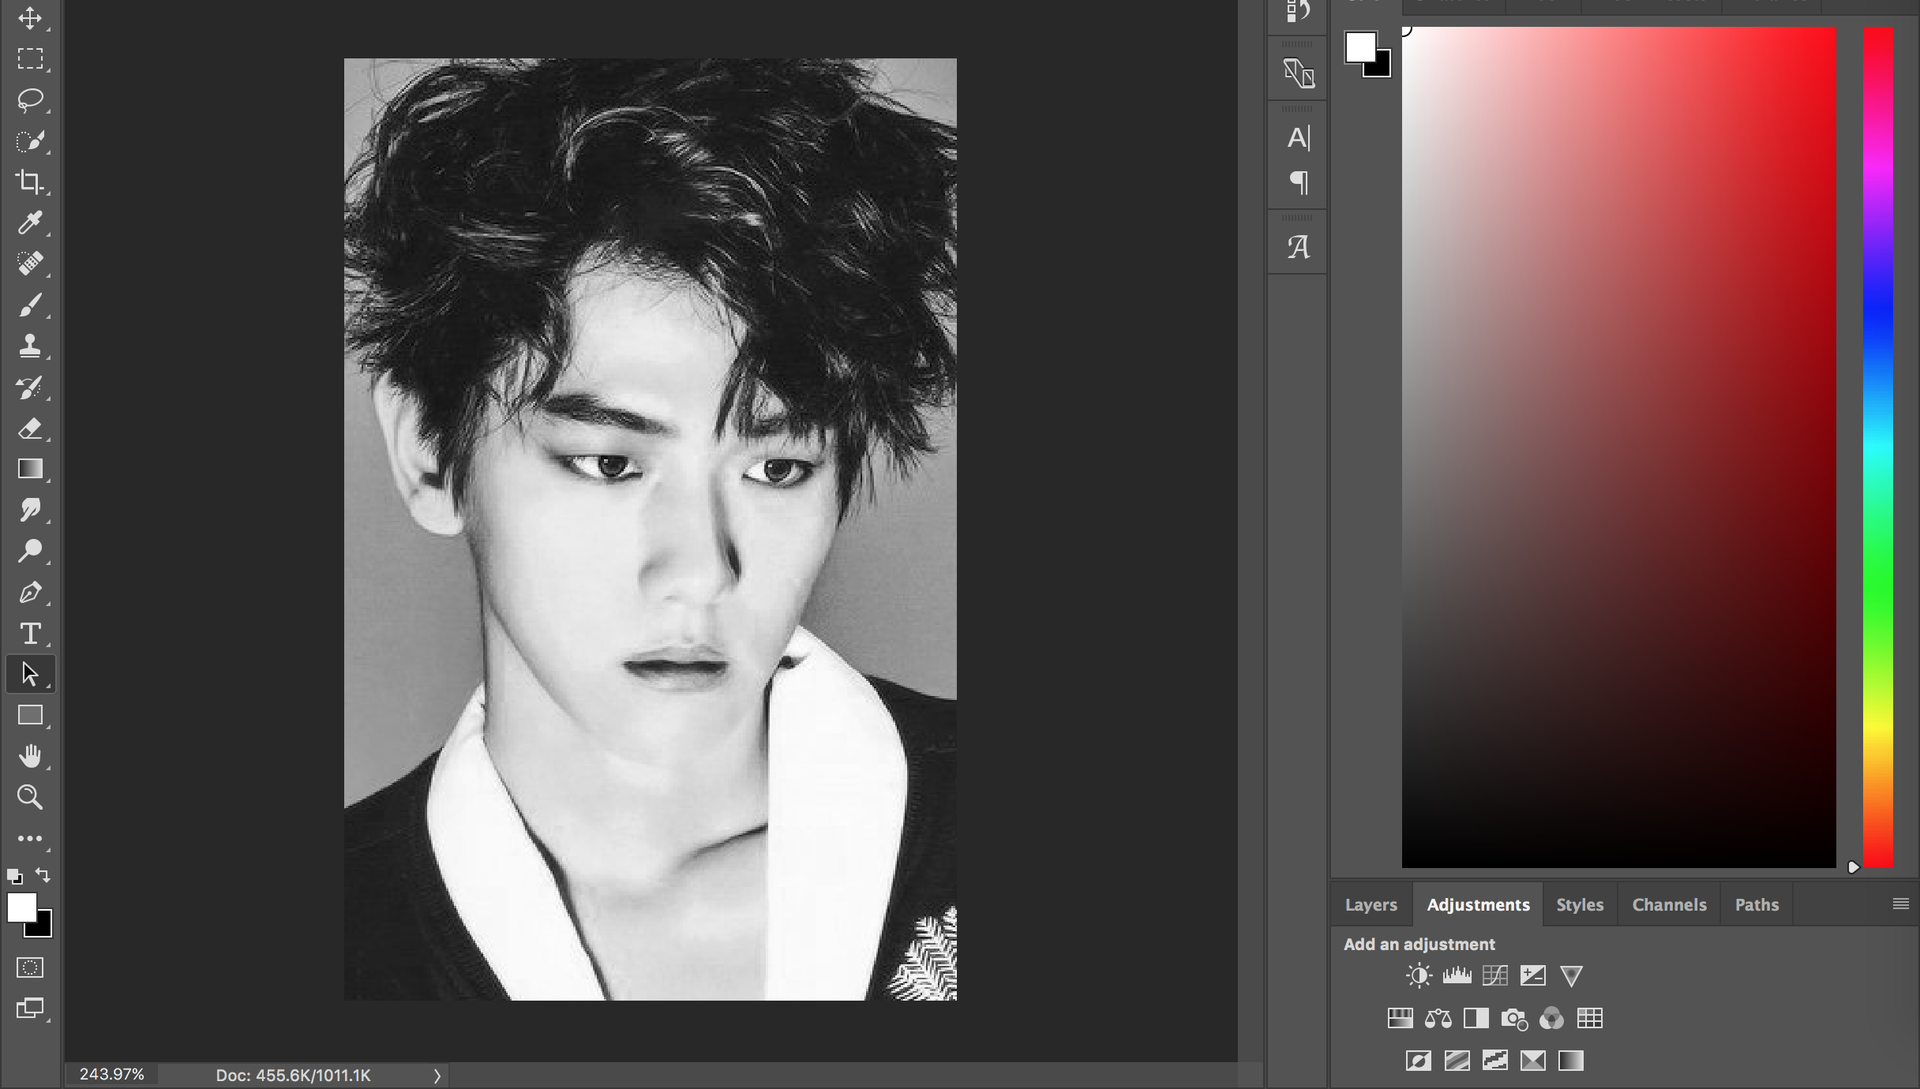
now go to save as and save your image as a psd file.
reopen your original (the non b&w version of the image you just saved as a psd) image into photoshop again, and begin adding any psd's or colorings, as well as any text that you'd like to displace/warp to fit the model's face.
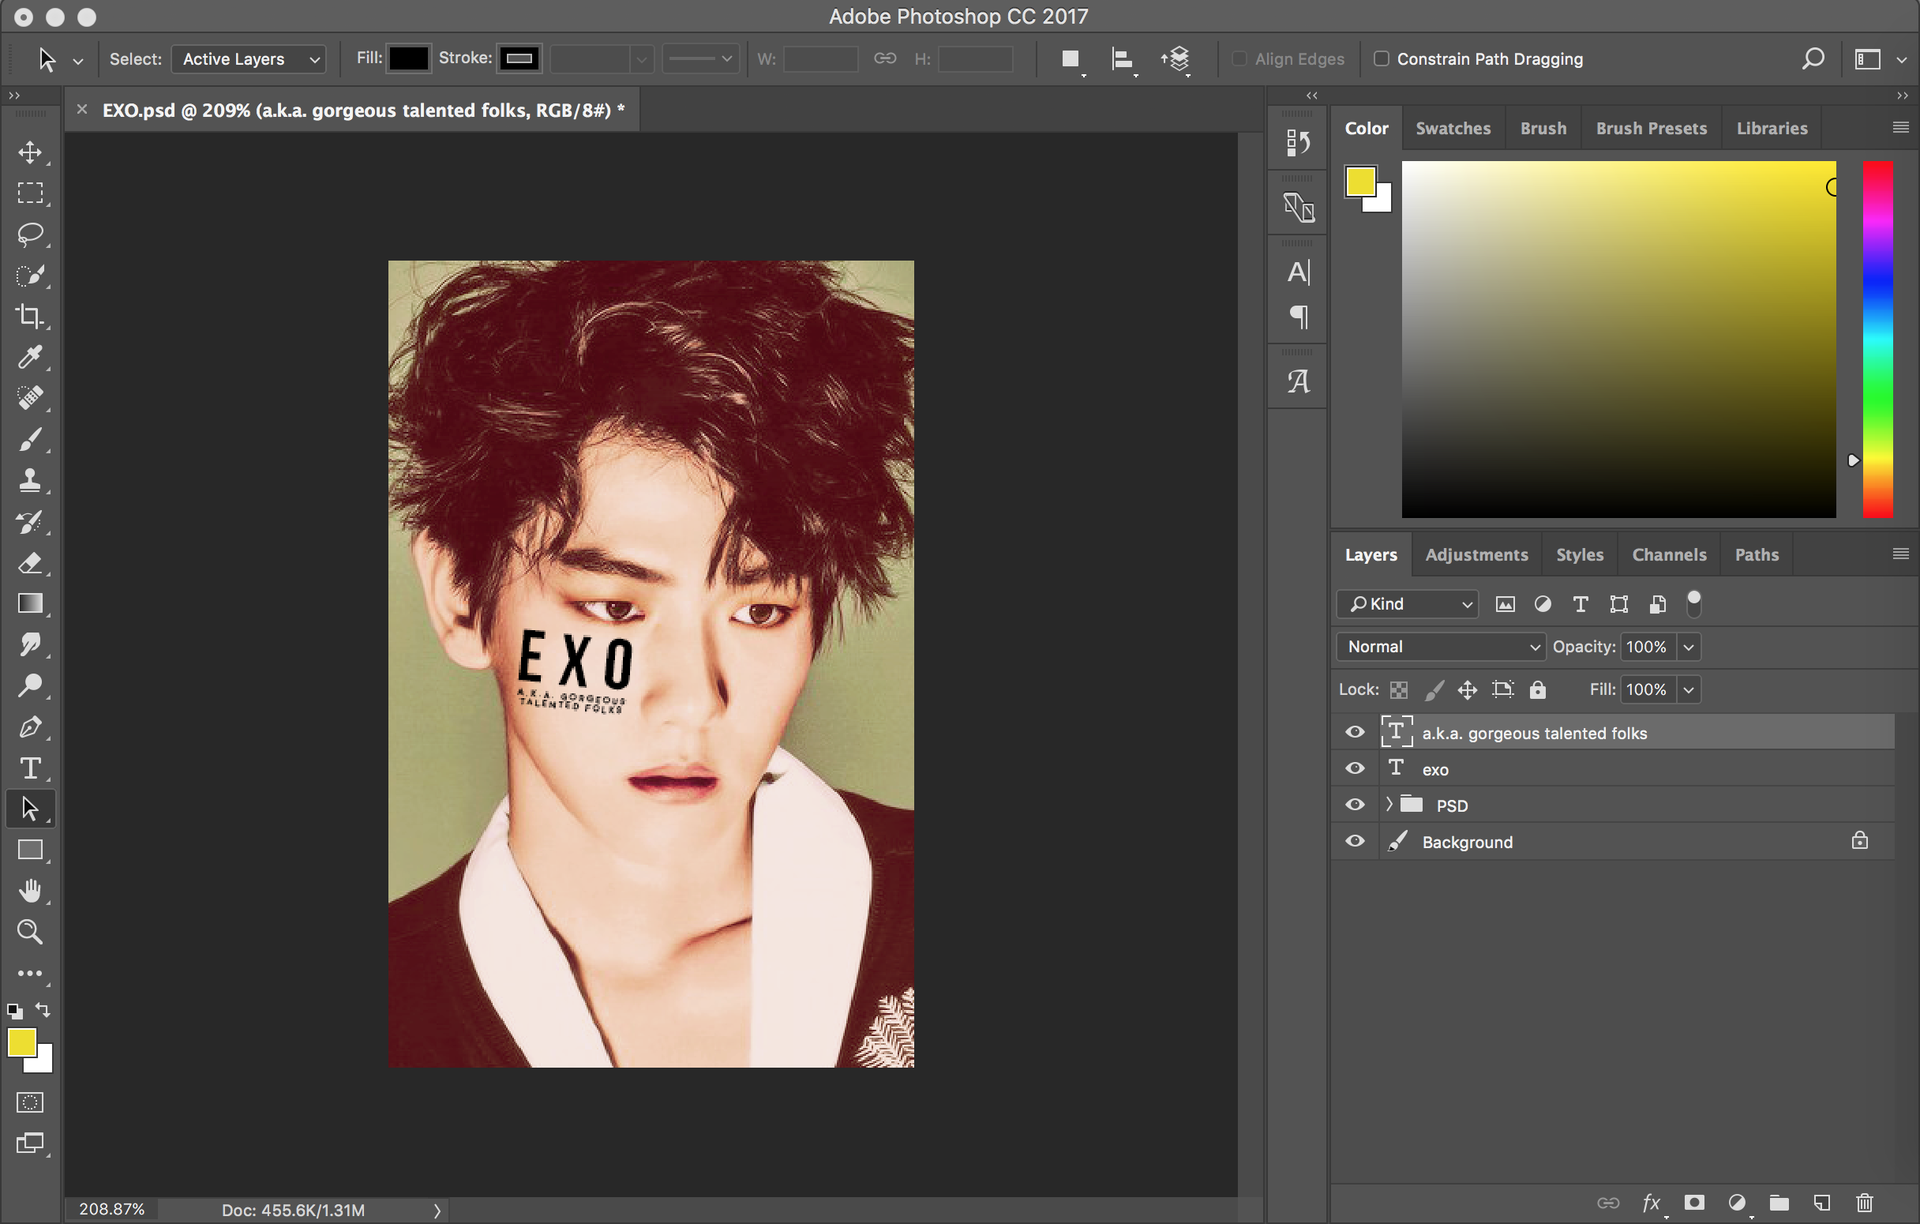
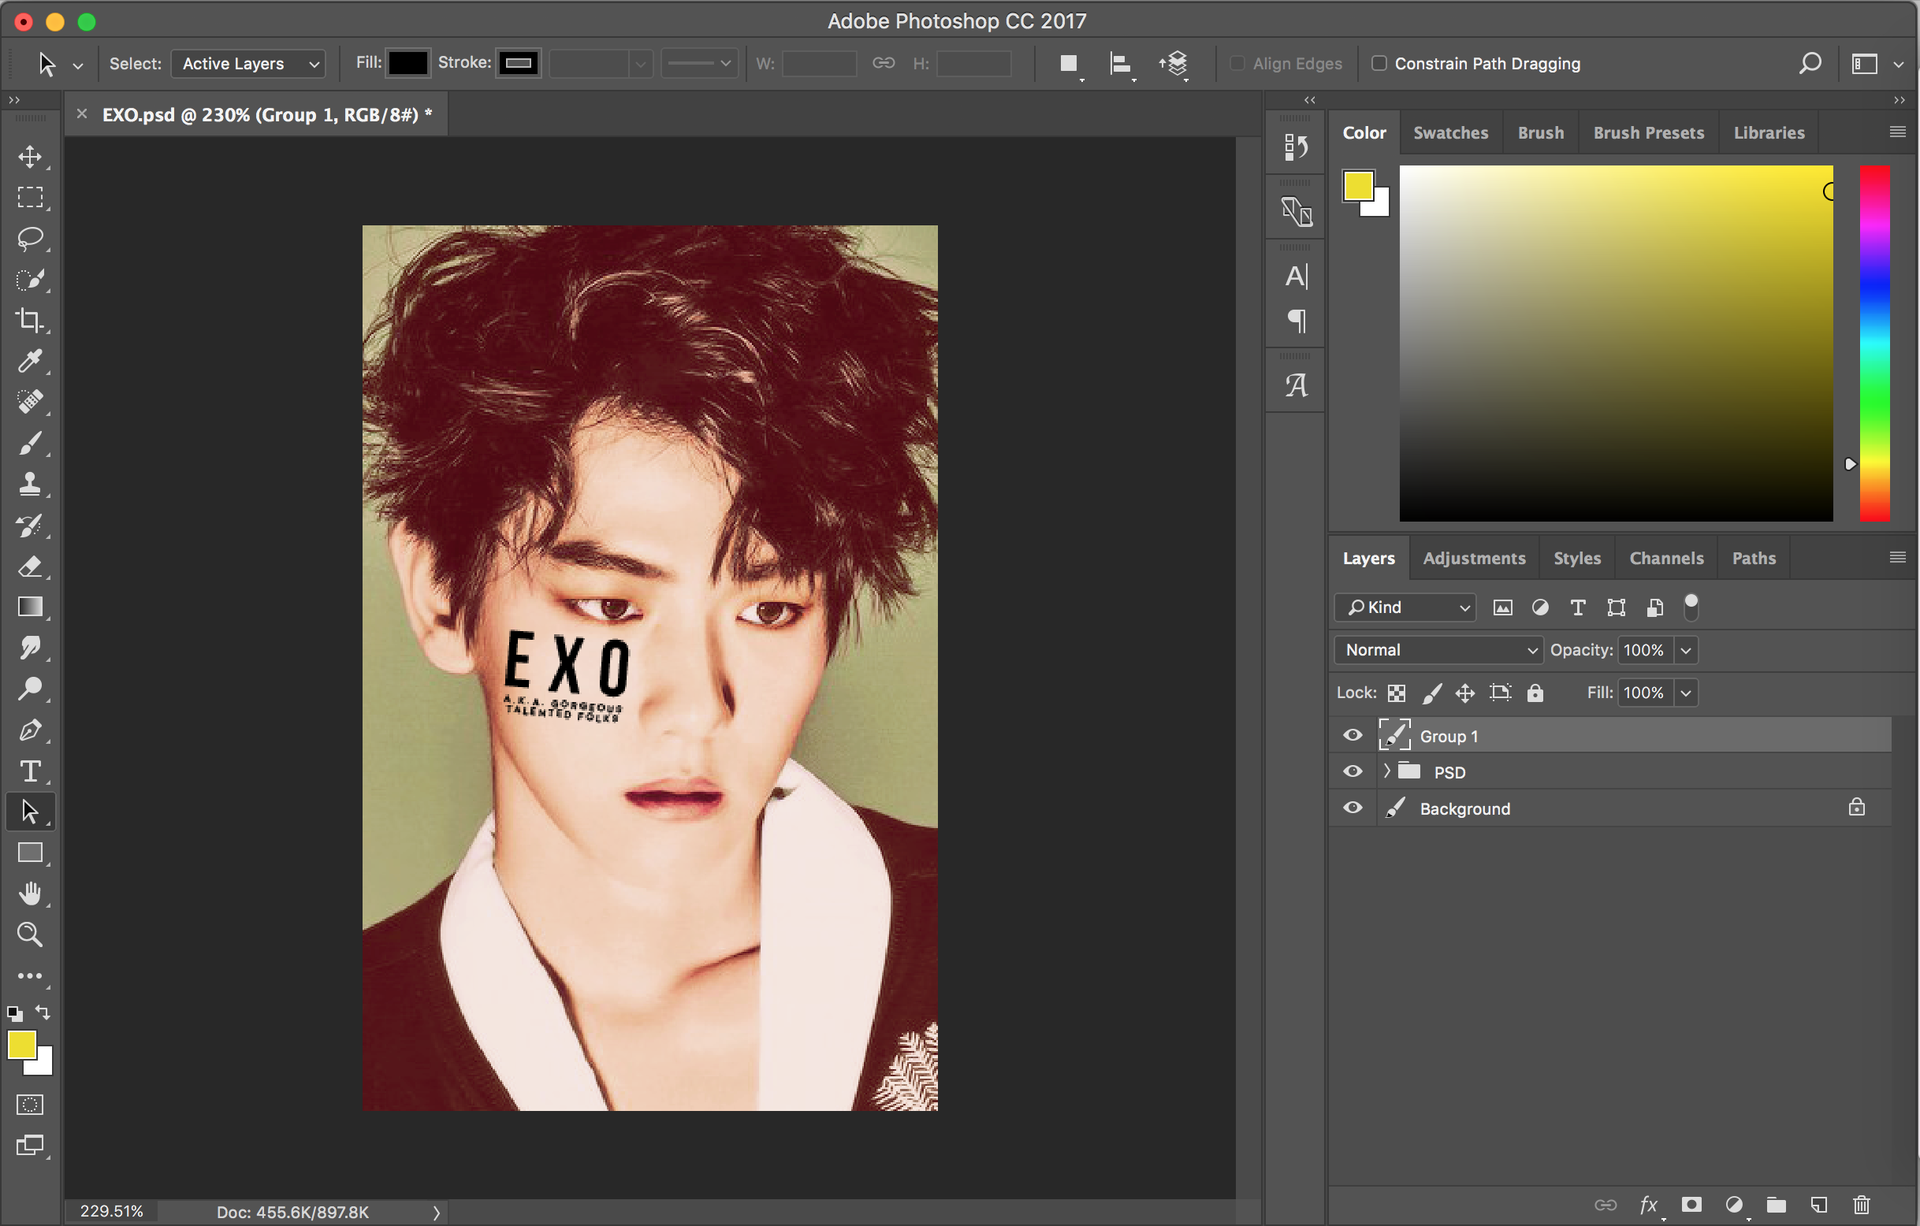
now select all of your text layers (you can do this by clicking on one of them and then pressing command-alt (on a mac at least) and then selecting the rest of your text layers) and make them into a group.
then merge the group by right clicking on the text group and looking for the option that says 'merge group.'
merging your text makes it into a smart object which means that it is no longer editable, but still preserves the quality and characteristics of the original text. when possible, always convert your text into smart objects rather than rasterizing it, which will make your text more pixelated and gross. *barfs*
now head over to filter > distort > displace.
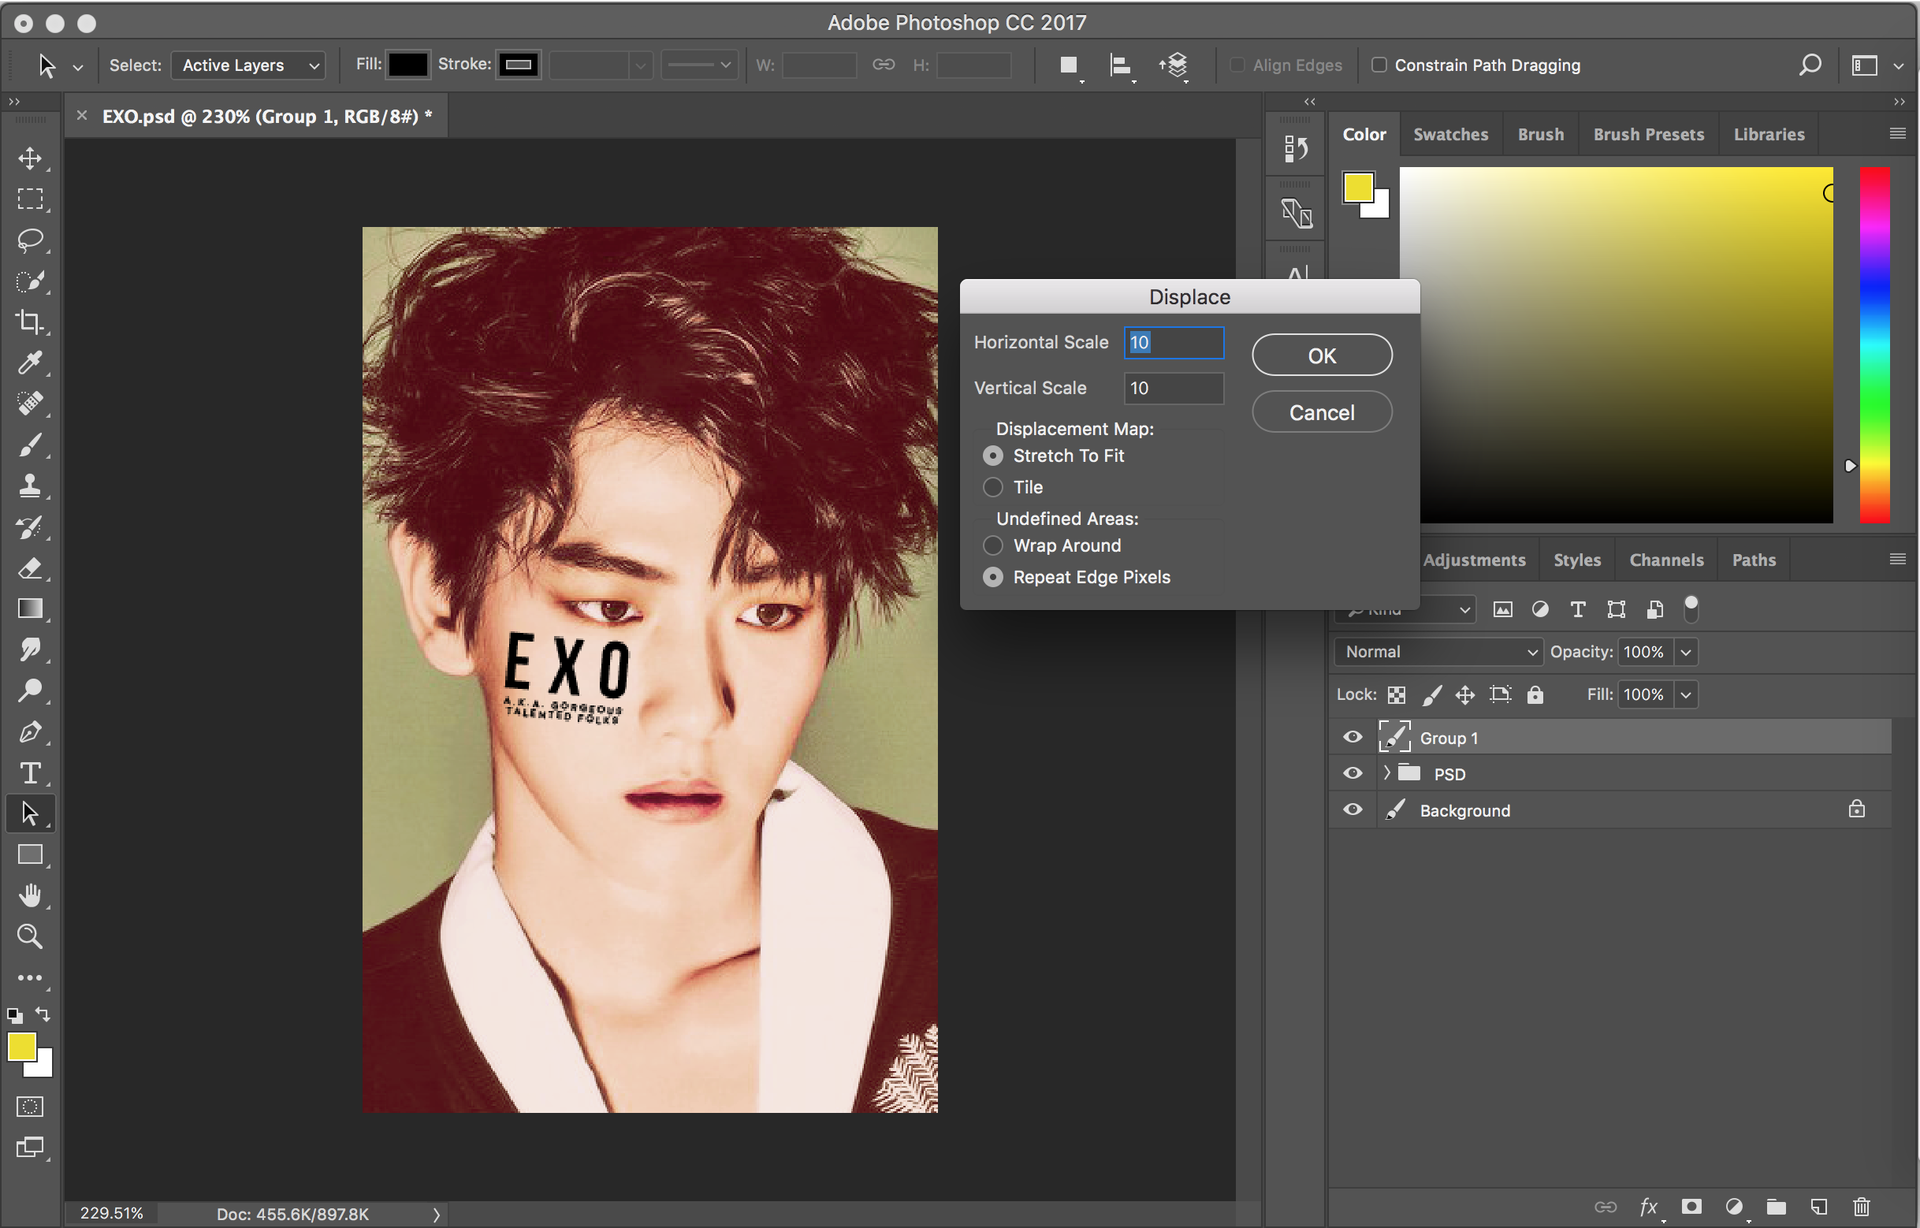
when the above menu pops up, just hit ok. although you might want to play around with the horizontal/vertical scaling after you've done a few of these types of edits, it's usually smarter just to stick with 10 for each of these fields. it gives the text a more natural warp than if you were to increase the scaling.
once you've hit ok, select the psd file that we saved earlier (containing the b&w version of your image).
and boom! your text should now be warped/distorted/i need to find out what the actual term for this is!

(if you think that you text was too distorted by this step, then you can undo the distortion and try again, this time lessening either the vertical or horizontal scaling from 10 to maybe 7 or 6.)
(also, if you don't like the positioning of your text, you can also try undoing the distortion and moving it around before trying again.)
but it still doesn't look entirely natural (what with the black text and everything), so head on over to that dropdown menu in the layers panel. right now, it should say normal, and it's right beneath the menu that says kind.
and then select the option entitled overlay (or soft light, depending on your image).

here's the final product:
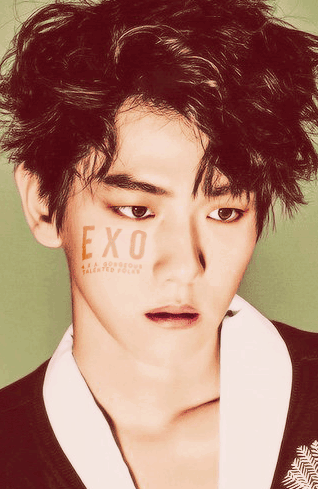
*fans self* WHEW BAEKHYUN WHY YOU SO HOT BOI
the trick with this technique, though, is that you have to find images that are 1) containing a large expanse of skin for you to put text on (cheeks are usually the best for this) 2) high resolution.
anyways, i hope this helped! <3 good luck!!
if you have any questions, don't be afraid to ask! :)
have a lovely day! and don't forget to vote and comment if this helped you!
Bạn đang đọc truyện trên: AzTruyen.Top