oceanwaved Presents: A Cover Tutorial + 9 Cover Tips
Hello, fellow Wattpadians, Block-Party-ians (I'm officially making that a word), kawaii potatoes, narwhals, strangers who like to stalk me -- everyone in general!! :)
First off, I'll like to give a HUGE thanks to KellyAnneBlount for hosting and letting me ruin this party, I mean, uh, taking part in this amazing Wattpad Block Party!! I feel so honored to be here, alongside other brilliant writers, readers, bloggers, designers, etc.
Oh wait, what's that? You don't know who I am? Relax, cupcake, I can assure you that you're not the only one.
I'm Hannah (), but you can also call me Han, or Hanzee, or Han-zolo, or Han-nu, or whatever other (pun) nicknames you want! I'm a Chinese-American thirteen-year-old girl -- oh wait, when you're reading this, I've probably already turned fourteen (birthday is on Valentine's Day yayyyy). You might know me because I talk quite a lot on other people's message boards (it's the first step toward world domination, just kidding); or because I like creating graphics; or perhaps it's because you read my stories before.
Enough of myself, let's get the party rollin'!

A COVER TUTORIAL
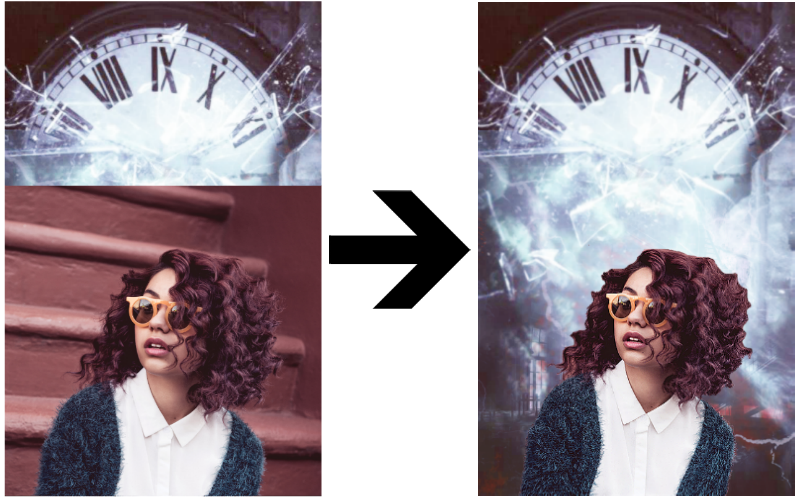
Today, I will be teaching you guys how to make a "manipulated" cover on Pixlr. I put the word "manipulated" in quotes because honestly, this one isn't that manipulated, compared to other covers that both I and other amazing graphic designers created.
Images Used:

Images can be found on Tumblr, DeviantArt, Pinterest, WeheartIt, or Google Images. To find a texture, search up "____ texture wattpad". For example, both textures can be found by searching up "dark texture wattpad".
1. Open up Pixlr.
Simply go to https://pixlr.com/editor/ or download the app. I use the website because unfortunately, I don't have a phone (yet). Set the dimensions to 512x800. I personally like having a transparent background, but that's up to you!
2. Insert your images.
Go to Layer >> Open image as layer OR Open image URL as layer. Position your image(s) to your preference. Tip: Label your layers! It makes life so much easier, especially if you have more than twenty layers.
To resize images, select the layer that you want to resize and go to Edit >> Free Transform. To keep the proportions, press the "shift" key while resizing.
3. Blend images to form the background "base".
In this case, I blended the two textures. There are several ways to blend two images together, including Overlay, Subtract, Hardlight, and Screen. To blend, select the layer you want to blend, click on that layer's setting, and choose the mode and/or opacity! For this cover, I used Screen:
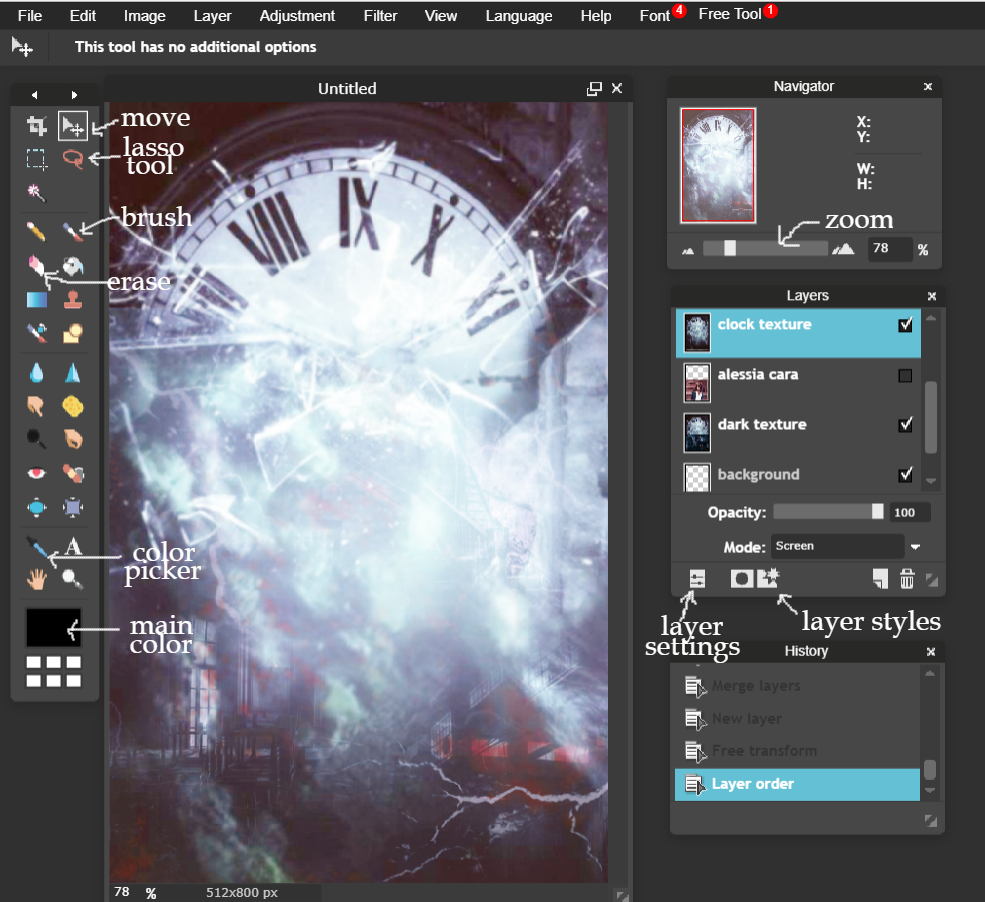
4. Unless you have a PNG, time to erase!
This step can be a little time-consuming. To save time and fasten the pace, you can use the lasso tool (drawing out a section and clearing it) or the wand tool (helpful if the background is not complex).
5. Add the text!
I used Cinzel Decorative for this cover. Other great fonts are Copperplate, Lemon Milk, Autumn in November, Times New Roman, Surfing Capitals, Supernova, Coolvetica, Stardust Adventure, and Athena of the Ocean (Athena and Poseidon??). You can download all of the mentioned fonts at dafont.com!
6. Filters, glow, and other final touches!
This is where the true magic happens, and it is also the part where you can really play around!
To make an object (layer) glow, click on that specific layer and click the "layer styles" icon. Adjust the opacity, hardness, size, and color to your liking.
At the top of the Pixlr Editor website, there are various image adjustments and layers. In Adjustment, I usually, well, adjust the saturation, hue, brightness, contrast, and color balance. In Filters, I usually only sharpen or blur, depending on your liking.
7. Time to download!
To download, go to File >> Save. I usually save as a PNG as it's better quality, but that also means that it takes up more storage in your device.
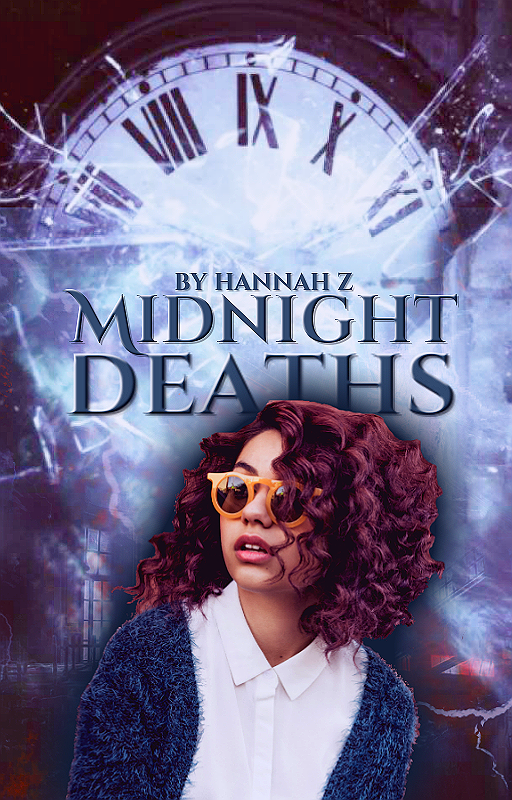
And that's the final product! I hope you guys like it, and if you have any questions, please do not hesitate to ask!
wAIT, BEFORE YOU GO...
COVER TIPS
1. Patience: Cover design is 99% experimenting, so take your time! I know it's sometimes really frustrating if you can't get something to work, but still... Don't give up!
2. Right Size: The custom Wattpad cover size is 512x800. If you don't use the right size, some parts of your cover may be cropped off.
3. Aesthetic-ness: I mostly get my images off of Pinterest, WeHeartIt, Tumblr, DeviantArt, and of course, Google Images!
4. Title Placement: When placing your title or any text, make sure they're eye-pleasing and that you can easily view them. I generally don't smack text in front of face claims.
5. Fonts: Try not to use more than three different fonts! It gets kinda messy.
6. Color Theme: There should be some kind of color theme so it looks like one piece. For example, my color theme was dark / blue.
7. Font Color: Most of the times, I use a different shade of the background color as the font color. For example, if the background color is light blue, perhaps use dark blue. If you can't find the right shade, I would suggest either using black or white. That being said, try to not use neon or really bright colors, like neon green. I have nothing against the color, but it just isn't really appealing when it's on a cover!
8. Simple is Elegant: Try not to cram too many images and layers into your cover. Sometimes, simple is elegant!
9. High Quality: For obvious reasons, I would suggest using high quality images, especially PNG's. When downloading your cover, I would also suggest downloading maximum quality (if you're downloading as a JPEG file) or downloading it as a PNG.
I hope the tutorial and these tips helped you, maybe. For more tutorials of if you just want to look at more graphics created by me, feel free to visit my graphic portfolio / shop, titled "Ocean Graphics".
If you want a chance to win a chapter dedication, a shout-out, and a free graphic (cover, banner, moodboard, etc.) from me, don't forget to enter my giveaway! This giveaway is open internationally. There will be three winners -- Good luck!! :)
Again, thank you so much to KellyAnneBlount for hosting this amazing party and for letting me participate! If you get the chance, please do thank her for all of her hard work and dedication!
That's a wrap (I think), and see you in the comments (hopefully)!!
Hannah xx
★ ★ ★
ENTER THE WATTPAD BLOCK PARTY GIVEAWAYS BY CLICKING HERE:
Shortened Link to Blog: https://goo.gl/oCHaqH
OR HERE:
Regular Link to Blog: http://kellyanneblountauthor.blogspot.com/2018/01/wattpad-block-party-winter-edition-iv.html
Bạn đang đọc truyện trên: AzTruyen.Top