VECTOR TUTORIAL 🐒
ana_ihatepeople wanted to know how to make vectors. I thought I would put up a tutorial cuz
1. Even though I could have sent her a tutorial from yt I decided not to cuz they didn't help me at all☠️☠️☠️ I understood shit only when my sister helped me 🤣
2. I learnt an amazing technique for the hair 🐒🐒🐒
3. Idk, aren't 2 reasons enough?
Okaaaa so here~
STEP 1
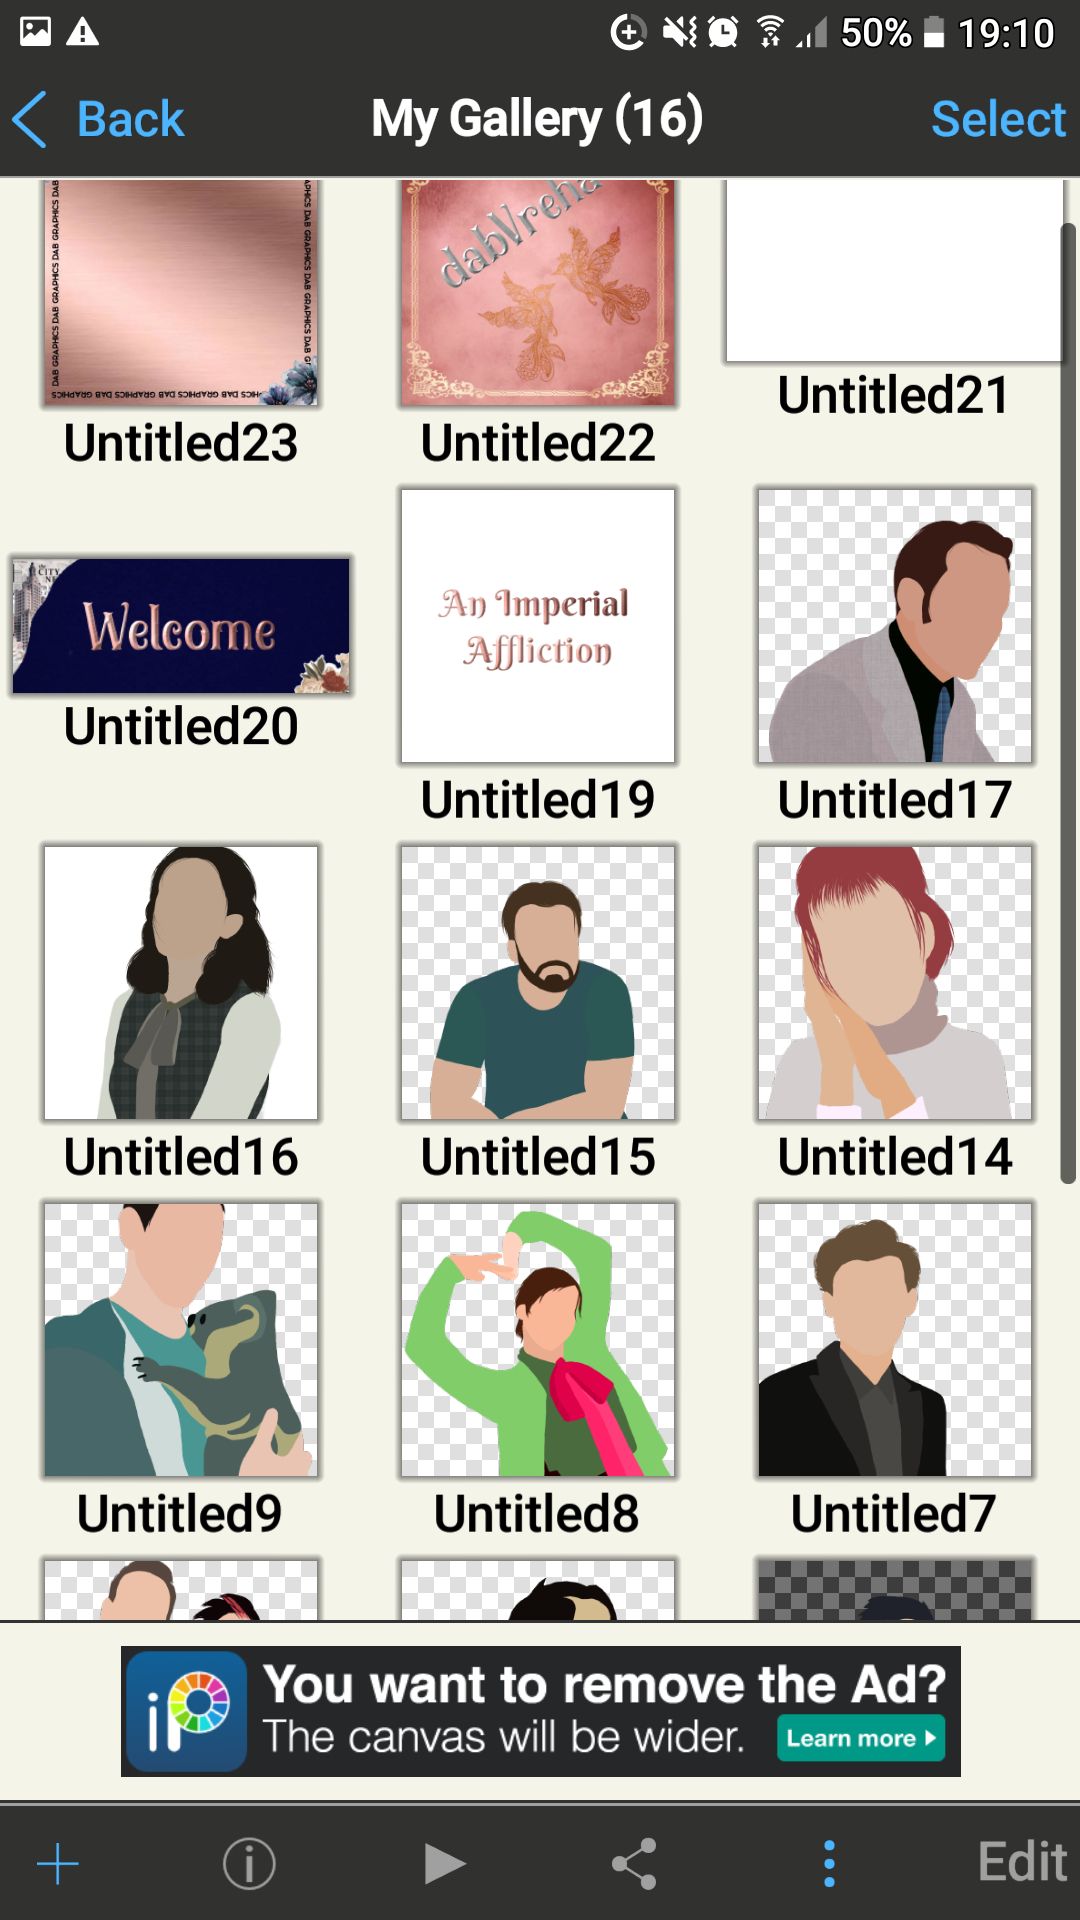
Go to ibis, select "my gallery" and select the plus sign at the bottom. (Can upload only 20 pics so I wont share ss of every step ☠️)
Ignore the random things I made, I was experimenting with the bevel effect 😂
STEP 2
Select a convenient size for your canvas and click ok.

STEP 3
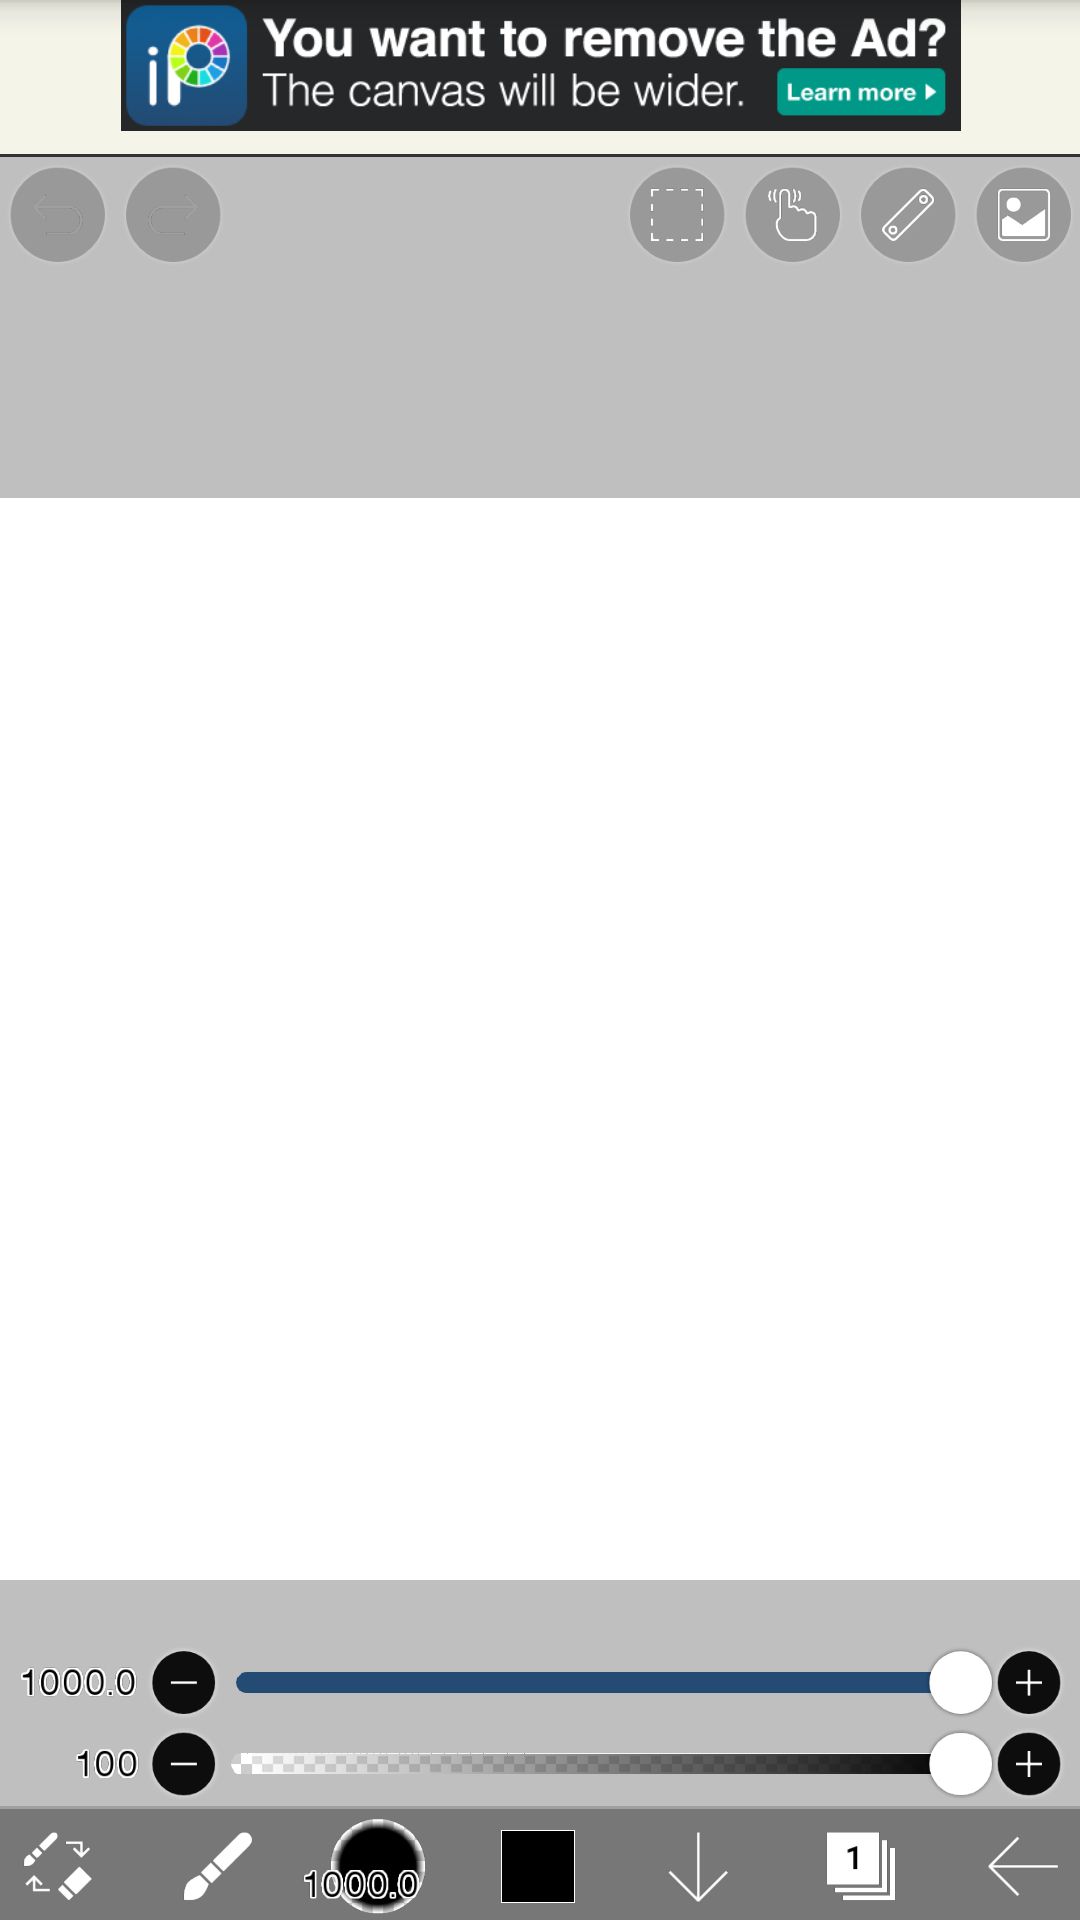
Select the multiple boxes saying "1" at the bottom right. Those are layers which make your work less complicated ☠️
STEP 4
Now on the screen you will see a camera sign. Select that. If you are using ibis for the first time it will ask permission to access your gallery. Click allow and choose a good image.
STEP 5
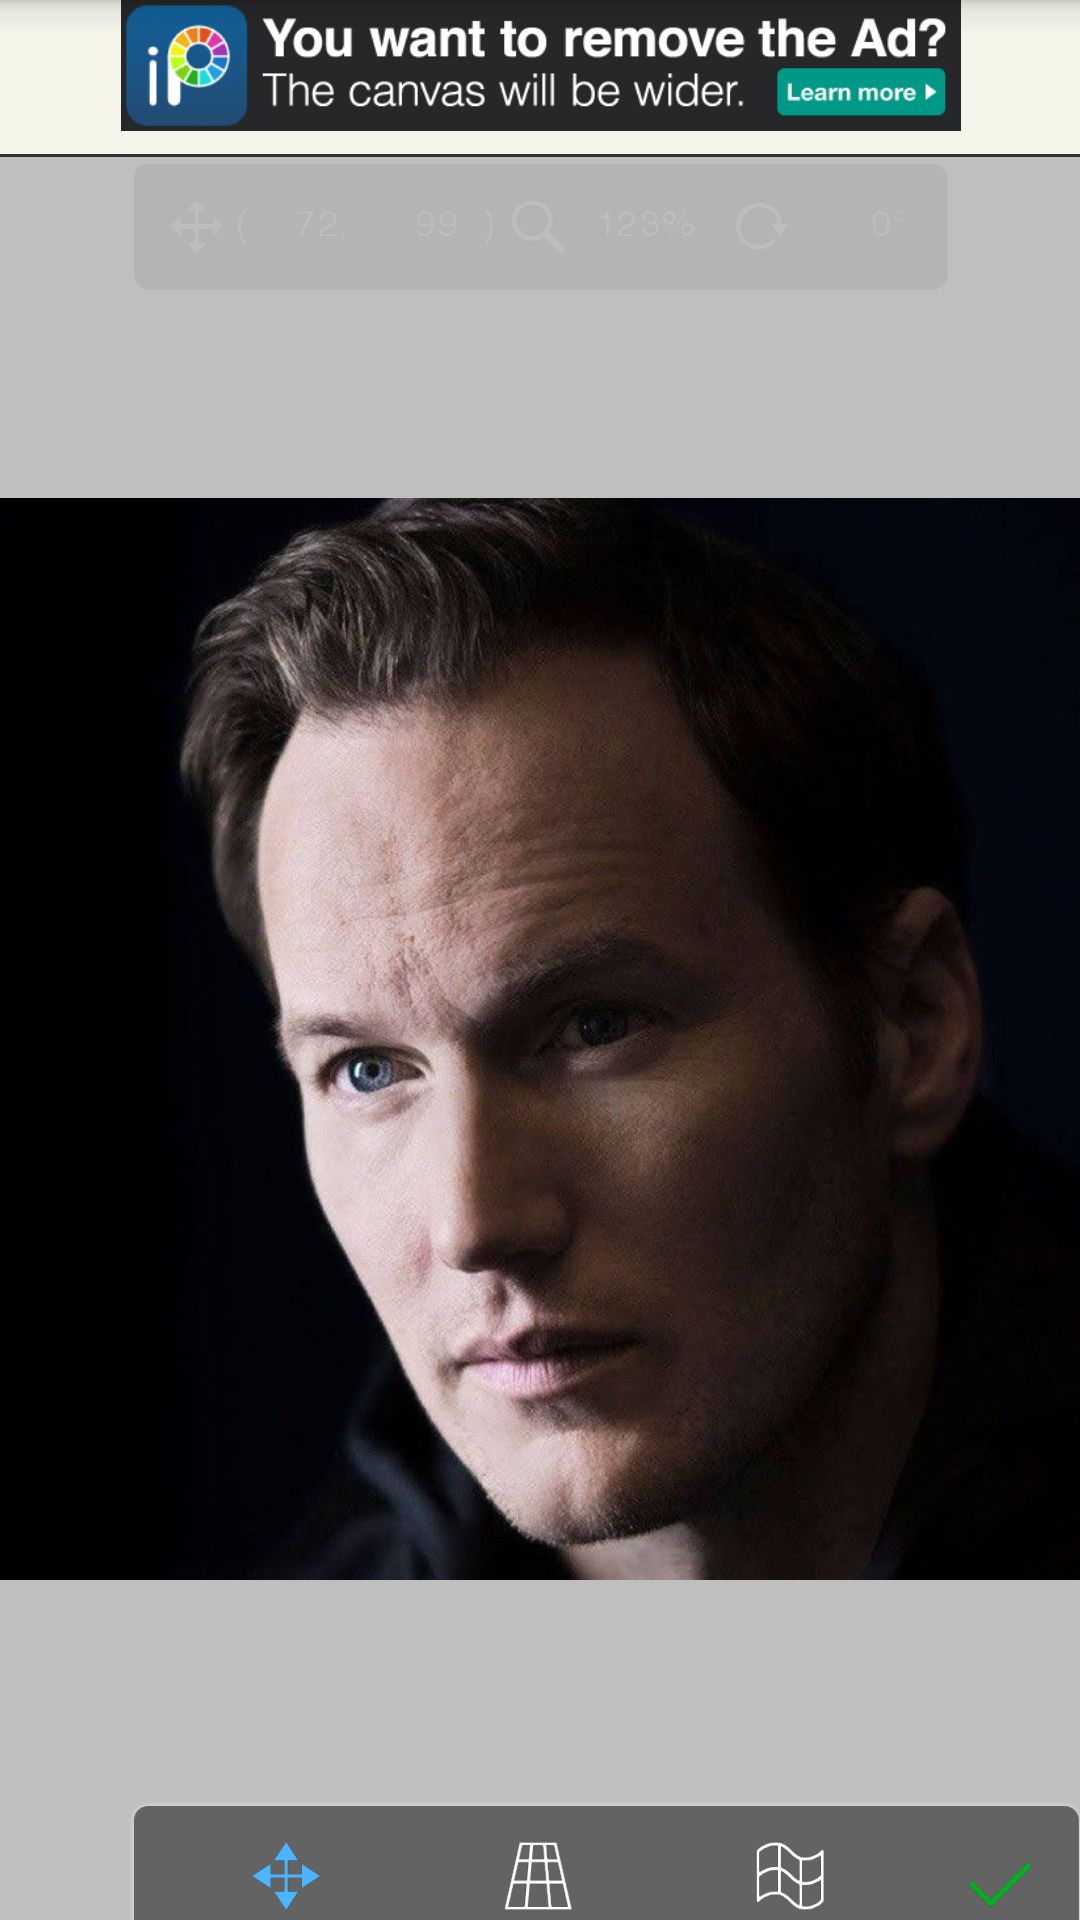
Make sure the image you choose is coloured and not black and white. Or your in a big trouble for your vector will look ABSURD. Don't experiment, I have done that for you. That's why I say ☠️
Now zoom your image in or out according to your convenience and fit it on your canvas. Once done, click the tick mark at the bottom.
STEP 6
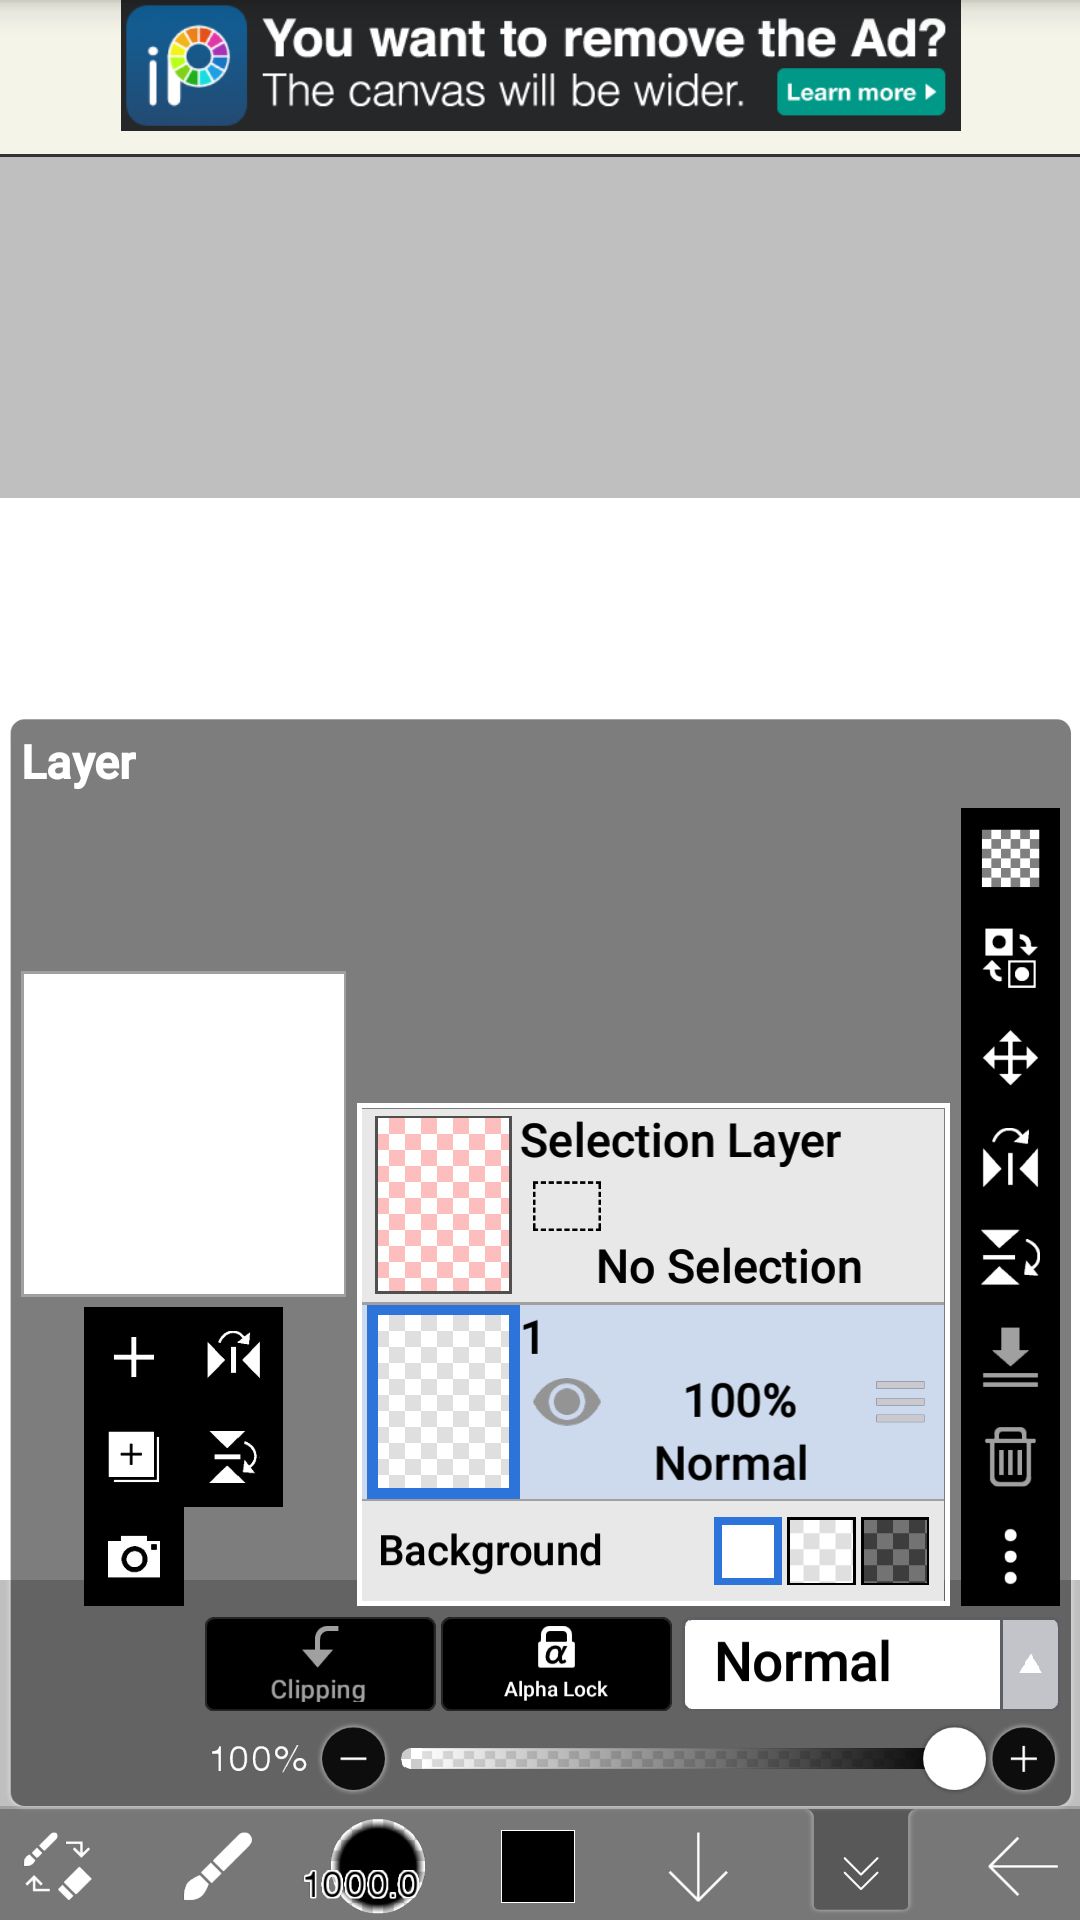
Now go to the layer box again. You might notice you already had a layer other than your image and the selection layer. If it doesn't have it, add layer by clicking the plus sign. Now there are 2 plus signs as you notice, click the one without the box 🐒 Next thing you do is make sure your main image is the lowermost layer. You can simply drag it down by holding the 3 horizontal lines and moving them below. Then come to your second layer.
P.S. ADDING LAYER FOR EVERY NEW COLOUR/ELEMENT IS A VERY IMPORTANT STEP AND SHOULD NOT BE IGNORED. IF YOU SIMPLY DRAW ON THE IMAGE YOU WILL NOT BE ABLE TO SAVE IT AS A TRANSPARENT BACKGROUND. ALSO, IF YOU WANT TO ERASE SPME PARTS FOR FINISHING, IT WILL ERASE OF THE MAIN IMAGE AS WELL, AND THAT MIGHT BE A BIG MESS.
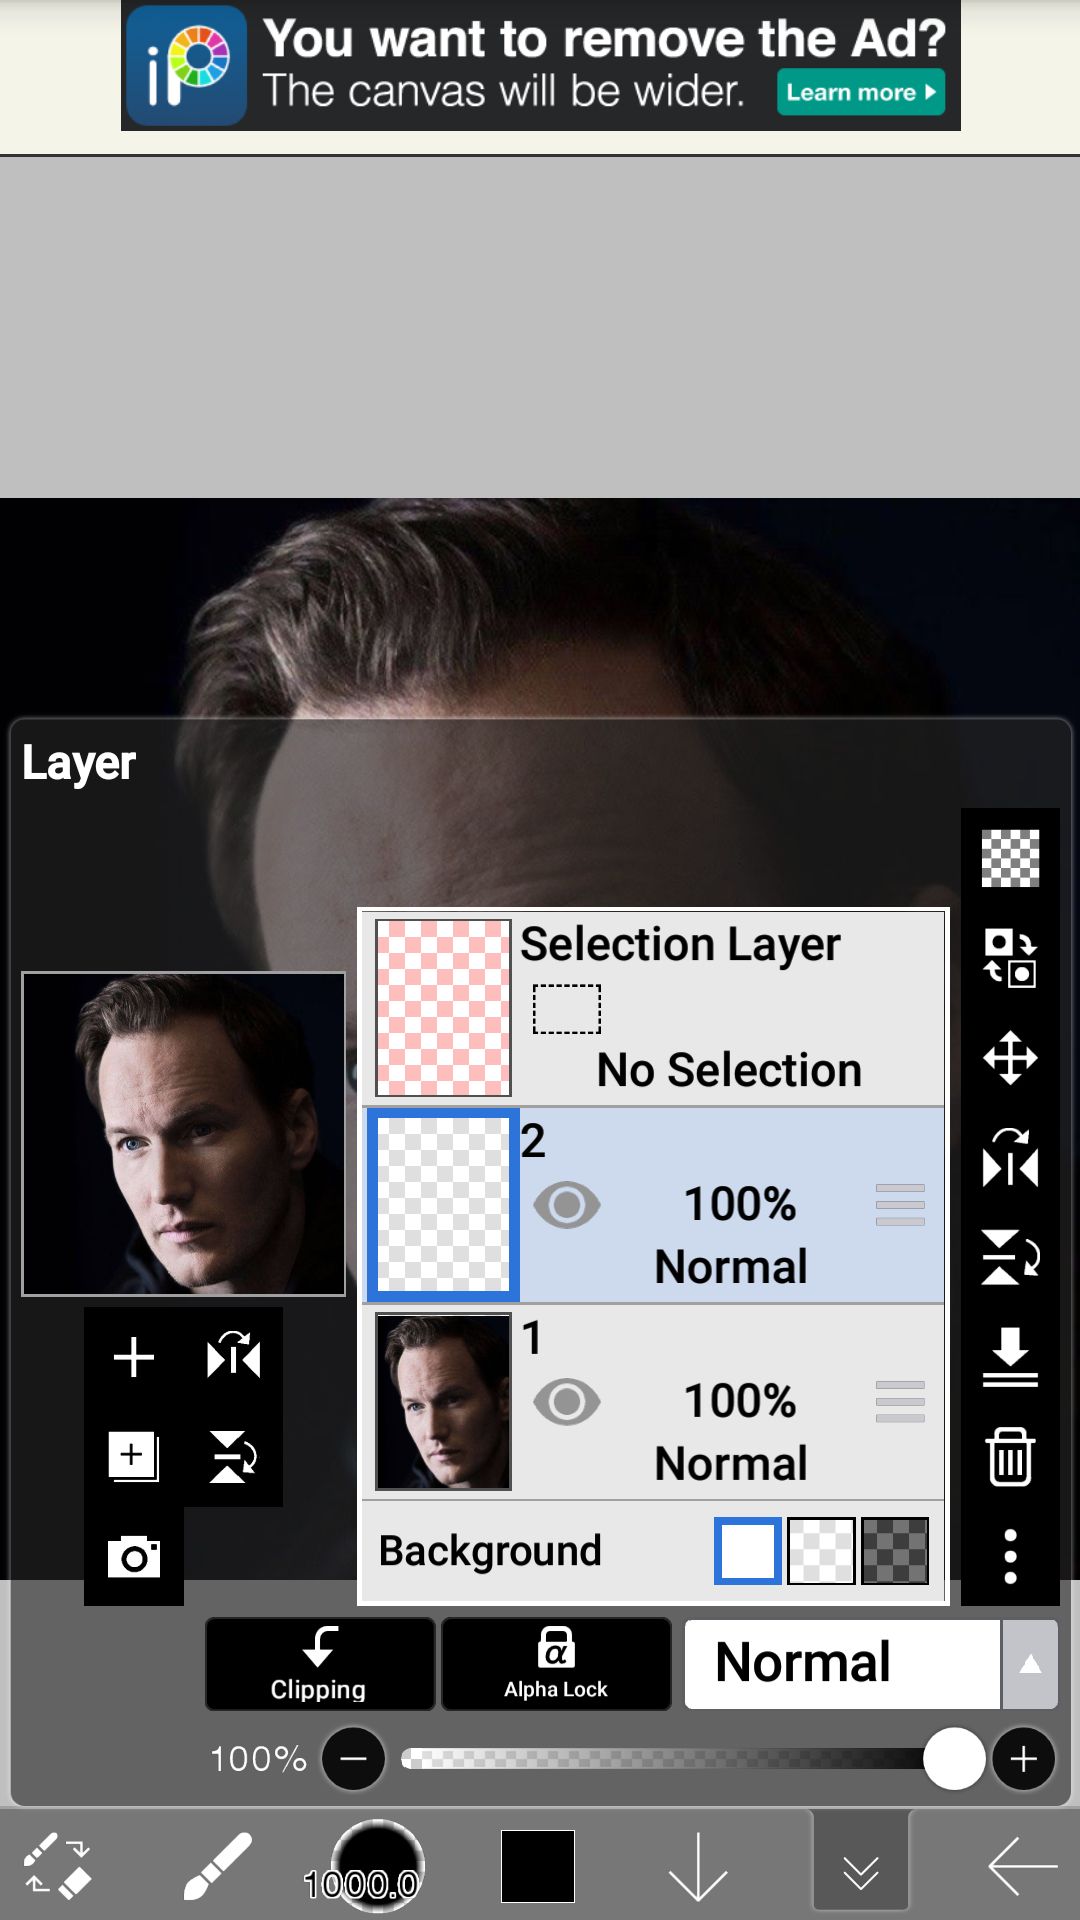
STEP 7
After that select the brush sign which is the second one from bottom left. After that you get a menu for various options. Select the option saying brush.
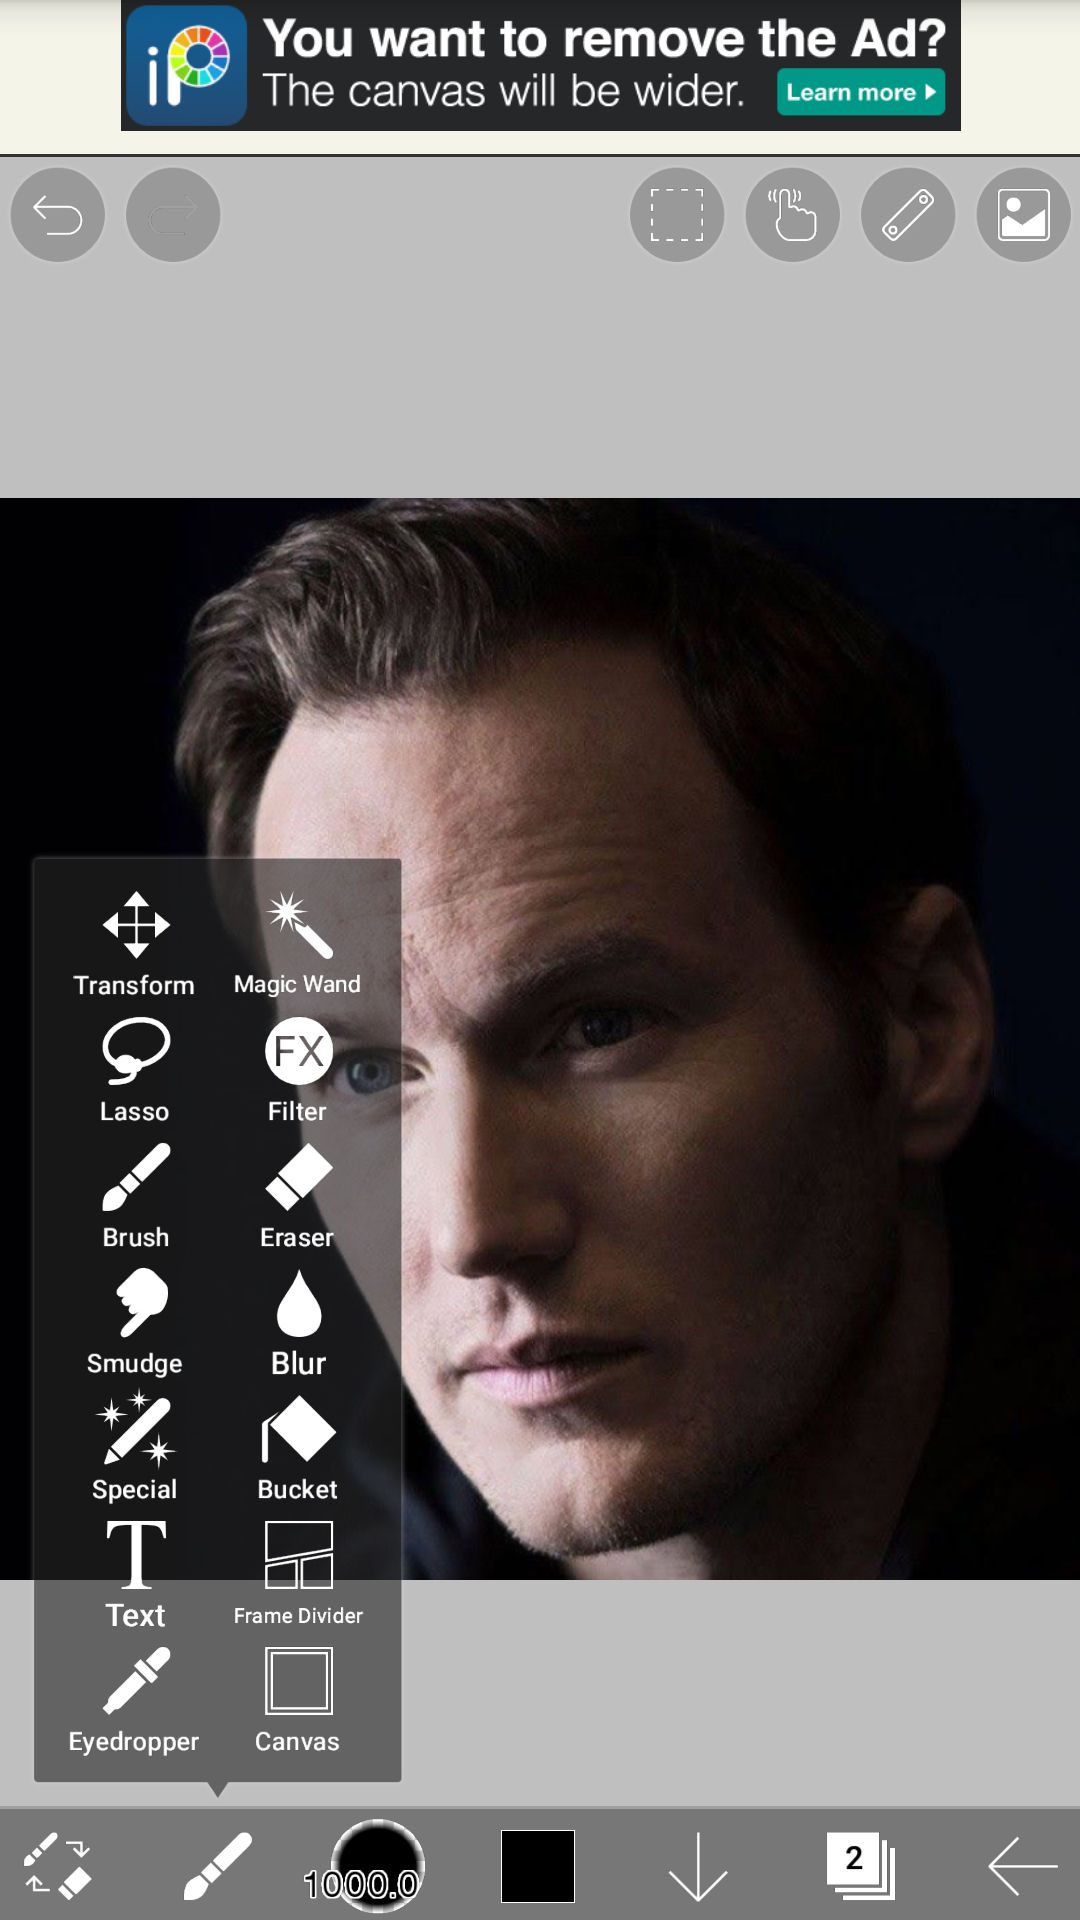
STEP 8
Select Felt Tip Pen soft.
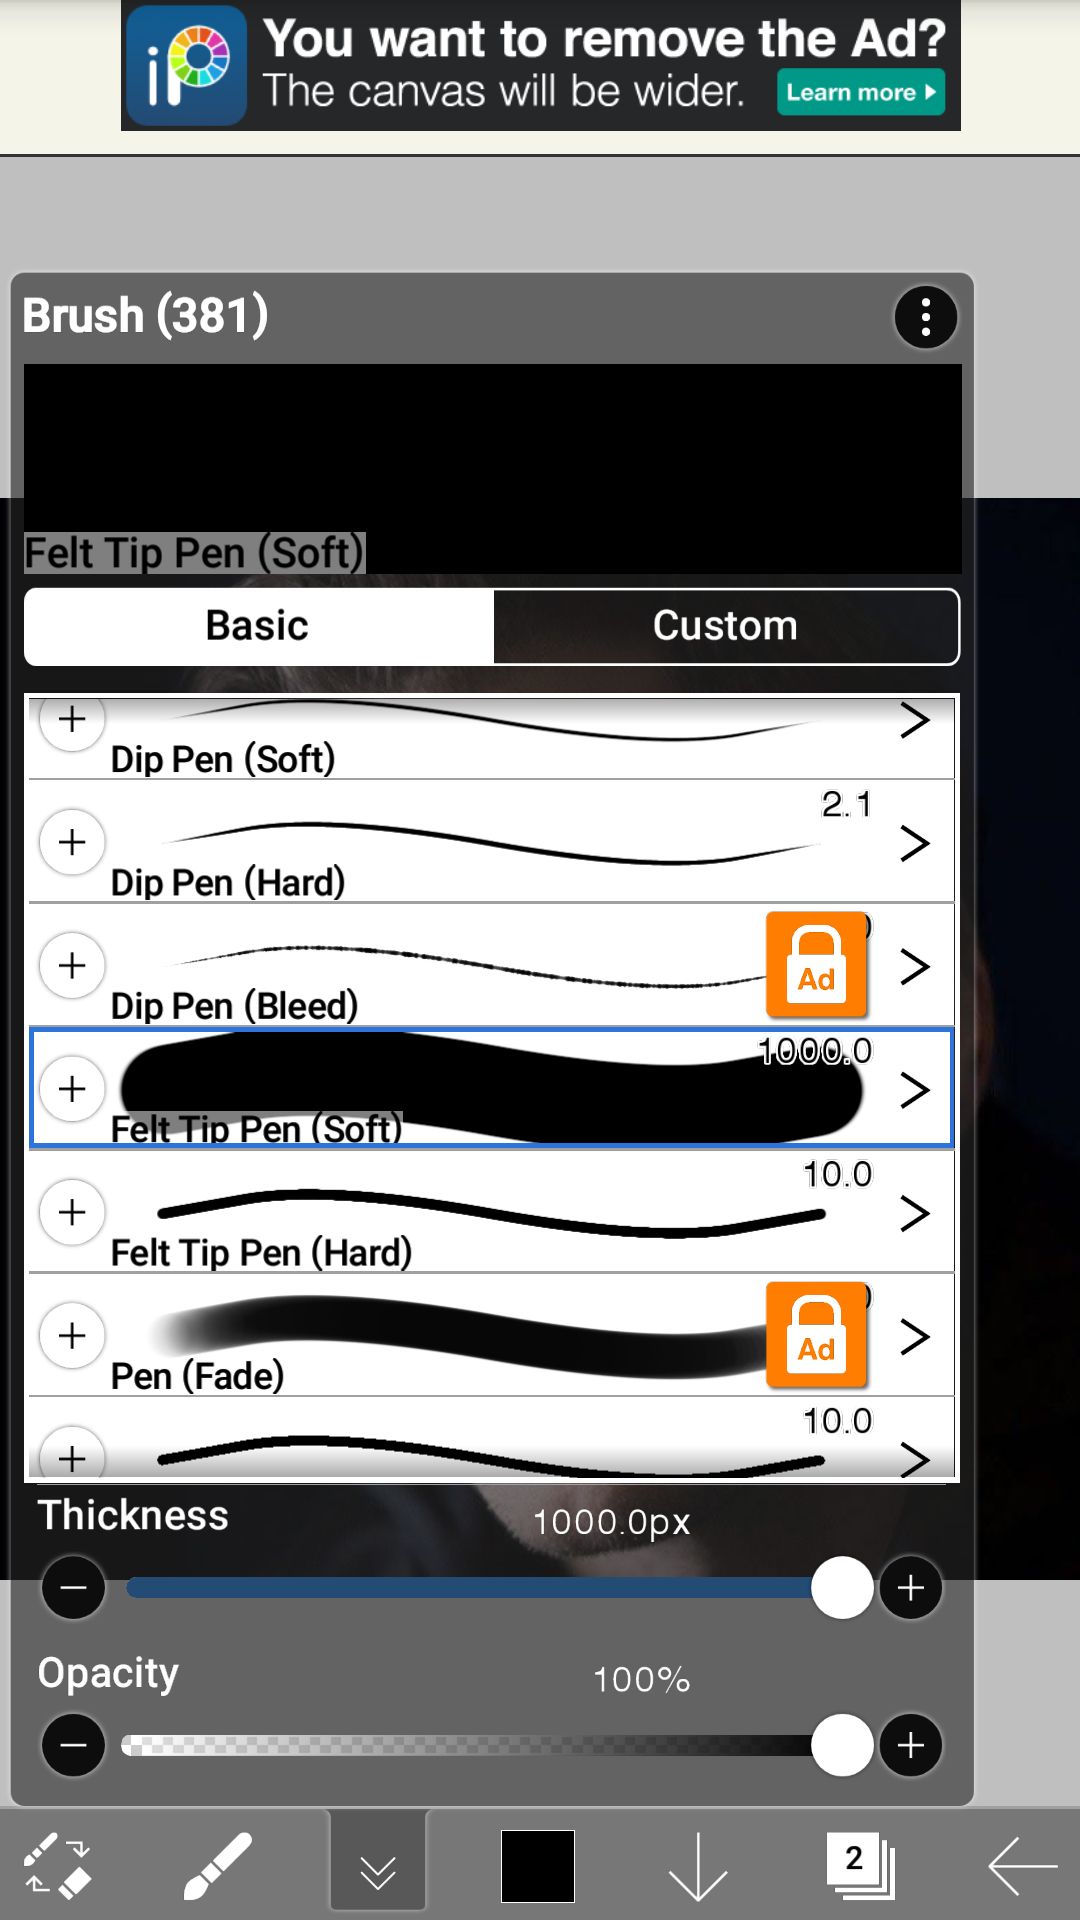
STEP 9
Go to the brush option again where it brings you the menu. There you can select the eyedropper at the bottom. (Refer Step 7 image for the same) after that drag your finger on the image and choose the desired colour. I started with the skin tone.
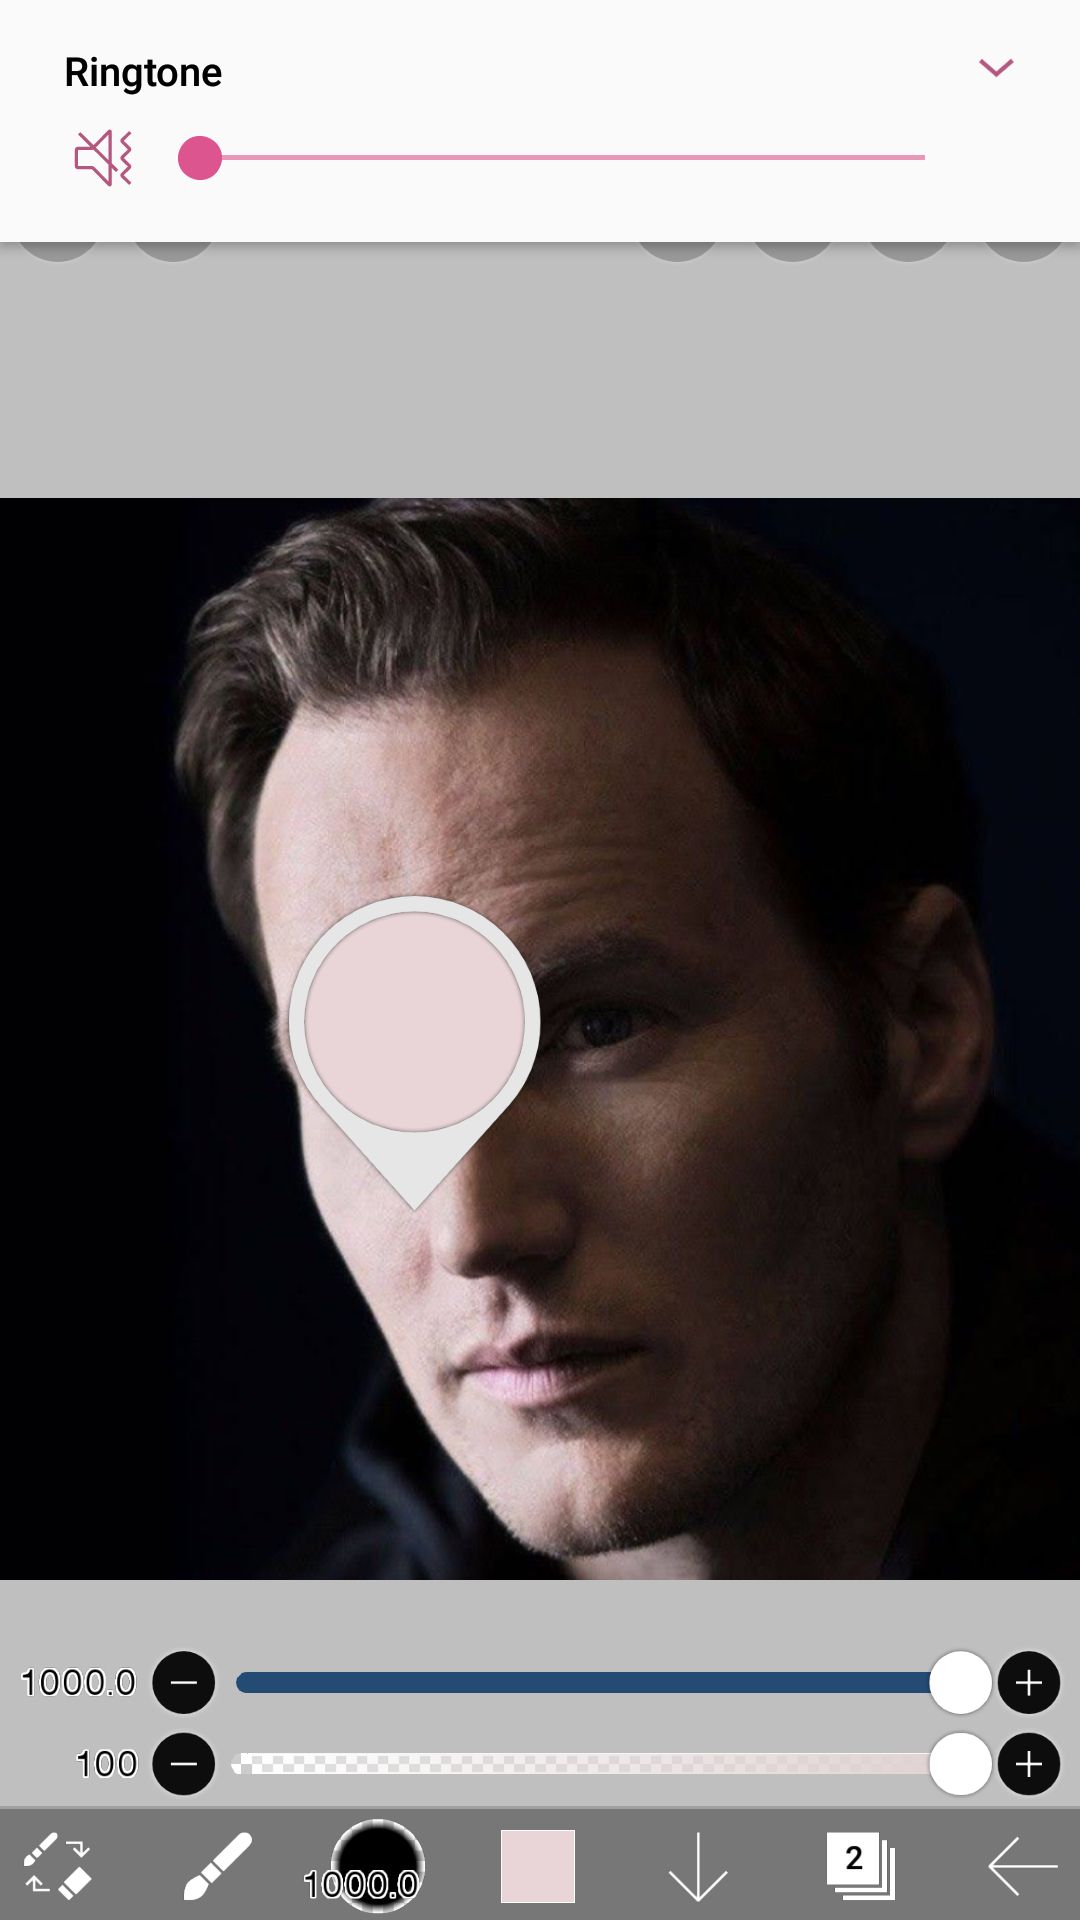
STEP 10
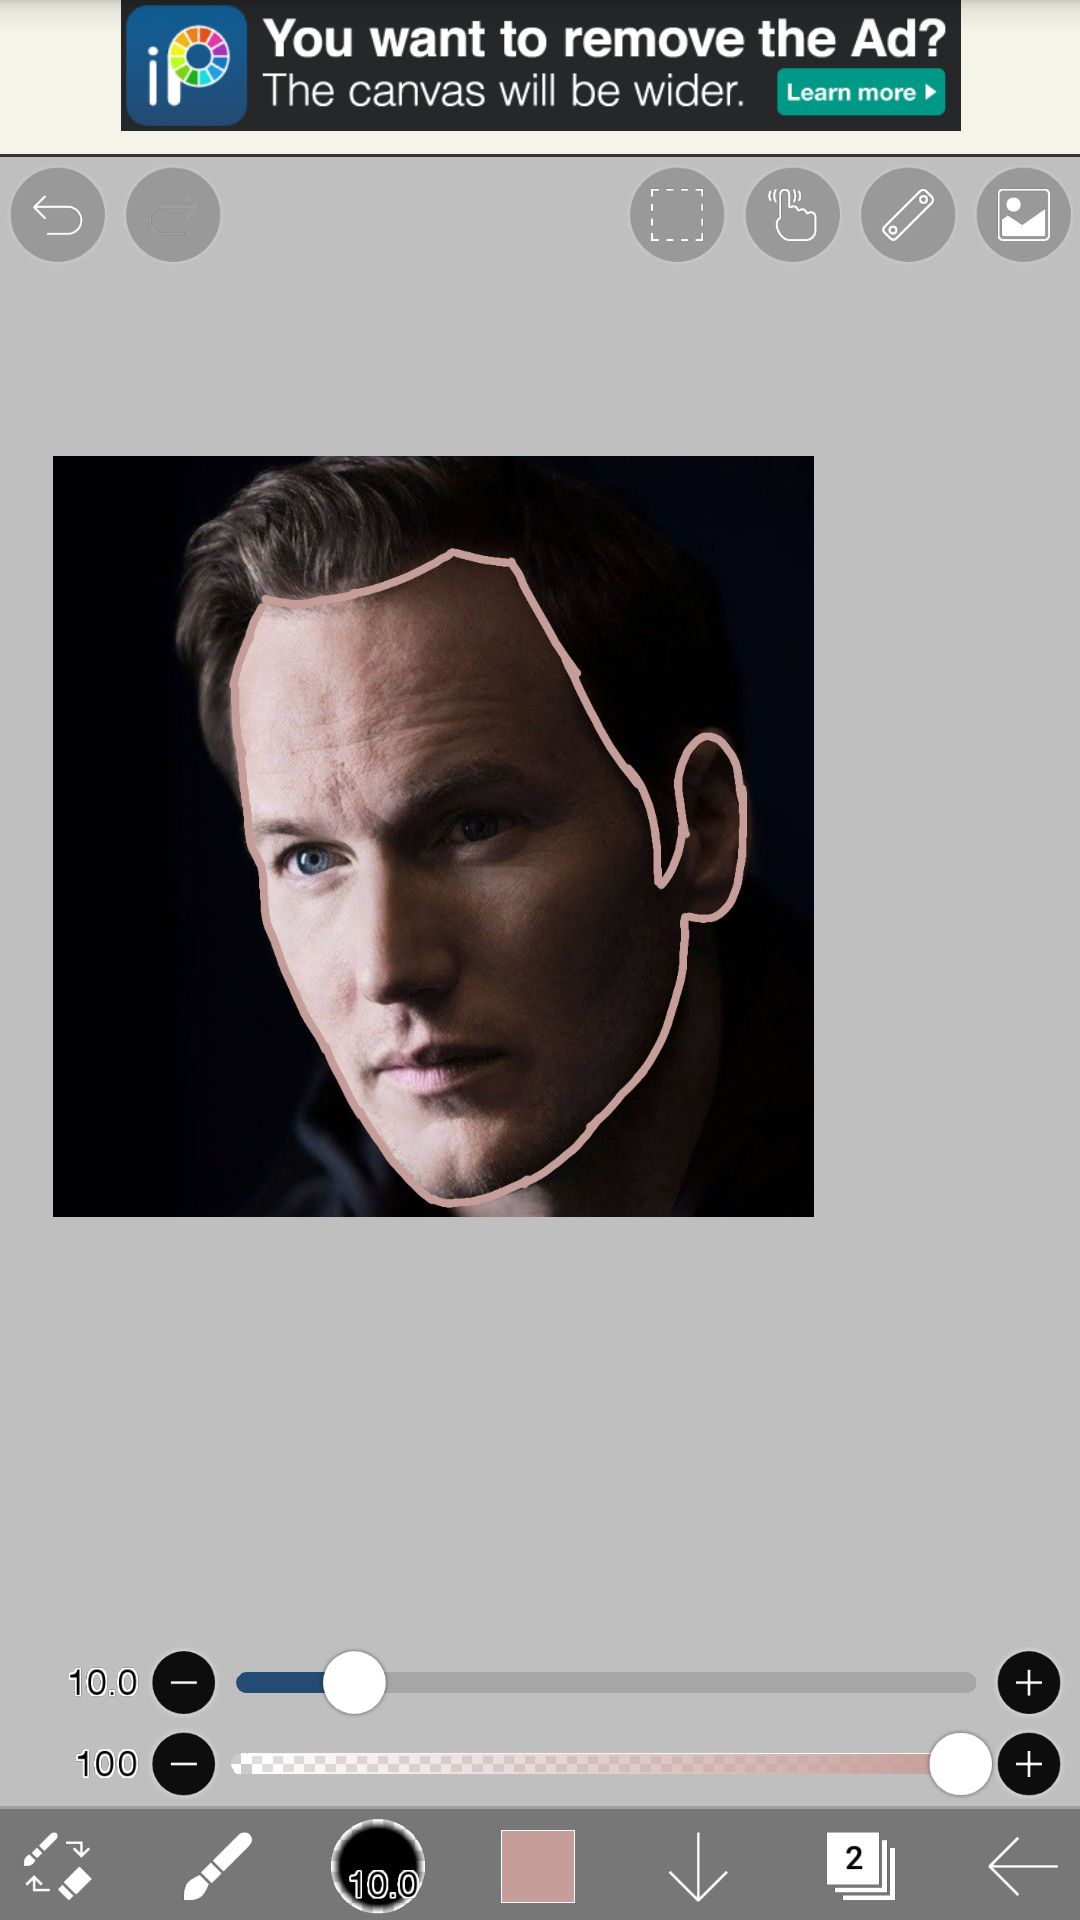
After done, bring your pen thickness to 10.0
Zoom into the image and outline the face. I have outlined it roughly for me is in hurry ☠️☠️☠️ please ignore the imperfections I have made so many PWilz vectors now that I am tired, but I chose this image because it was the most recent one in my gallery 😂😂😂
STEP 11
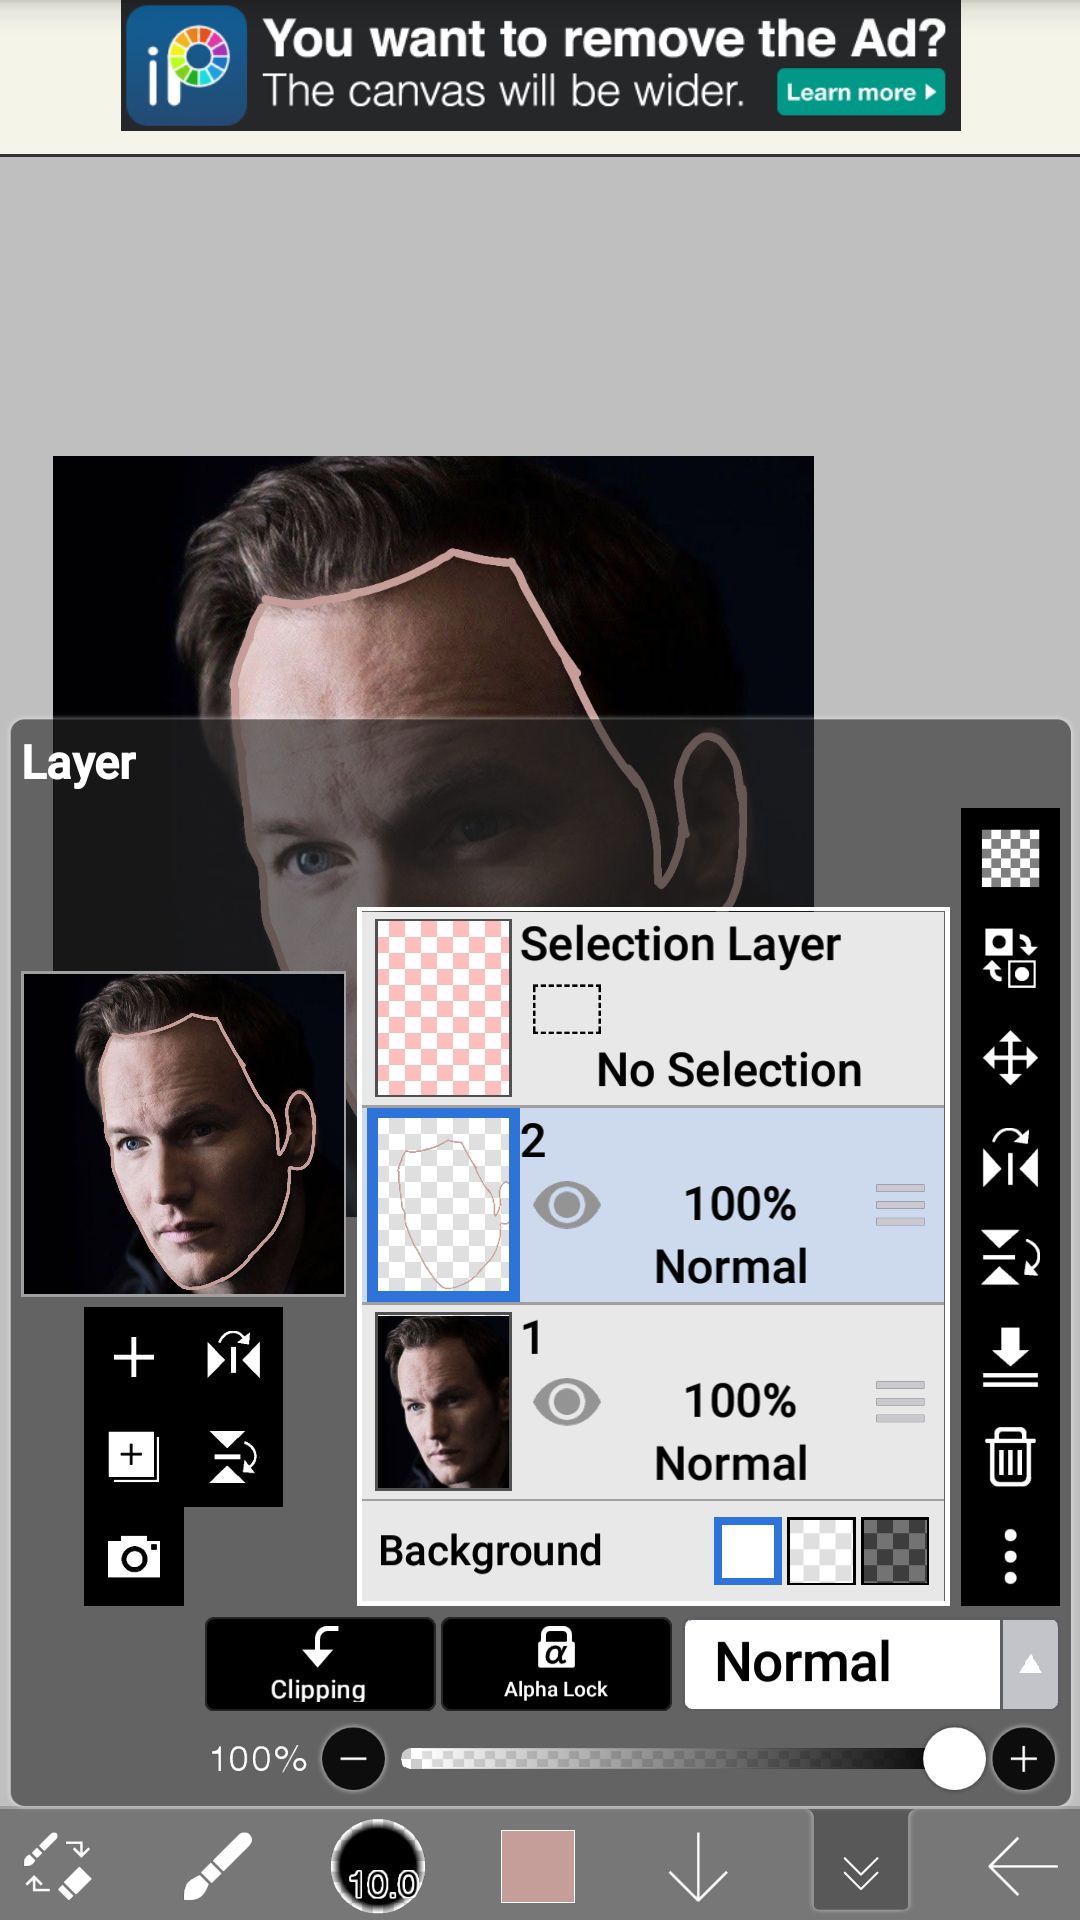
Go to the brush menu again and select bucket. Now make sure that before you select the bucket option YOU HIDE THE MAIN IMAGE by clicking on the eye sign of that particular layer.
STEP 12
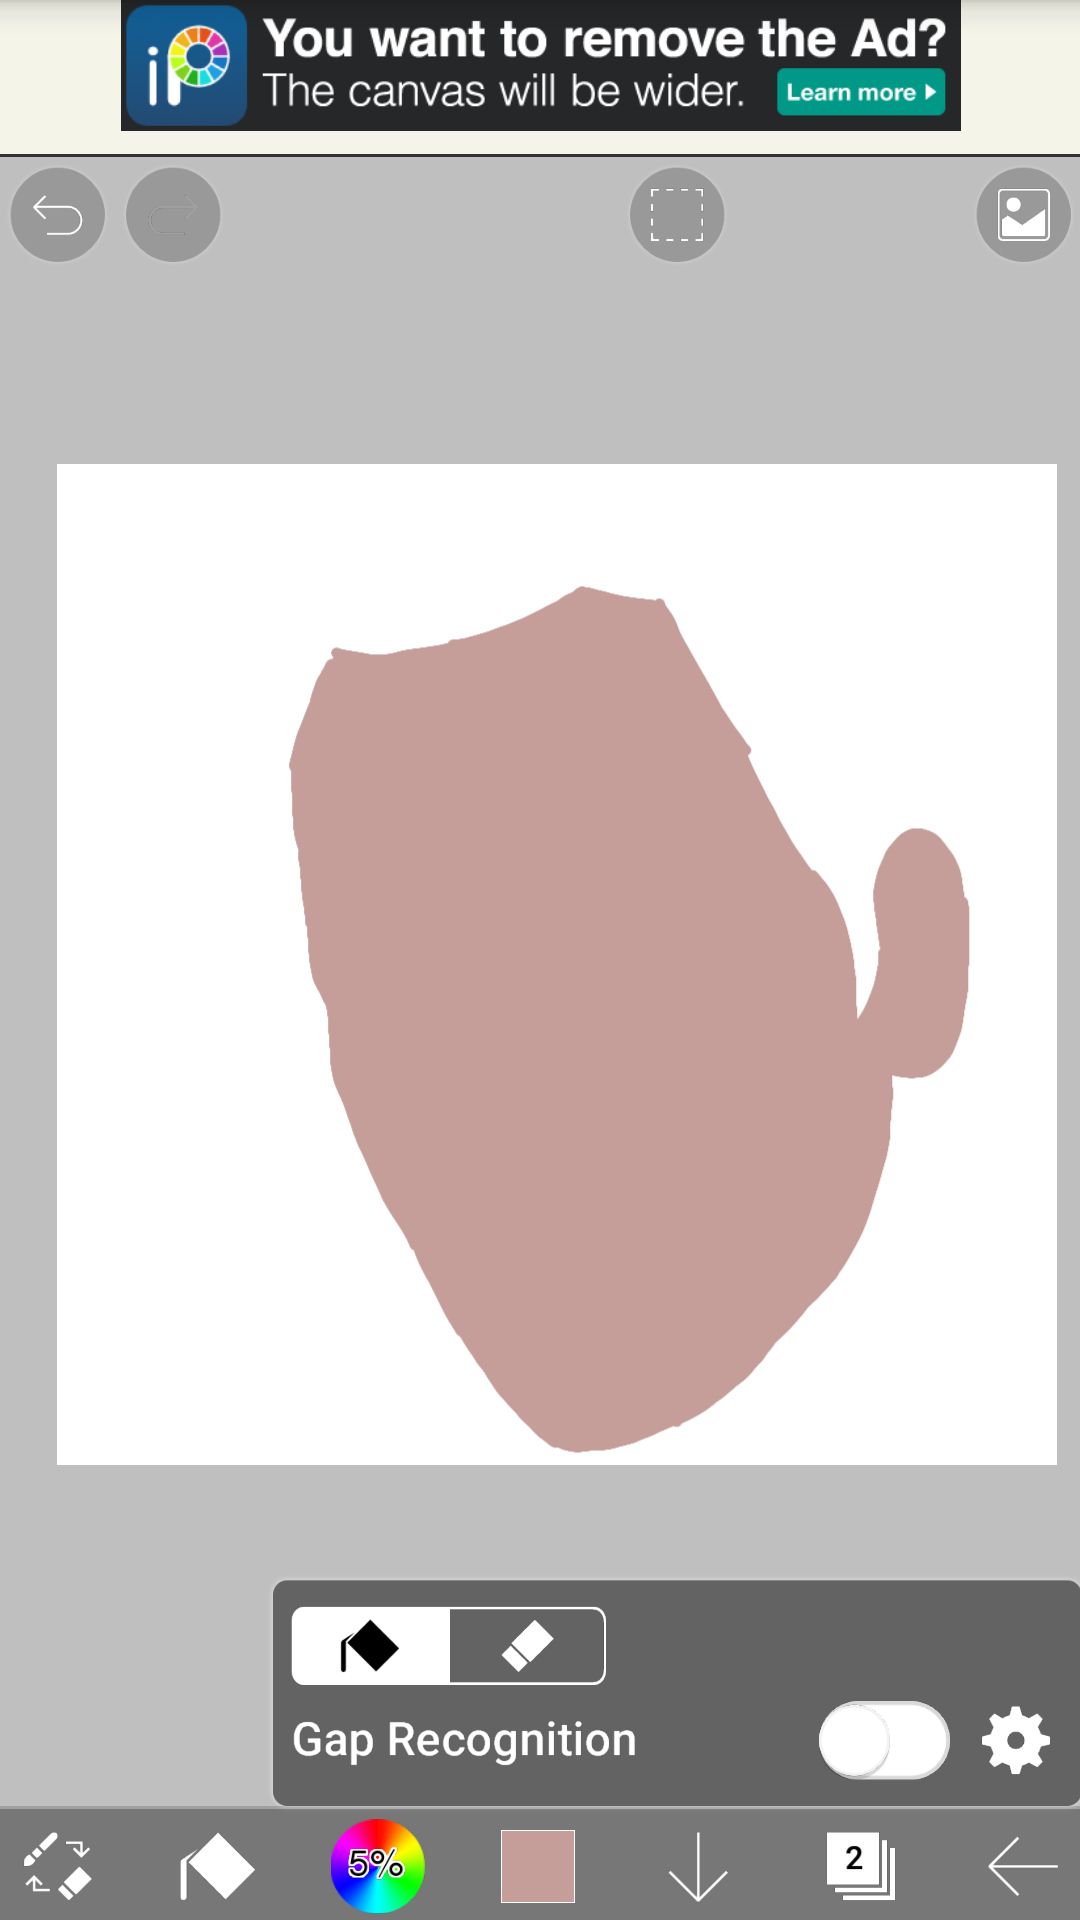
Fill it with one tap duh, but make sure that when you do the finishings at the end, you color the left out areas using the brush tool, because bucket might miss some parts.
STEP 13
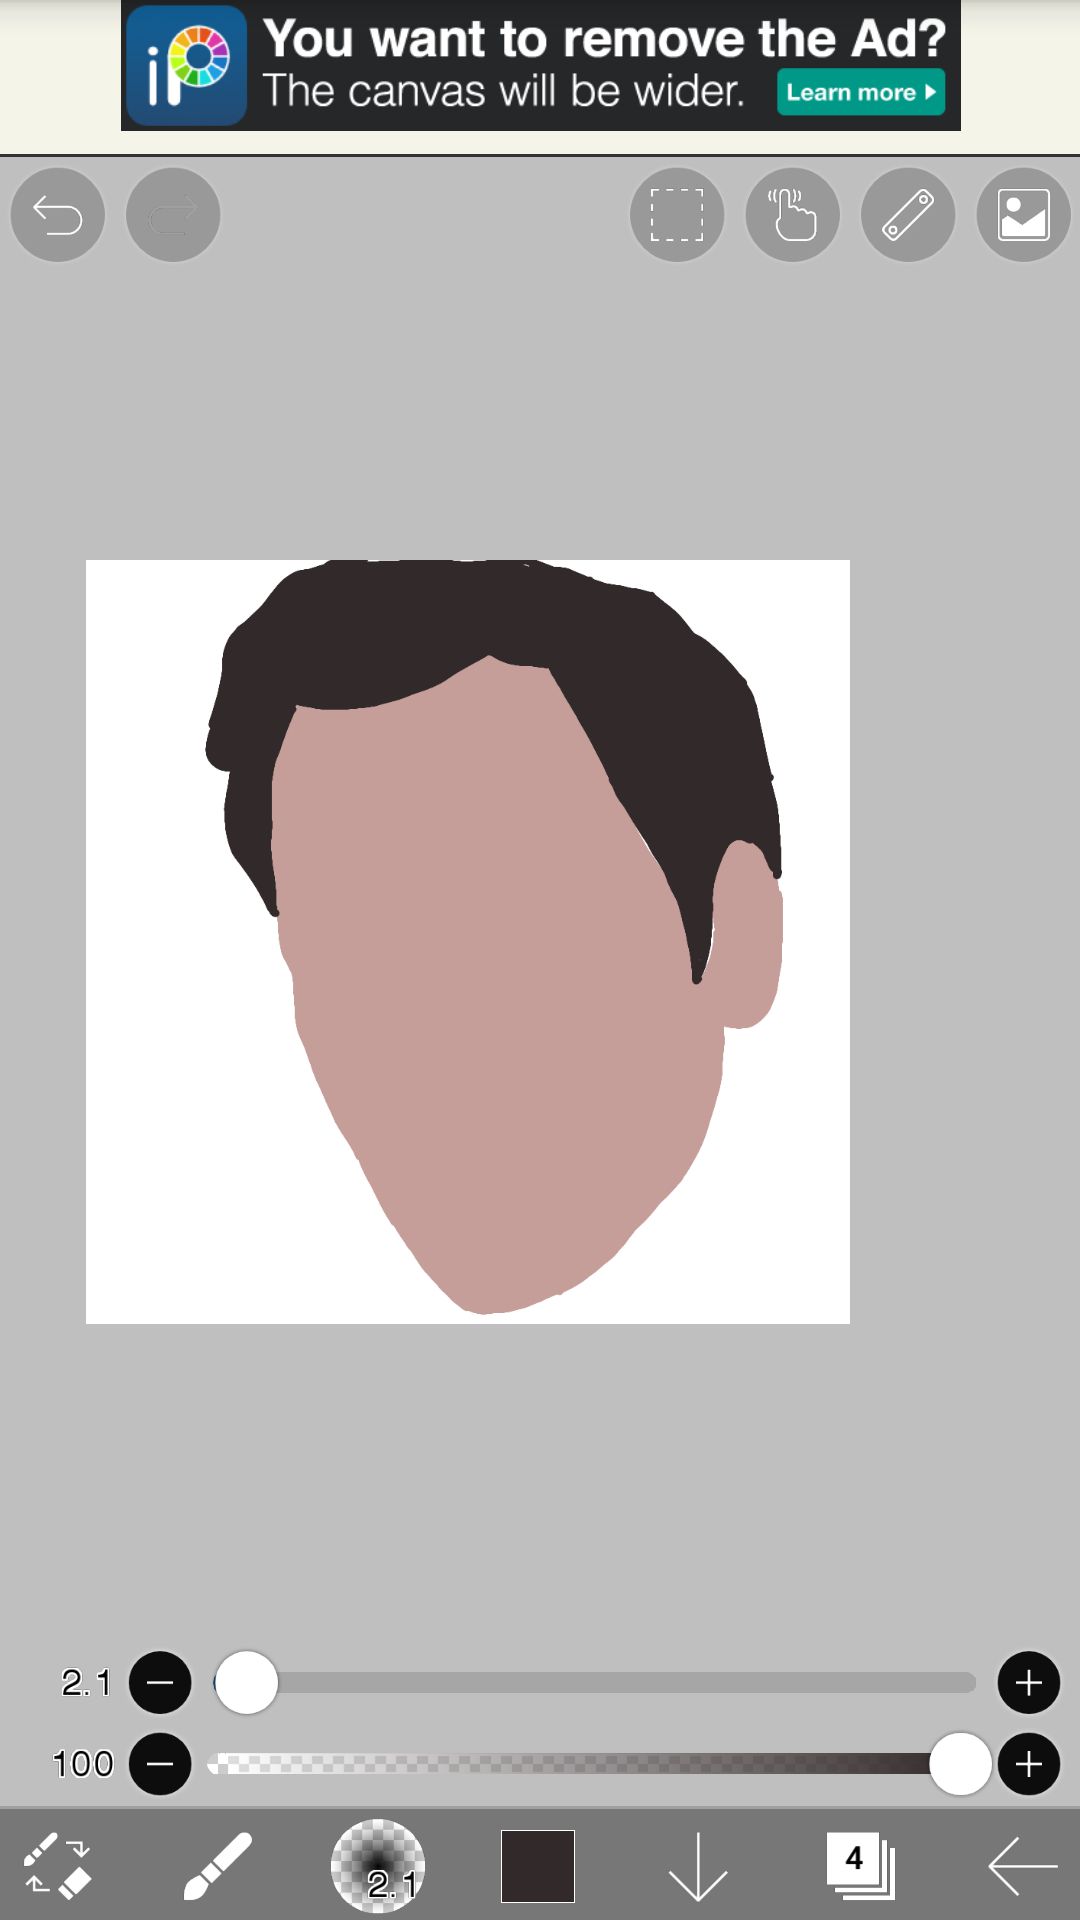
Make the main image visible, add another layer for the hair, go to brush and repeat the process for the hair.
Whenever I add a layer for the neck, I make the skin shade slightly darker or slightly lighter so that the jawline can be differentiated and the vector looks like your model.
P.S. I DID NOT ADD A NECK FOR THISH CUZ I AM NOT USING THIS VECTOR ANYWAYS ☠️☠️☠️
STEP 14
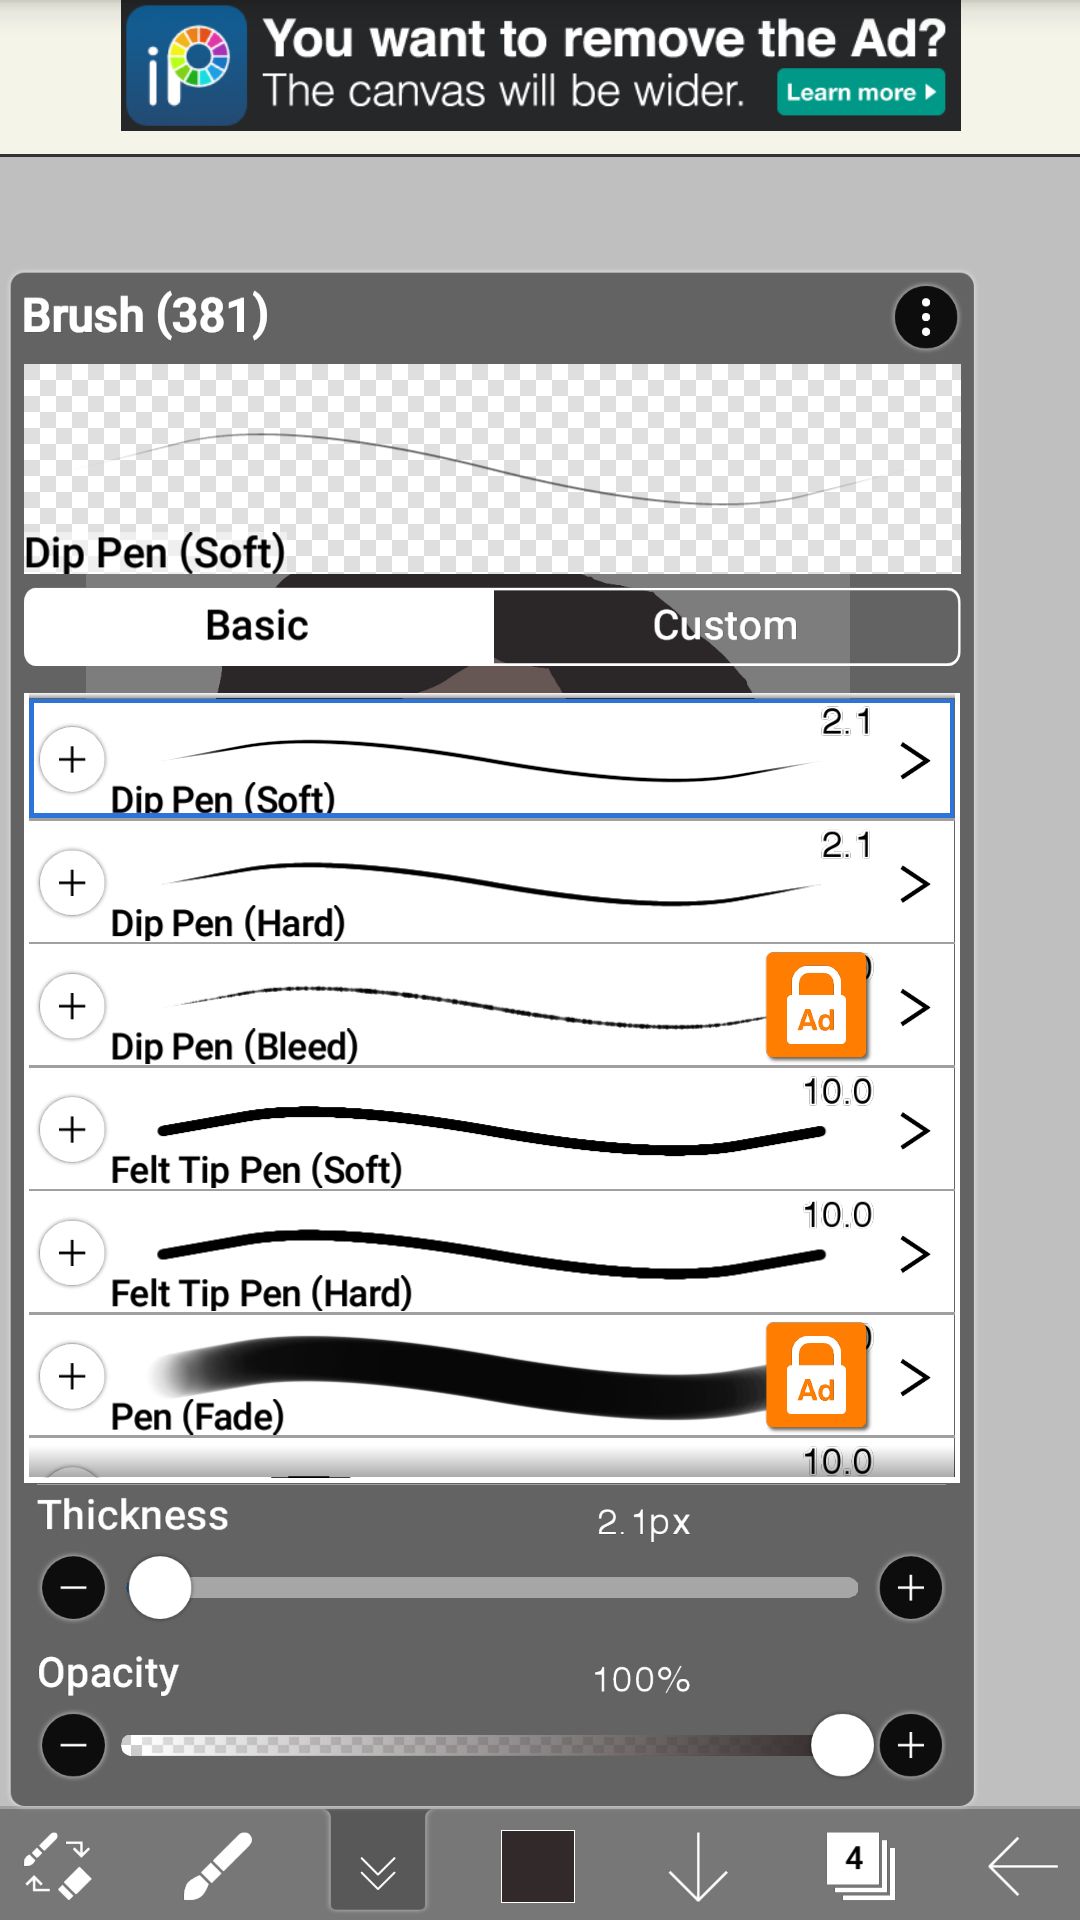
Now go to brush again for giving good hair strand details to your hair. Select Dip Pen Soft. Hard doesn't make a difference either but I like soft more UwU
STEP 15
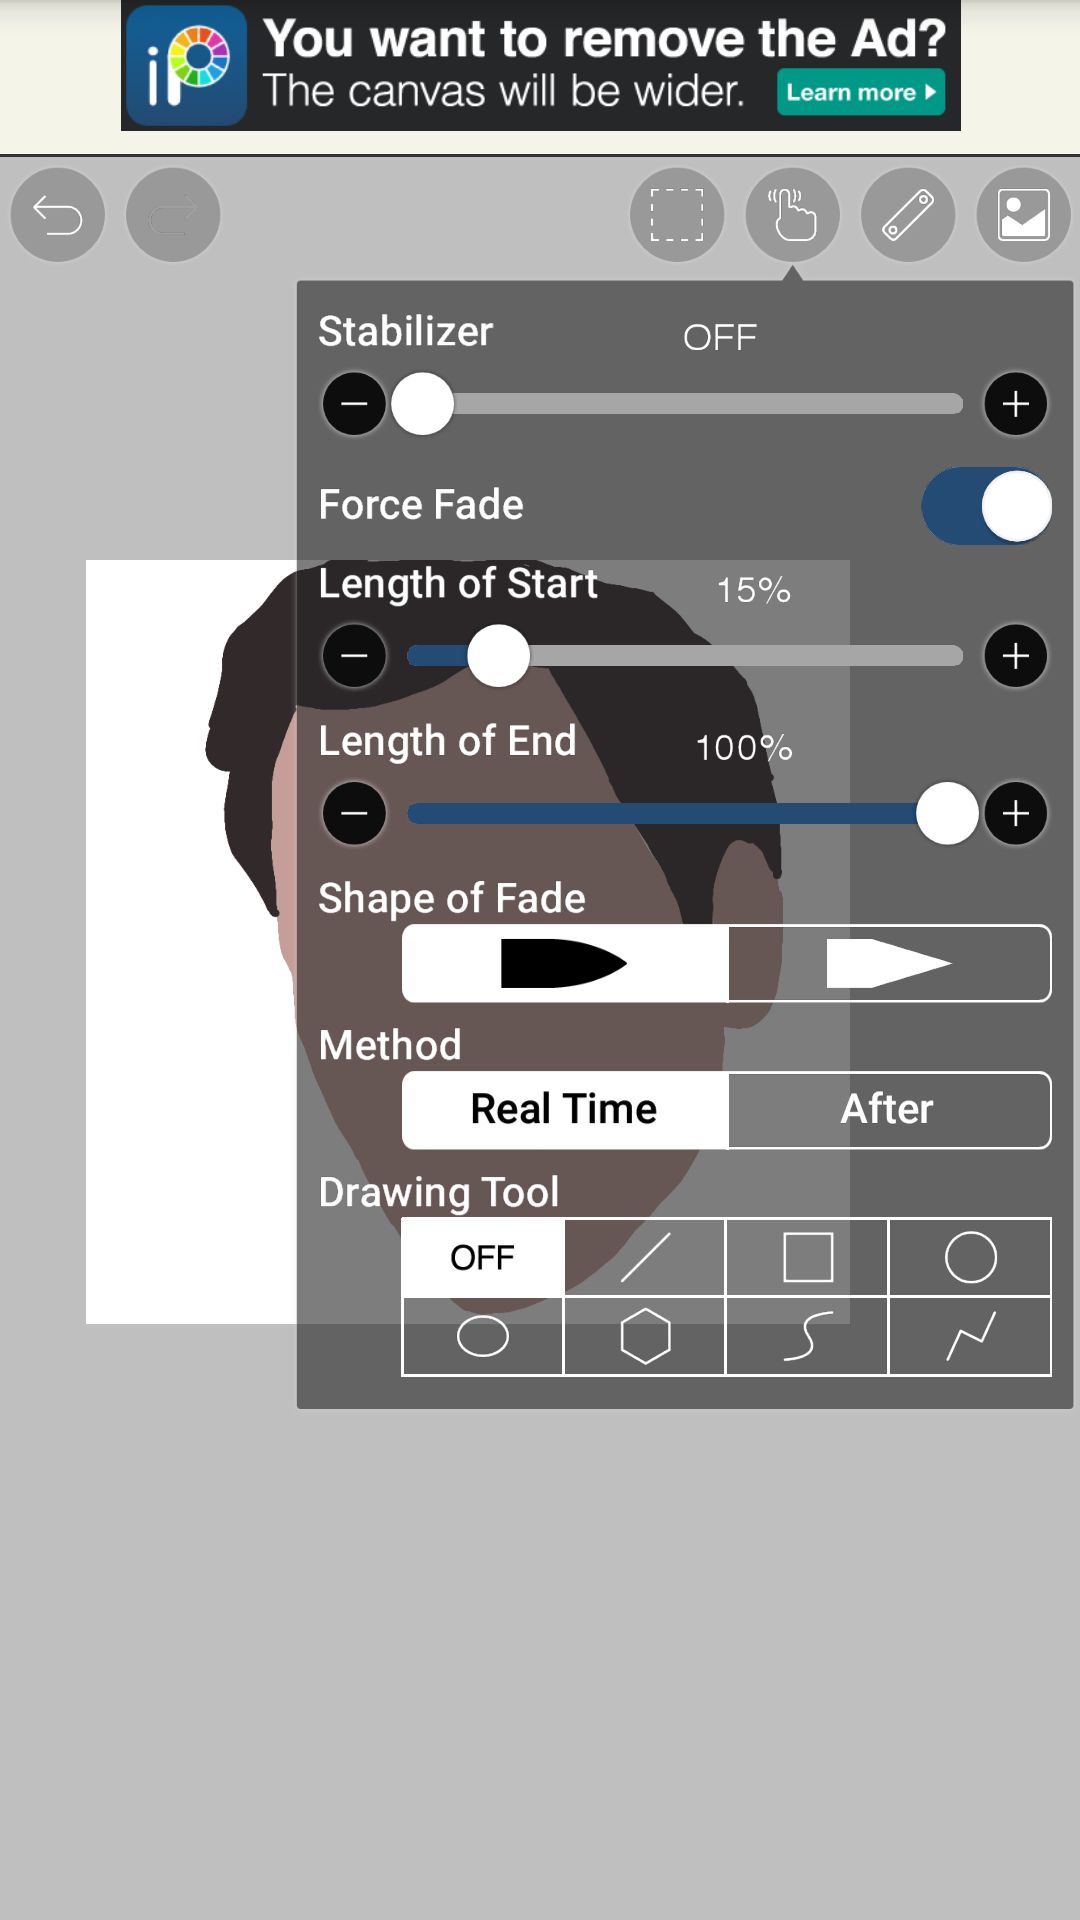
Now go to the third last symbol of the finger at the top and turn force fade on. Bring the leght of start to 15 and end to 100. This way, the point where you start will be more rounded, at the point where you end will be more pointed, giving a hair strand look to it.
STEP 16
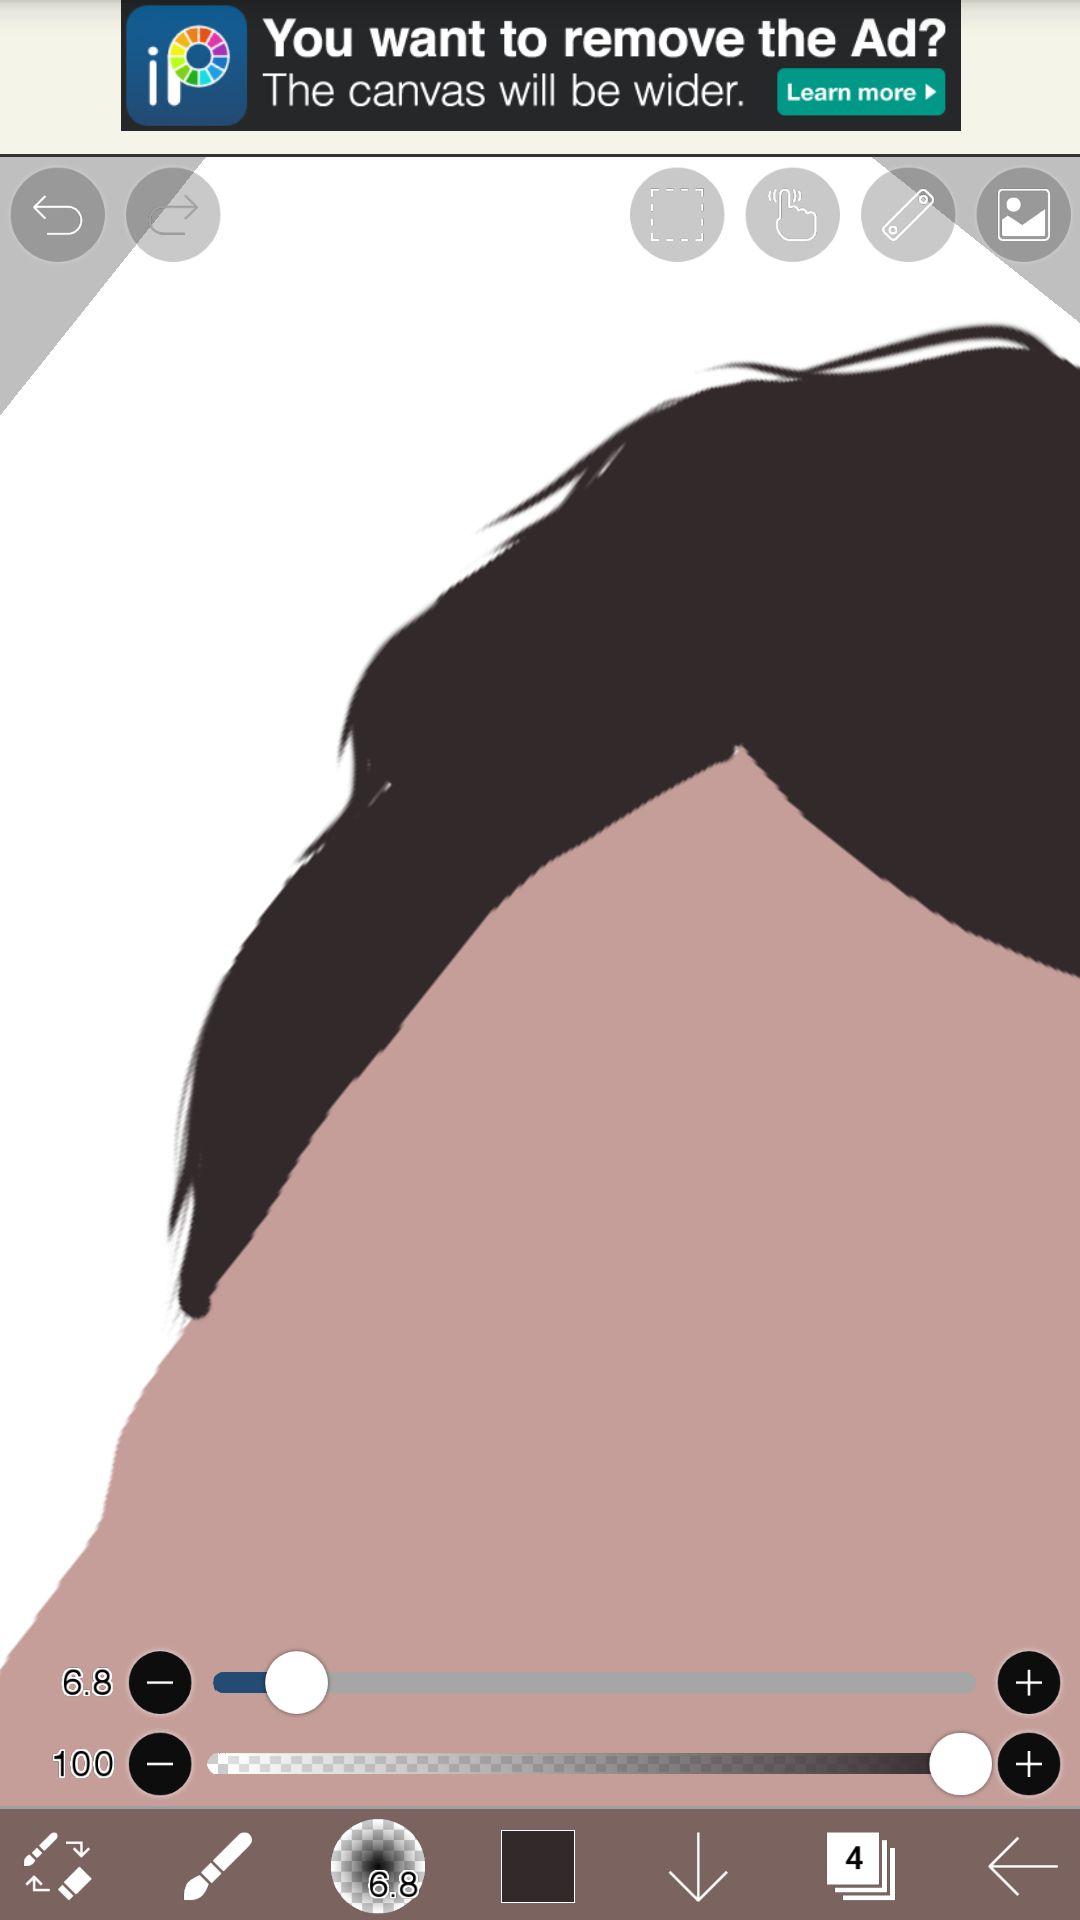
Now what I mostly do for this hair detail part is that I add a top most layer for it. This is because sometimes I put my hair layer below my face layer to give the hair sharper edges. But then If I wanna add hair strands above the face to give it a realistic look, the hair gets hidden below the face. Adding a new layer for it would be the best. Now zoom in and randomly start adding hair strands.
P.S. IF YOU DID NOT GET THIS, YOU WILL ONCE YOU START USING IT
STEP 17
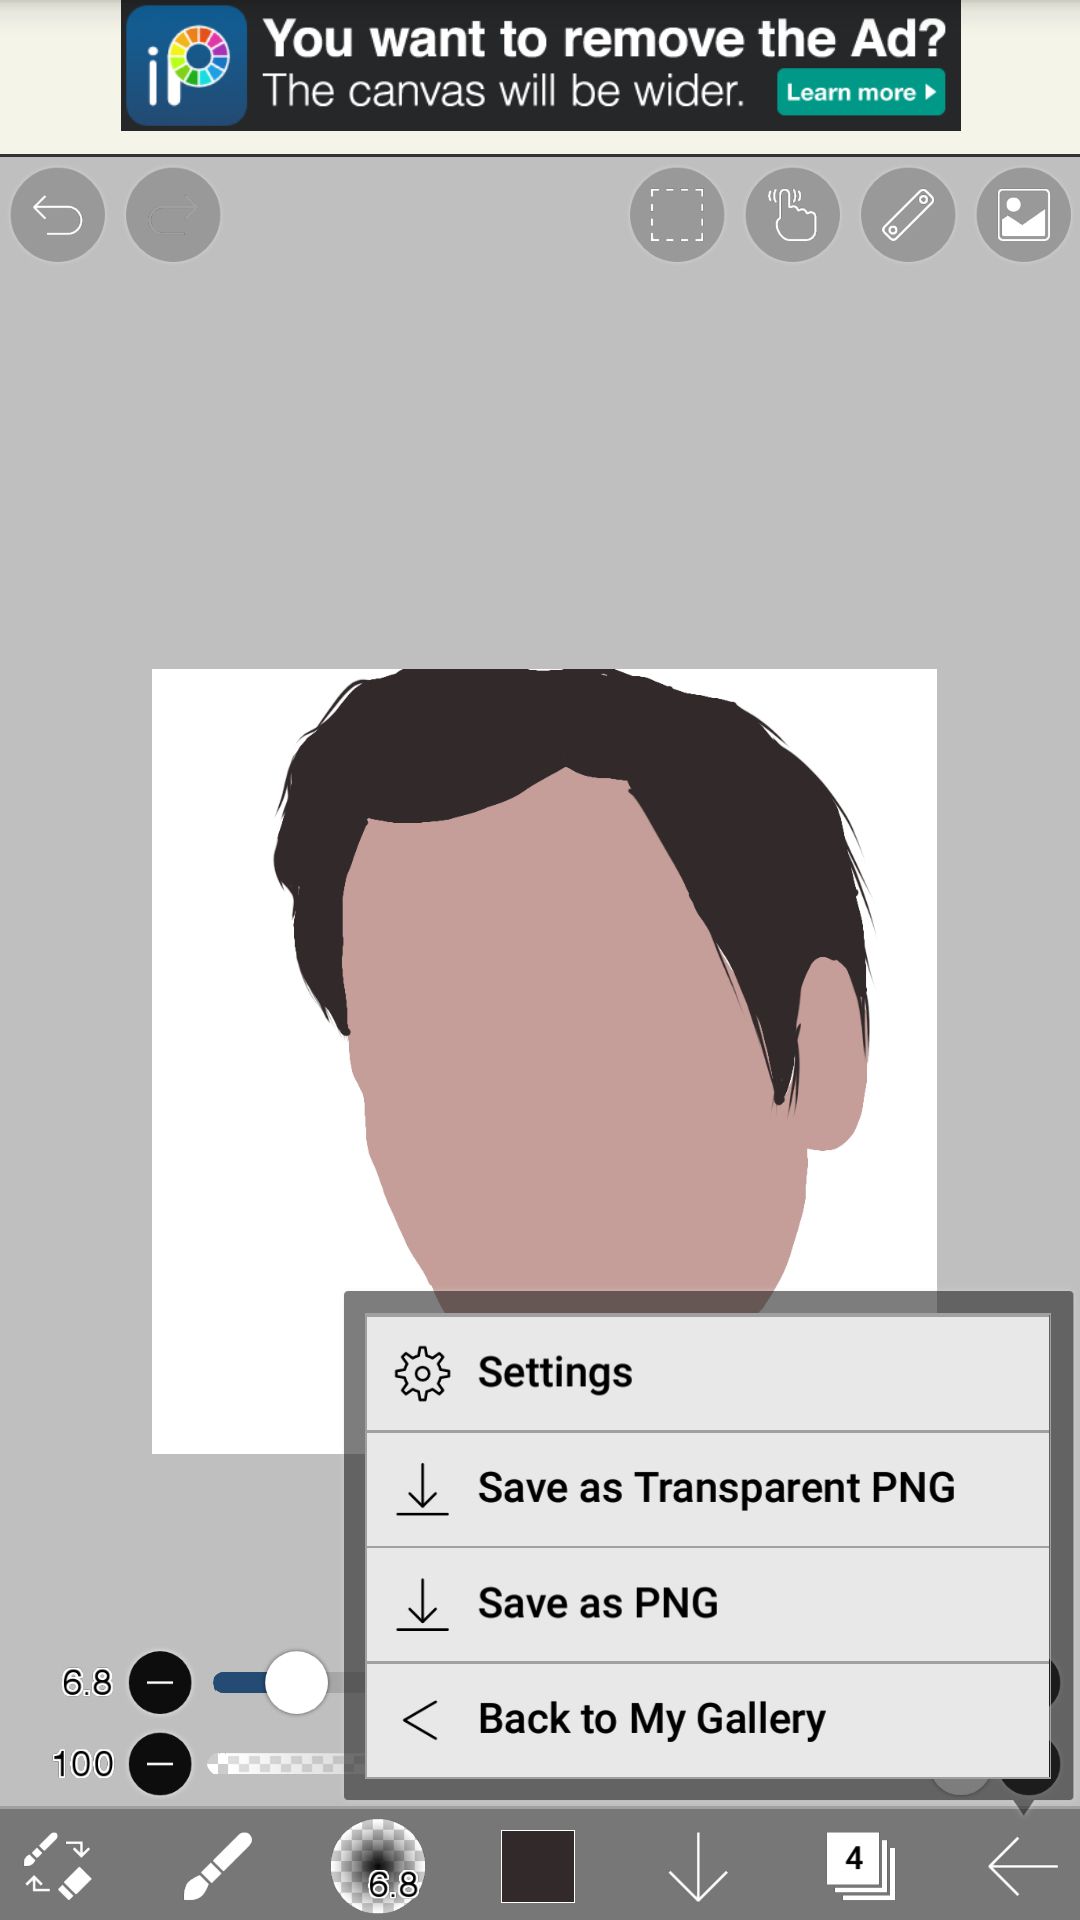
Make sure that before saving it you have either hidden or deleted the main image layer. After that select the back arrow at the bottom right and save it as either transparent PNG for a transparent background or normal PNG for a normal background. And your done. We ended in 17 steps and 17th is mah bdate UwU
OKAAAAAAA BABYEEEEEEEEEEEEEEEEEEEEEETTTTT~
Bạn đang đọc truyện trên: AzTruyen.Top