8 || Superimpose Basics
Hello guys! It's Verenice here and I'm going to show you how to navigate through the life saving app called Superimpose.
If you want to improve in your cover making skills I highly recommend this app even though it costs money. If you live in the US I believe it's .99 cents.
A great replacement for this app is PicsArt but if you have the money buy Superimpose.
What you are going to need today is a solid color and a PNG. To find a certain PNG you can search up a celebrity's name and add PNG at the end. Ex: Selena Gomez PNG.
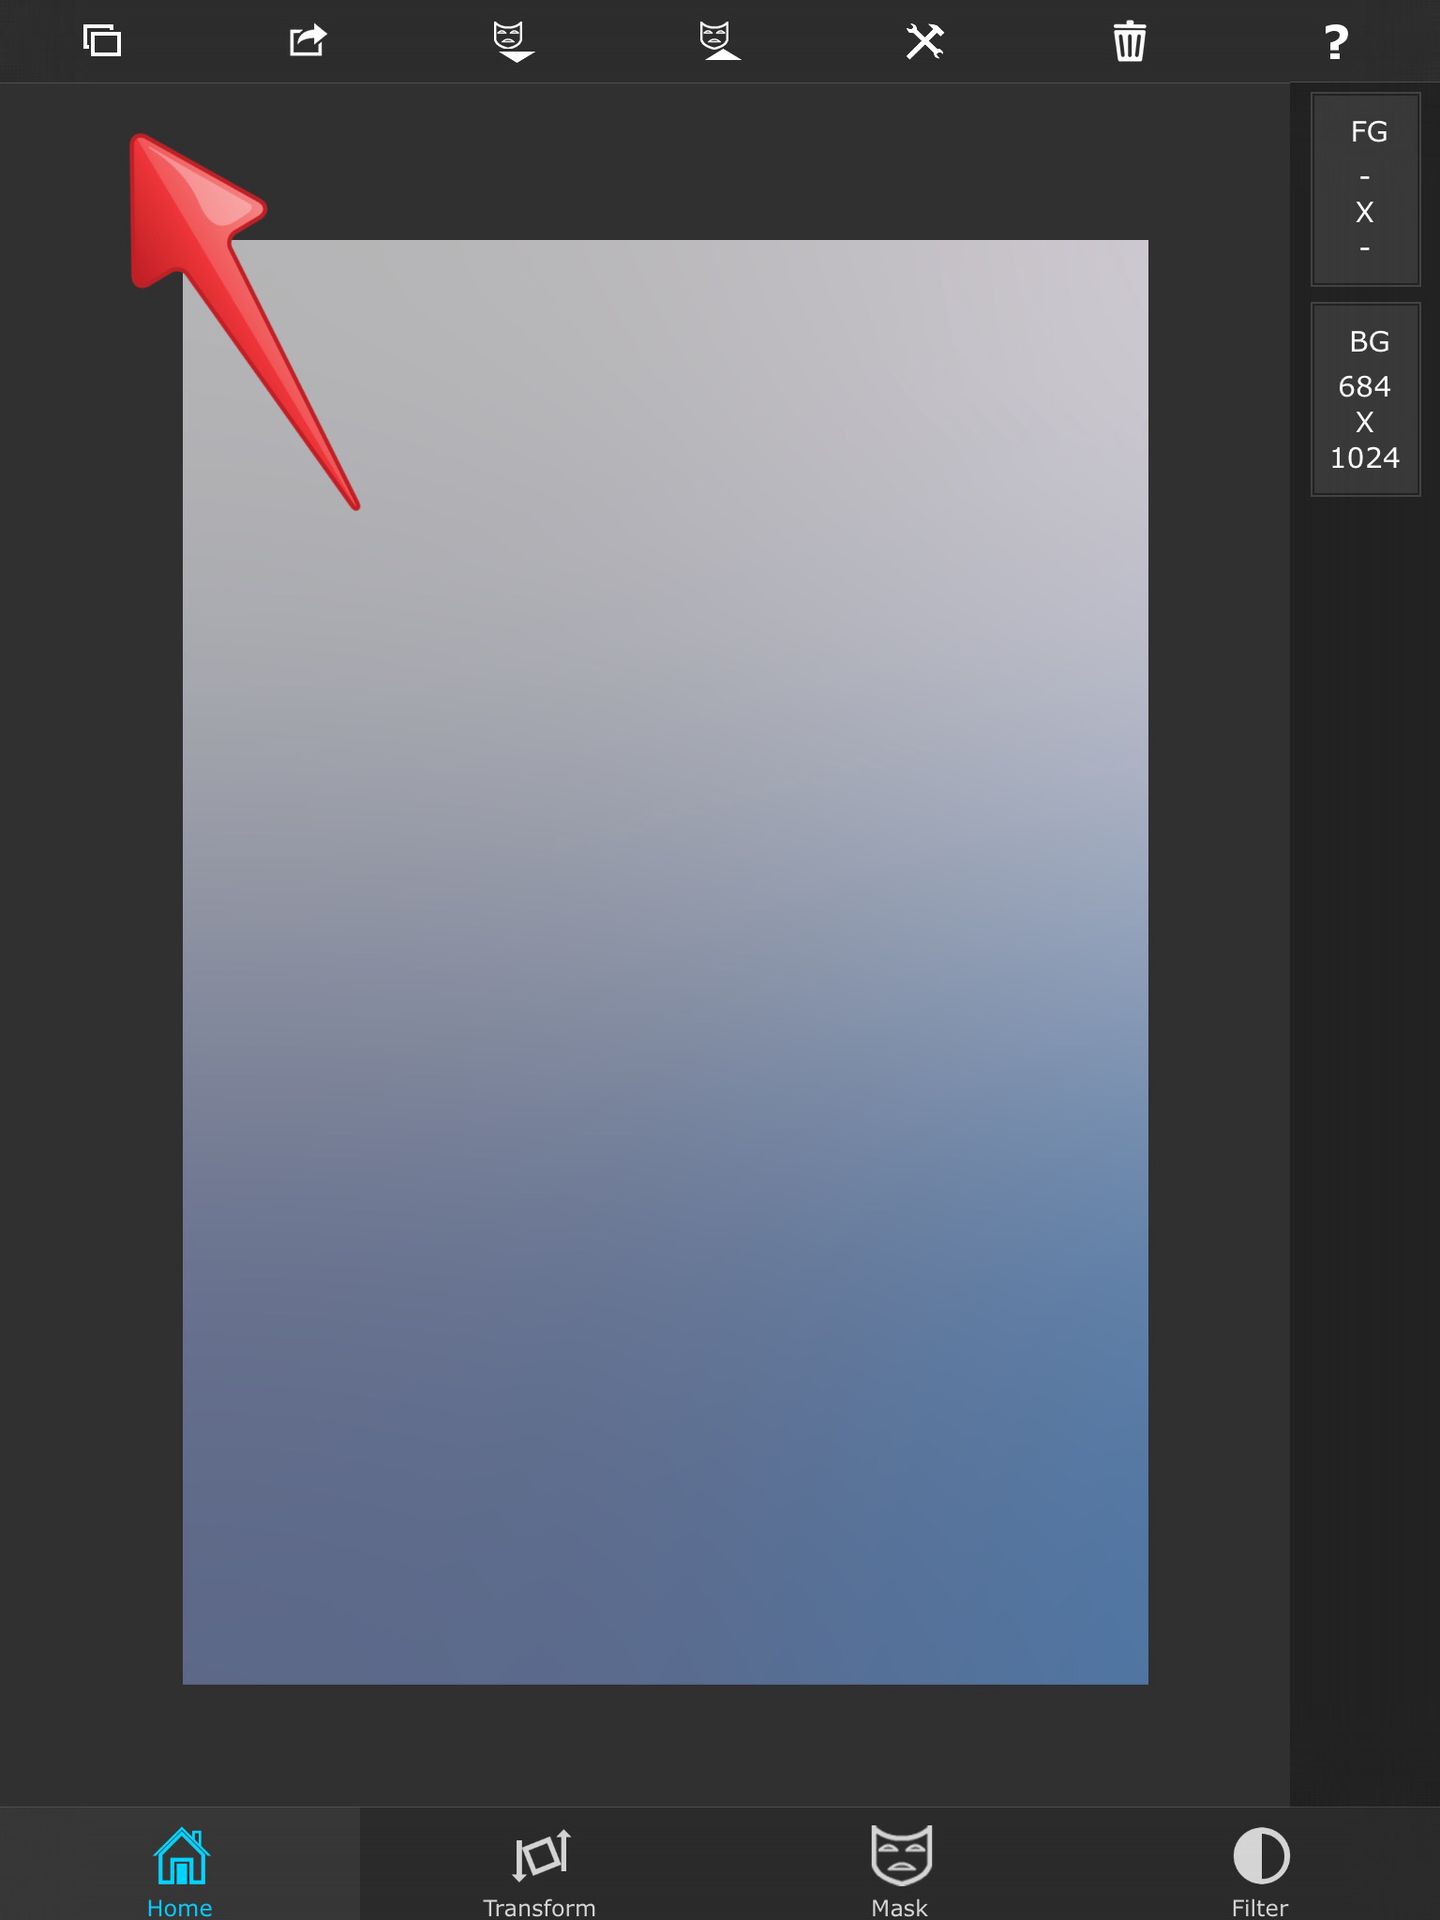
Step One: When you open the app you will be in the home screen. At the top of the screen there are tons of icons but the ones you need to focus on are the first one. Click the first option.

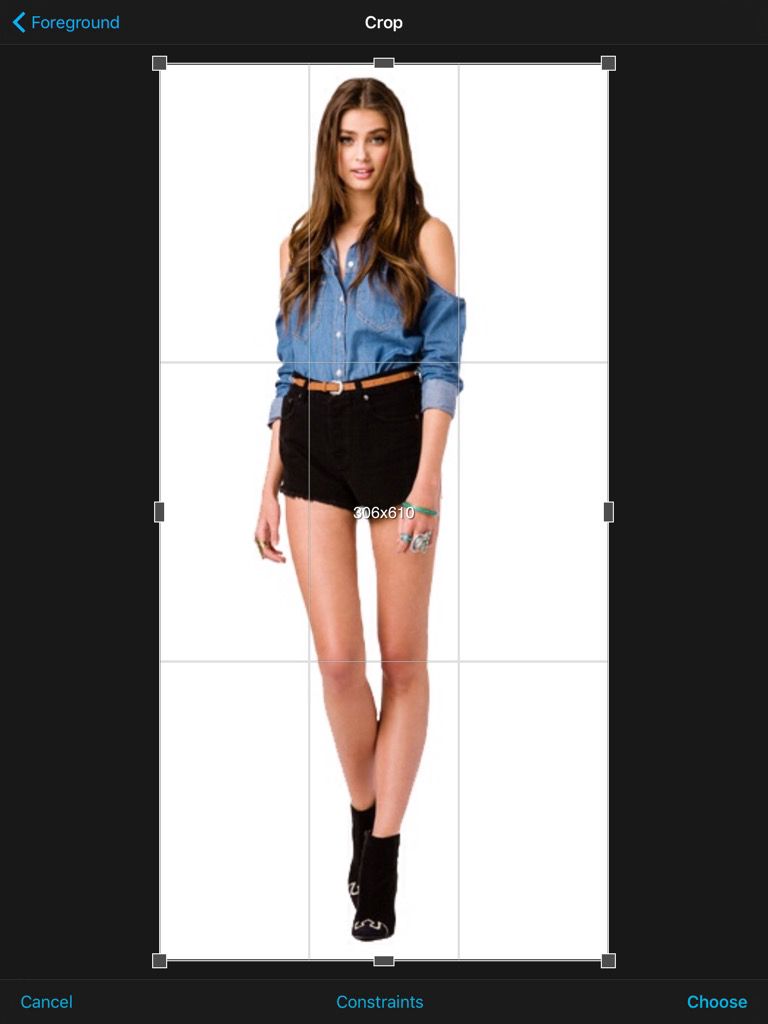
Step Two: This will appear. Click the first option that says photos and choose the solid color image. Crop it to Wattpad Coved size which is 2:3

Step Three: Go back to home and click the first icon on the top.
Step Four: Two options will appear and it says Import Background and Import Foreground. Click photos where it says Import Background.
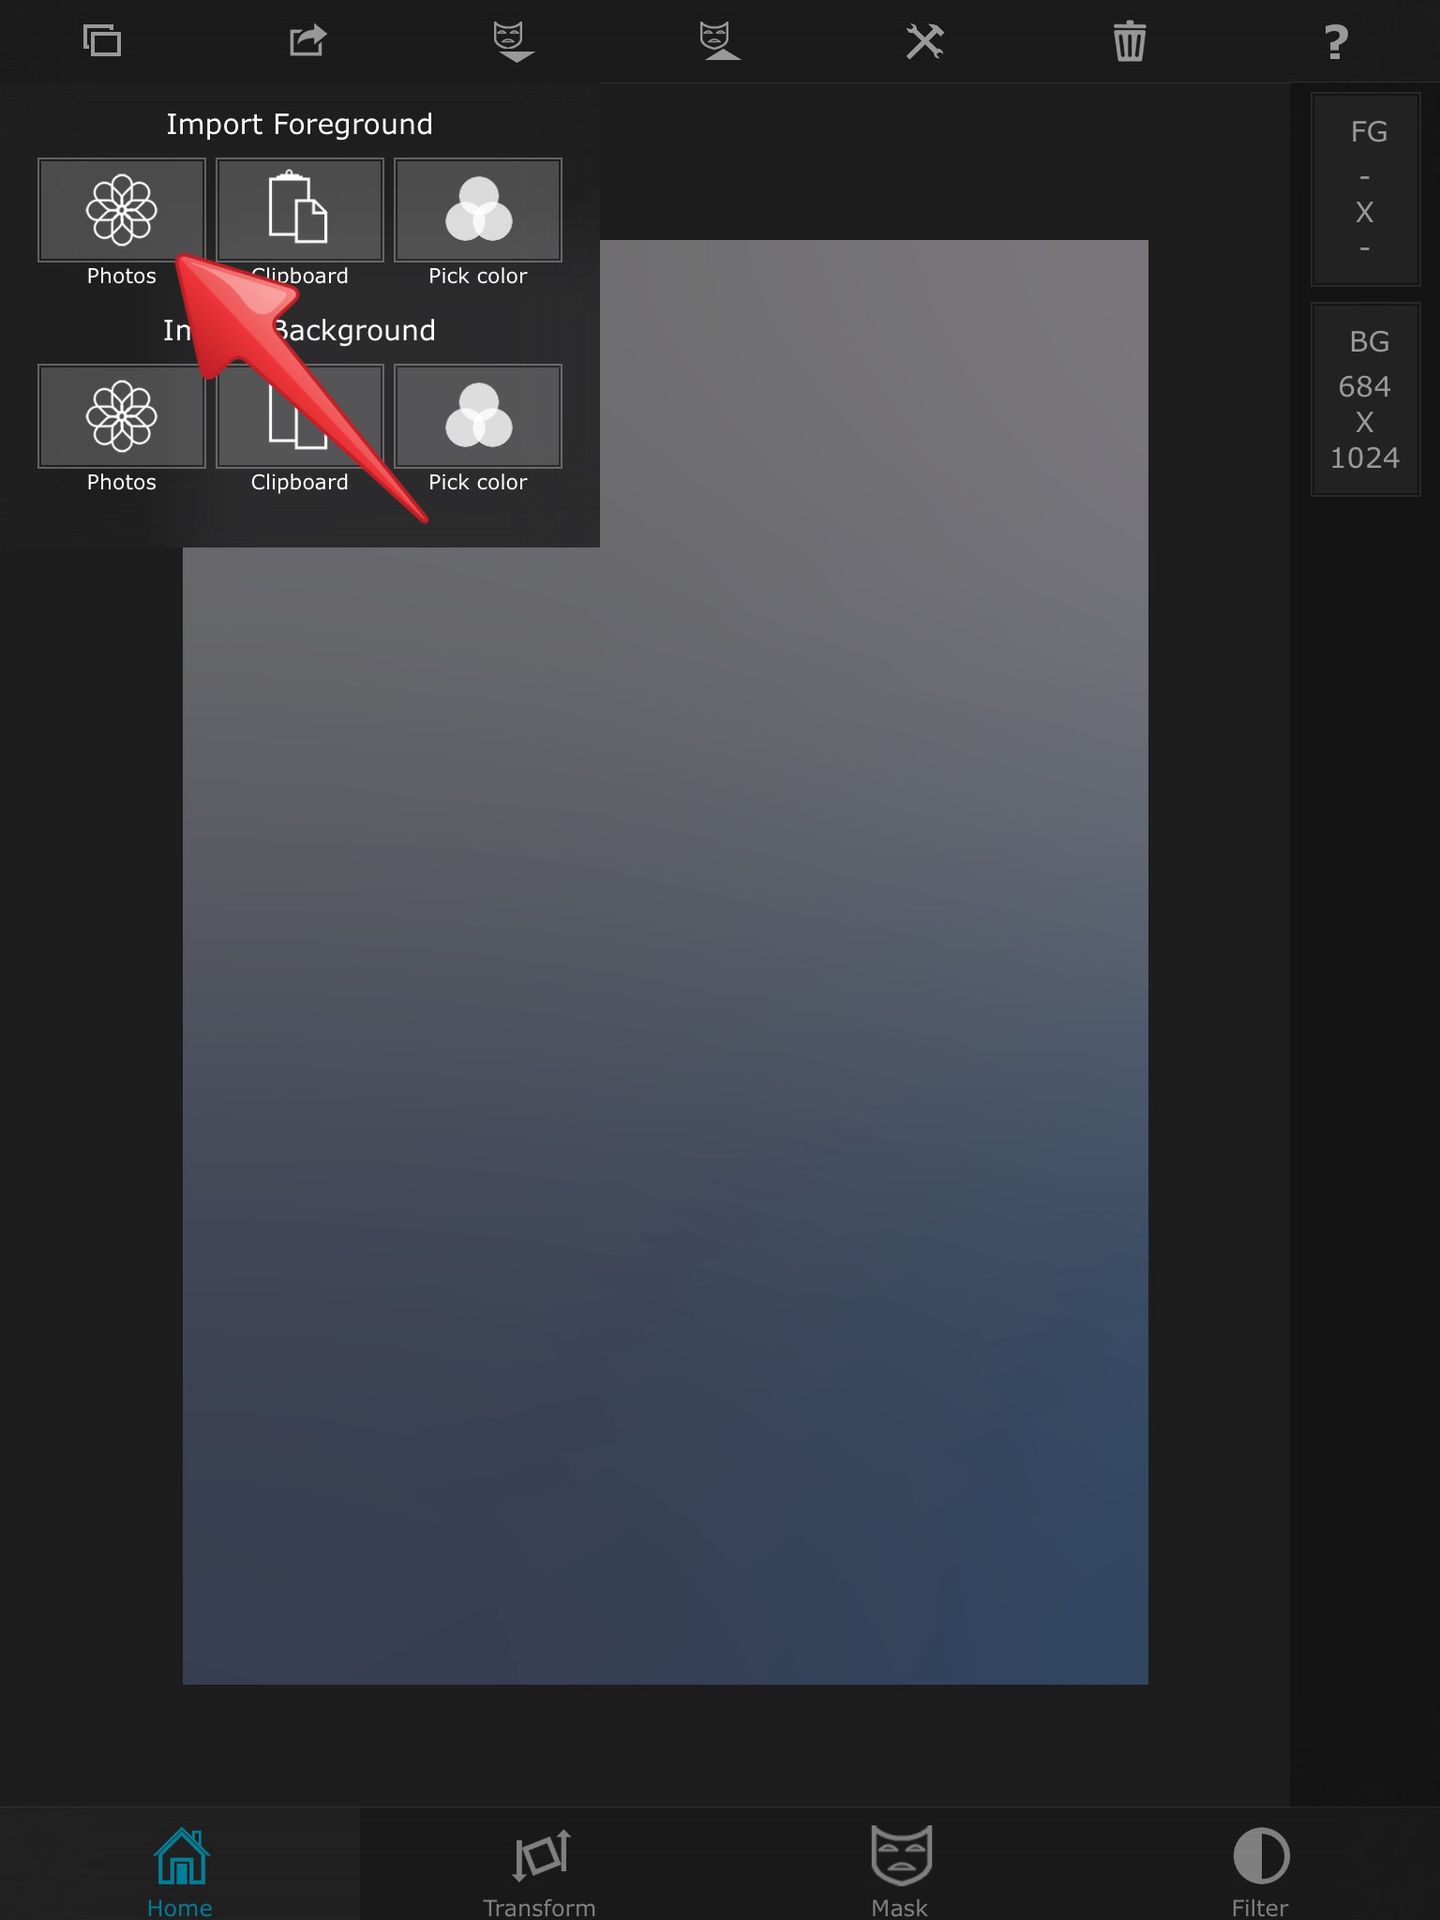
Step Five: Choose your PNG as a foreground.
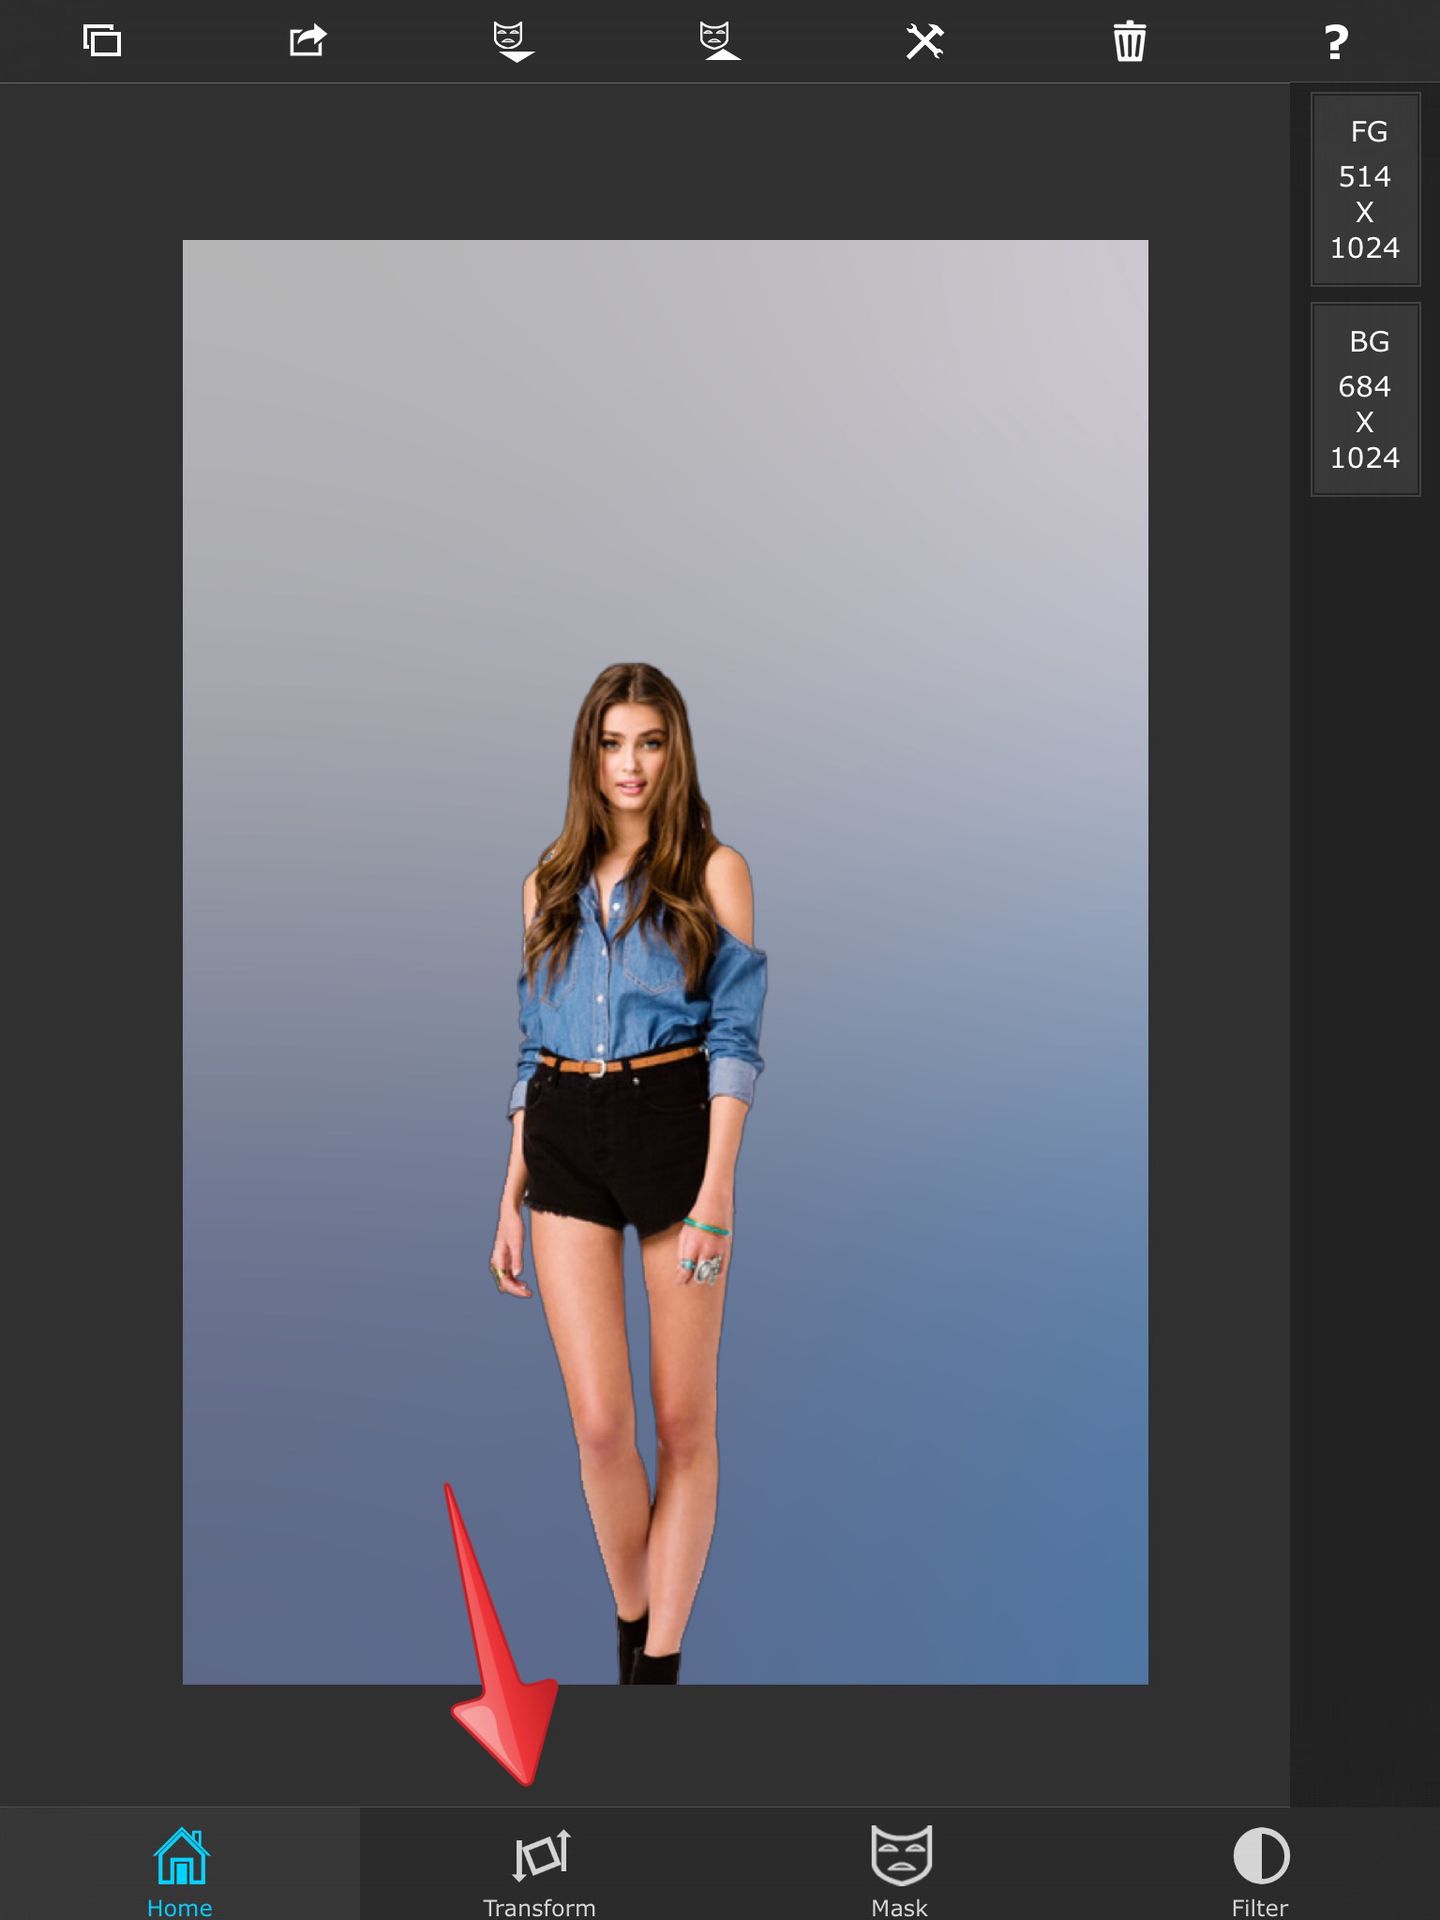
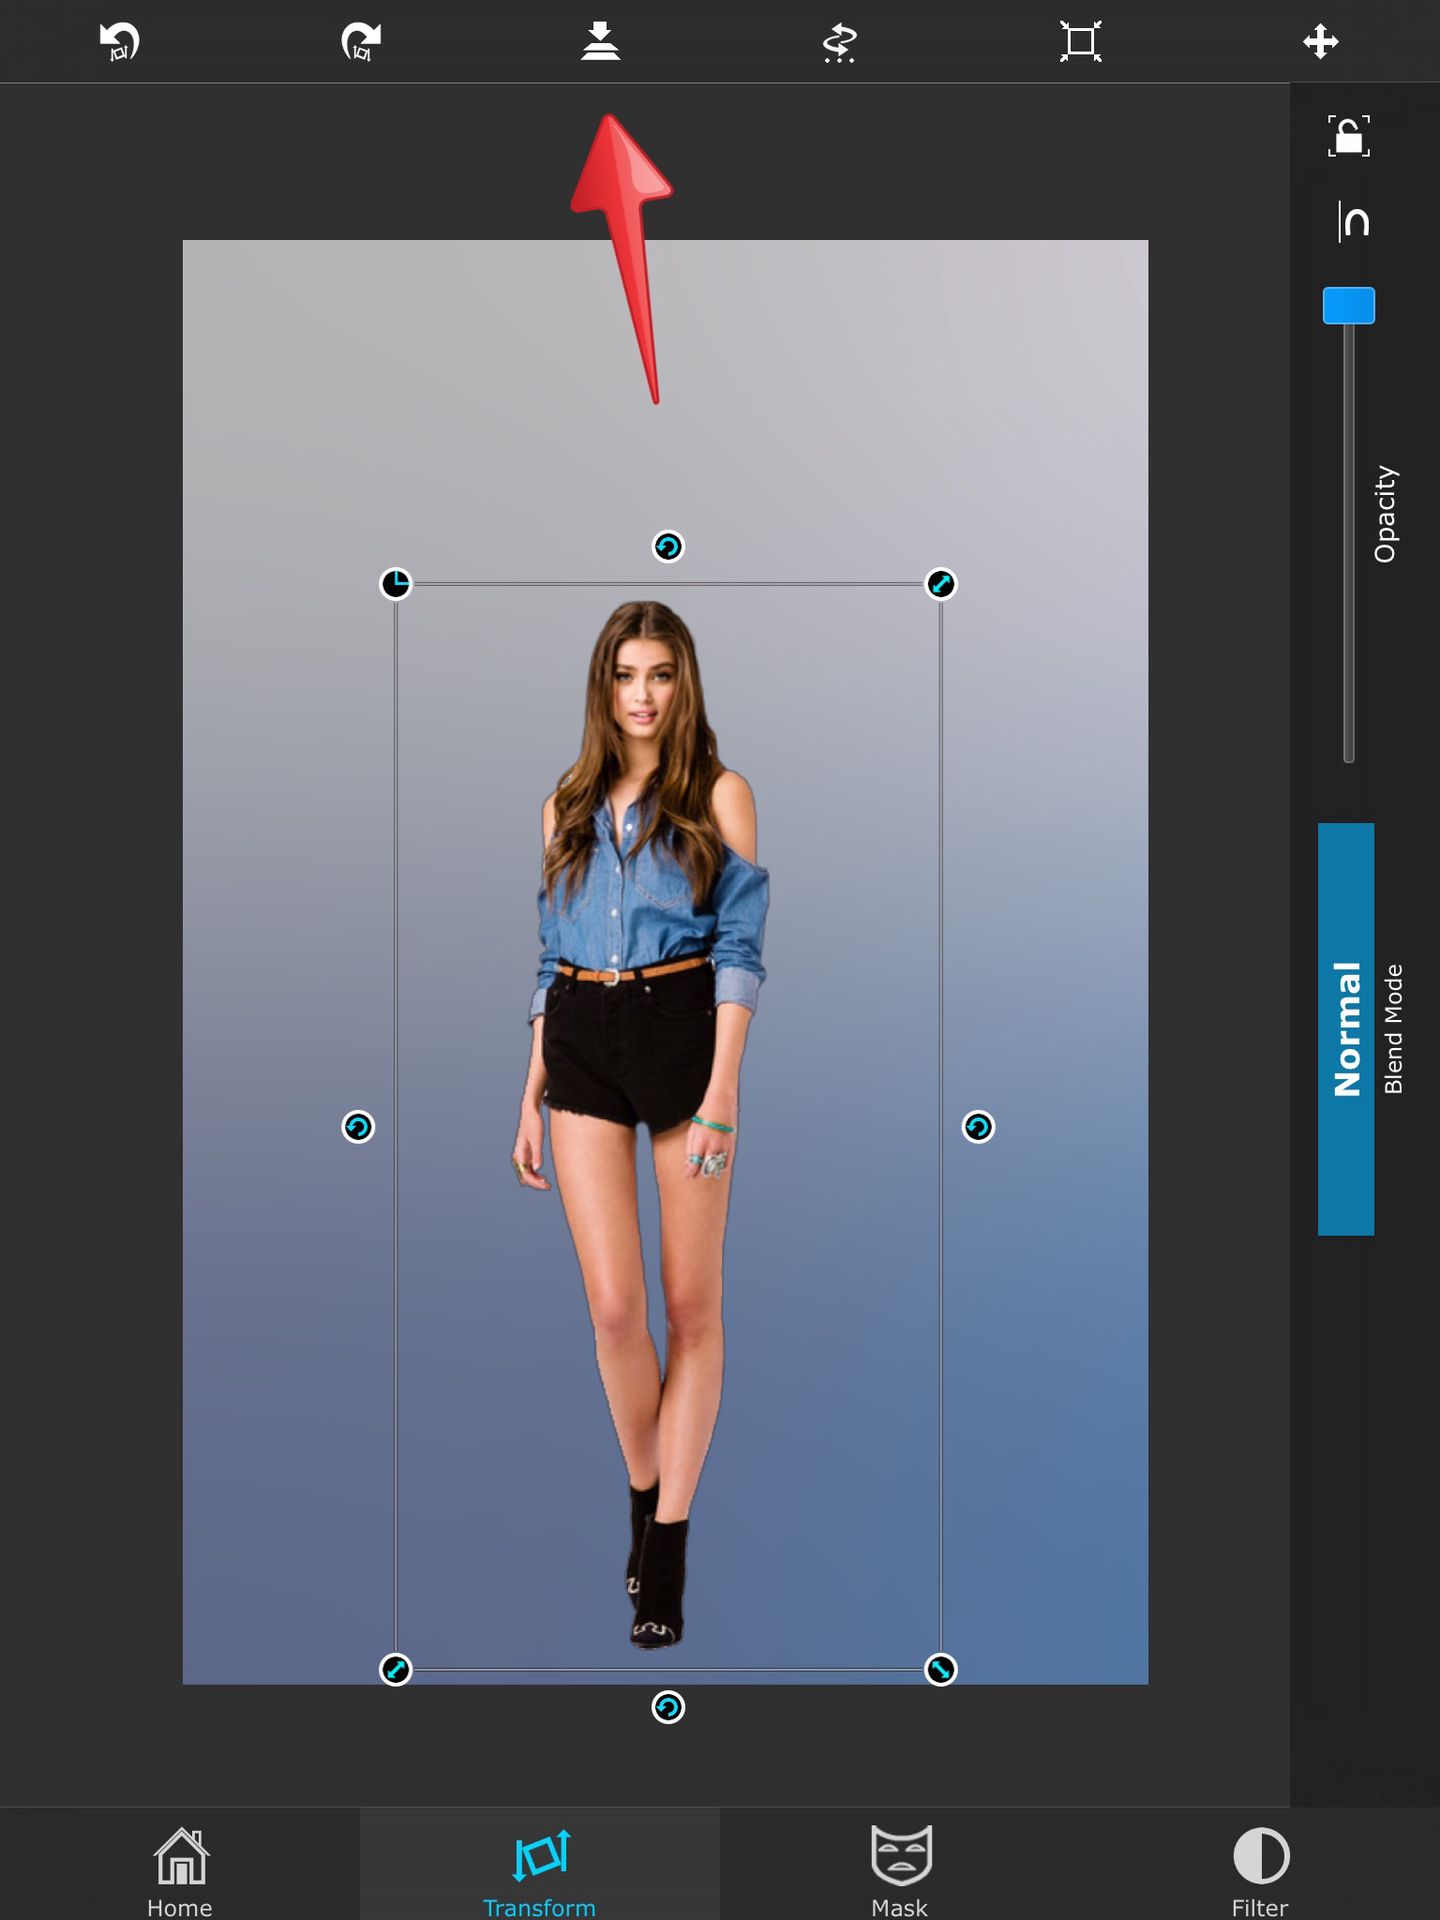
Step Six: At the bottom there are a bunch of options. Click the one that says Transform. Here you can move your image around and turn the opacity down. You can also choose from many options of overlays such as Screen and Multiply which should be familiar if you use PicsArt.
Step Seven: Adjust the PNG to your liking. Once you are done there are options at the top. Click the third icon which looks like an arrow pressing down two rectangles. Three options will appear. Click Merge.
What you have done when you click merge is that you accepted that the PNG should be there. Once you click merge you cannot move your PNG around.
Step Eight: So let's say you wanted to add a texture. Go back to home and click the first option. Hit Import Foreground ' Photos ' and click the glossy texture you have. Go to transform and look at the side. There will be a thing that says blend modes. Here you can choose many options on how you want the image to overlap the bottom image.

Step Nine: Click Screen. You can turn the opacity down if you would like. Merge.

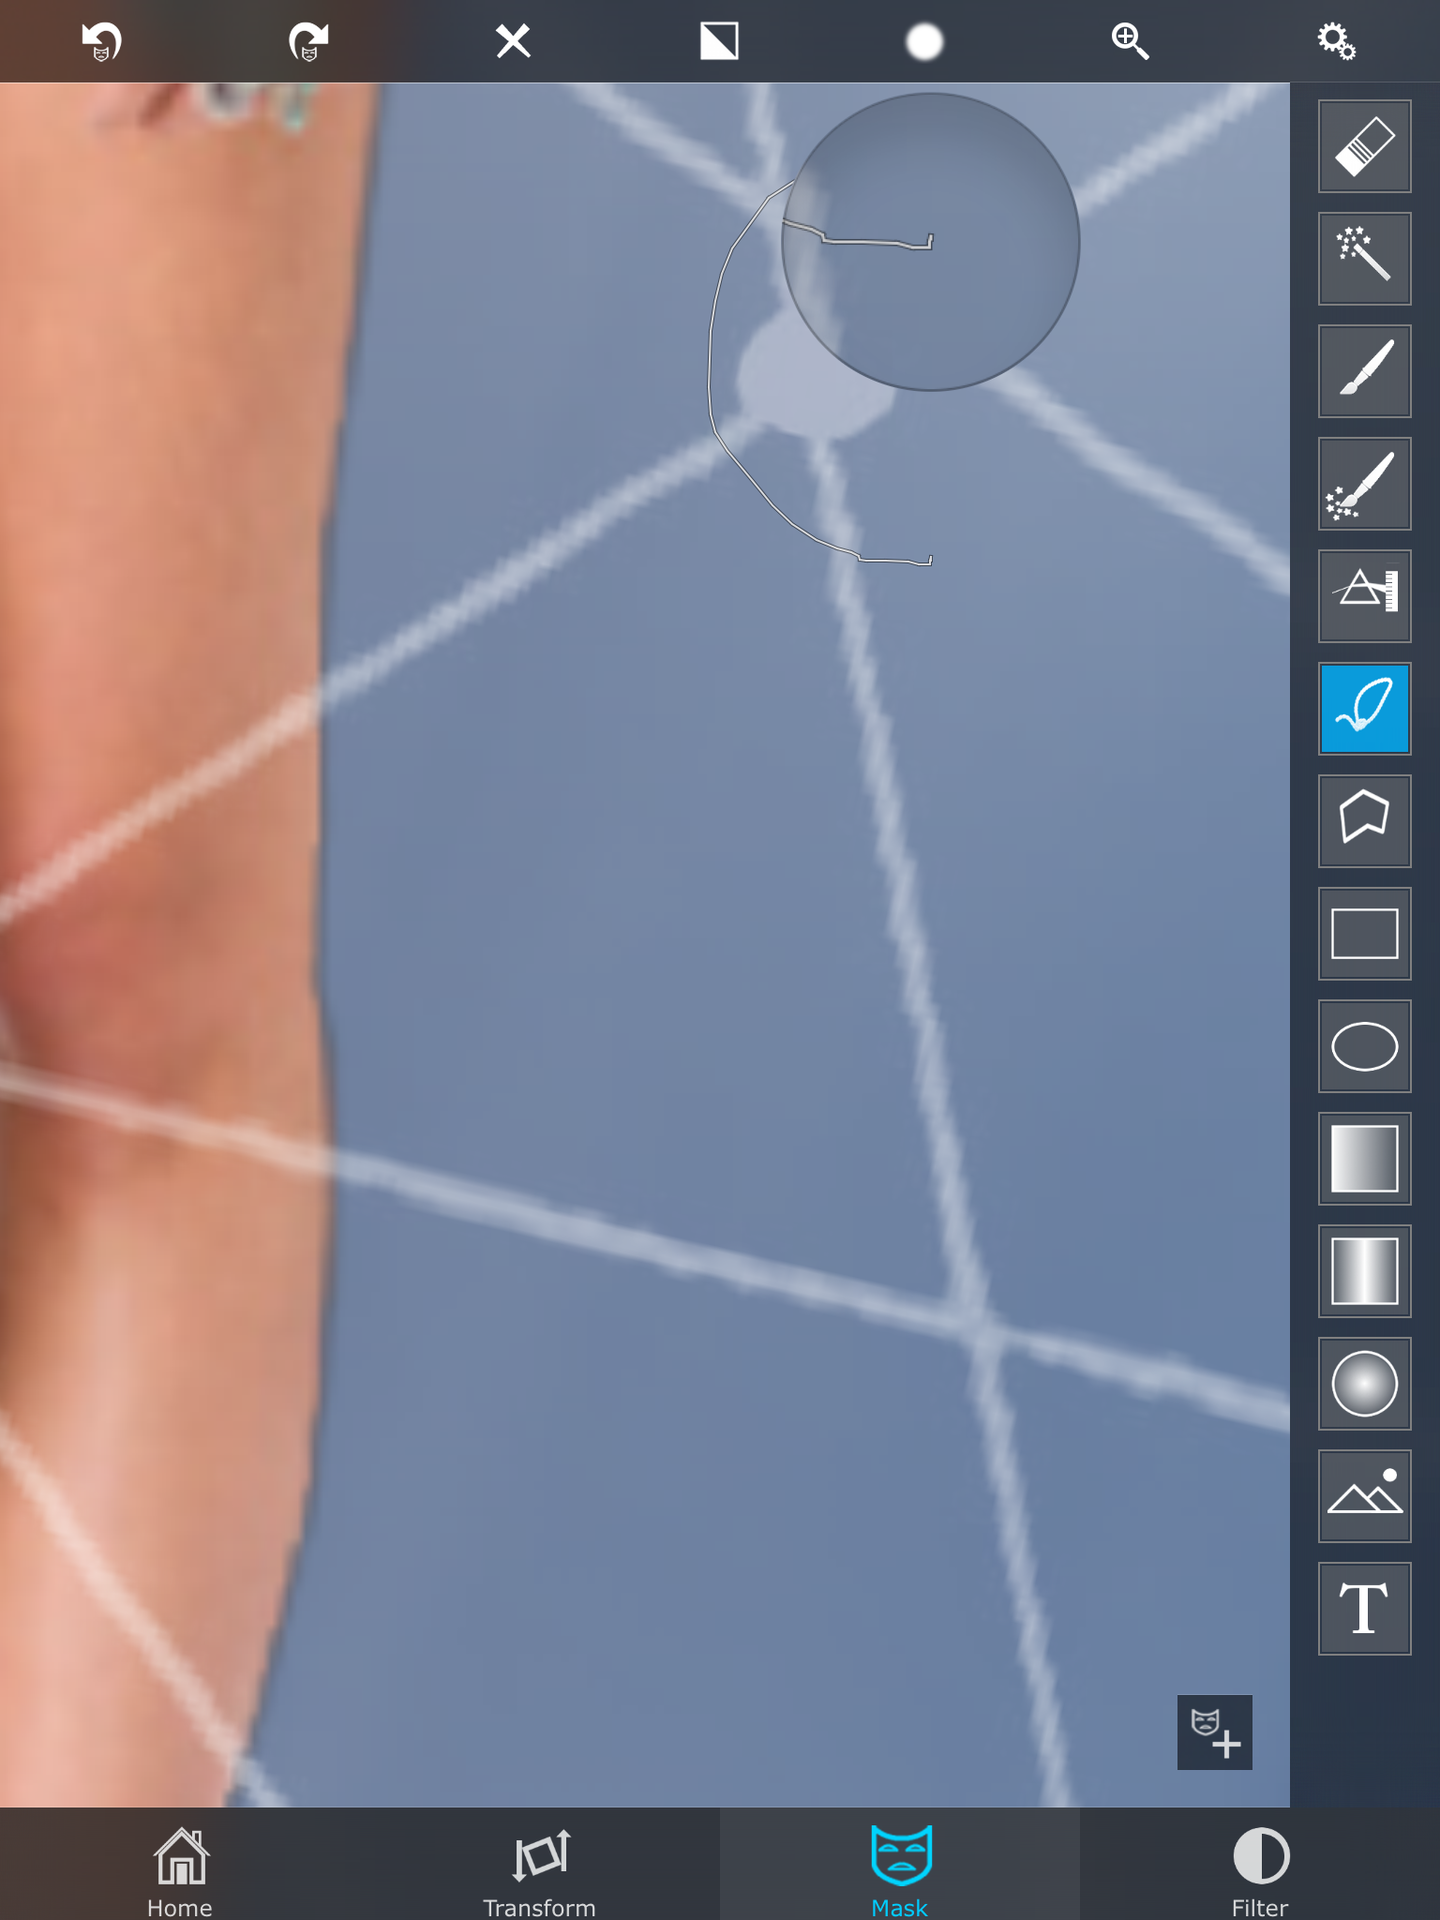
Step Eleven: Right now I will show you the wonders of the part of the app called Mask. I'm going to open up a constellation PNG and put it over the girl. I only want the constellation to overlap the girl and not the rest of the picture. Head over to the tab Mask. There you will find tons of erasing brushed and options. For more precise erasing you can click the lasso option.

Step Twelve: Circle the part of the image you don't want. To erase make sure the lines touch and let go. The part you circled will erase. Before you merge I will show you the last feature Superimpose has so don't merge.
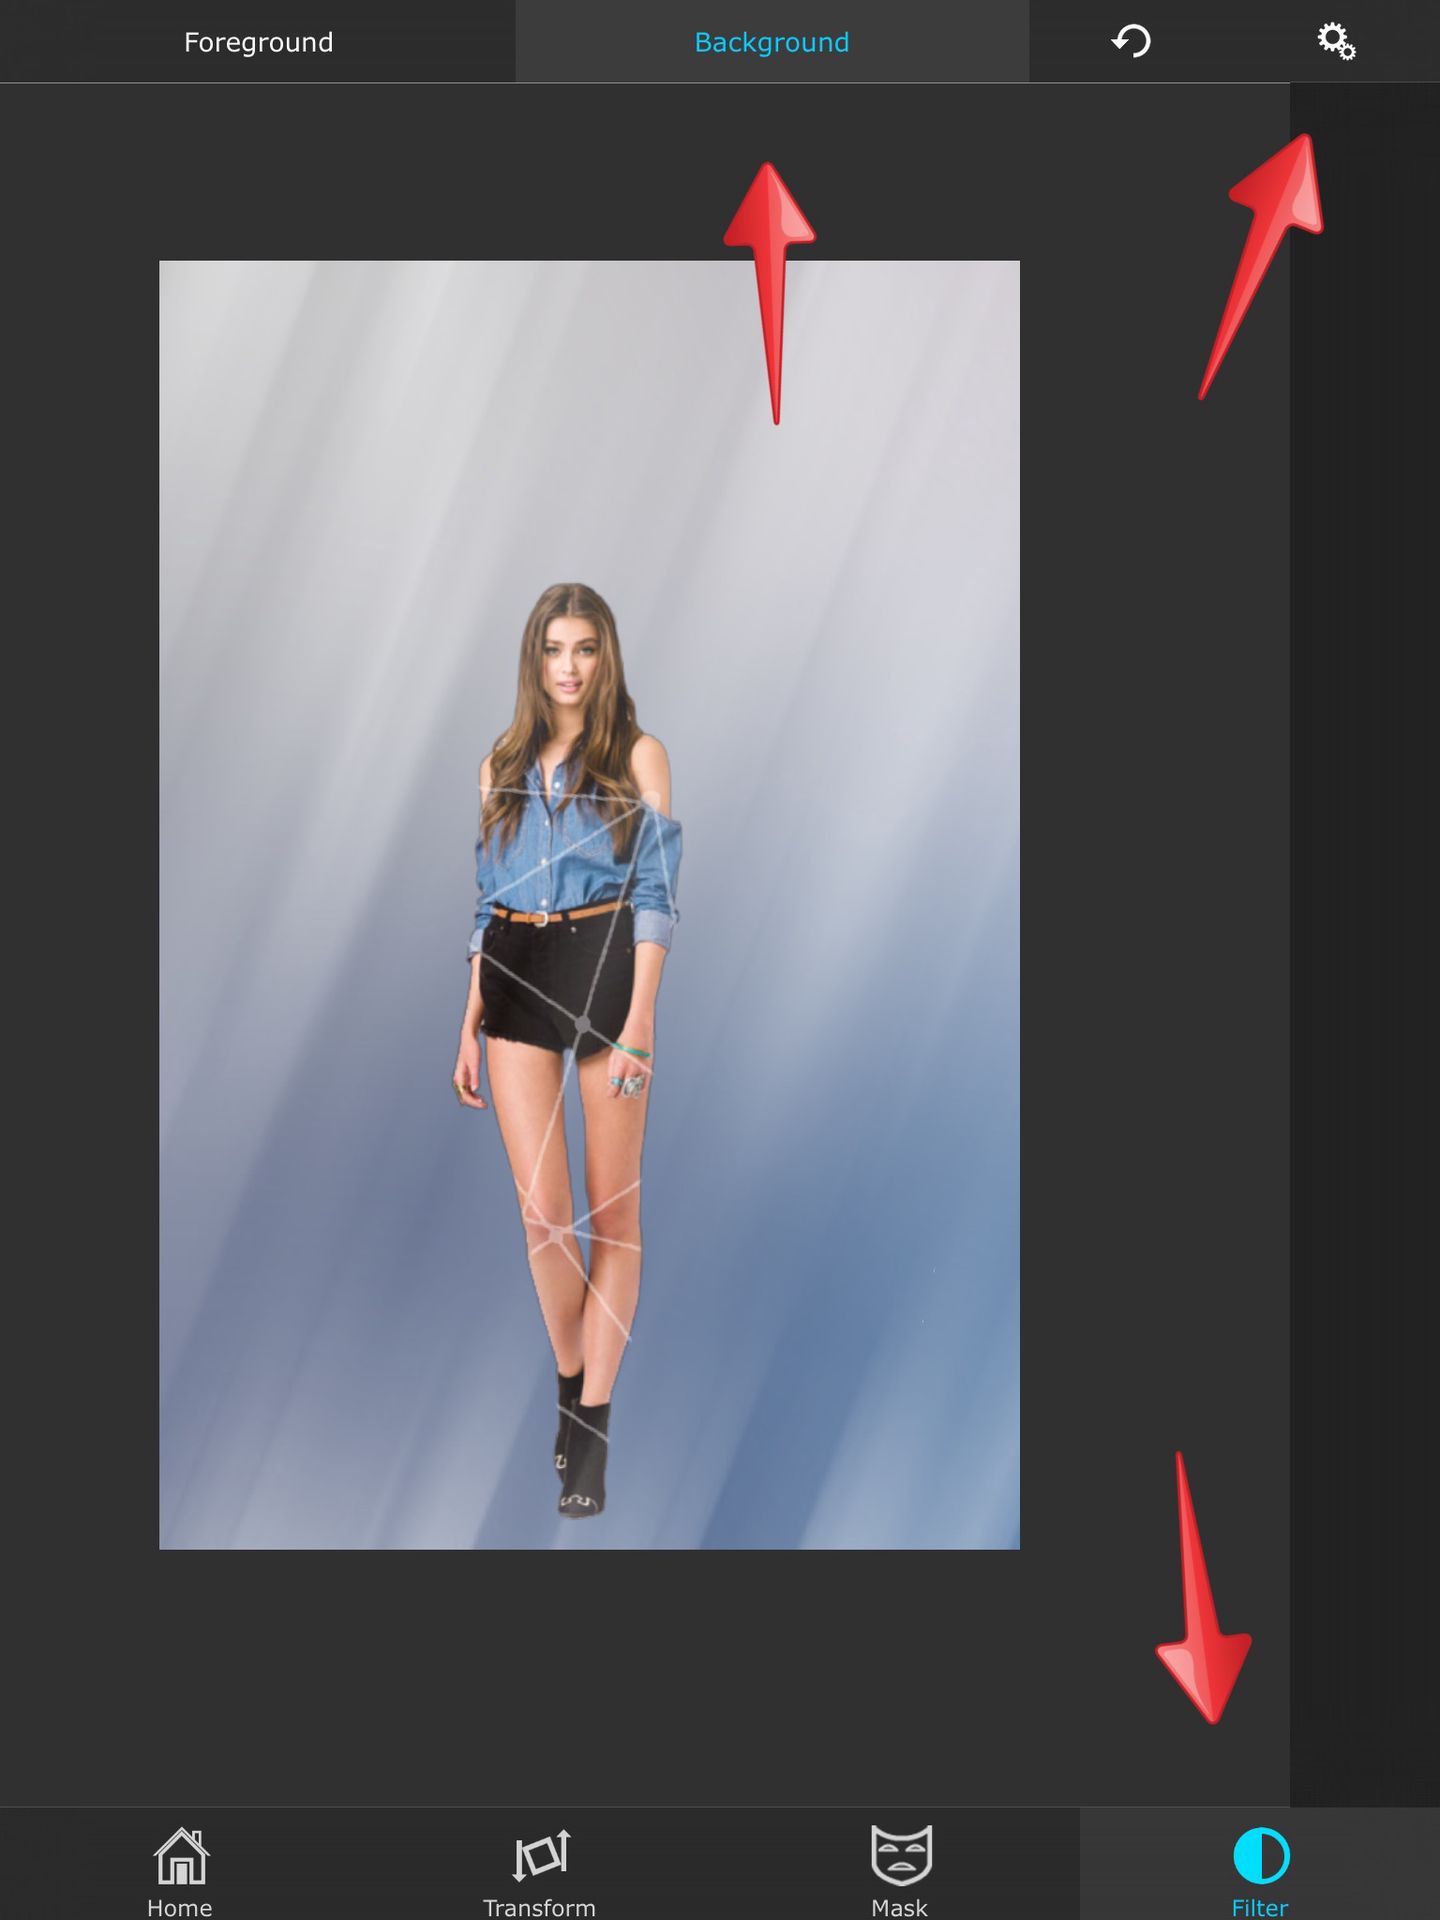
Step Thirteen: Okay let's say I made a mistake and I didn't make the background darker. To fix this you click the last at bat the bottom that says Filter. At the top it will say Foreground and Background. Since we want the background to be darker I will click background. At the near top right there are some gears. Click it.
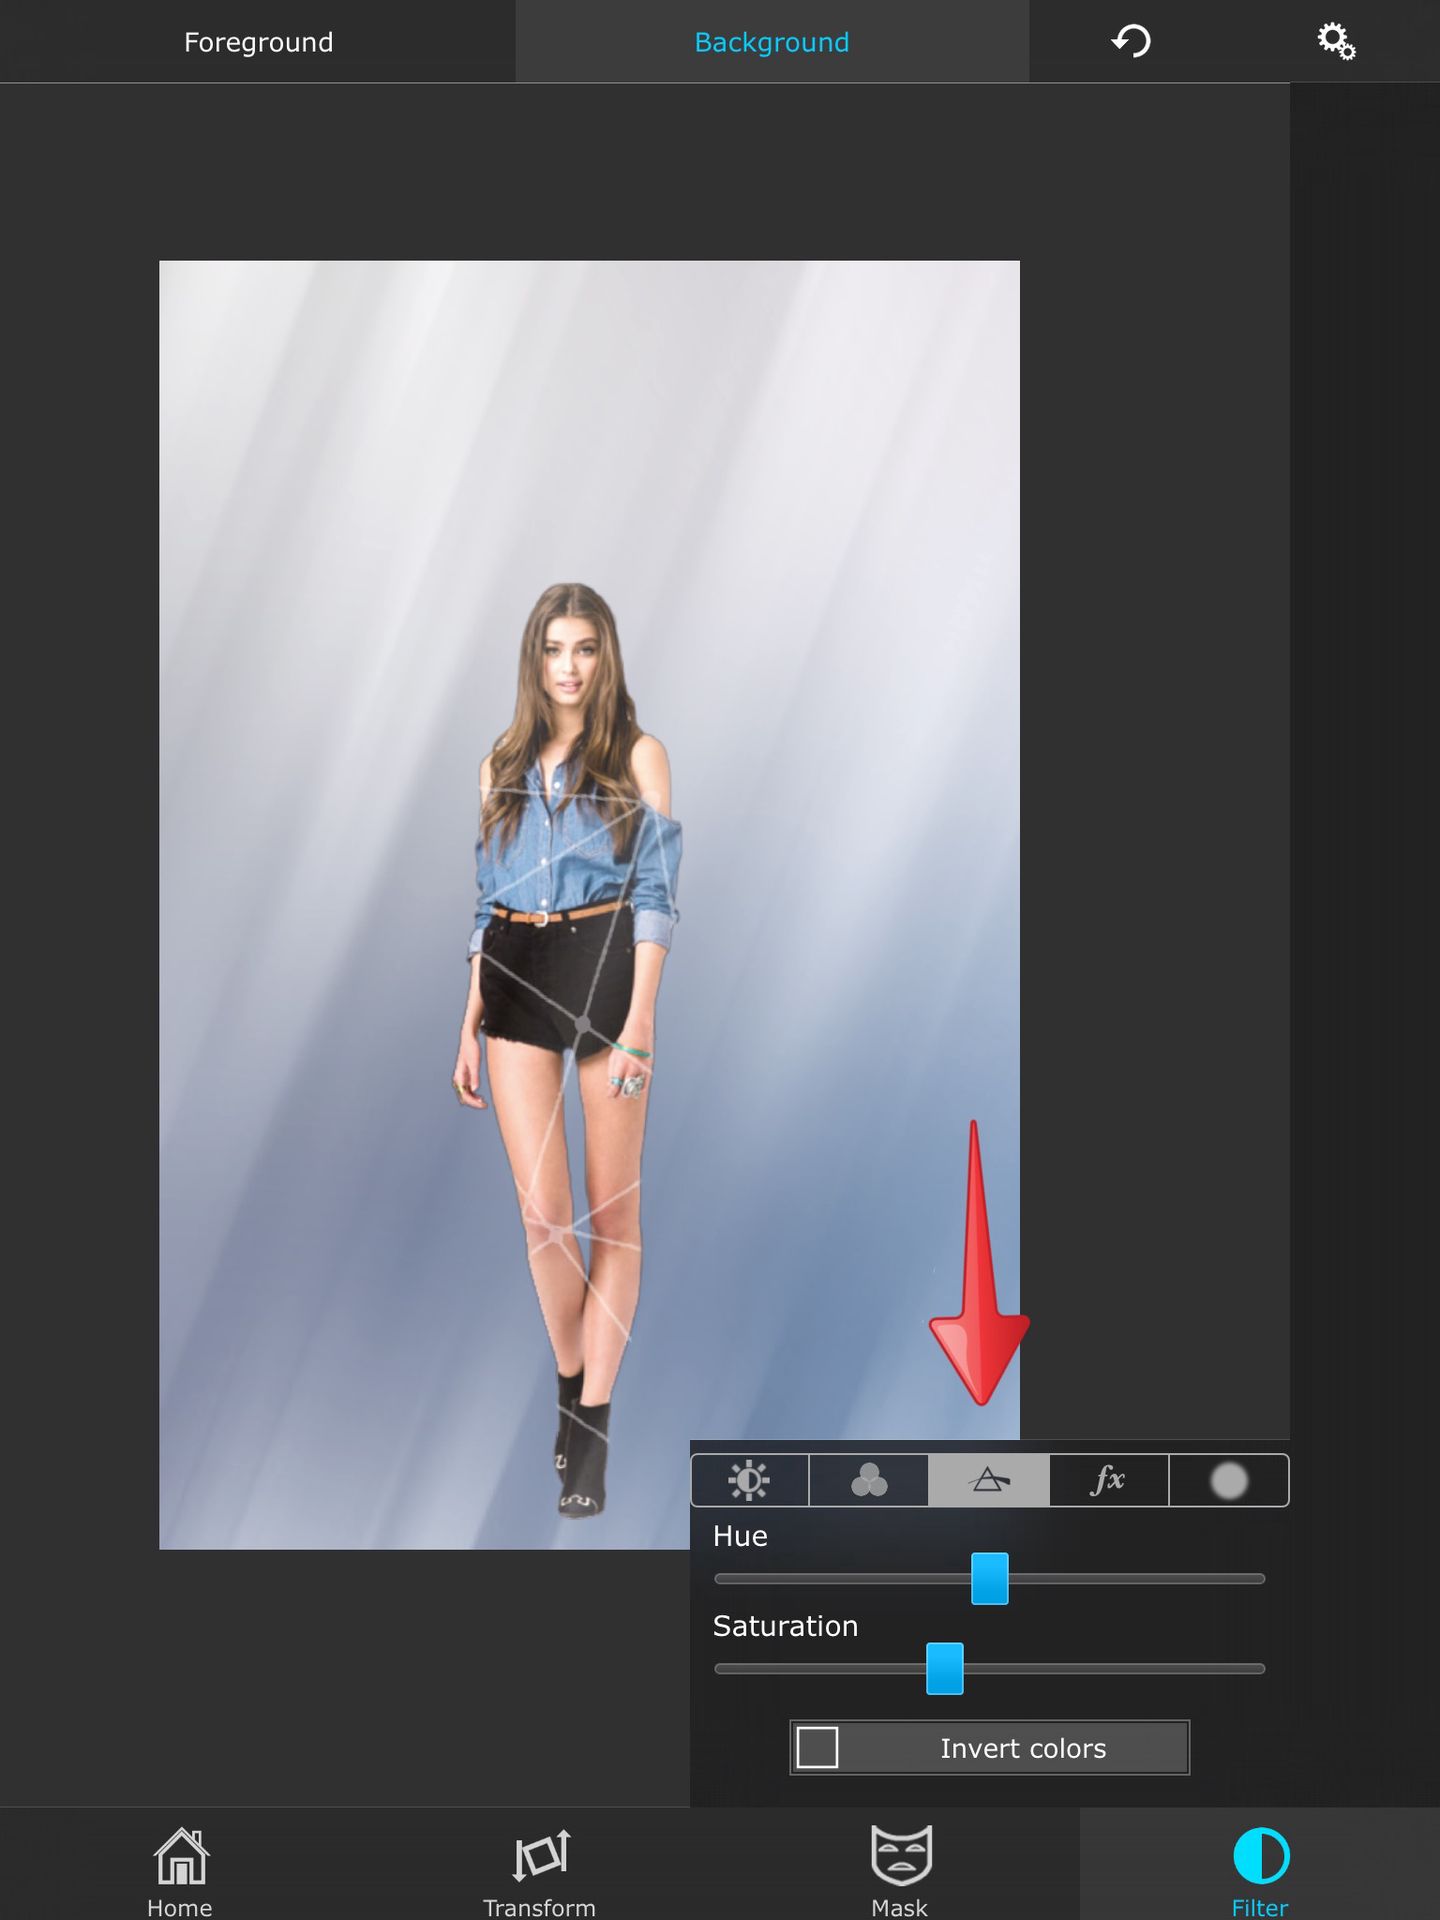
Step Fourteen: There are many options that will provide you when you click the gears. Hit the first one that has a sun. Here you can fix the darkness and exposure etc. Move the buttons until you are satisfied. You can also mess around with the other options if you want.

There you have it! The basics of Superimpose. Once you get the hang of it you will make amazing edits! Here is the finishing project of this image once I added some cool overlays and textures.

Make sure to support this account by following us! Thanks guys and see you next time.
Bạn đang đọc truyện trên: AzTruyen.Top