14 || How to Blend Textures
I'm back and it's the one and only: lyricalls!
Alright, more onto the topic. I remembered when I used to scream at all the tutorials and just stare at the beauty of blending. After slowing a speed cover down, it all makes sense and all.
Except for mobile users, you can't slow down videos.
So here's a tutorial on photoshop :)
★★★
You have your two amazing textures [creds to carllton for mine :)] and you've put them on your canvas together. And you've realised they're overlapping and doesn't look normal or realistic.
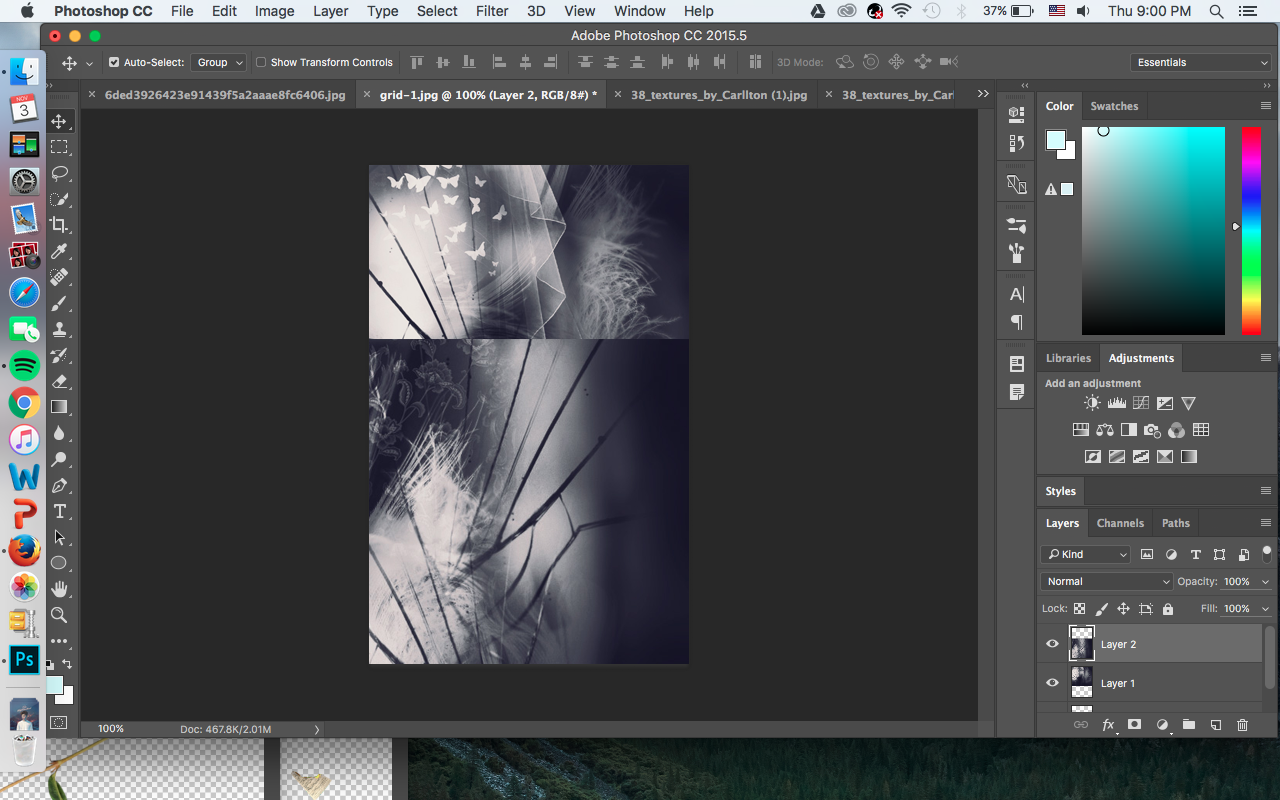
Finally, you've realised what was wrong. You needed to blend the textures together! But how do you do that? That's why Eva's here to save the day.
Using a big [100-200 sized] brush, set the hardness at 1% or 0%. Some people find it easier with an oval brush, but I prefer a round circle.

Then slowly, erase the parts of the texture that doesn't look right or the sharp edges. As you can see in the picture below, I've erased with that soft brush and it's starting to blend a little.
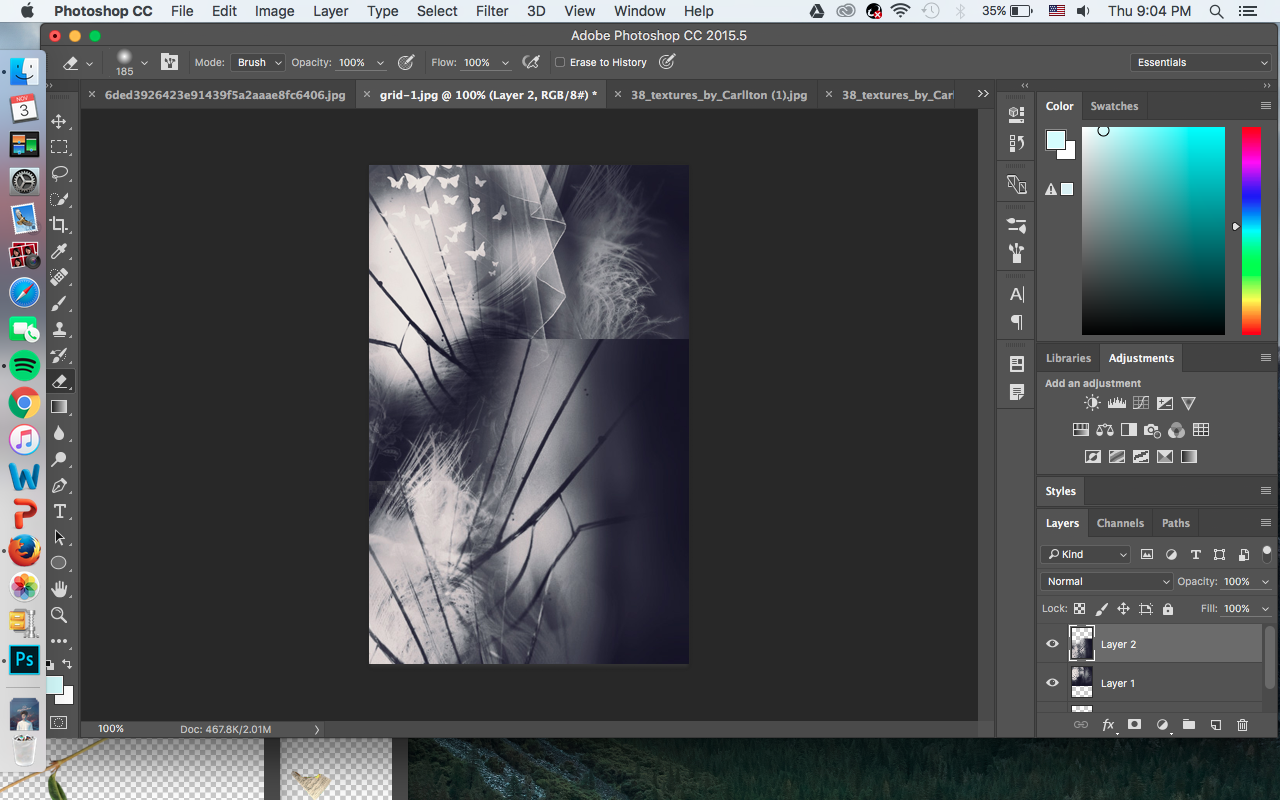
If it doesn't look right, try another texture or move the texture around a little.
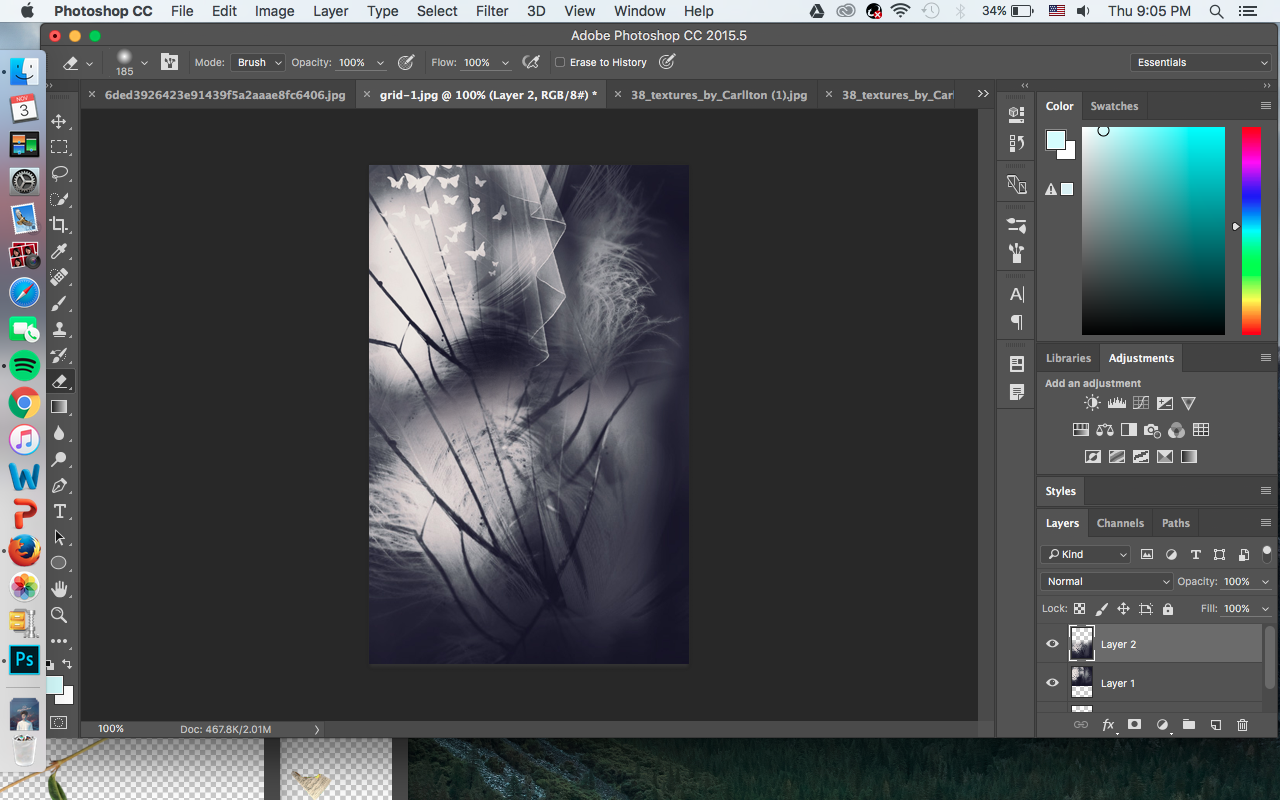
So for me, after a little more erasing and a little help with the move icon, this is my end result of the blending of two amazing textures. Note that it's not the most perfect thing because I did it in 3 minutes.
But spend more time to perfect it, and slowly, it'll take you no time to blend!
It's the same with PNGs! To blend it into the background a little at the side/bottom/top. Use a soft eraser brush and just erase the parts you'd like it to blend!
★★★
I'm so sorry if you wanted a superimpose of this, but you could use:
1. Eraser - Opacity: Under 10%
2. Gradient tool :)
Both available on superimpose.
Always remember that practice makes perfect! And it doesn't matter if you don't have photoshop, because I can find more than ten graphic designers that don't have photoshop but still slay with their graphics :)
Leave your questions in the comments!
Bạn đang đọc truyện trên: AzTruyen.Top