[68] - retouching *rebooted
This might be the last tutorial I'll ever make... oh wow..., we've come really far since then.
The next 3 parts are extras, *wink wink* which I'll tell you all tomorrow ;).
(Don't worry, I'm planning on making a second book after this).
Ngl, kinda disappointed it's not gonna end on the funny number, AKA 69 because that would be hilarious.
...
About this tutorial, I made it on part 43 - 44 before and it was... mediocre at its best. So, I decided to make a new one that's more subtle and natural(?).
...
Reference :
[9] - all i know about filter
...
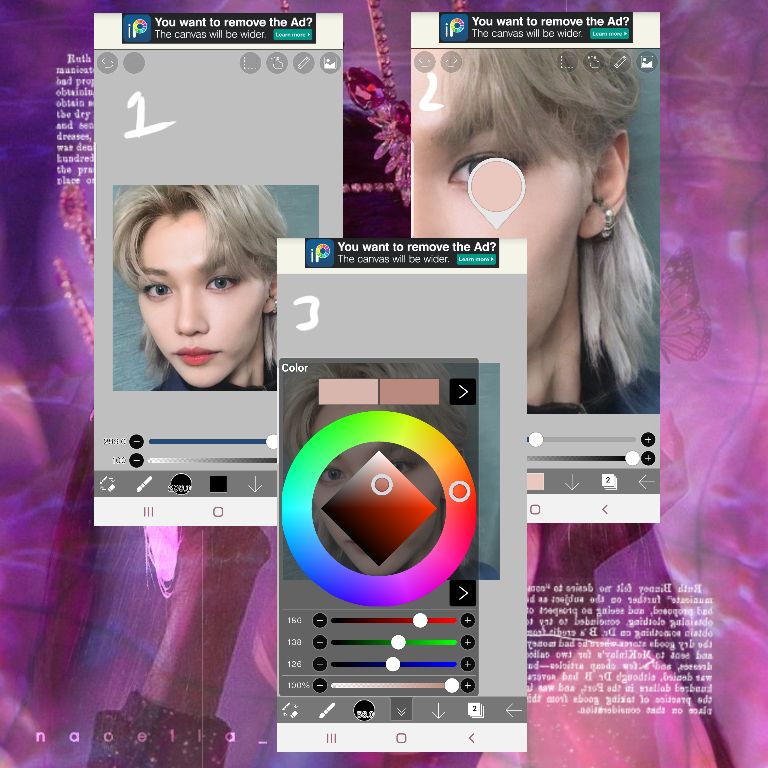
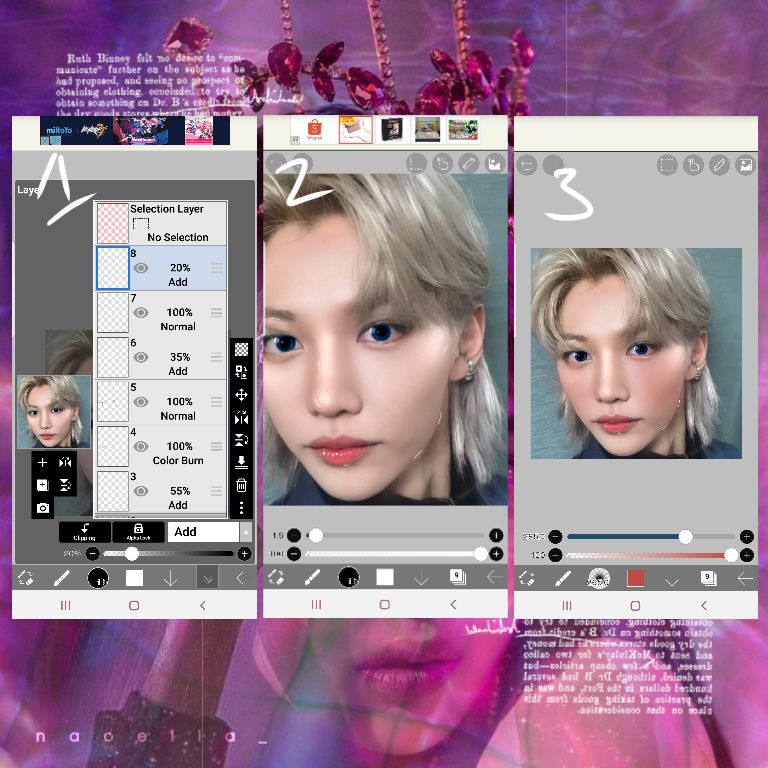
1. Add the picture of the person you want to edit
2. Hold the screen till this small blob appears to sample the color
3. Then go to the holy color wheel and drag it left and down a bit to make it darker
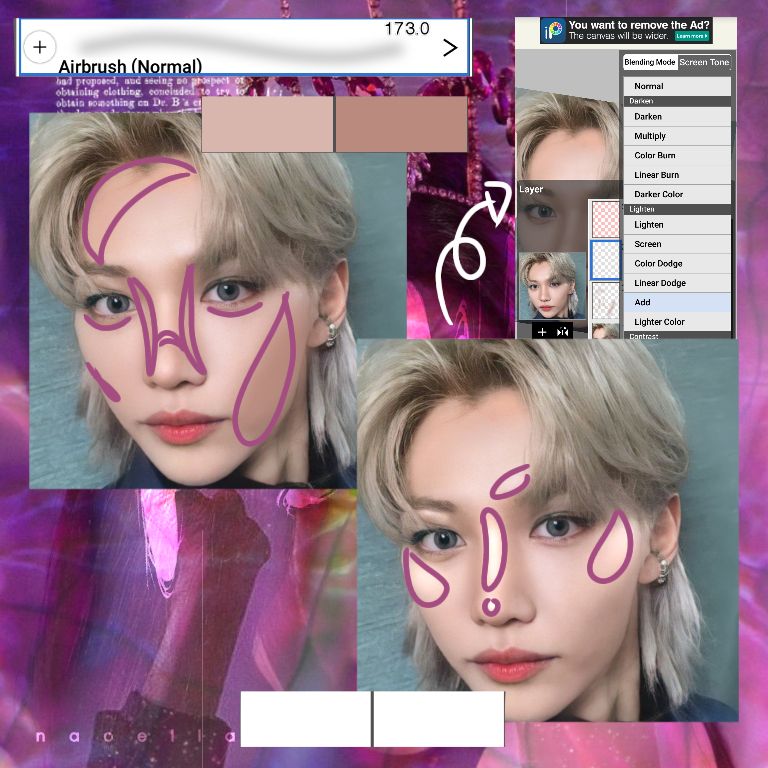
1. With an airbrush, contour his face.
Common areas to contour = below cheekbones, sides of the nose (I drew a line at the middle to make the button nose effect), and forehead. I contoured his 'aegyosal' or his eyebags to make it more pronounced so he looks cuter :).
2. Then add a new layer, change the blending mode to Add, then highlight his face with white.
Common areas to highlight = around eyebrows, cheekbones, nose. I watched a make up guru that said not to highlight the forehead because it makes it look greasy but it's just personal preference when it comes to editing.
*Because the Add blending mode is way too bright I lowered the opacity to 55%
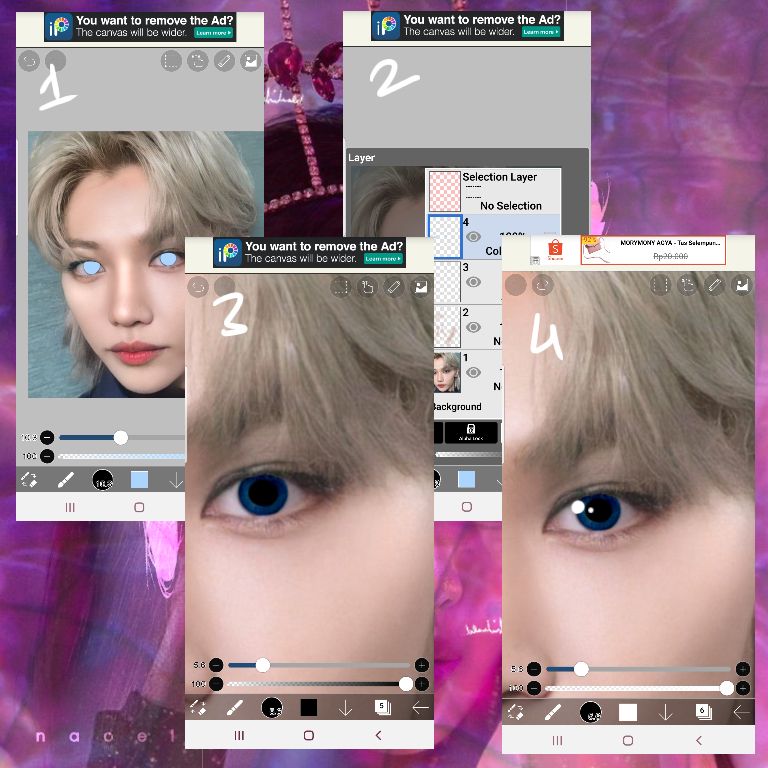
1. color their iris with your prefered color, mine's blue
2. Change the blending mode, you can try each of them to see how it turns out. I decided to use color burn.
3. With black, draw a circle as their pupil. I think the color change kind of faded their pupil.
4. Highlight their eyes by drawing small white circles around their eyes, then lower the opacity if it's too bright.
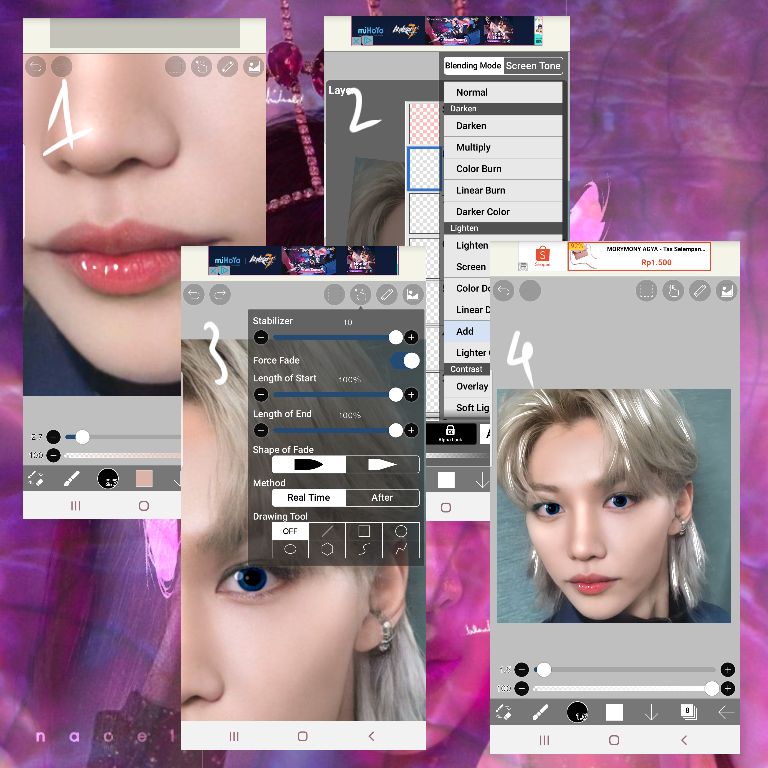
1. On their lips, I put white dots to make it seem glossy
2. Add a new layer, and change the blending mode to to Add
3. Go to the finger symbol and set both of the length of start and end to 100%
4. Highlight his hair by drawing small strands on the lighter parts of his hair (where the light source shines on them)
1
. Make the opacity really low (10% - 30%) so it looks like a natural shine
2. On a new layer, make the brush size really low and draw small white lines around the highlight area, jaw line, neck, etc.
3. It's really optional but I added a little red blush on his cheeks to make him look nicer.
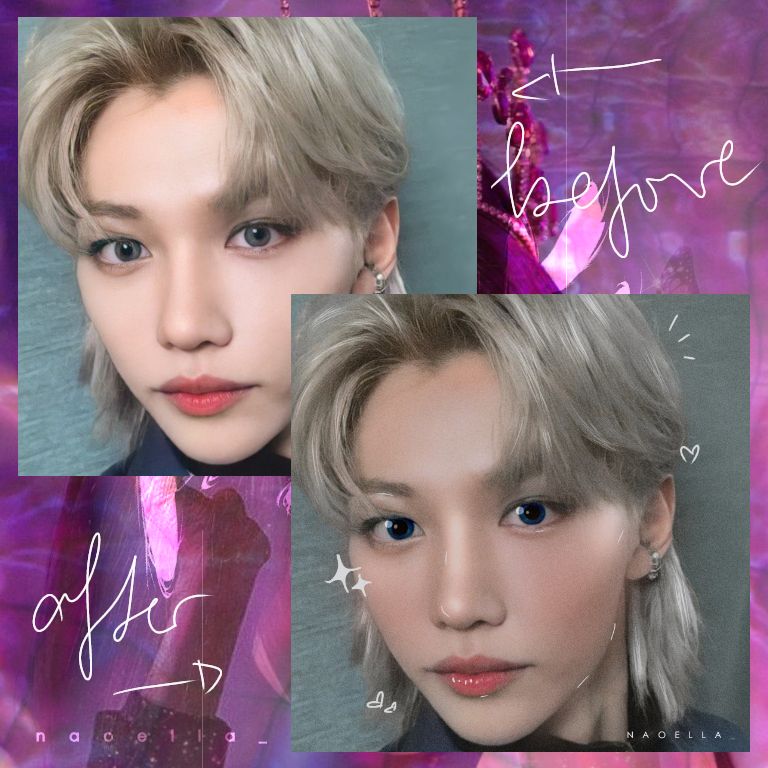
During this step you can decorate the pic, such as changing the colors, doddling, add effects, etc. You can also add more make up such as eye shadow, lipstick, whatever your creativity brings you.
I think it looked way better than part 43 - 44 plus it's easier.
■ ■ ■
Welp, last tutorial :').
But don't remove this book from your library yet, because the extra parts will be announced tomorrow ♡.
See you then <3
Bạn đang đọc truyện trên: AzTruyen.Top