☞ Tutorial #21 - Interior Background
Tutorial #21
• How to Create an Interior Background •

unlocked! 🔑🔒🔓
Goal Achieved!
×---------------------------------×
Before we proceed to the steps, gusto ko lang ibahagi kung ano iyong kakailanganin niyo para makagawa ng interior background.
What you need:
• Wall Texture
• Couch Png
• Table Png
• Floor Png
• Window
(marami ka pang malagay na ibang options na indoor things like cabinet, frame portrait, books, and etc)
Resources I used:

Credits to the owners of all the resources I've used. I just collected it all from google.
Then that's it! Let's proceed to the steps.
~~~~~*~~~~~
Step 1
Open PicsArt

Step 2
Go to draw and customized size. Put 512 × 800 for a cover size. Then click ok.

Step 3
Pag nasa draw ka na, go to layer icon. Click the colored all icon at pumili ka ng color ng background mo sa indoor. Iyong gusto mong color sa magiging wall mo sa bg. If done, click the arrow na nasa itaas facing right side then click edit jmage.
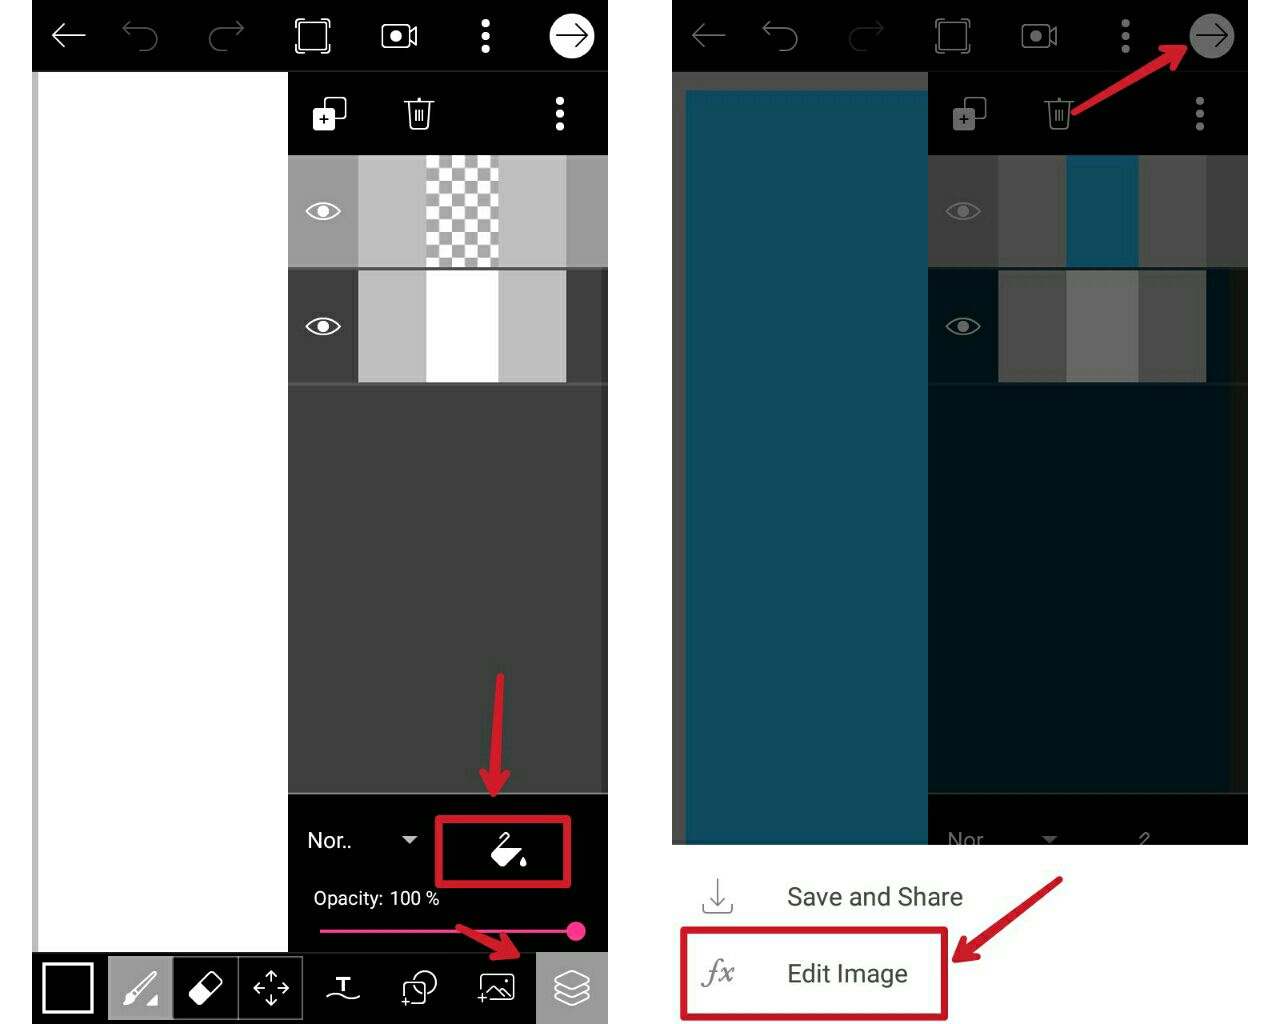
Step 4
D
iretso sa add photo pag nasa main menu ka na. Add wall texture. It's optional tho pero mas maganda kasi pag meron para magmukhang realistic-- Pag naka-add na, go to blend and lighten. (Pwede rin multiply, it's up to you). Pag naka lighten na, go to opacity then low it and click check if done.
Just search btw on google like "wall texture". Marami kang options na mahahanap lang bricks or what.

Step 5
Click add photo again then add your floor. Marami kang mahahanap sa google. Floor PNG. Then click check.

Step 6
This time, add your indoor thins designs (eg. Couch {he most common one}, table or etc).
First, Add the lamp. (kasi iyon iyong nasa pinakalikod ng nagawa kong indoor background)
Next, don't click check muna instead click the square + button na nasa itaas, tas may makikita kang add photo. Add again your couch png. Then your table and lasly the flower vase. Then click check if done.
Note: Make sure na tama iyong mga size or proportion ng pagkalagay mo. Nasa iyo lang ang pag-asa (nu daw), kung ano ang magiging itsura ng mga indoor things mo.

Step 7
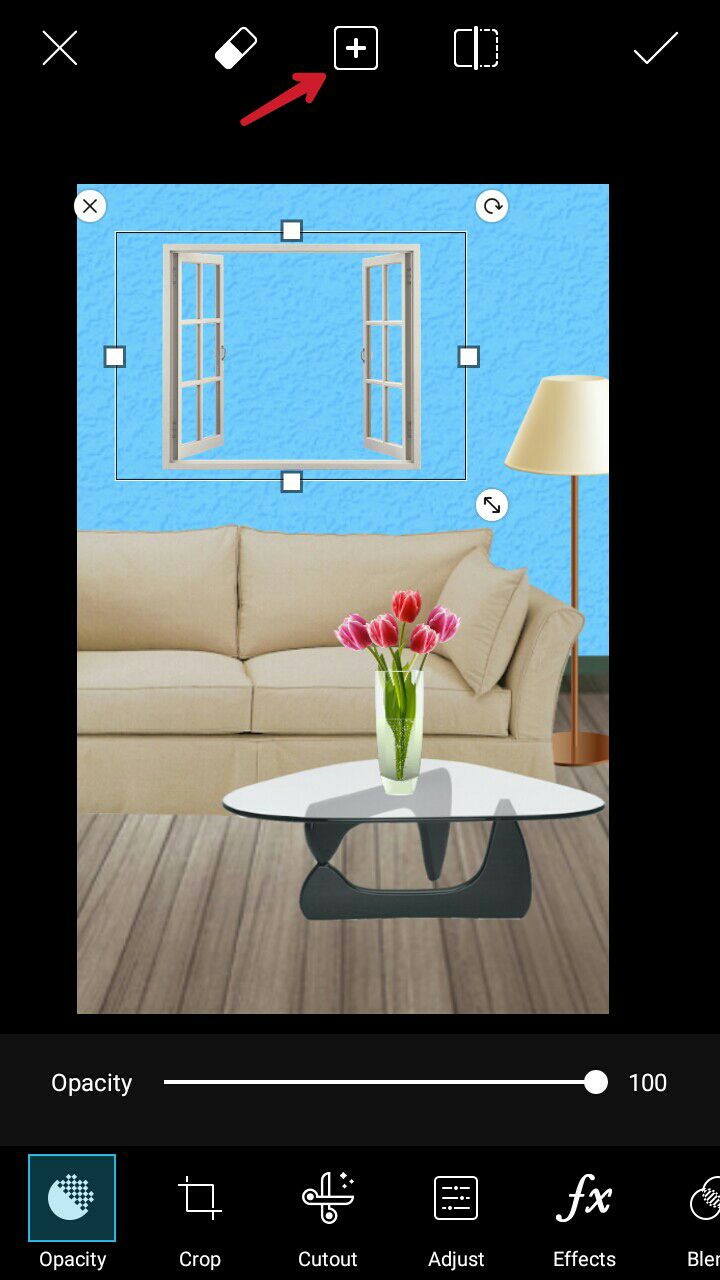
Pag nasa main menu ka na ulit, click add photo again and add your window. After that click the square button + tapos add mo iyong magiging background ng parang labas niya.
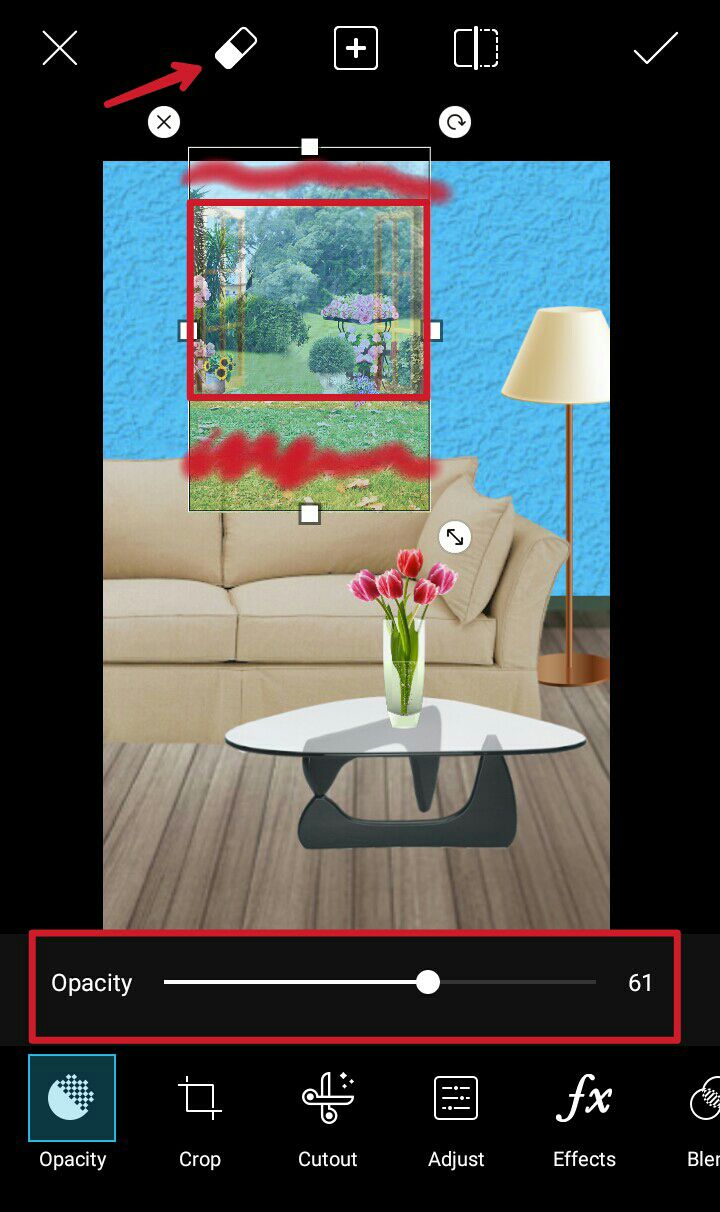
Step 7
Pag na-add mo na, erase the unnecessary sides. Iyong parang lumagpas sa window mo. Low opacity para maging visible iyong edges ng window mo. Then start erasing by clicking the eraser icon sa mga parts na lumagpas sa window.
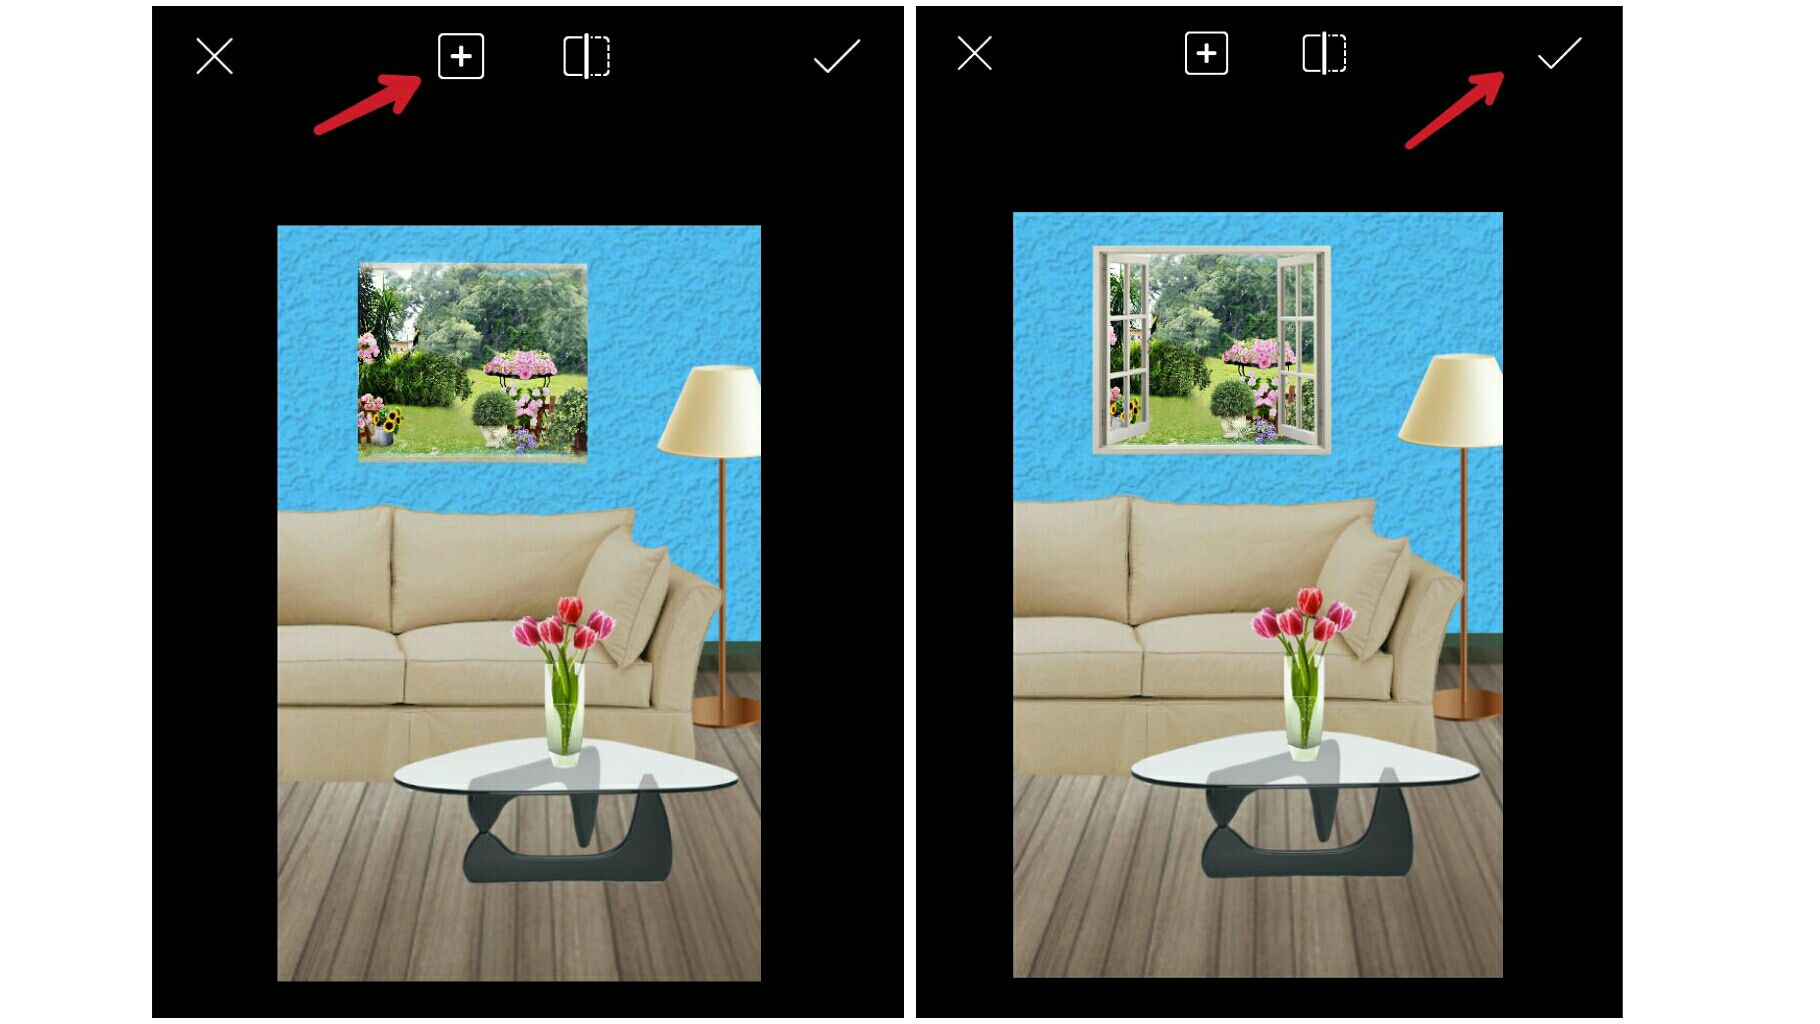
Step 8
Pagkatapos, add photo ulit by clicking the square + button then add again your window png. Ilagay mo sa ibabaw nung outdoor background mo then click chek.
Step 9
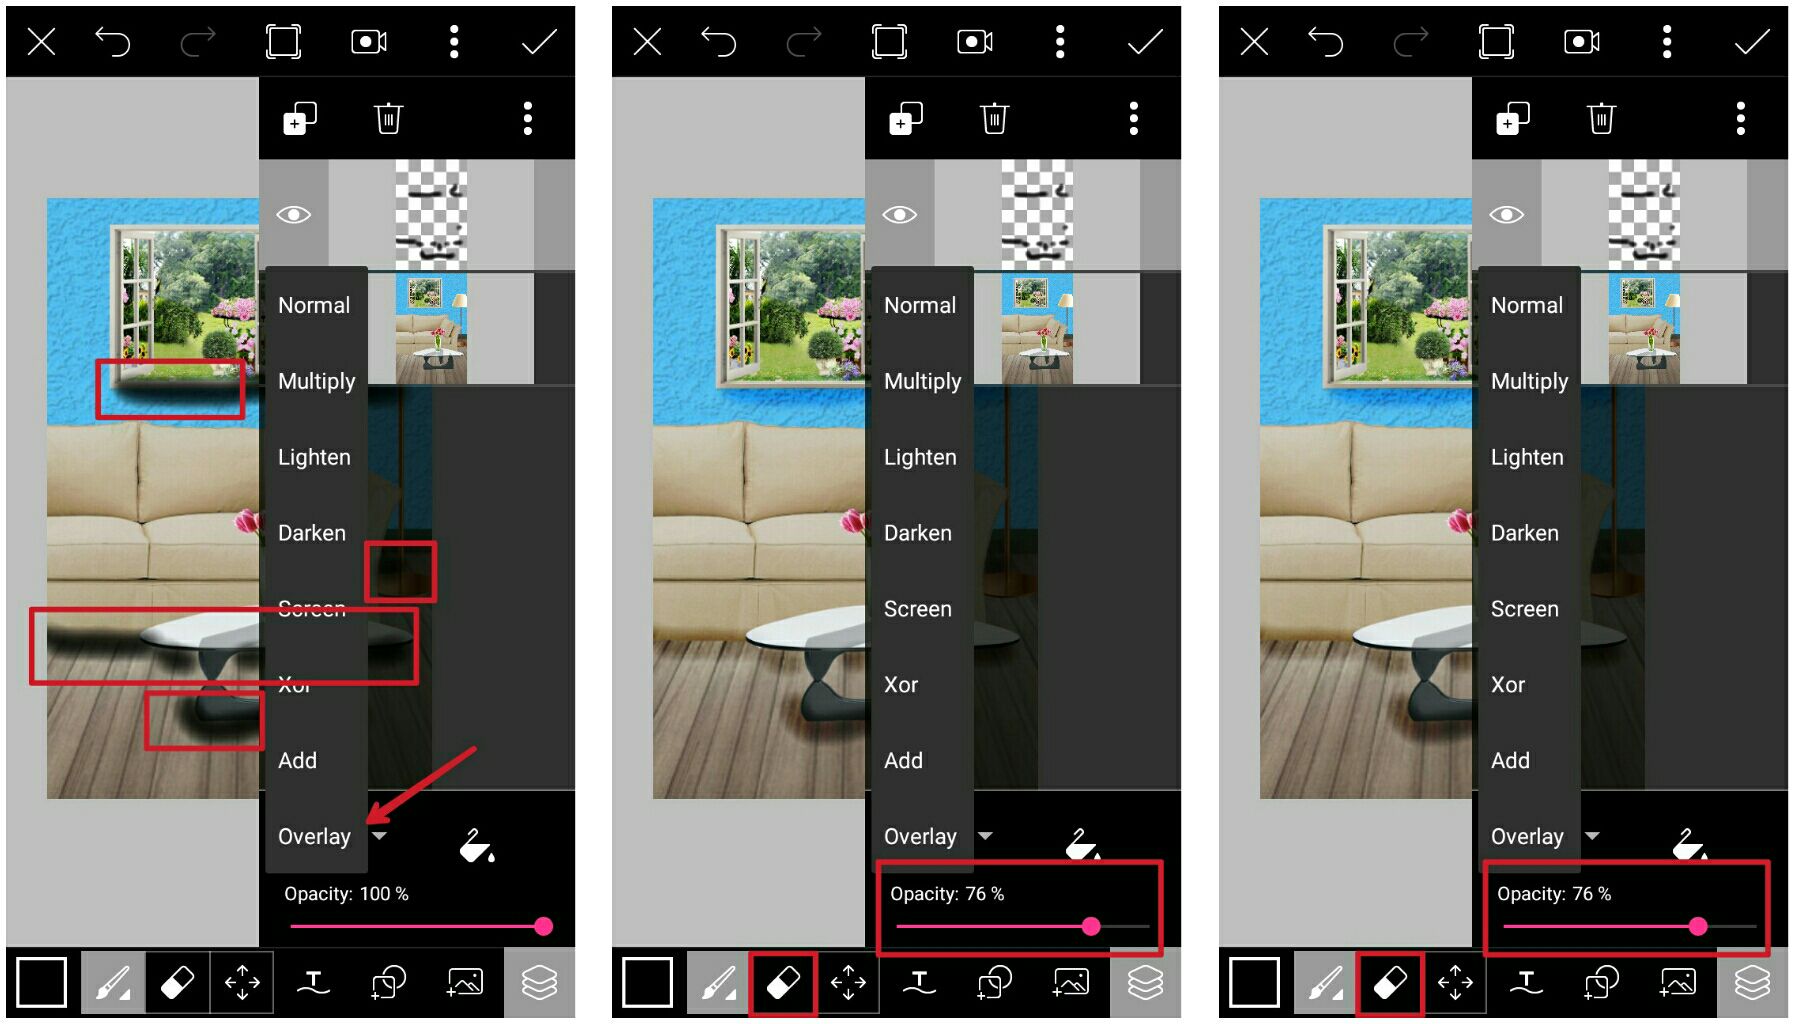
Para mas maging realistic pa (optional/additional steps lang to), go to draw > soft brush.

Last Step
Start drawing sa mga ilalim ng mga things na nailagay mo. Like sa ilalim ng couch, table, vase or whatsoever. Then go to layer icon and blend options. Click overlay. Low opacity hanggang sa kung okay na siya then click check and save!!
Tennenn!! Nakagawa ka na ng indoor/interior background. I hope this tutorial helps you.
(ps. Hindi pareho color ng nasa baba at sa screenshots. Hindi na kasi naperho iyong kulay para sa screenshot purposes at di ko nasave iyong nagawa kong bago lol)

~*~
If you have questions regarding on this tutorial, don't hesitate to comment below :>
Thank you for reading and God bless!
S H A I ♡
Bạn đang đọc truyện trên: AzTruyen.Top