>Tutorials<
So I've been asked to give some short tutorials and tips for drawing faces quicker and with better proportions. I myself am still learning, and developing my own style and trying to perfect proportions, but I can still share what I do know, for those of you looking for tips and short hacks for proper facial proportions. ^_^
Please note that the following sketches were done extremely quickly, and are kinda sloppy and don't all have realistic features, but hopefully they will still help me explain! This is mainly just to give you a basic idea of where everything is positioned on the face :)
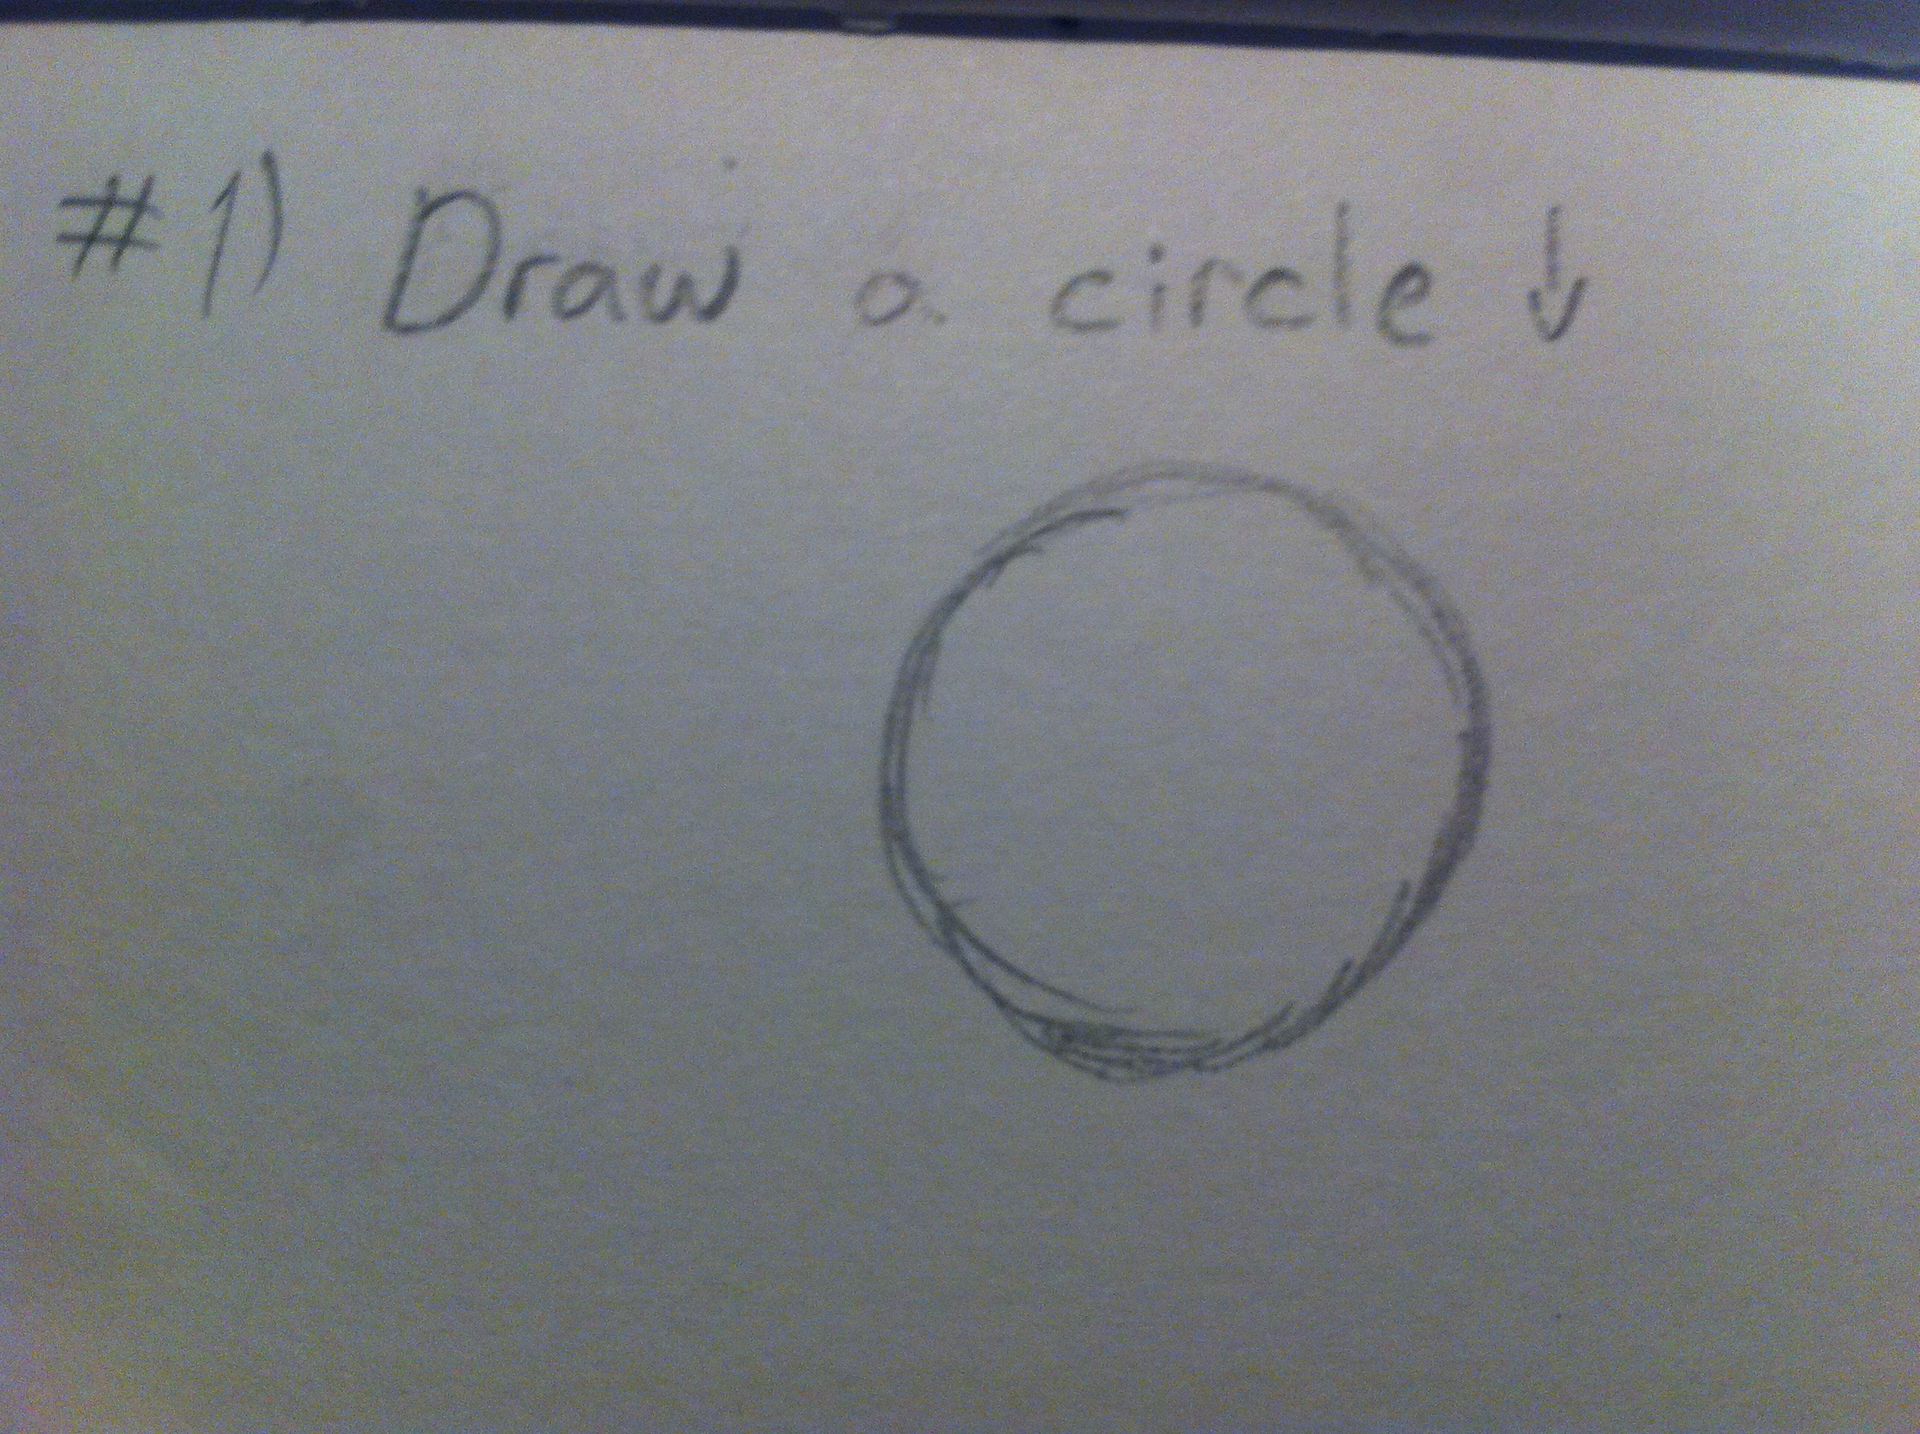
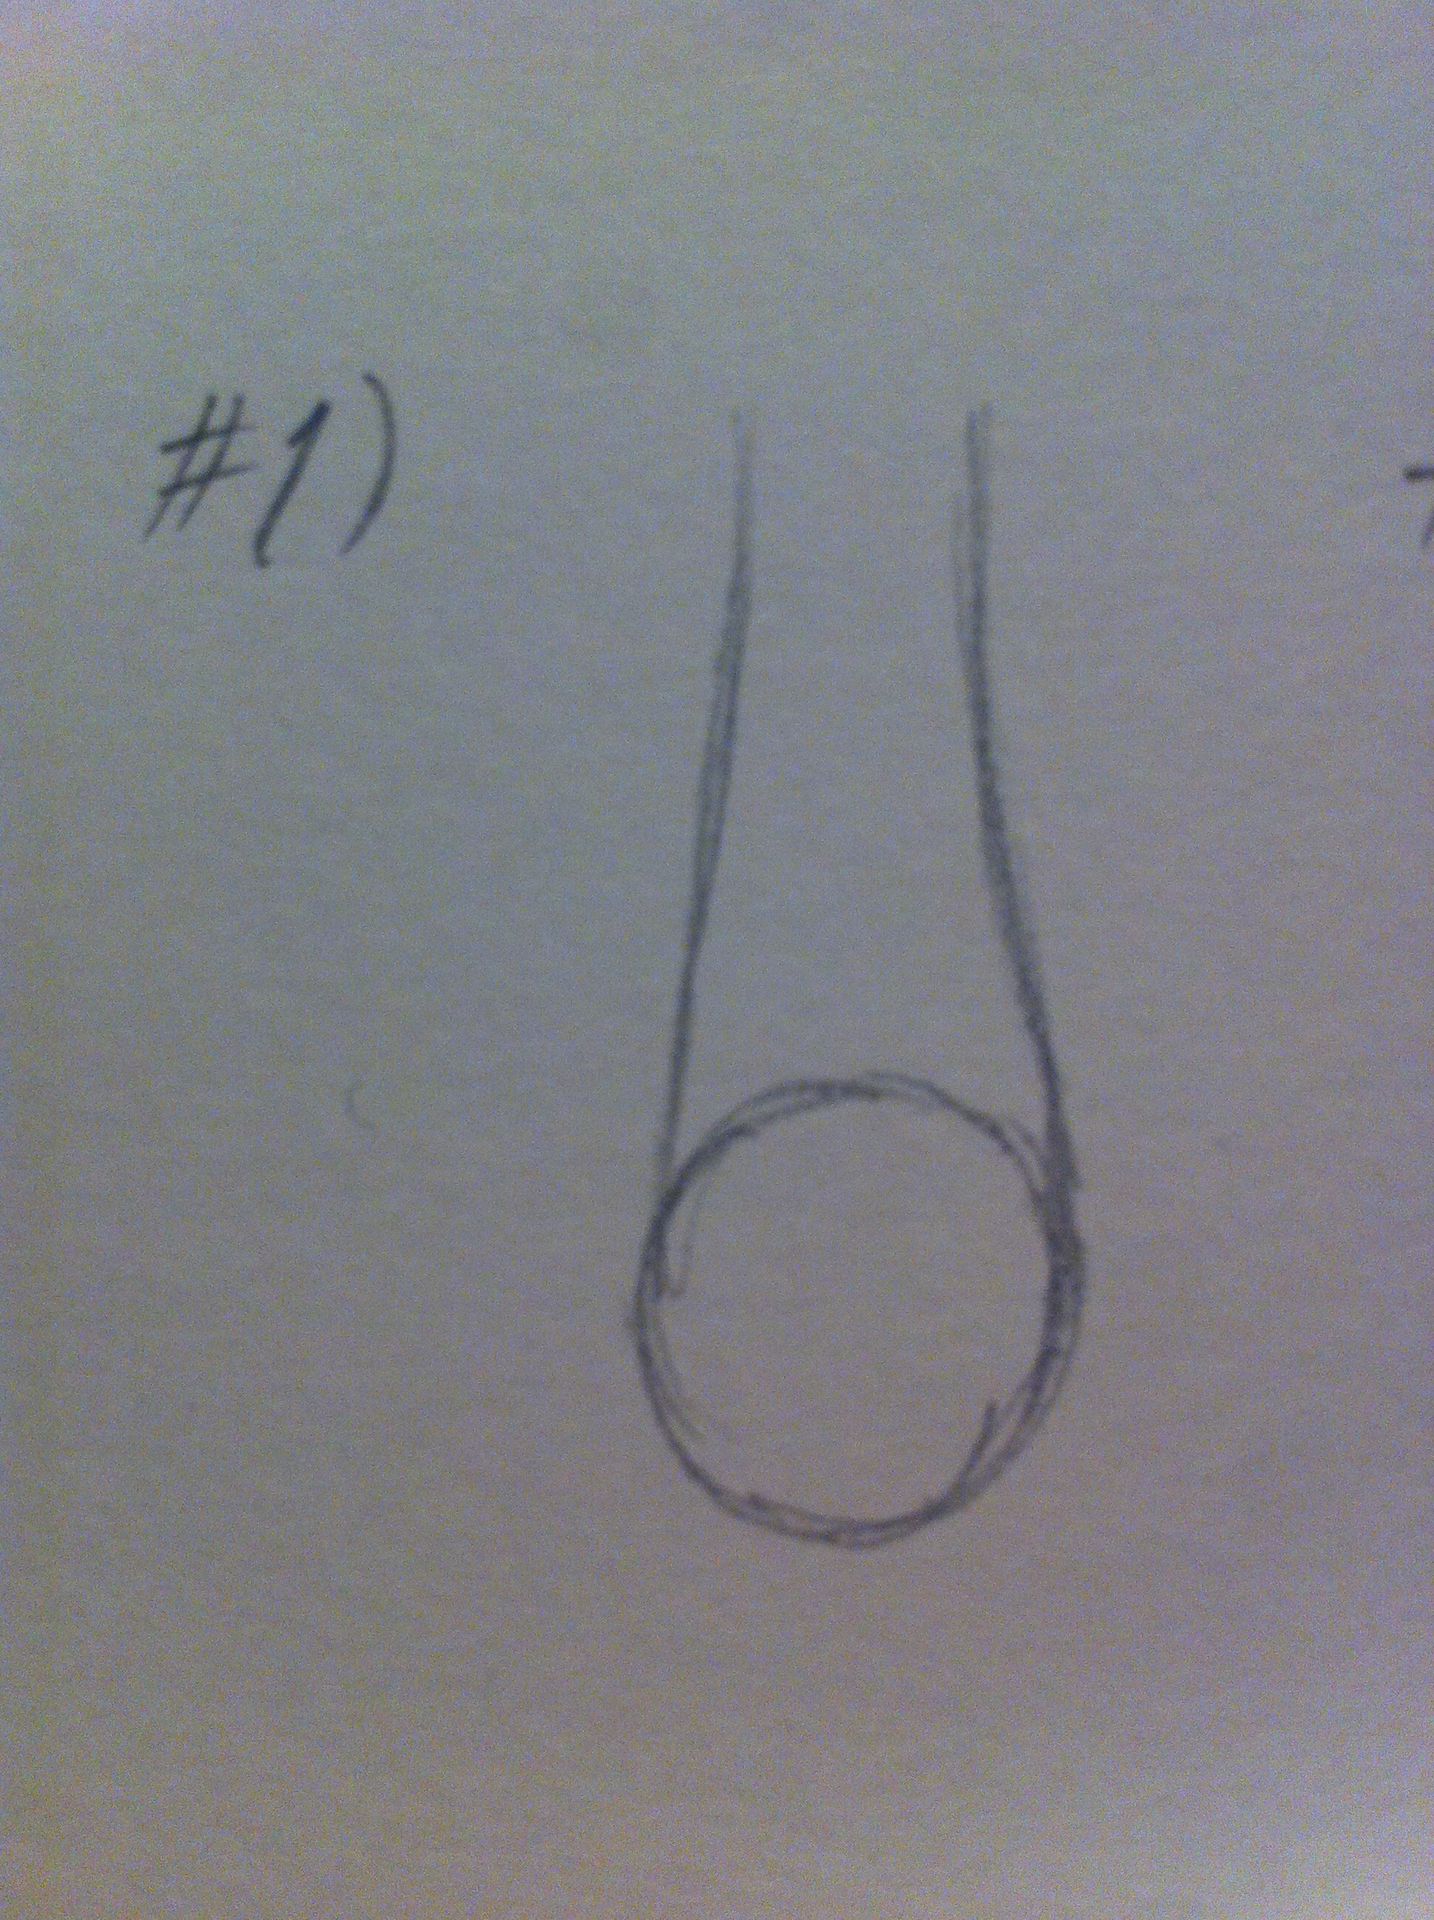
Step #1) Draw a circle
When drawing a head, I always start with a circle, not necessarily a perfect circle, but a circle.
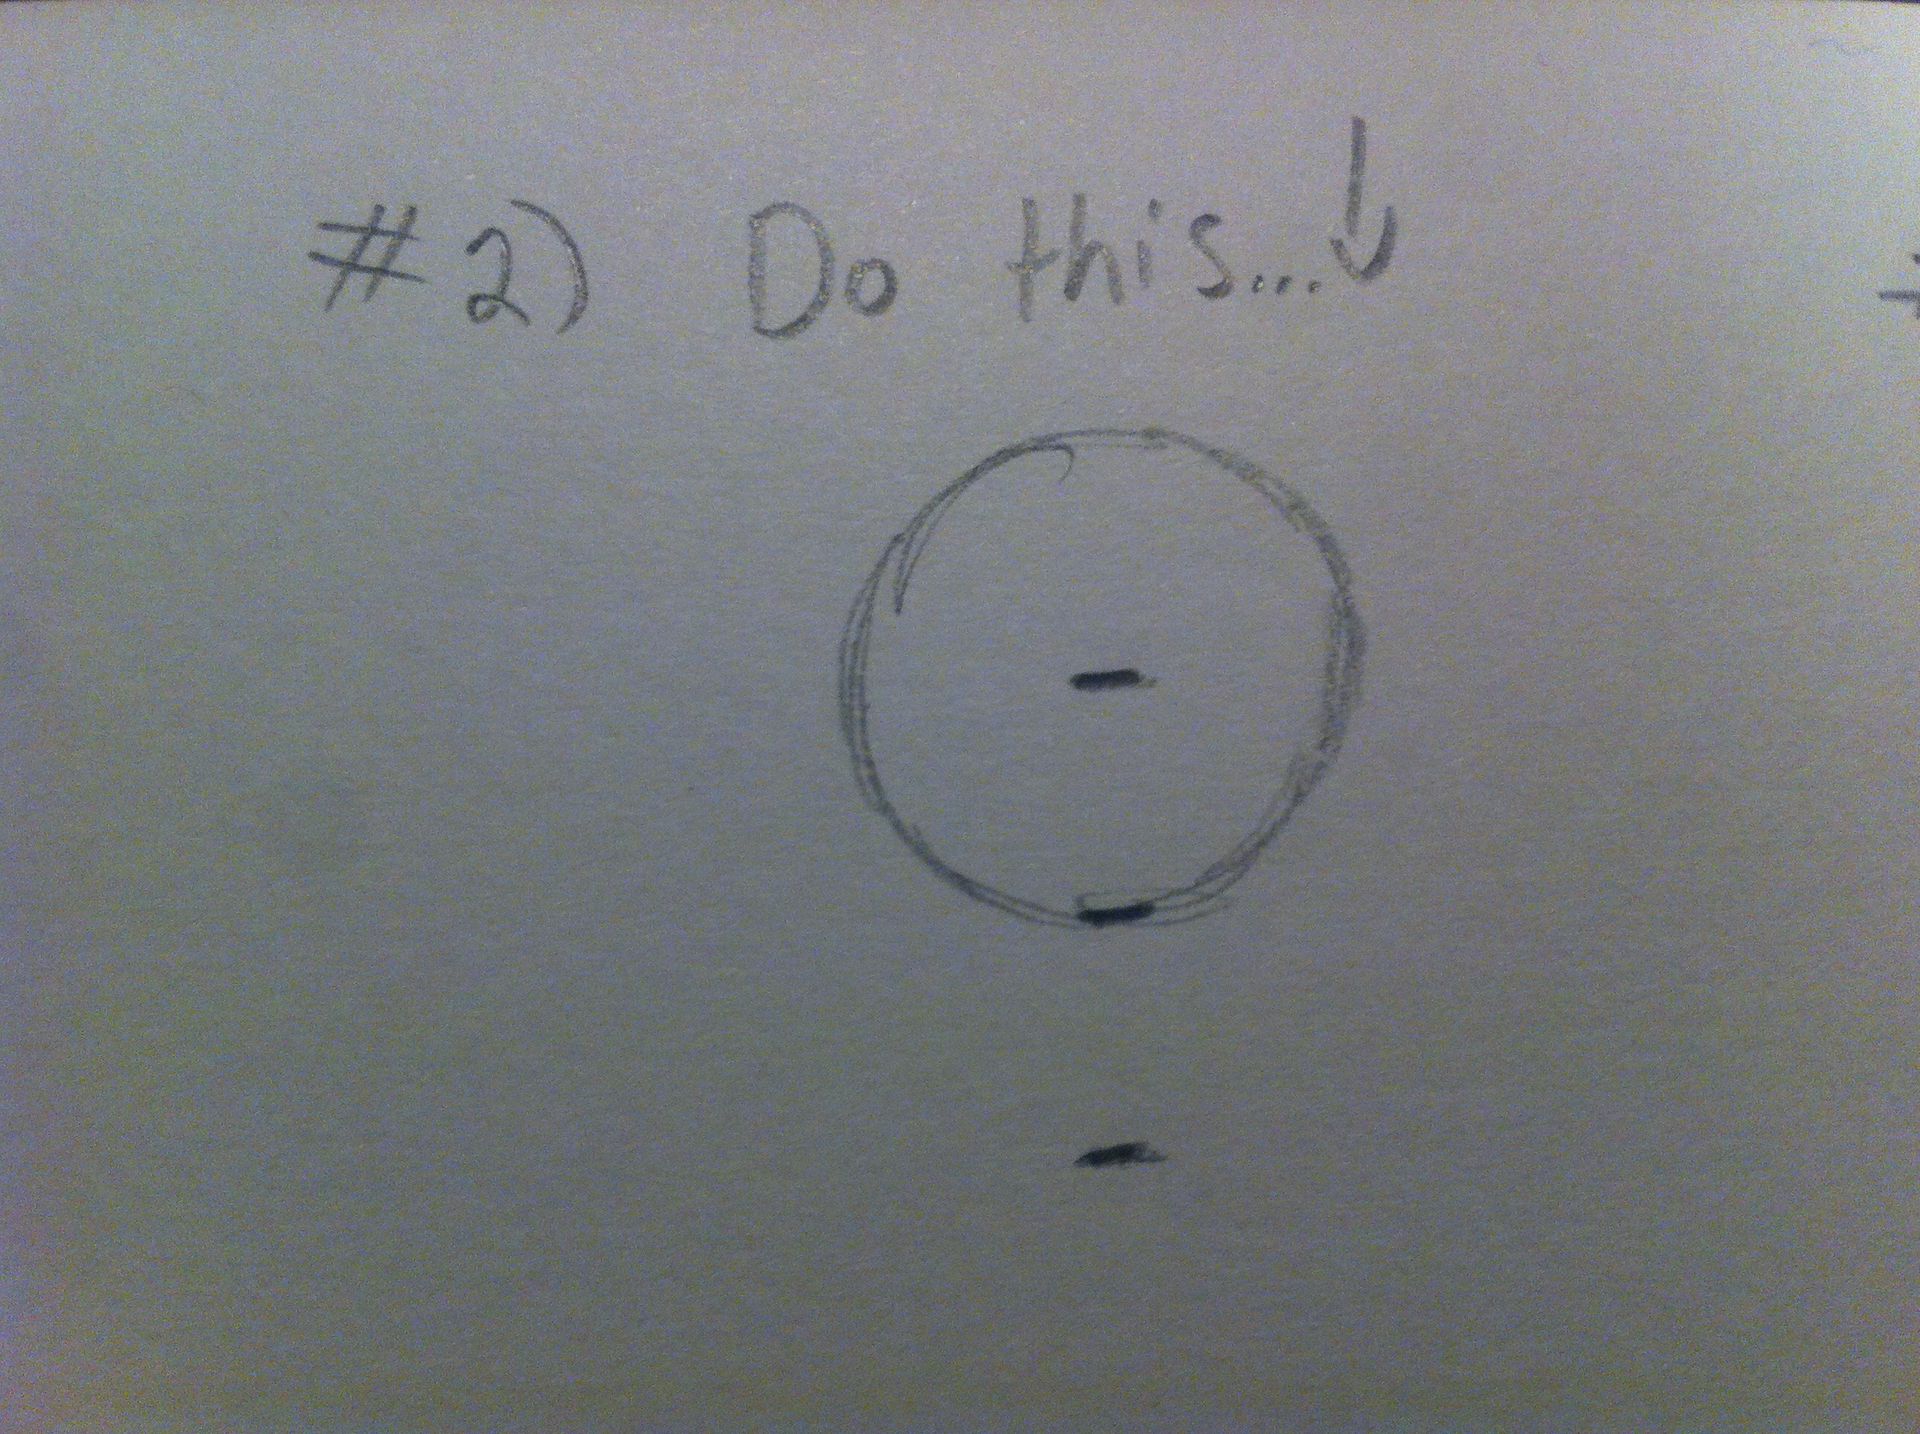
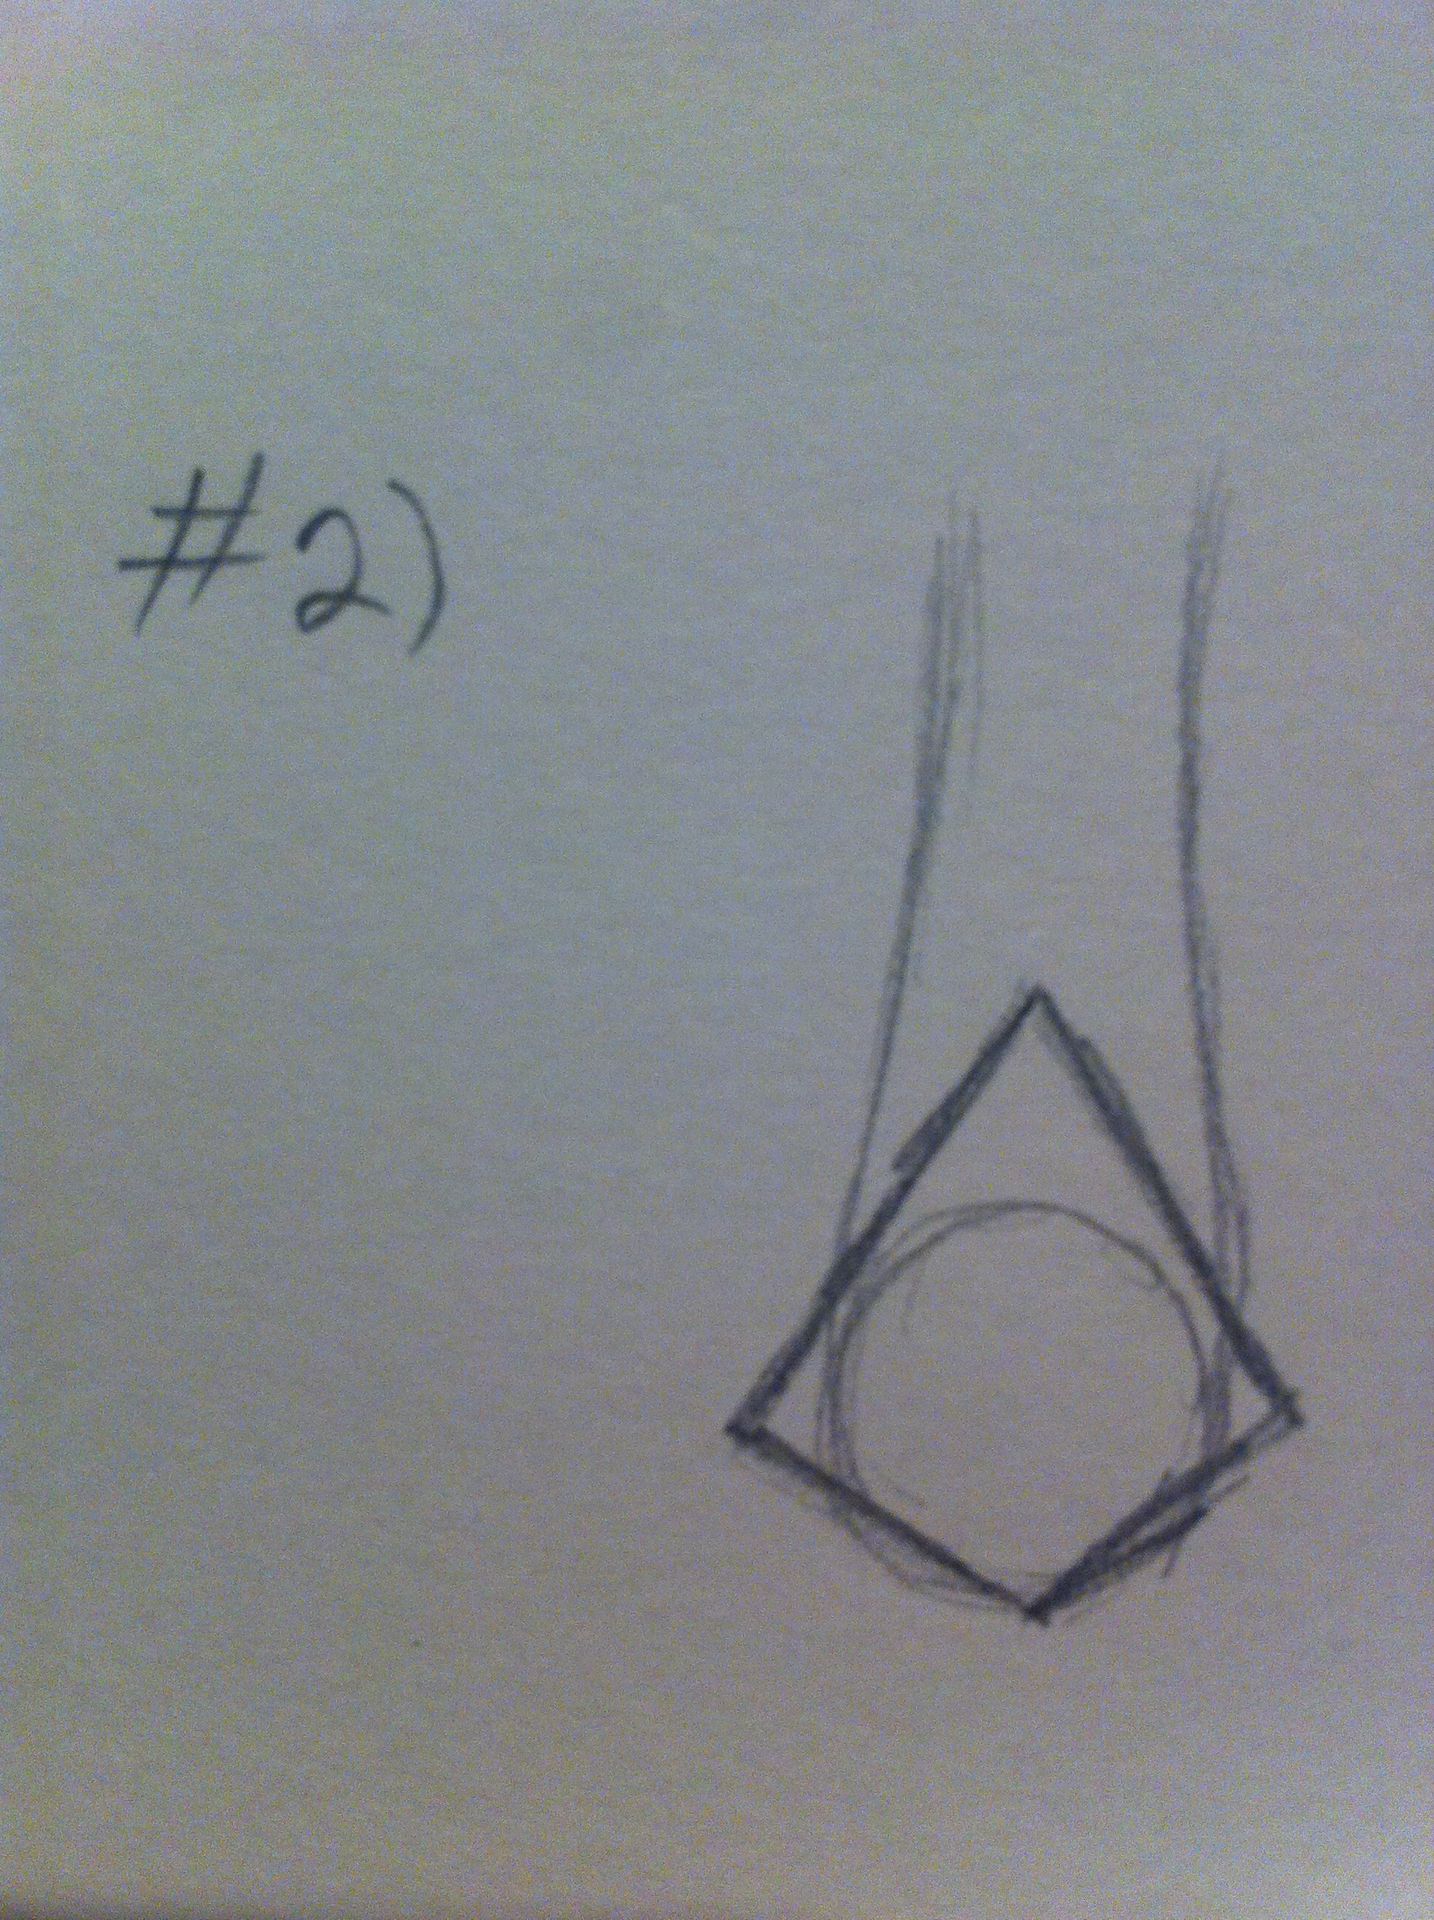
Step #2)
So next you want to make three points- one in the center of the circle, one on the bottom of the circle, and the third one should be roughly the length of the circle's radius, placed below the second point.
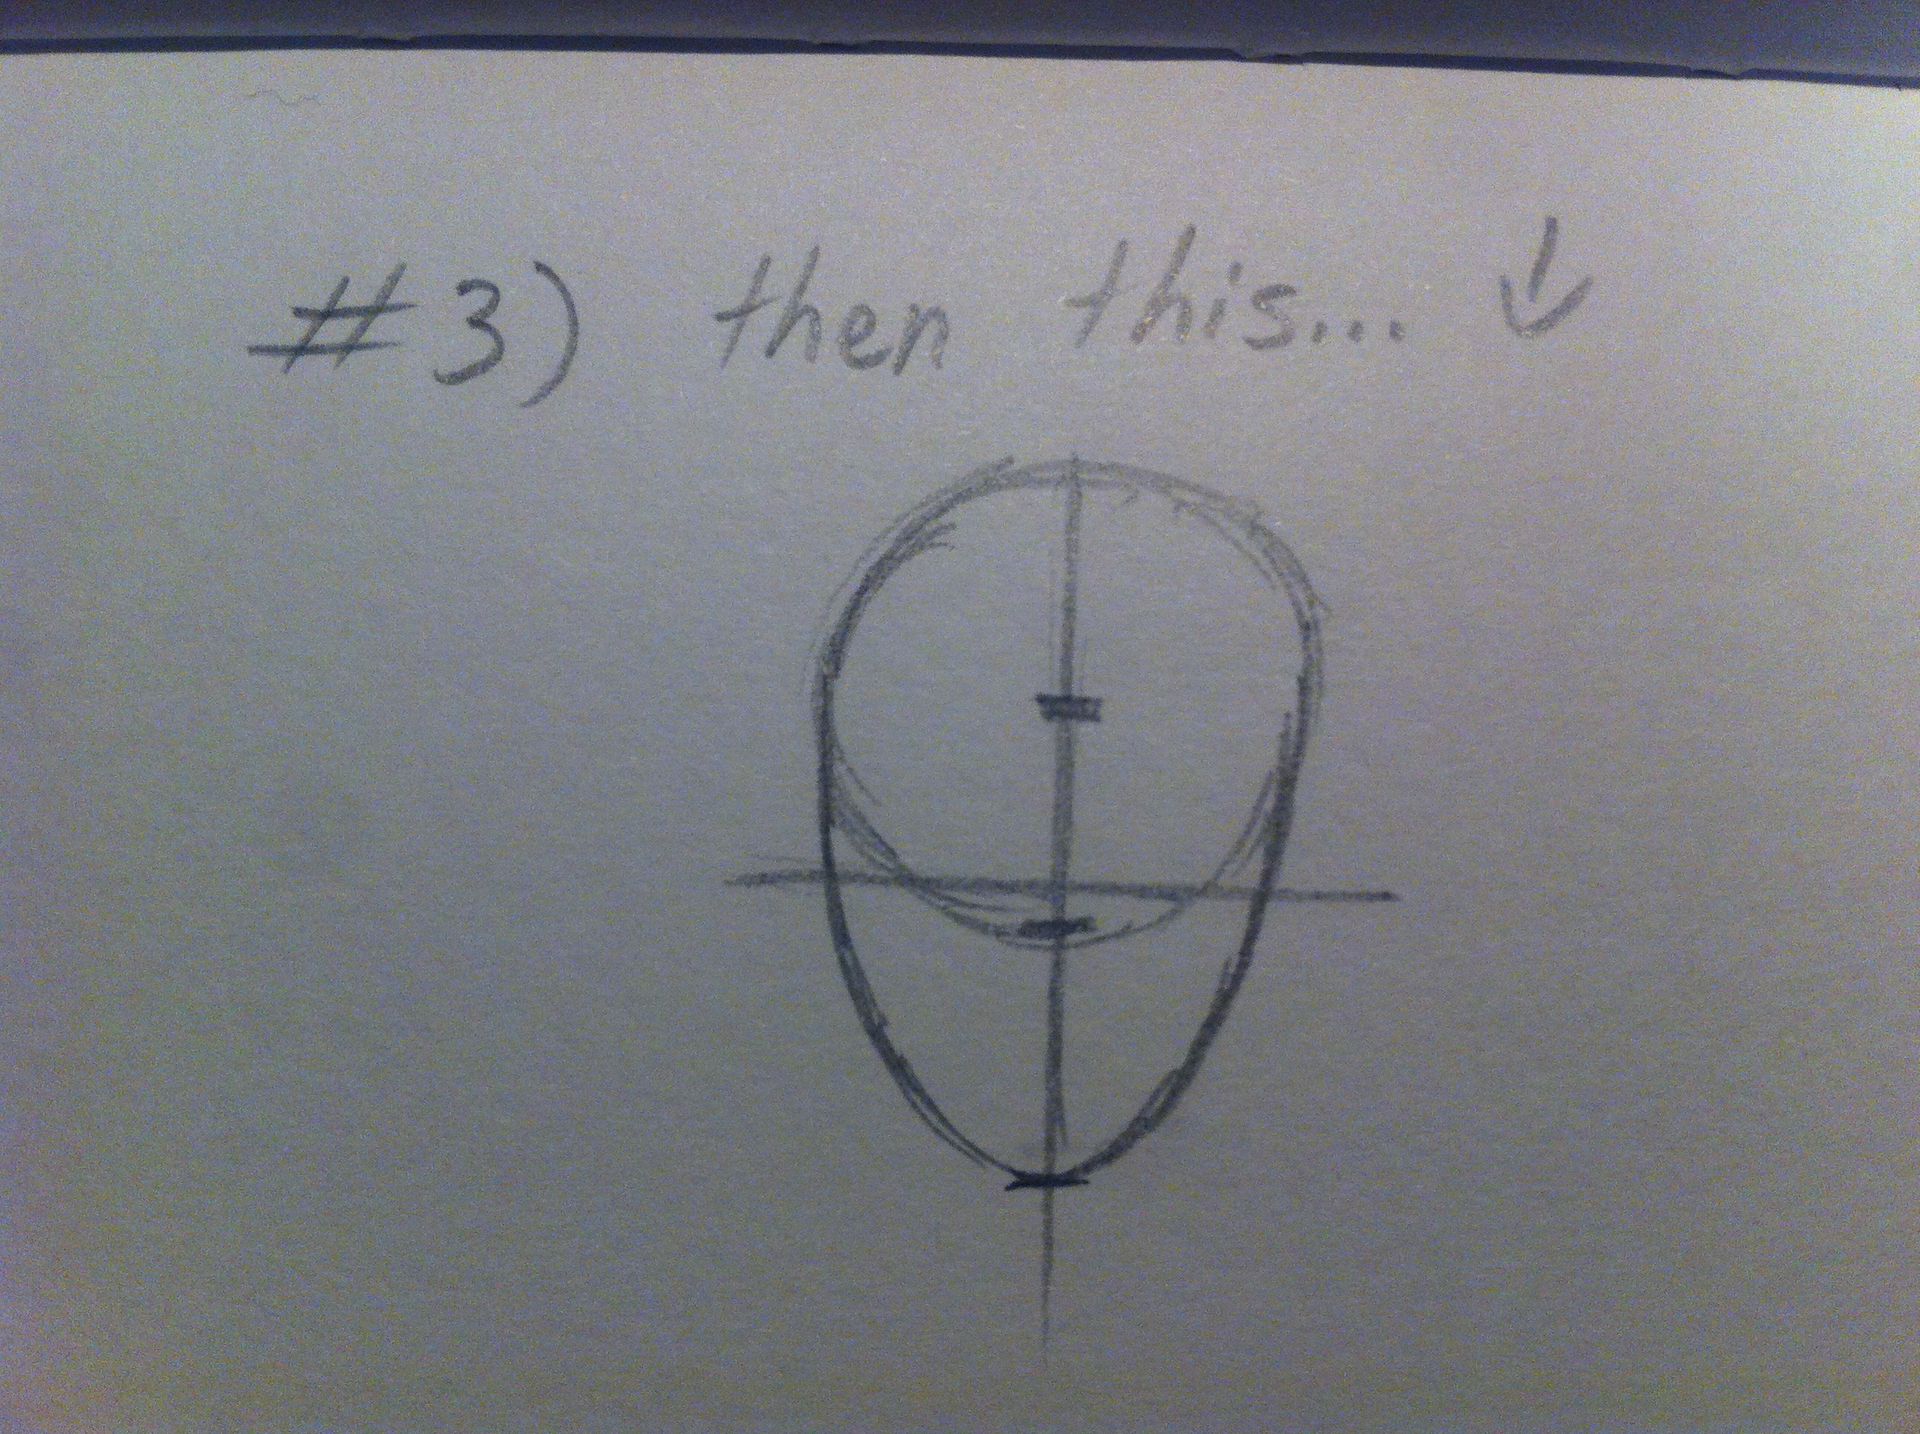
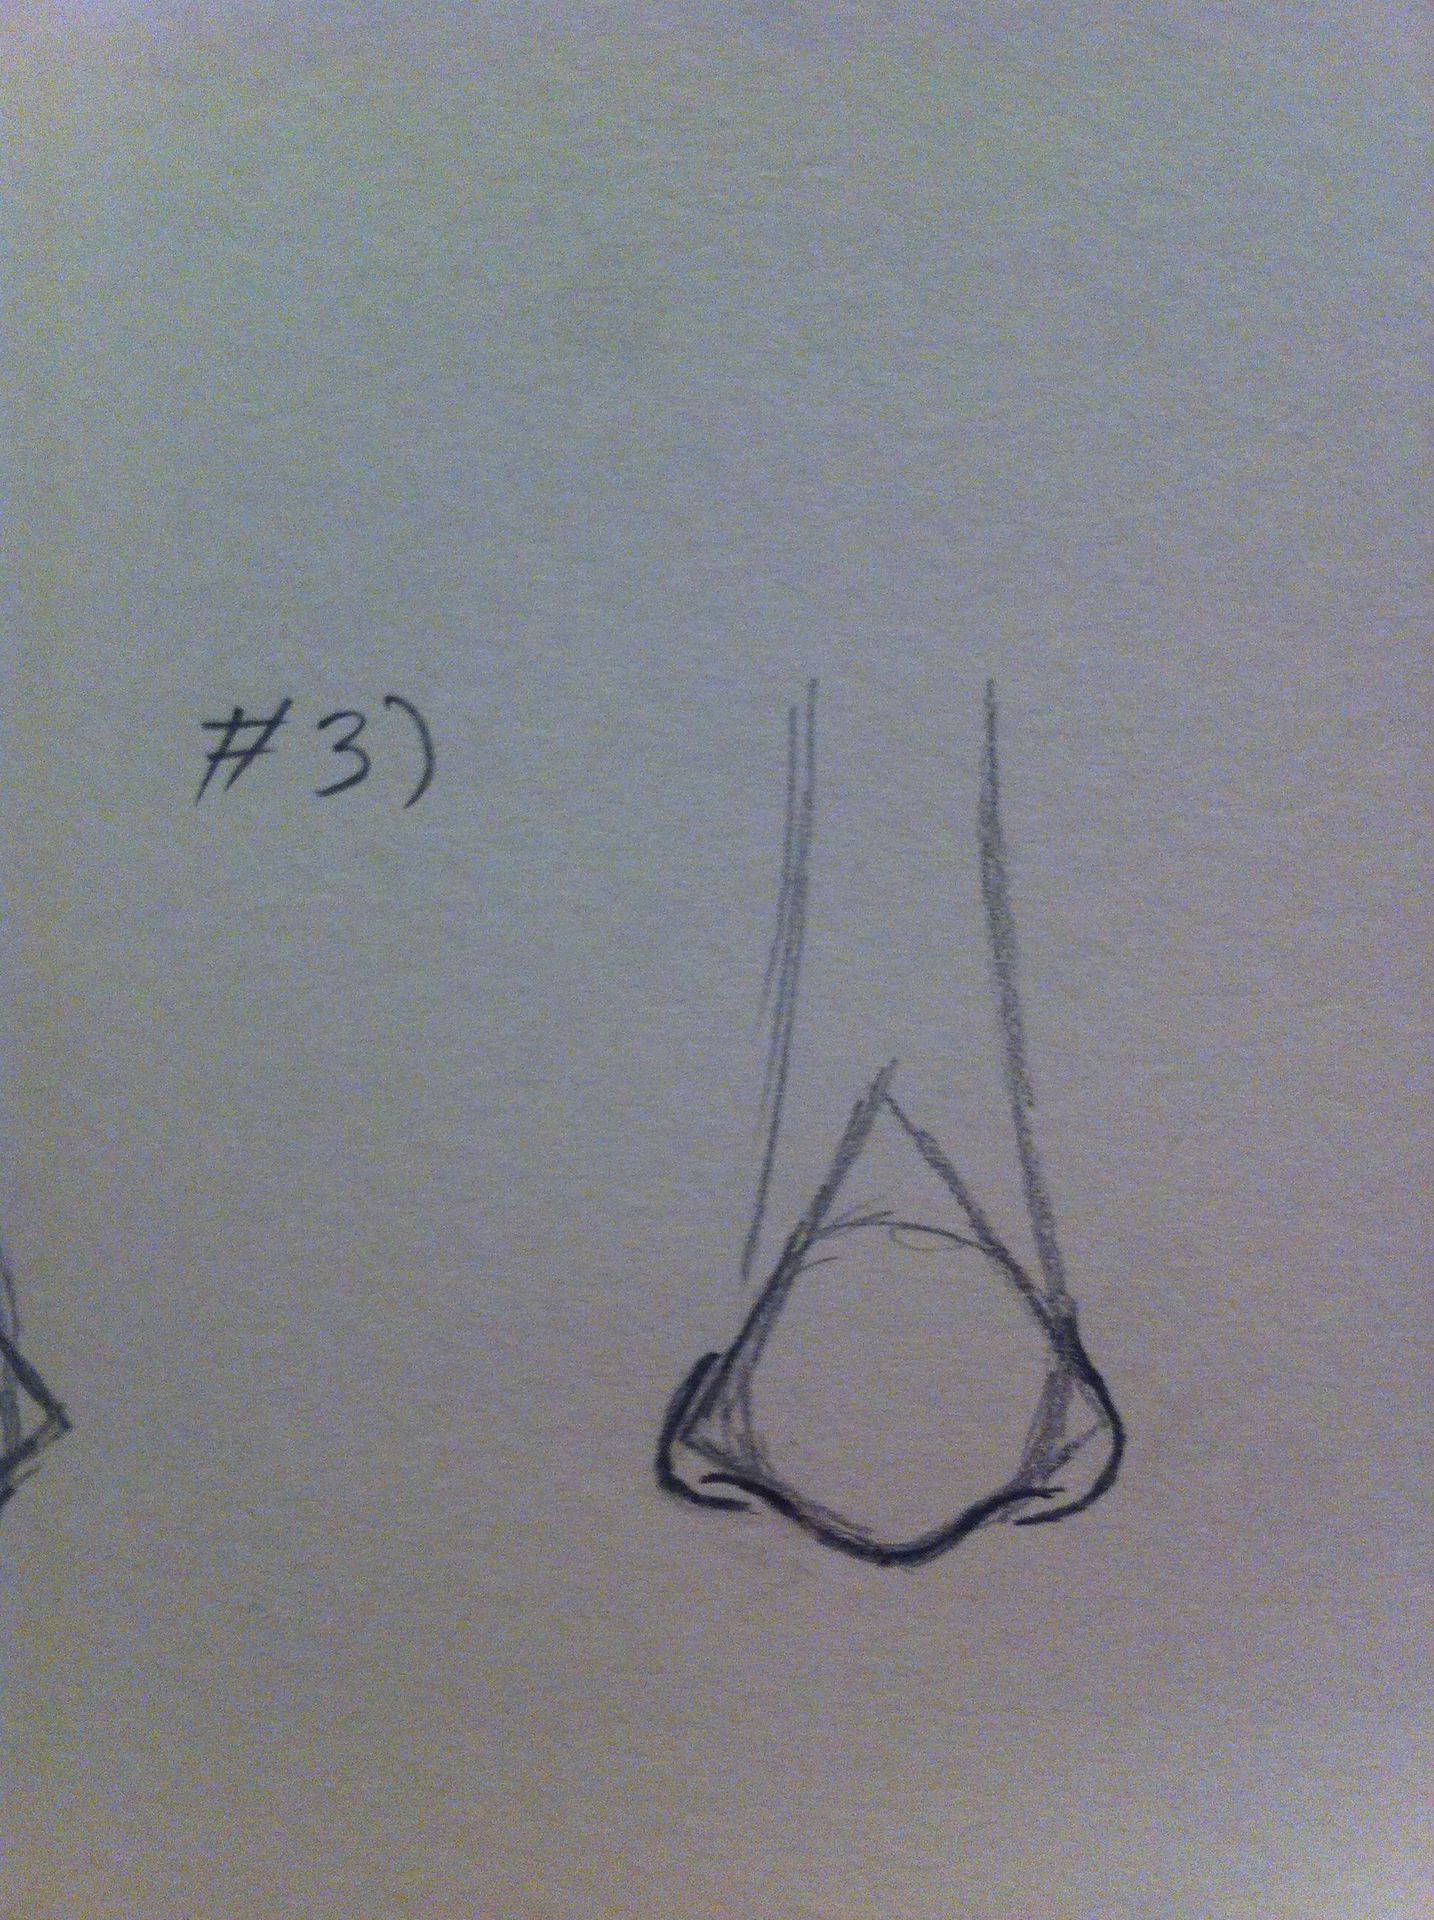
Step #3)
Next, you should draw two straight lines- one vertically, right down the center, and the second one should be drawn just a little above the second point, horizontally.
Also, at this point, you have enough of your head-structure down to add the cheeks/jawline. Which should now give it an egg-shape, as shown below.
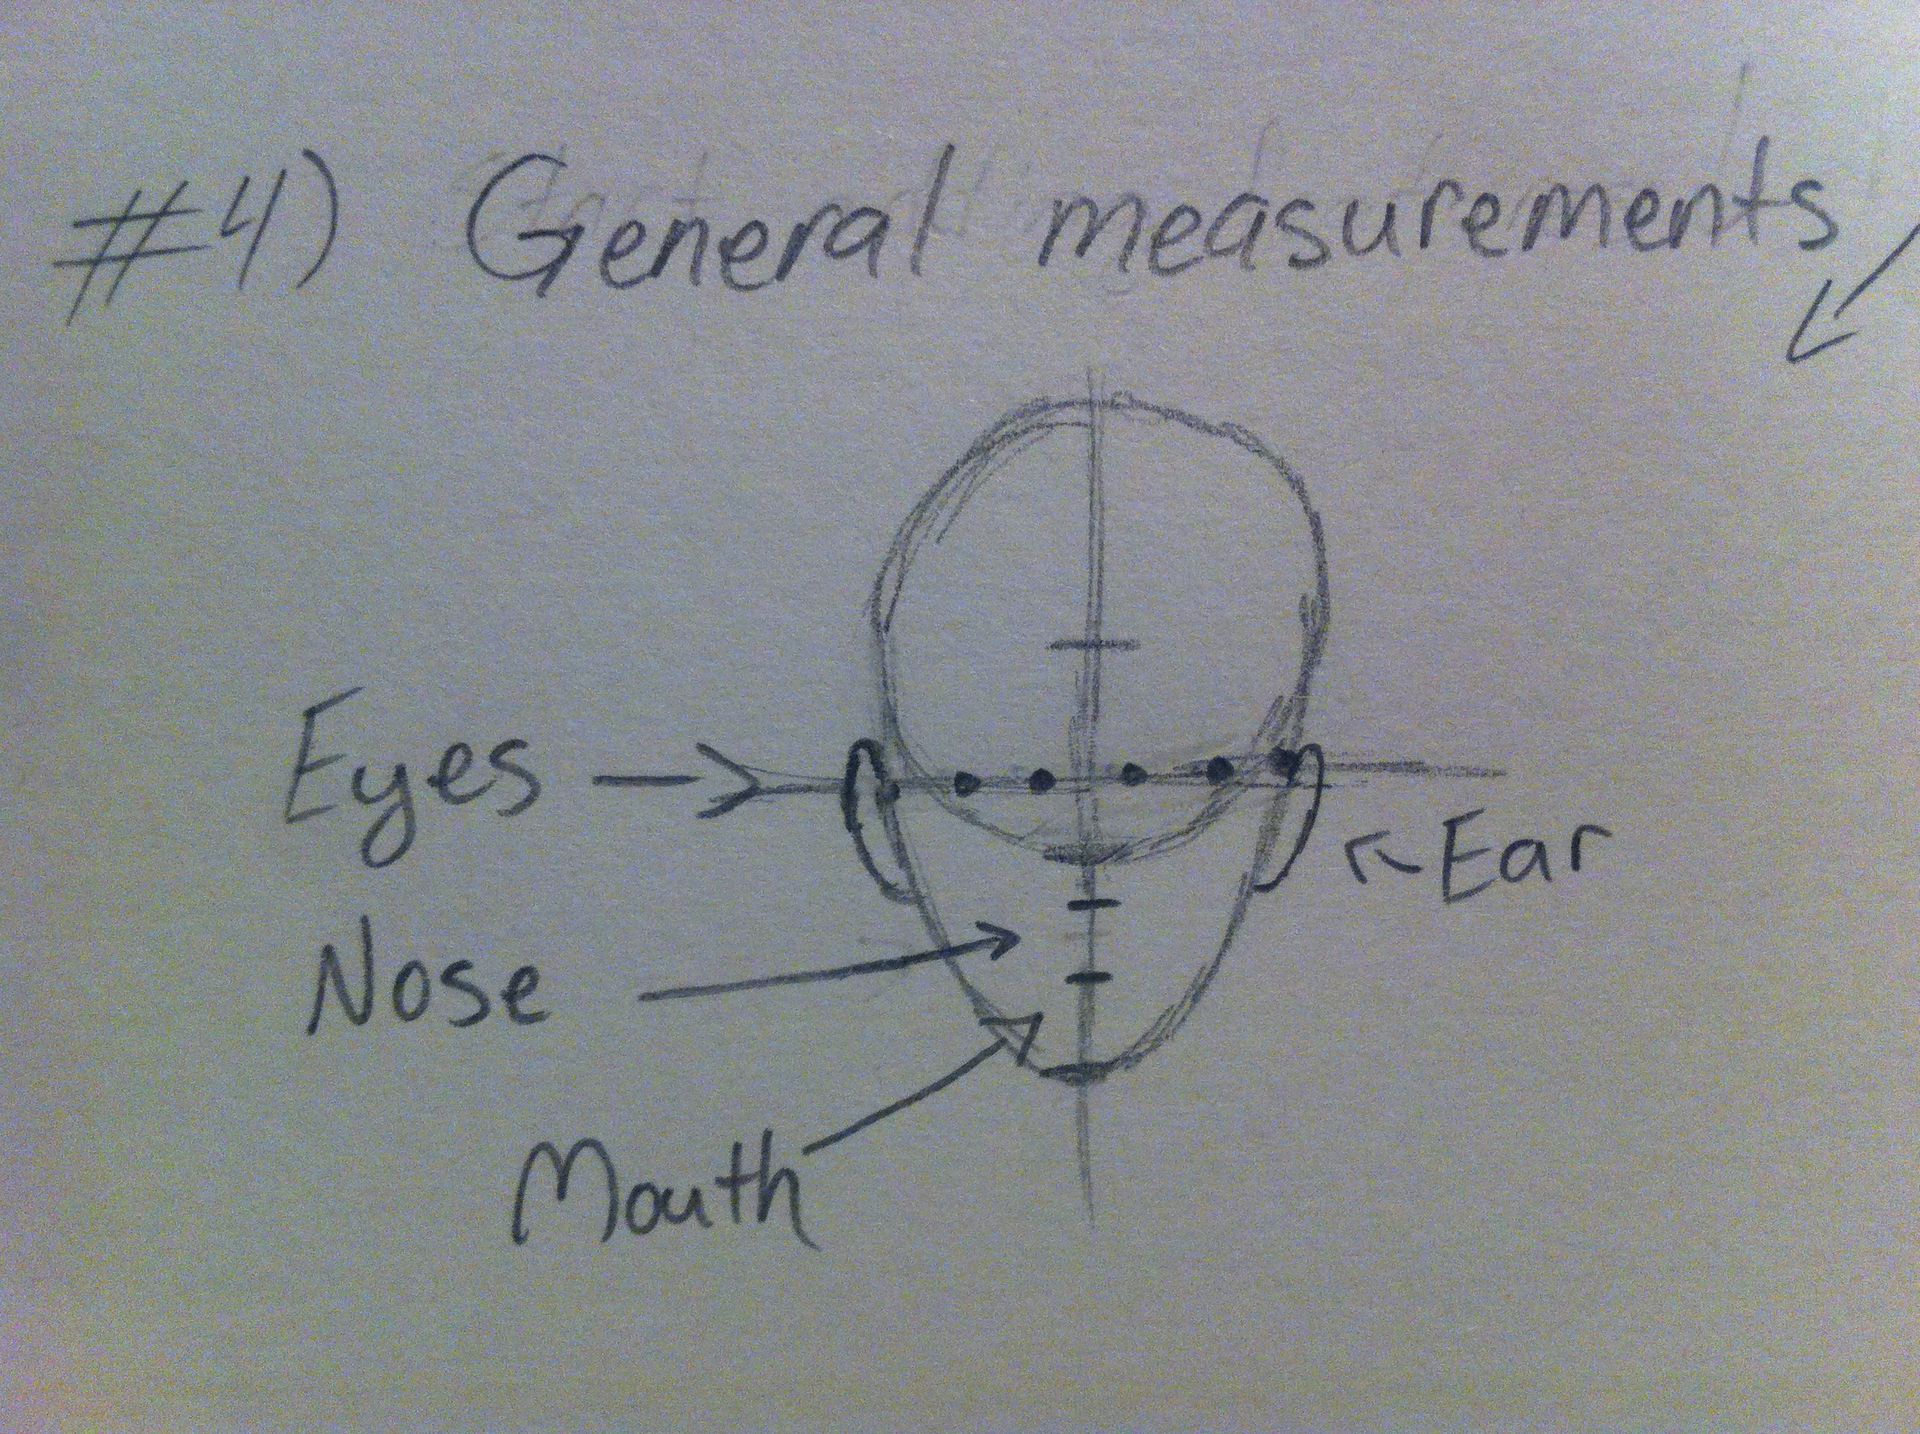
Step #4)
In this step, you will draw six dots across the horizontal line as evenly spaced as possible. This will help determine the eye-placement. Typically, when drawing a person directly facing you, you should be able to fit five eyes across the face (not that you're actually trying to draw that!)
For the mouth and nose, you kinda just have to wing it, but generally, the nose is as long as both eyes together are wide, if that makes sense? And it's kinda just up to you where you want the mouth to be!
As for the ears, the top of the ear usually starts at the top of the eye, and reaches all the way down to the bottom of the nose.
Step #5)
This is where you start to actually add in the features. I know, there's a lot of measuring steps that must first take place before getting to the actual fun part, but once you do it enough times, it won't take very long at all.
Now you add the eyes (however you want them to look, depending on your style! But for this one particularly, I went with more of an animated look). You want to draw the eyes in the correct dots on the horizontal line, and try not to make them too small or too big to fit in the spaces you made. Remember both eyes don't have to be exactly alike! Nobody has perfectly identical eyes, there's always a flaw. Just try to give them a similar shape and size, and you'll be fine.
Noses and mouths can vary, depending on your art style. Some people might want to draw the entire bridge of the nose, while others will just do the bottom and shade it a bit, or even just draw a dot for the nose! Then the mouth can have all kinds of shapes, since it's one of the main expressional facial features.
Same goes for the eyebrows! Eyebrows especially serve in expressions, so do anything you like with them. Make them thick or thin (or nonexistent), and try different positions for them!

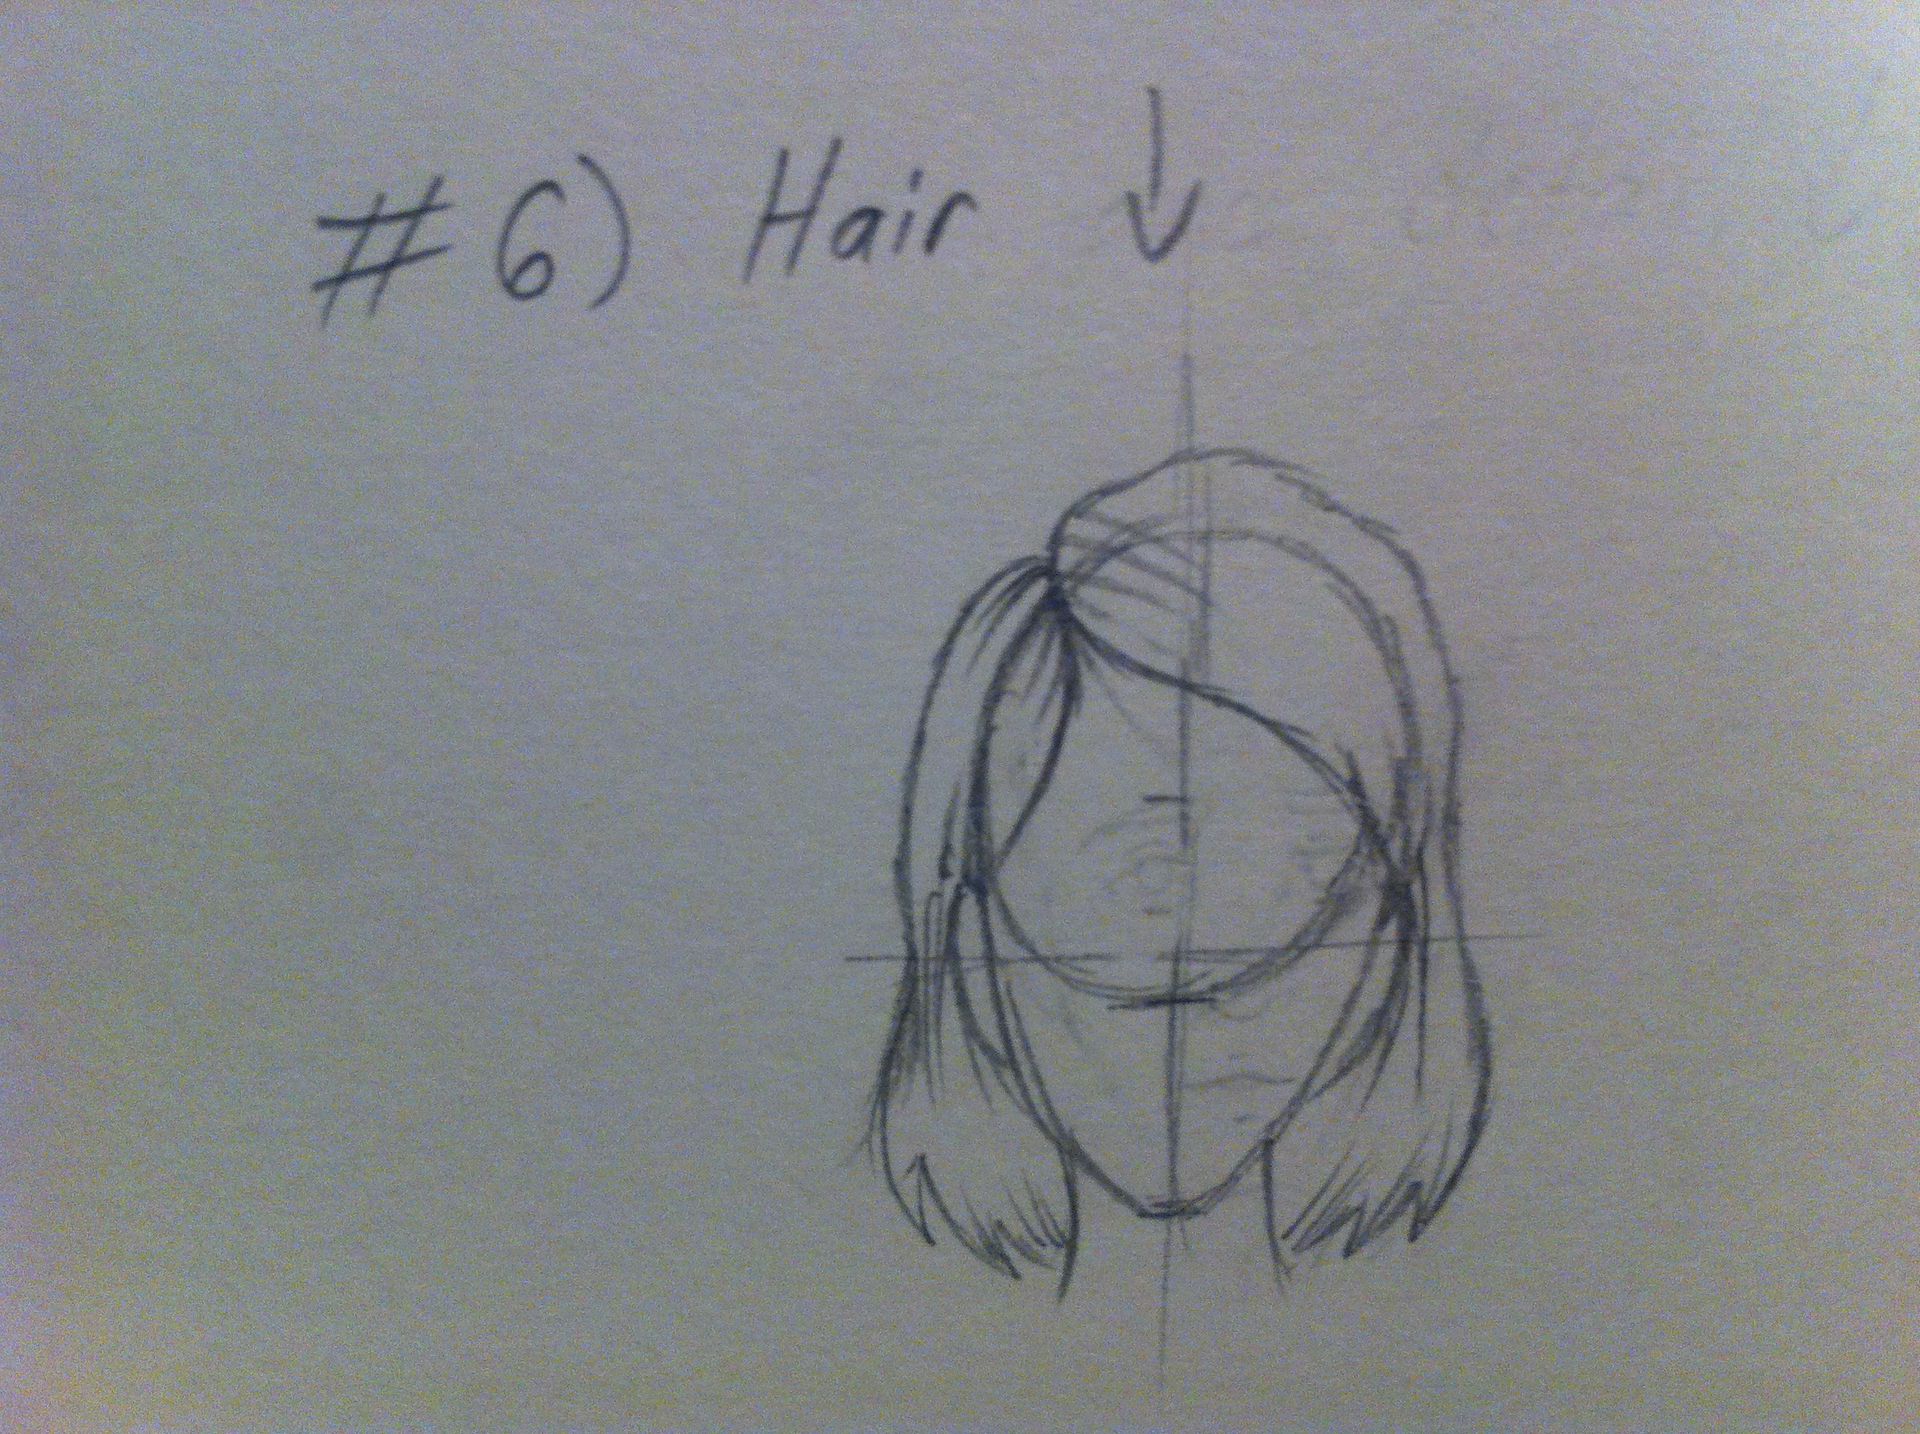
Step #6)
This step is just for adding any extra details (freckles, shading, scars, etc.) and the hair! Whoo! Just go crazy with the hair! I can make a much better tutorial for making different hairstyles another time if you guys want! But this is all I've got right now...
HOW TO DRAW A REALISTIC NOSE

Shade the other side of the nose as well! ^^
SHADING EXERCISE

In the image above, I drew two spheres. The one on the top is your first step. You're just going to start with a regular circle. You might've noticed the word "light" in the corner, with an arrow pointing at the sphere. That is supposed to represent the light-source in the room. When shading, you always want to give your illustration a light-source. It doesn't need to be drawn into the drawing itself, just pretend that there's light coming from a given place off the page, like from the upper right corner of the page (which I use a lot). Okay, so next you're going to draw a dark crescent-shape along the side of the sphere opposite the light source. Don't make the crescent too thick! Then you'll make another crescent beside the dark one, but make it slightly lighter, and repeat that one more time, making an even lighter crescent. (See drawing above^)
Next, you're going to blend all three crescents together. This takes a bit of technique, and might take a little while to master. But once you do master it, then you should be able to make the smooth, 3-D effect as shown in the second sphere.
_____
Everyone has their own techniques and styles, so I'm not saying that you must follow these steps and tips. They're just what I personally use when I draw faces, and I figured...why not share?
Let me know if these might come useful to you, and if you'd like me to do more tutorials on other things!
-MK
Bạn đang đọc truyện trên: AzTruyen.Top