DIY With Katie
DIY WITH KATIE
Most of us want to do something creative or just some art but we need ideas to work upon. Hereby, I will tell you how to decorate a glass easily that can be used as a vase or a stationary holder.
The things you'll need:
1) Glass
2) Nail polishes
3) Crackle nail polish (If you want that effect)
4) Clear/Glitter nail polish (I used glitter one)
5) Ribbons
6) Lace (A shiny one)
7) Glue (Liquid one of course. I used UHU tube.)
8) Paper tape
Now, let's move on to the very first step!
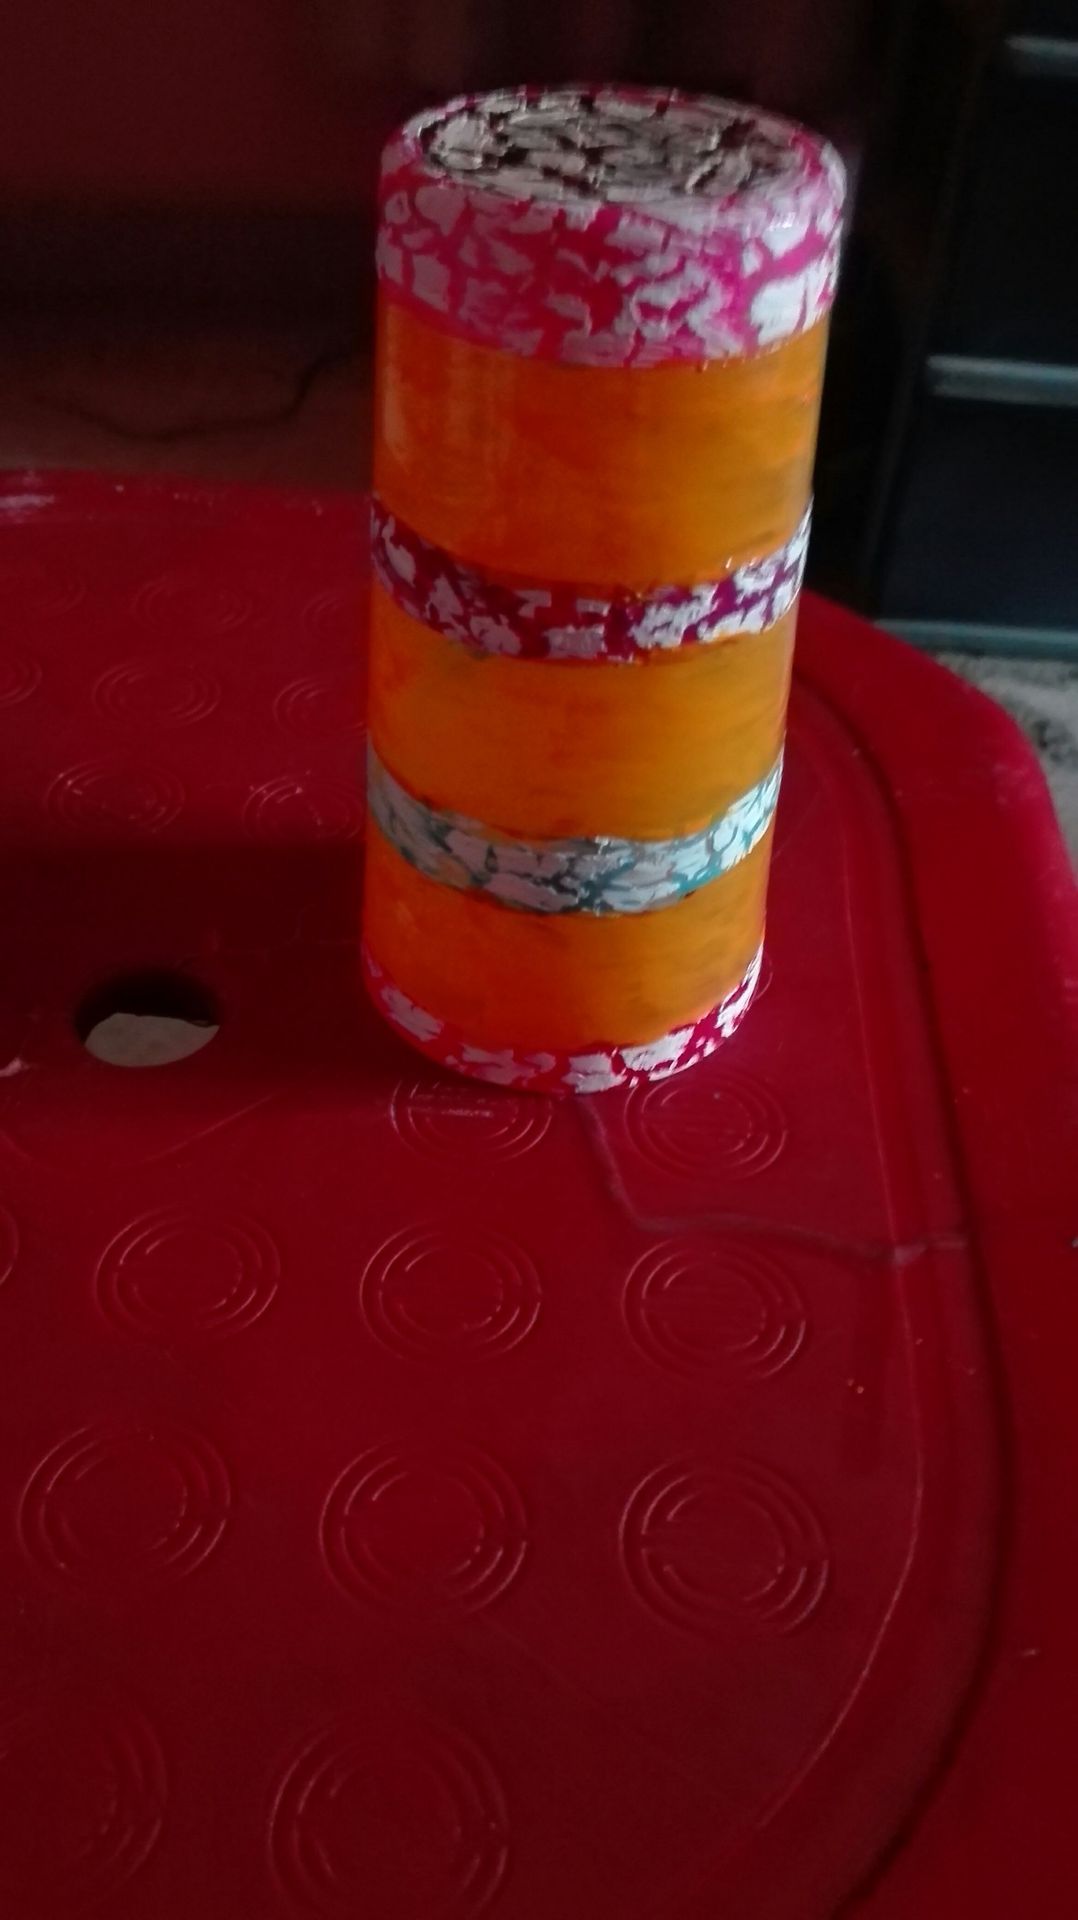
Step # 1: Wrap the tape on the glass like shown in the picture below. (I did rough digital art to make you easily understand).
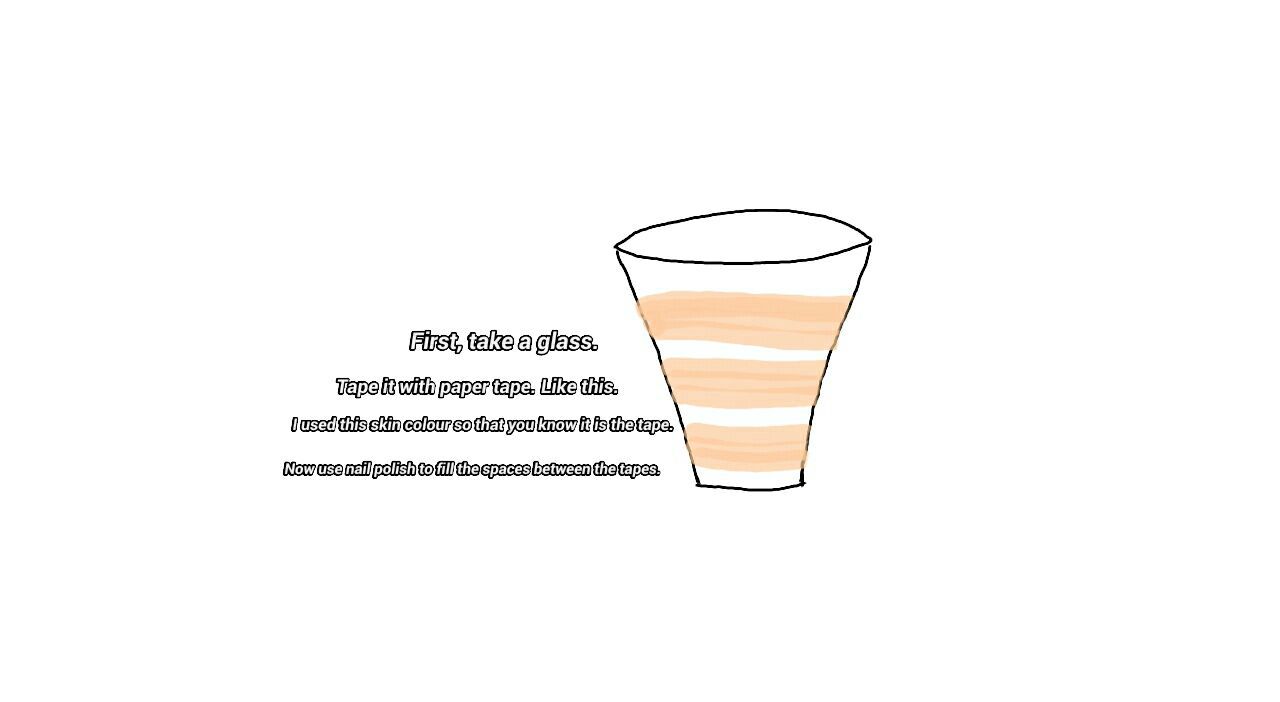
Step # 2: Coat the spaces between the tape with nail polish. Choose any colour you like and leave it to dry for ten minutes.
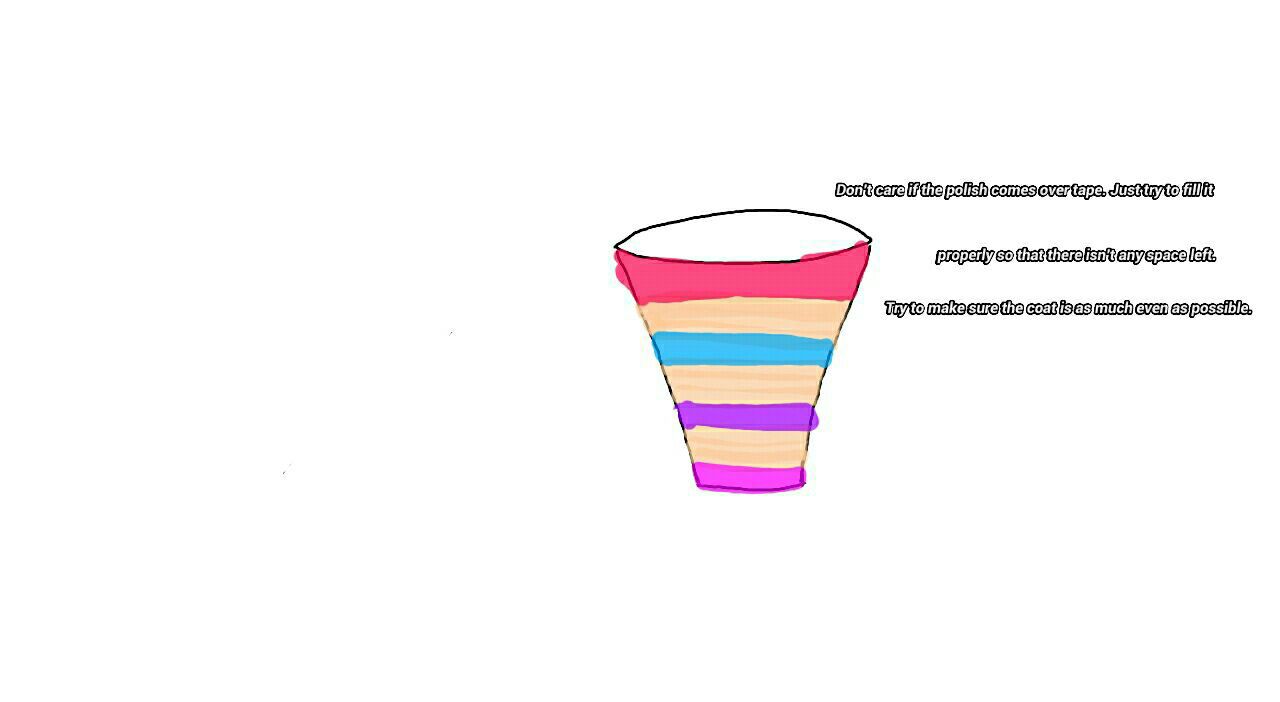
Step # 3: Make sure that the nail polish has completely dried. Apply a second coat and make sure you colour it well and evenly (as much as it is possible). Then, again leave it to dry for ten minutes. If you want to use crackle nail polish, do that and leave it to dry.
Step # 4: Apply a coat of clear or glitter nail polish to make them more prominent and thick. Leave it to dry for 10 minutes or a bit more.
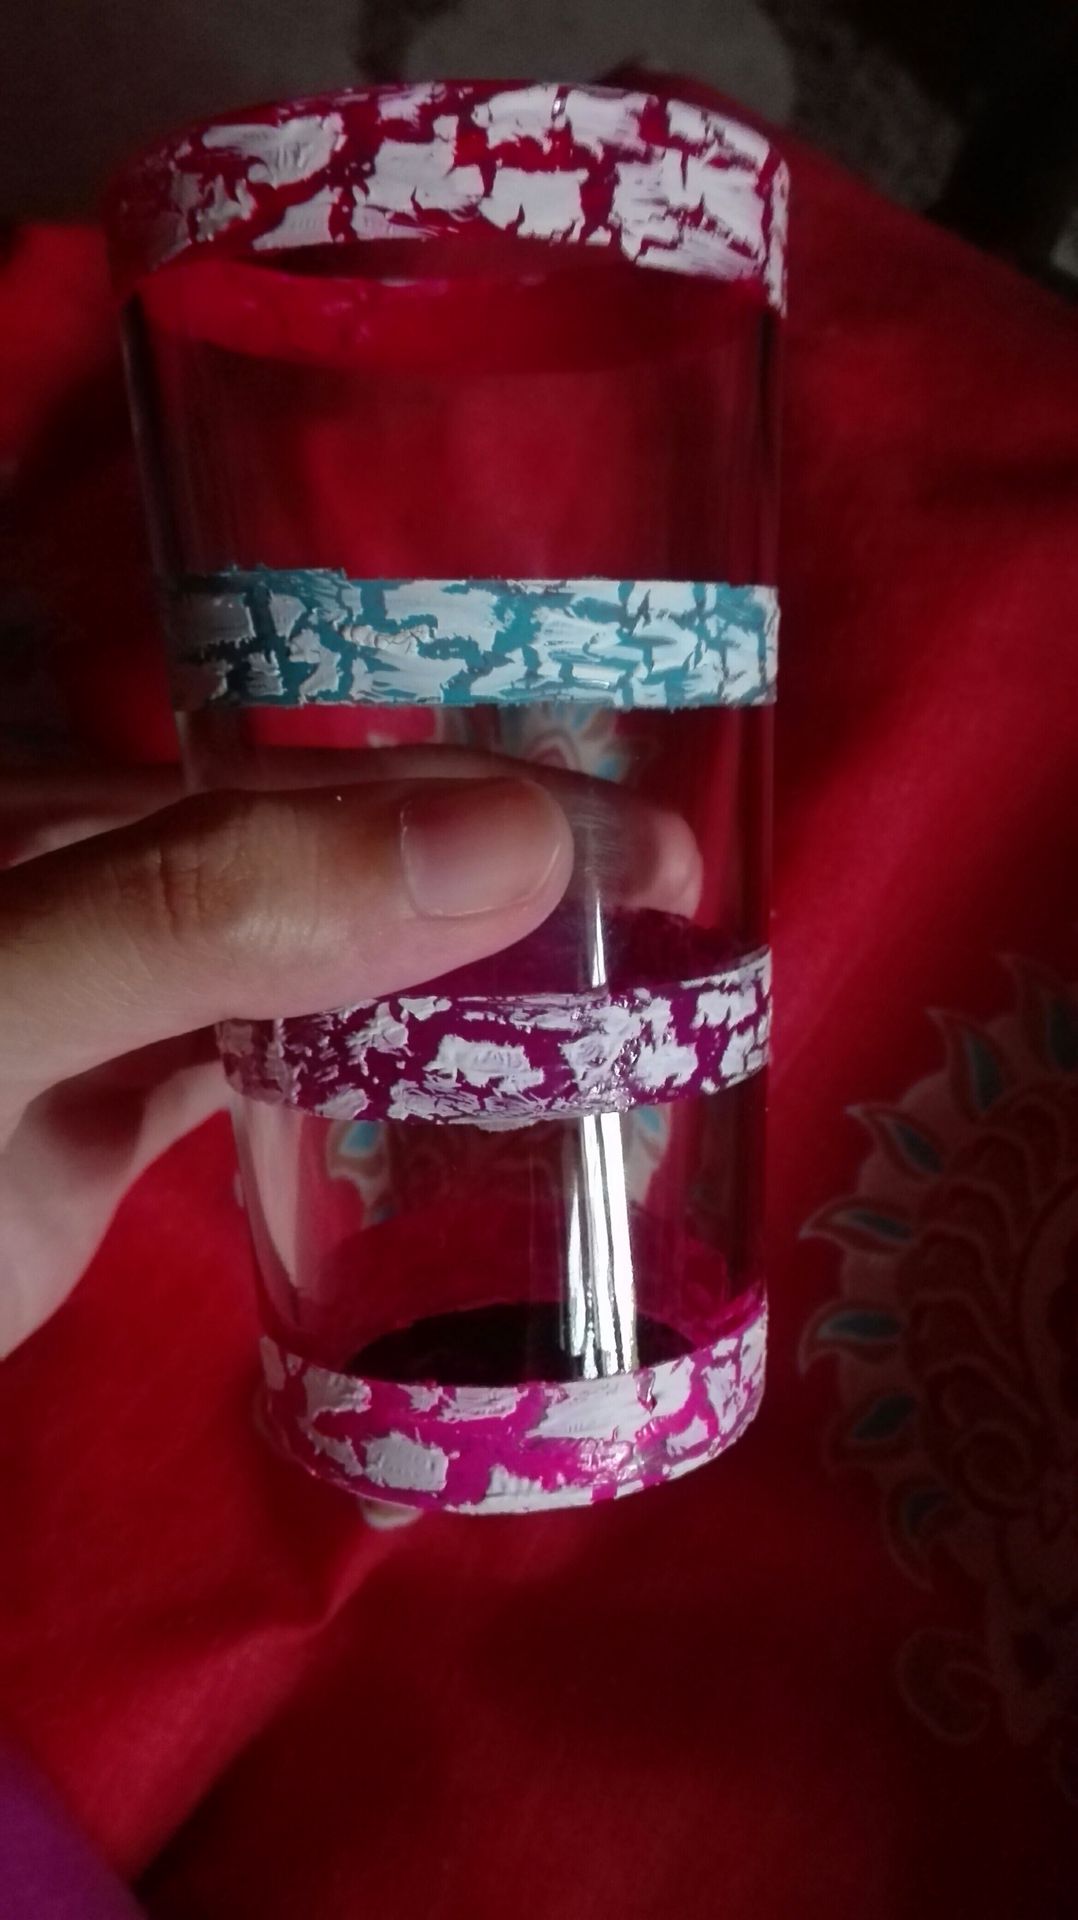
Step # 5: Remove the tape carefully. This is what you'll get. (See picture)
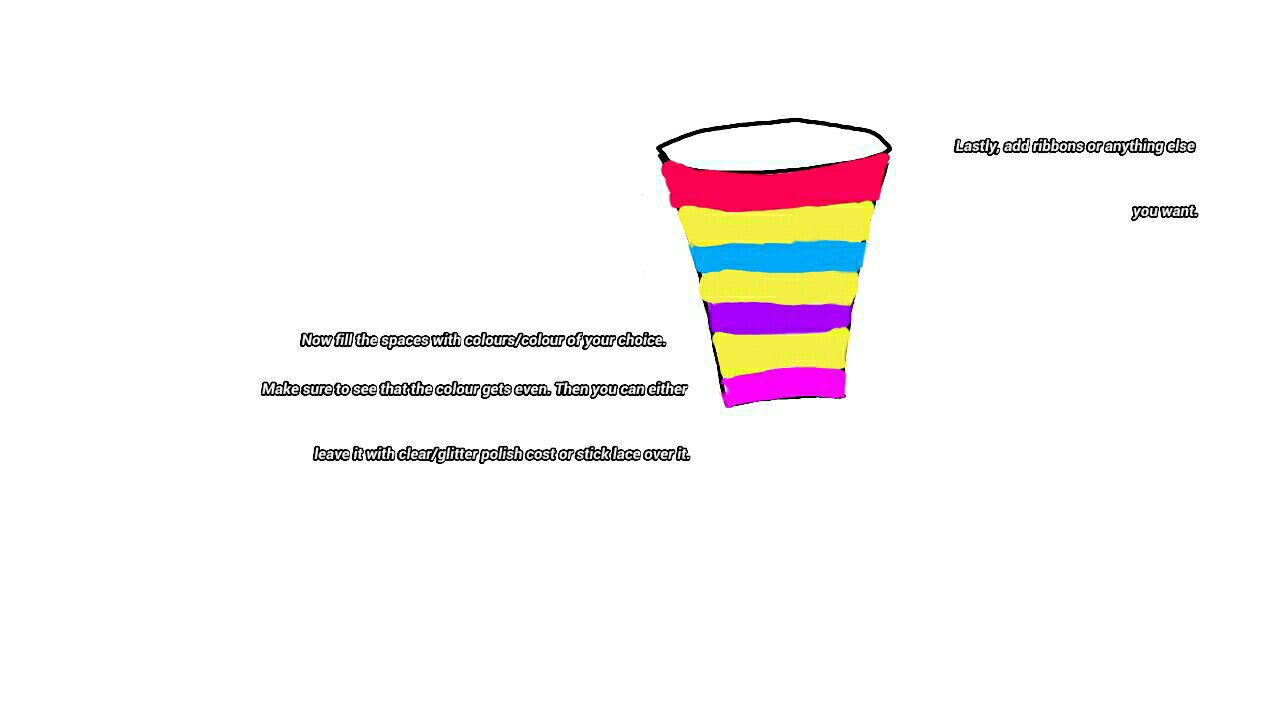
Step # 6: Now apply one coat of nail polish/polishes, in the empty spaces where the tape had been. Either choose one colour or choose many. The choice is yours. Let it dry for the same time and then apply a second coat. Make sure to colour it carefully so that it gets coloured evenly. Let it dry.
Step # 7: It is your choice if you want to coat it with clear/glitter polish or not. I didn't coat it and directly used a lace to cover the area that had been wrapped by the tape. So, if you're going to do the same as me, stick the lace carefully with the right amount of glue.
Step # 8: When you're sticking the lace, it might be like when you stick it from one side and it falls short when coming back to it from the other side. So, to avoid that, I made one end overlap the other. Not too much. Just a bit so that it doesn't fall short. (I did it in slant direction. It's your choice if you want to or not.)
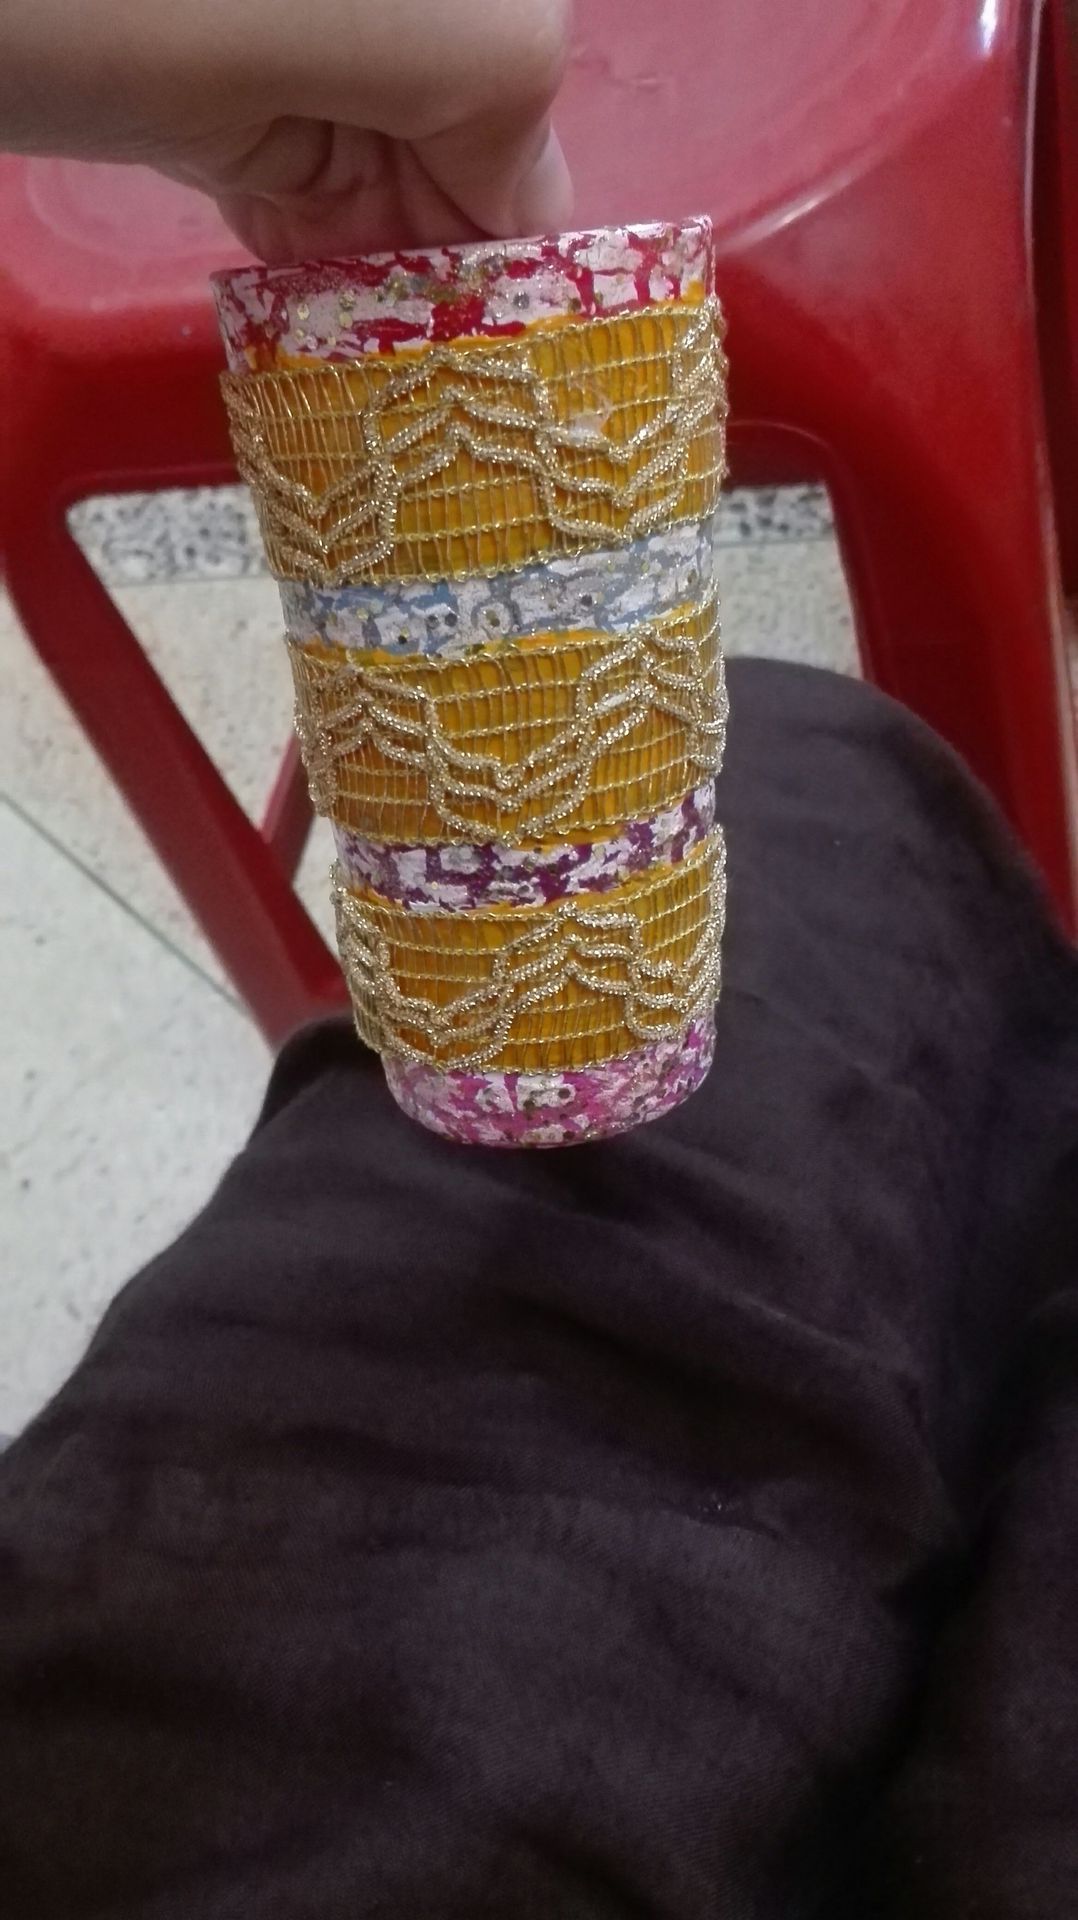
Step #9: Now, the places where you've overlapped the lace, there seems the need of something to hide that, right?
Here is where the ribbons come. Take ribbons and tie them into a bow using a fork. It's easier and doesn't mess up this way. (See the picture below; showing how to make a bow by using a fork).

Step # 10: Stick the bows to those overlapped places in such a way that it gets hidden from the eye. Let it dry.
The decorated glass is now ready!


Sincerely,
KatieFlemmings96
Bạn đang đọc truyện trên: AzTruyen.Top