tutorials
so, fair warning that this may not sound all that good, but I'm going to explain the best I can. Abby asked for a tutorial after I showcased the cover to an upcoming story, so here we go. also, another fair warning, I do this all on my phone 😬 let's get to it!
APPS I USE (all free!):
- Google / Ecosia
- PicsArt
- Phonto
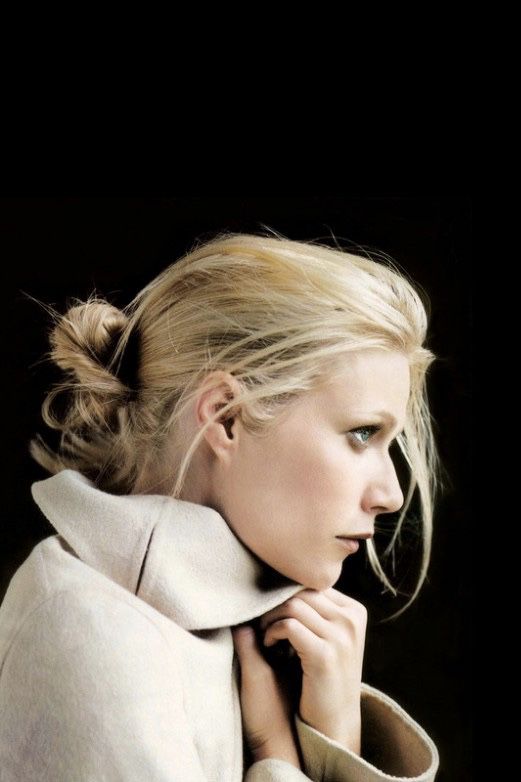
STEP ONE: download the photo of your choice.
→ in this case, I searched Gwyneth Paltrow Tumblr into google and scrolled until I found a photo that I liked.
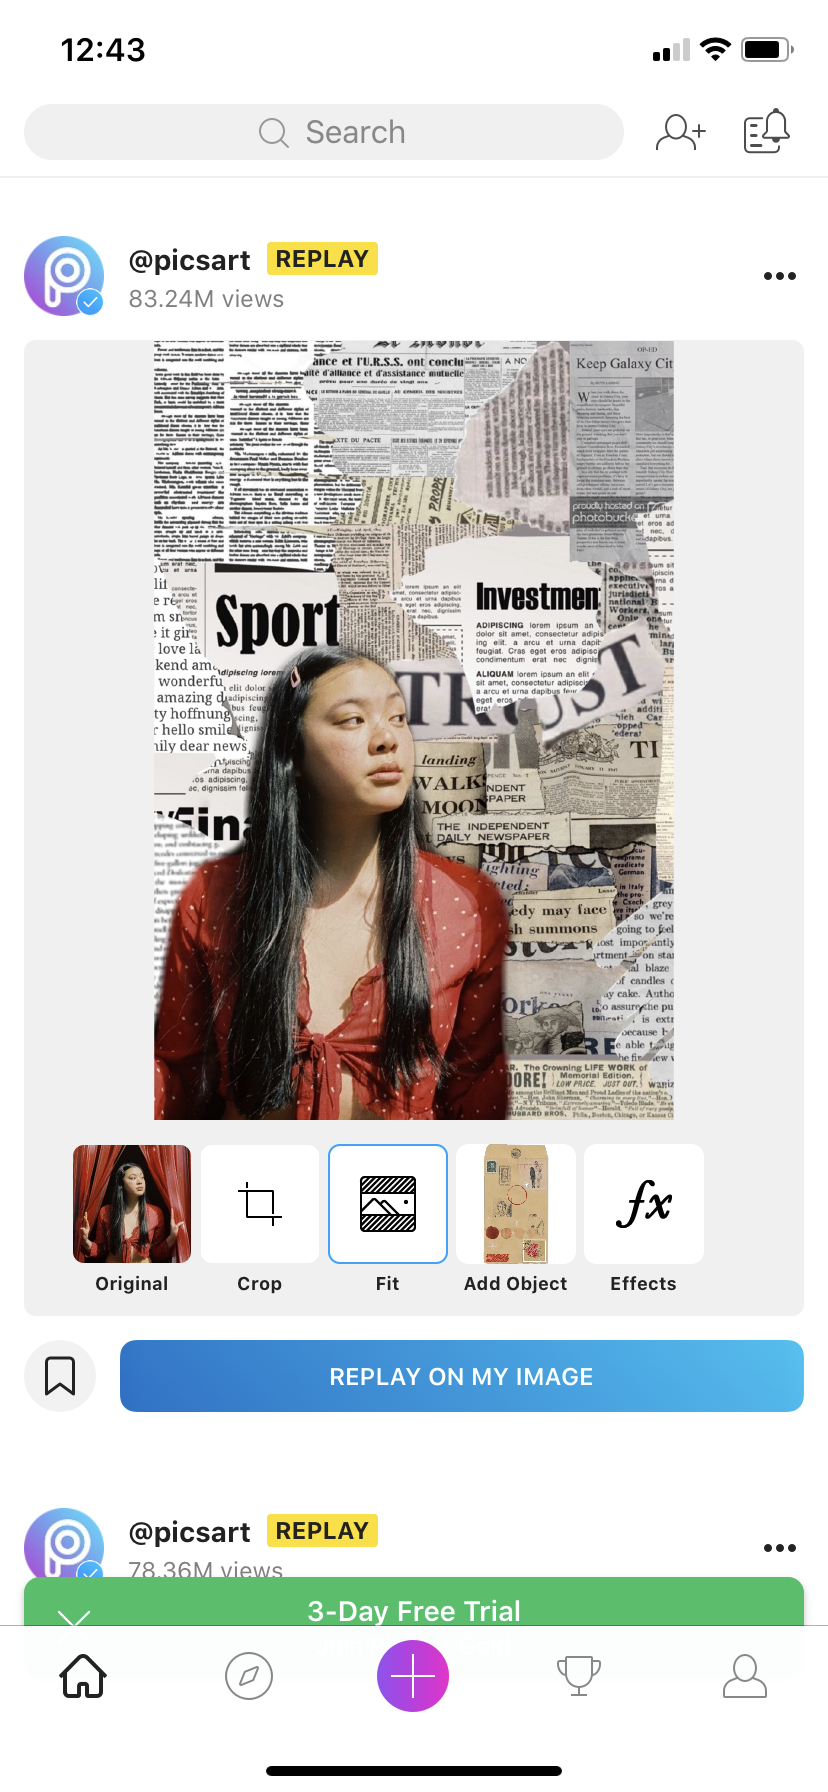
STEP TWO: go into PicsArt
→ this cover was made by using the "replay on my image". these options are really cool and make for some awesome photos. maybe I'll do another tutorial for a cover that doesn't use that option.
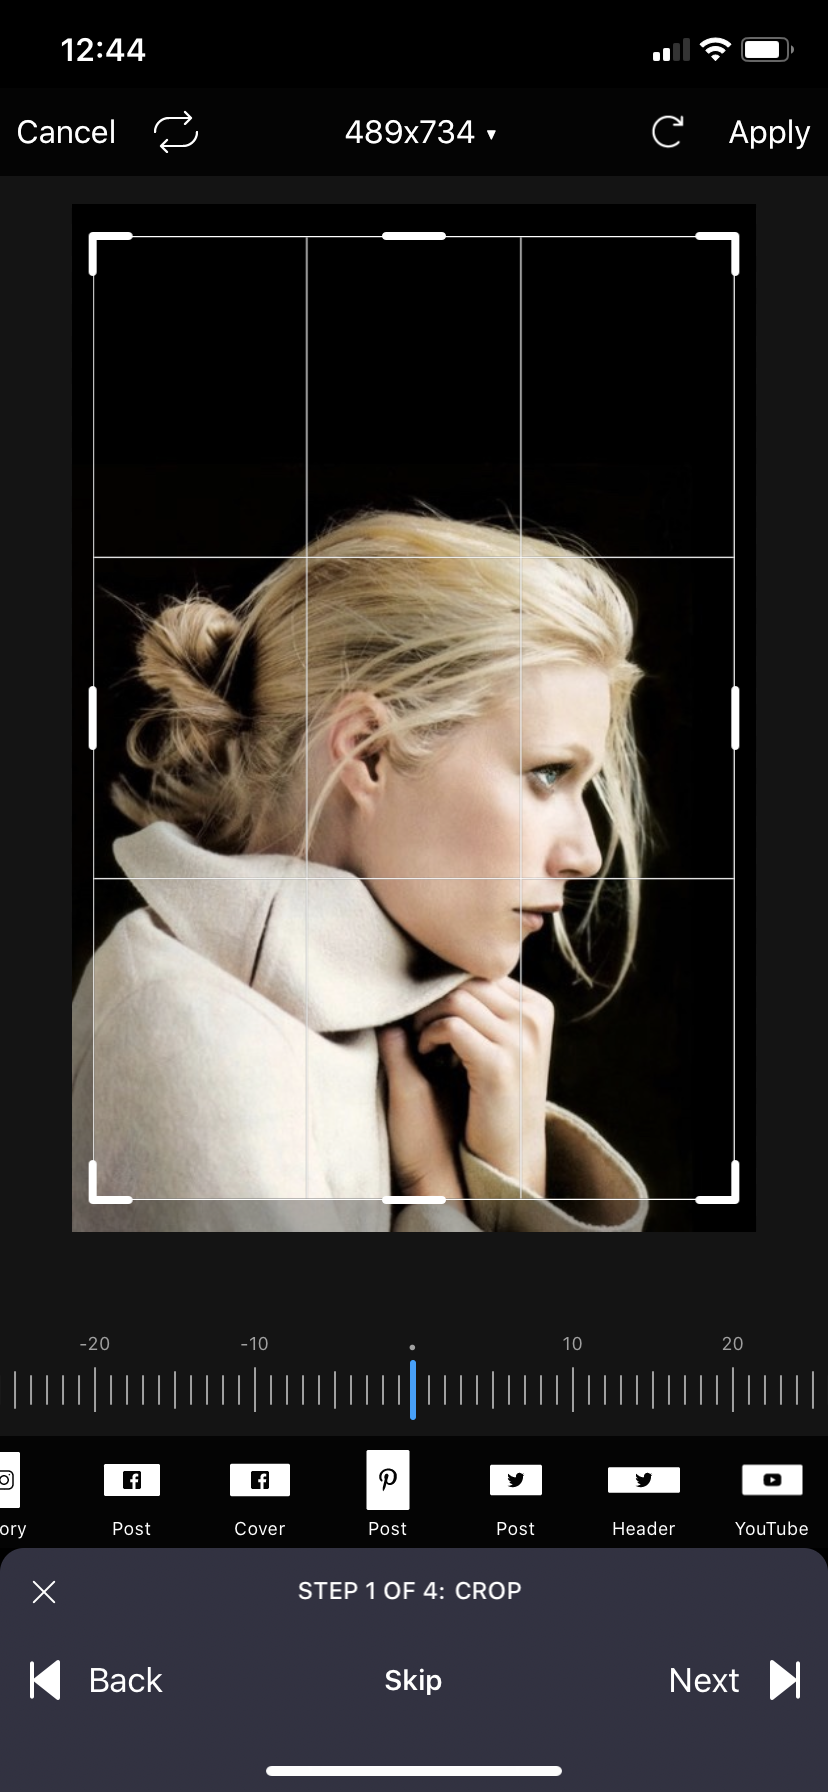
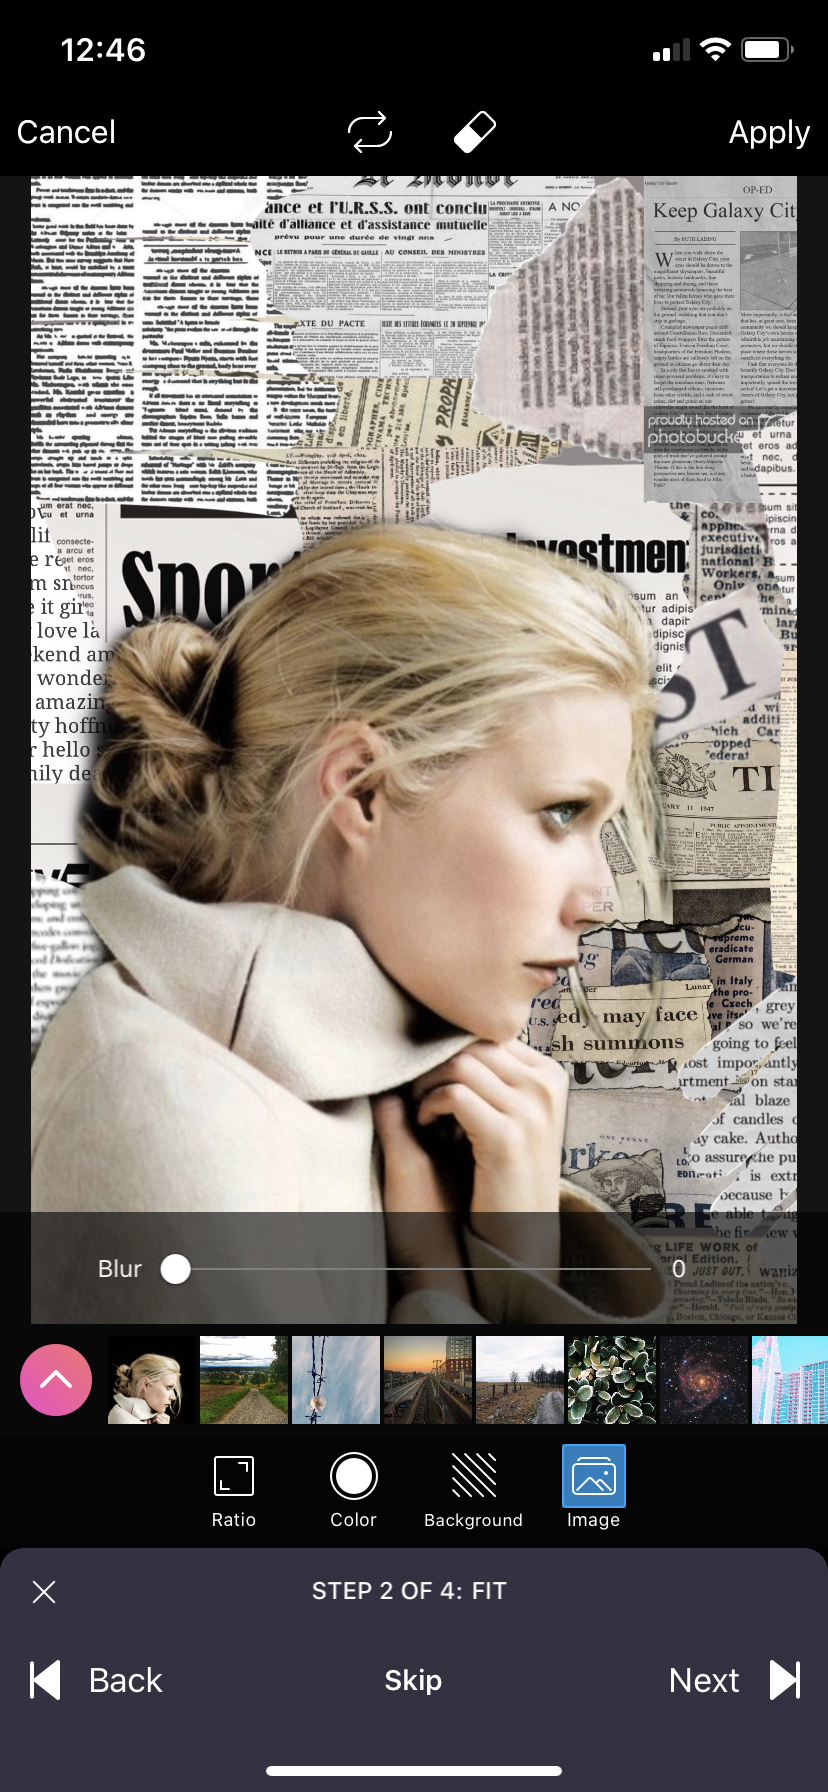
STEP THREE: crop your photo.
→ I find thar using the pinterest template is best for wattpad covers as they are close in size, but don't be surprised if wattpad trims the cover a bit to size it. also, the 2:3 portrait template works well too.
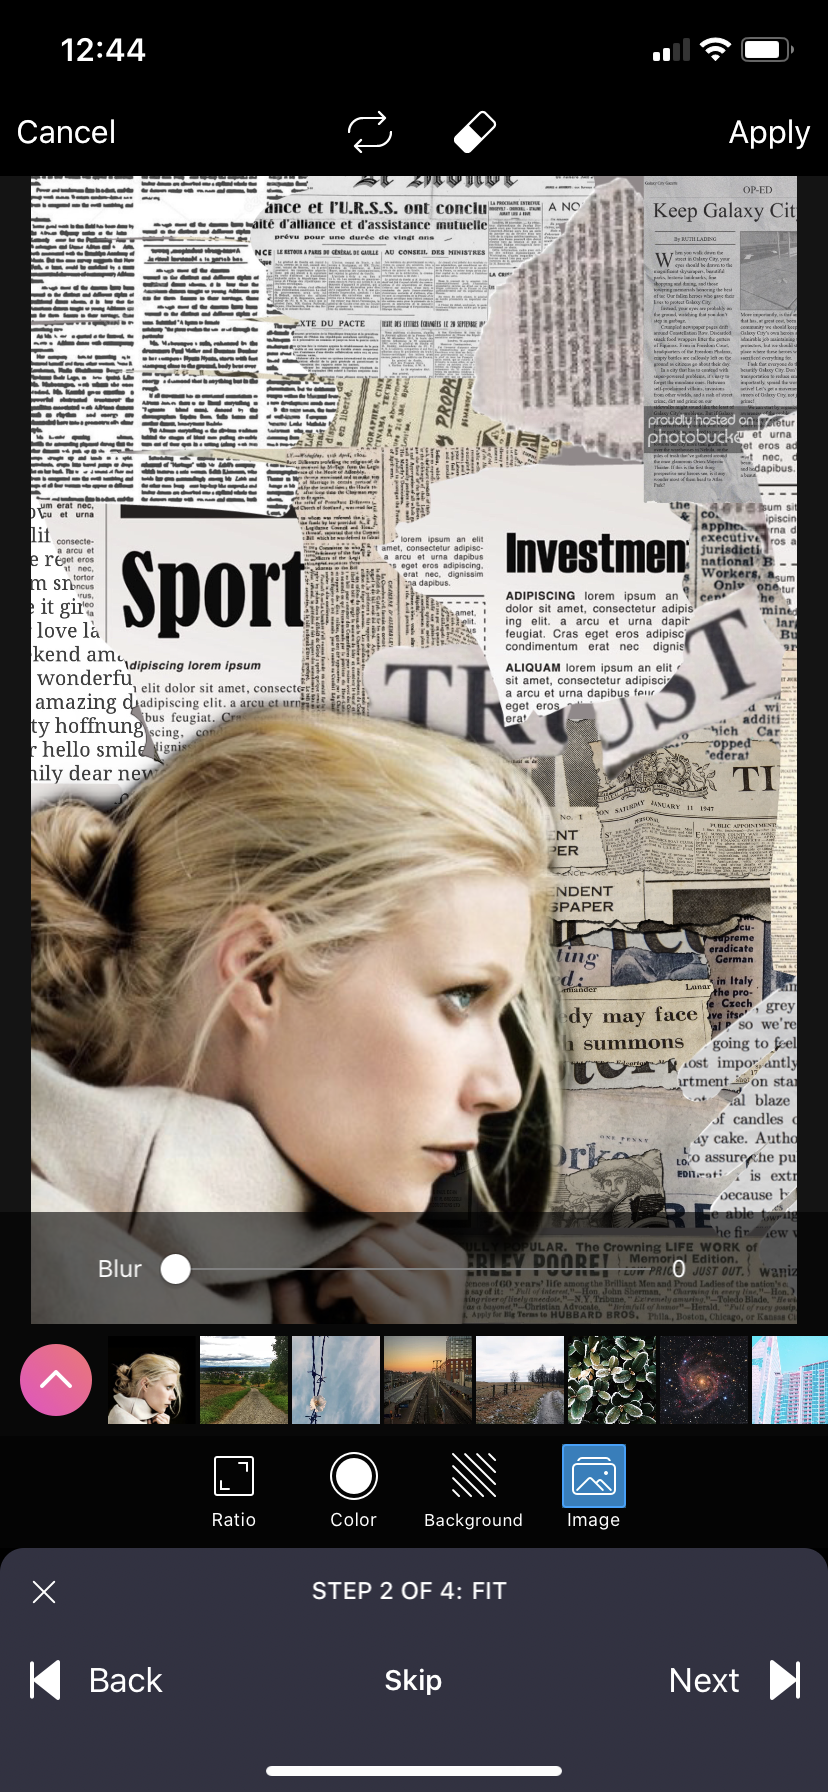
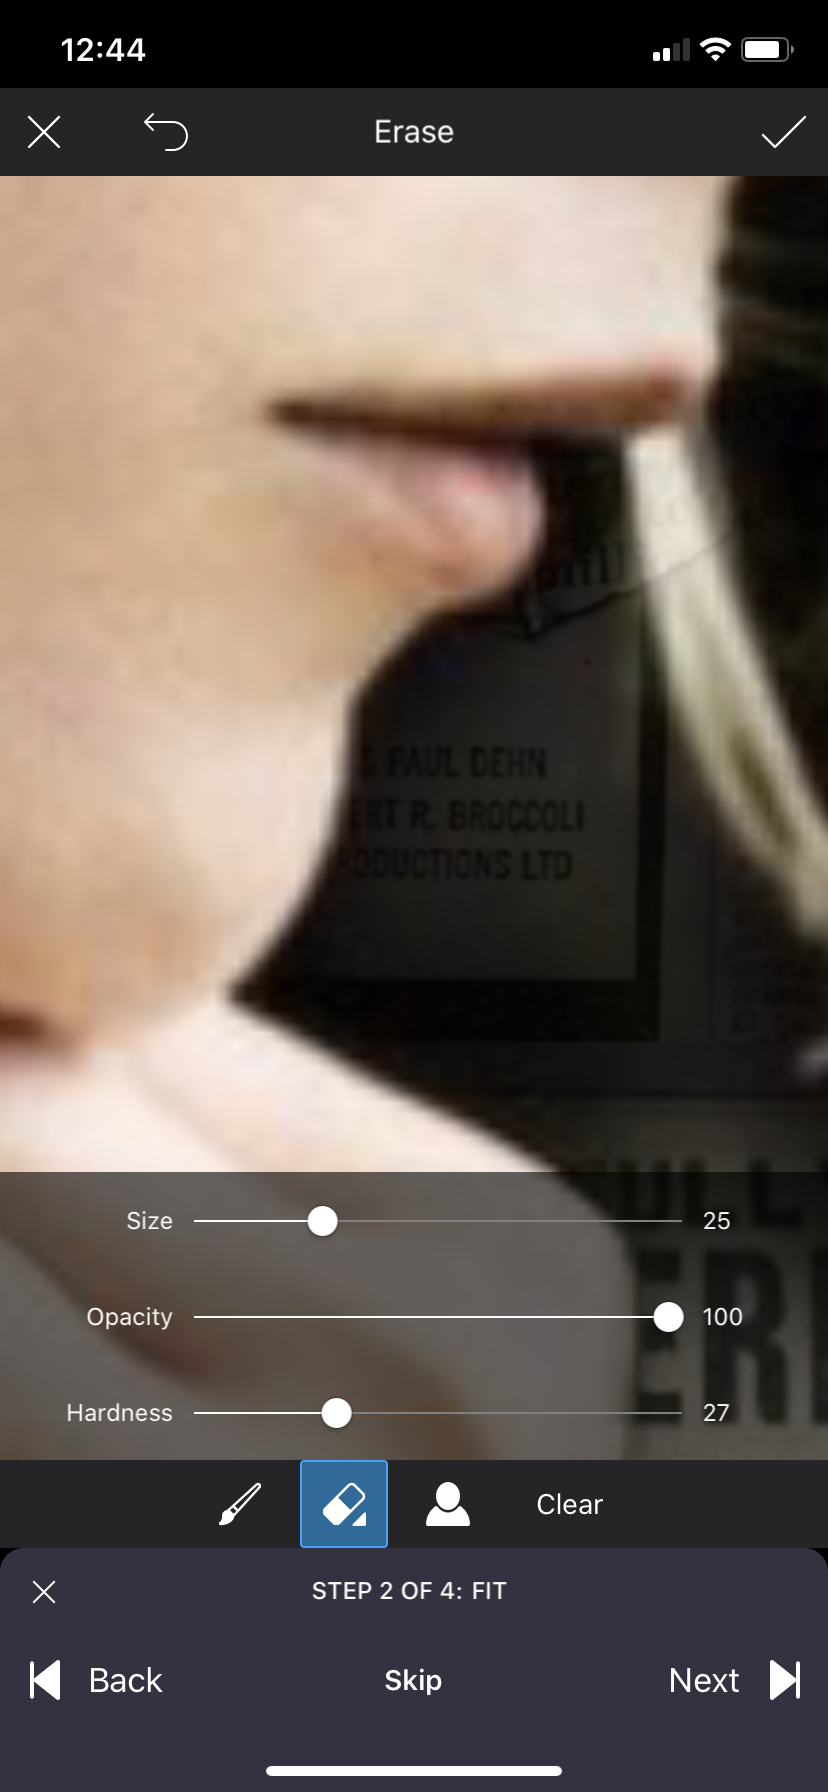
STEP FOUR: erase what got missed.
→ do you see the black outline against the photo I choose? click the little easer at the top, and you'll get to this screen.
STEP FIVE: lower the hardness of the eraser.
→ believe me, you want to do this. by lowering the hardness of the eraser, you'll make it a lot easier. it's easier to get up close and personal, and it's harder to make mistakes. however, you have to go over an area more than one to completely erase the area.
STEP SIX: move the focus.
→ with this particular "replay this on my image", it moves the focus to bottom left corner. my image was too big and it looked funky in the corner. move it if you have too, and manipulate it anyway you need too. if you mess up, there's an undo button.
STEP SEVEN: assess the image.
→ assess the image and decide what to do. see how low the birds are? and where that scribble is? personally, I didn't like it, so I manipulated it to my liking.
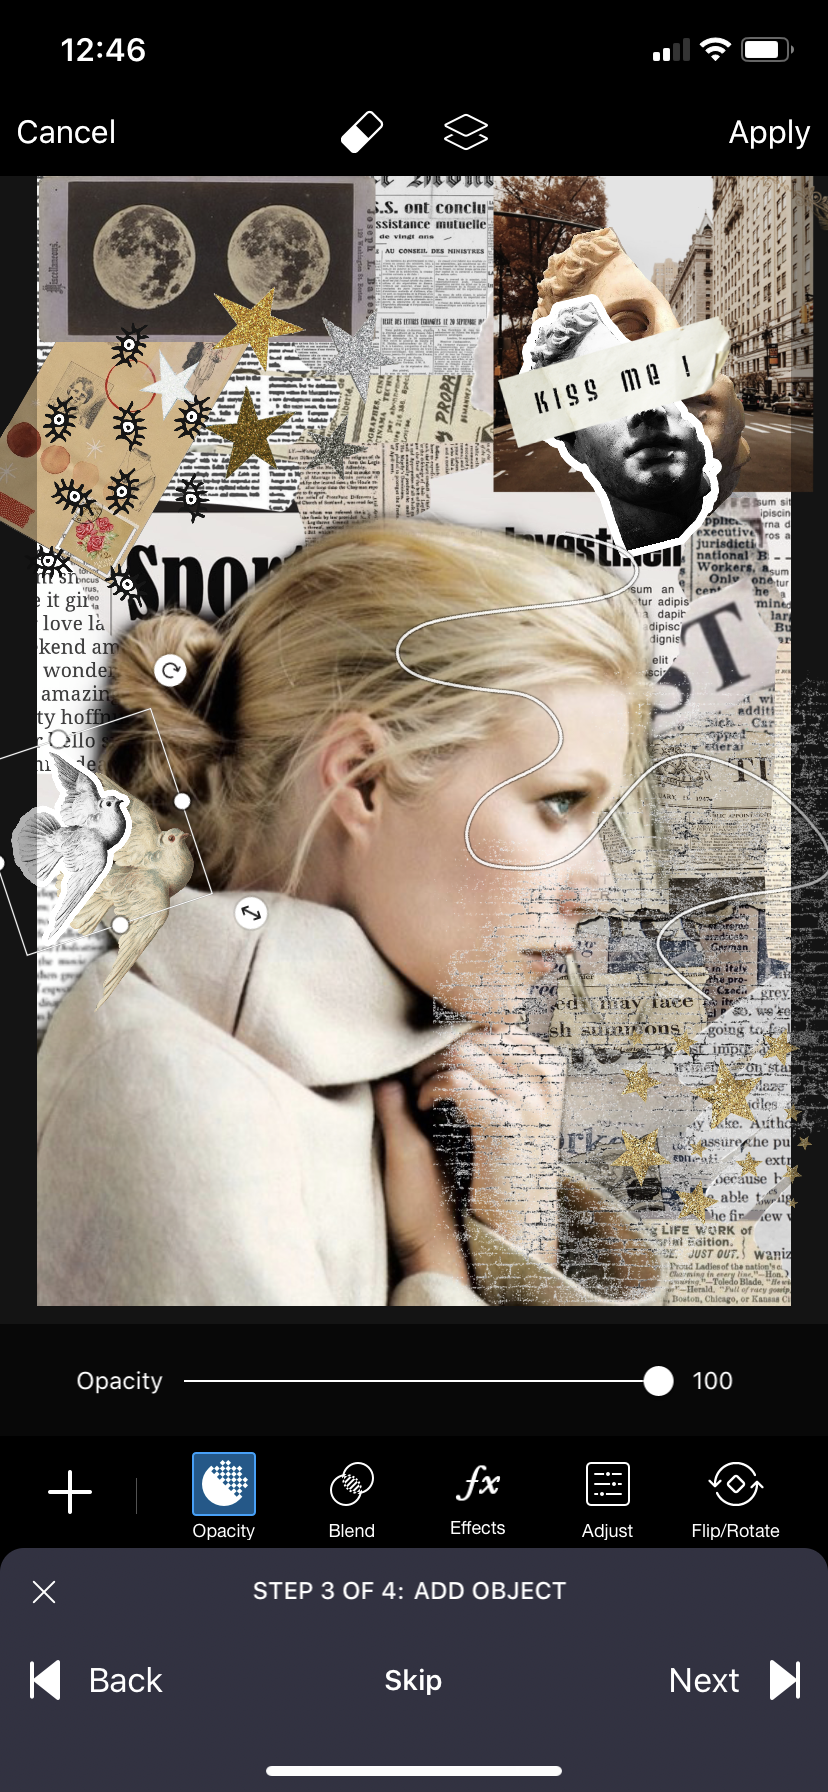
STEP EIGHT: manipulate.
→ typically manipulation is bad, but in editing, it is not. move the stickers around until you find that you like your image. I moved the birds and the scribble to where I found it looked good appropriate. that varies from person to person.
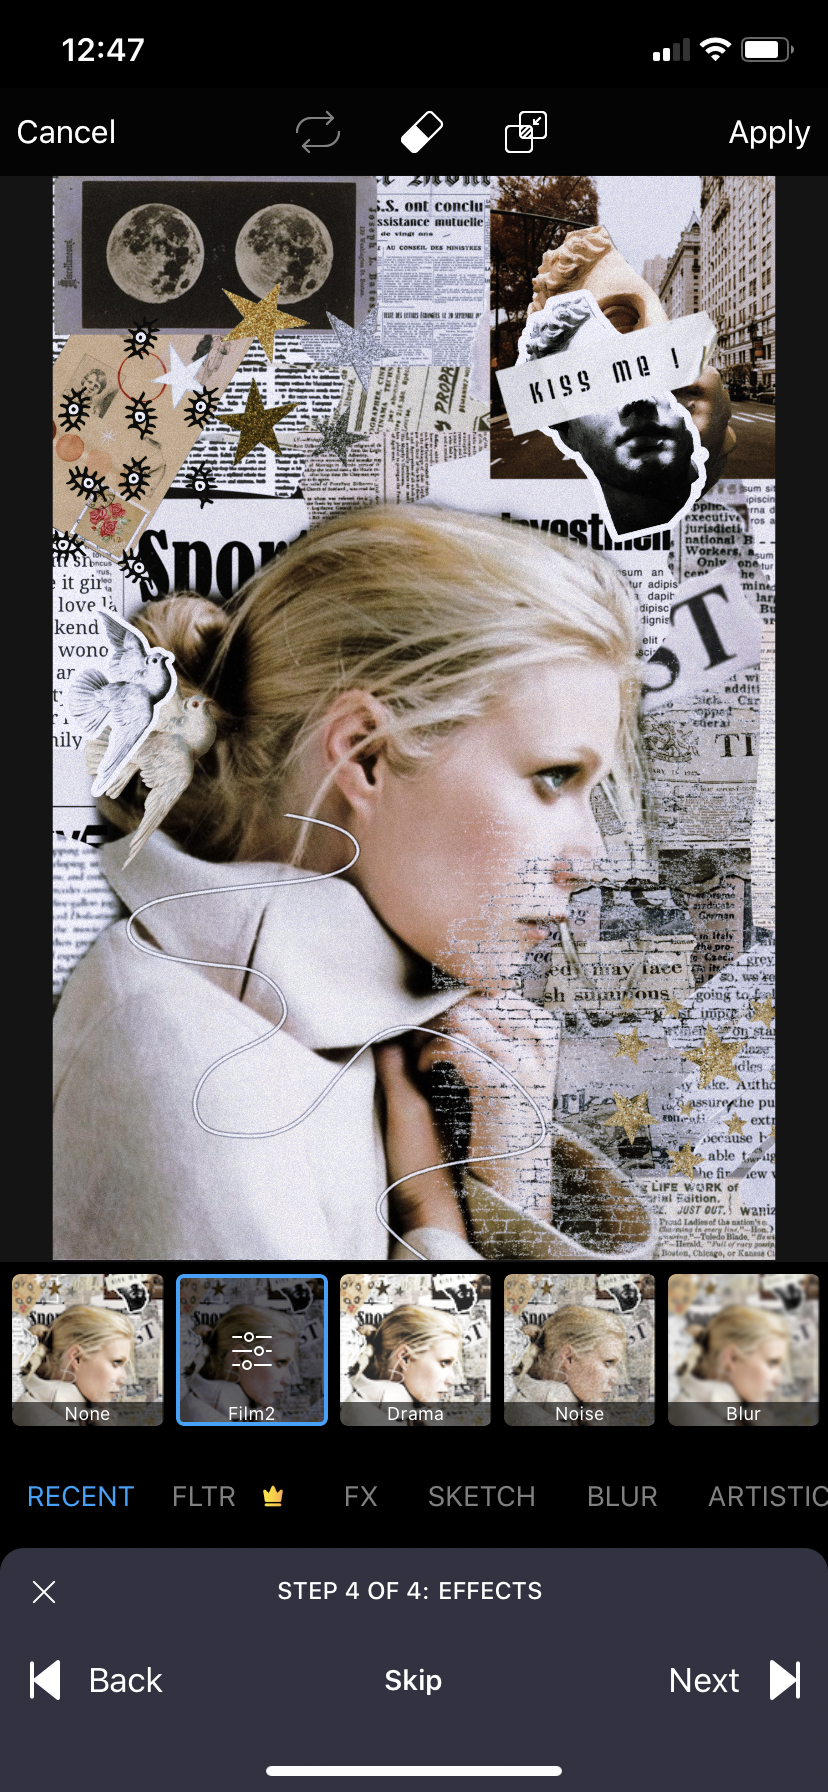
STEP NINE: choose the effects.
→ this automatically choose the effect of film 2. you can change that and play around until you find the right one.
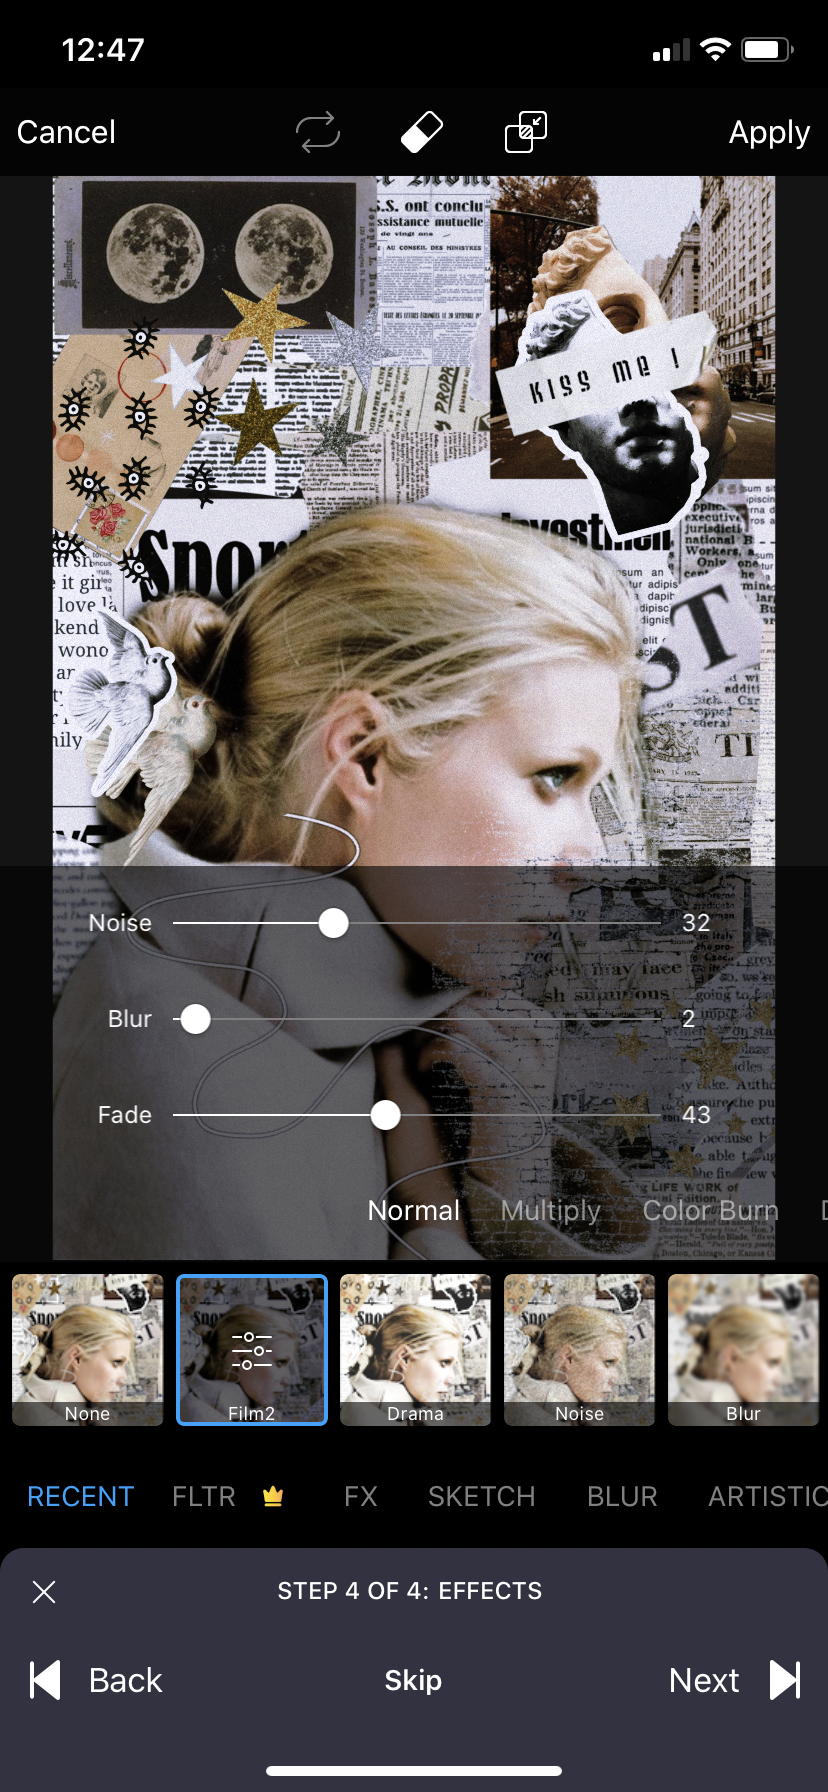
STEP TEN: manipulate the effect.
→ click on the effect that you want. it should open a slide bar with a couple different options. each effect has its own input and output data. play around with it.
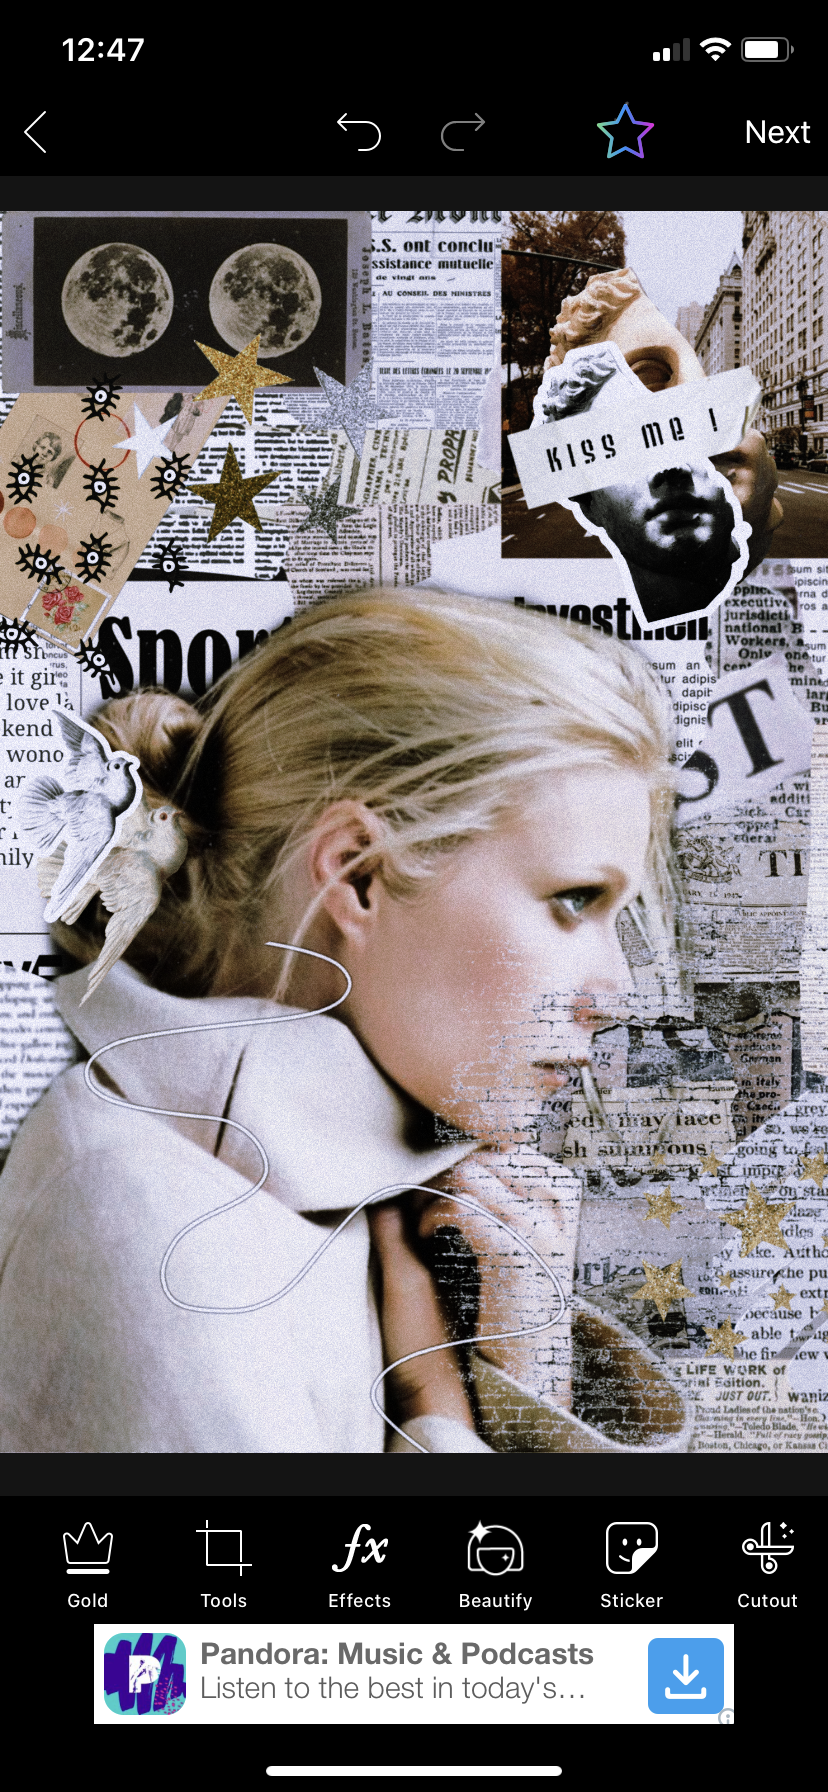
STEP ELEVEN: you're done.
→ once you hit next after choosing and manipulating the effects, it takes you to the regular edit screen. you'll hit next in the top right corner once you're finished.
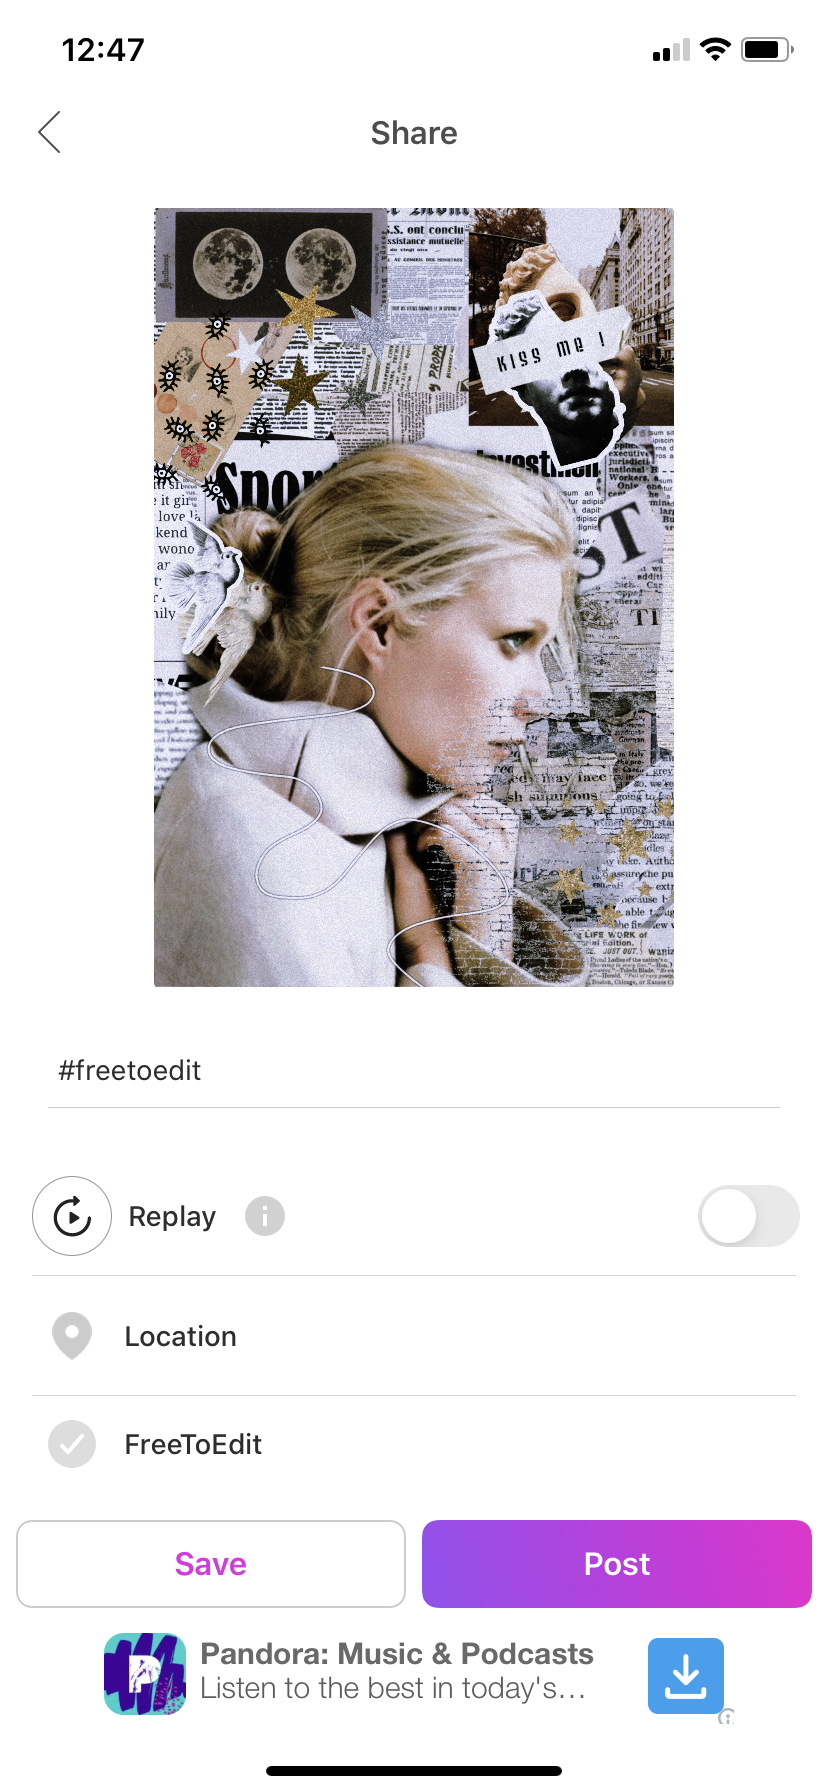
STEP TWELVE: download your edited photo.
→ you'll be brought to this screen. hit save and download to photos.
STEP THIRTEEN: upload to Phonto
→ tap the camera icon in the center bottom screen, it'll bring up a menu like this. then you'll want to tap photo albums.

STEP FOURTEEN: add the text
→ once you upload your photo, hit done in the next menu. (trust me, that menu is something you won't want to mess with). It'll load your photo, and once it's loaded, tap the photo anywhere. it'll say add text, and tap that. it'll bring up a text bar, and that's where you'll type your title. after that, play around with fonts, colors, shadows, curves and tilts.
→ you download more fonts by going into google/safari/or whatever and to dafont.com, find the font you want (and make sure it's free) then tap download. it'll prompt you from there.
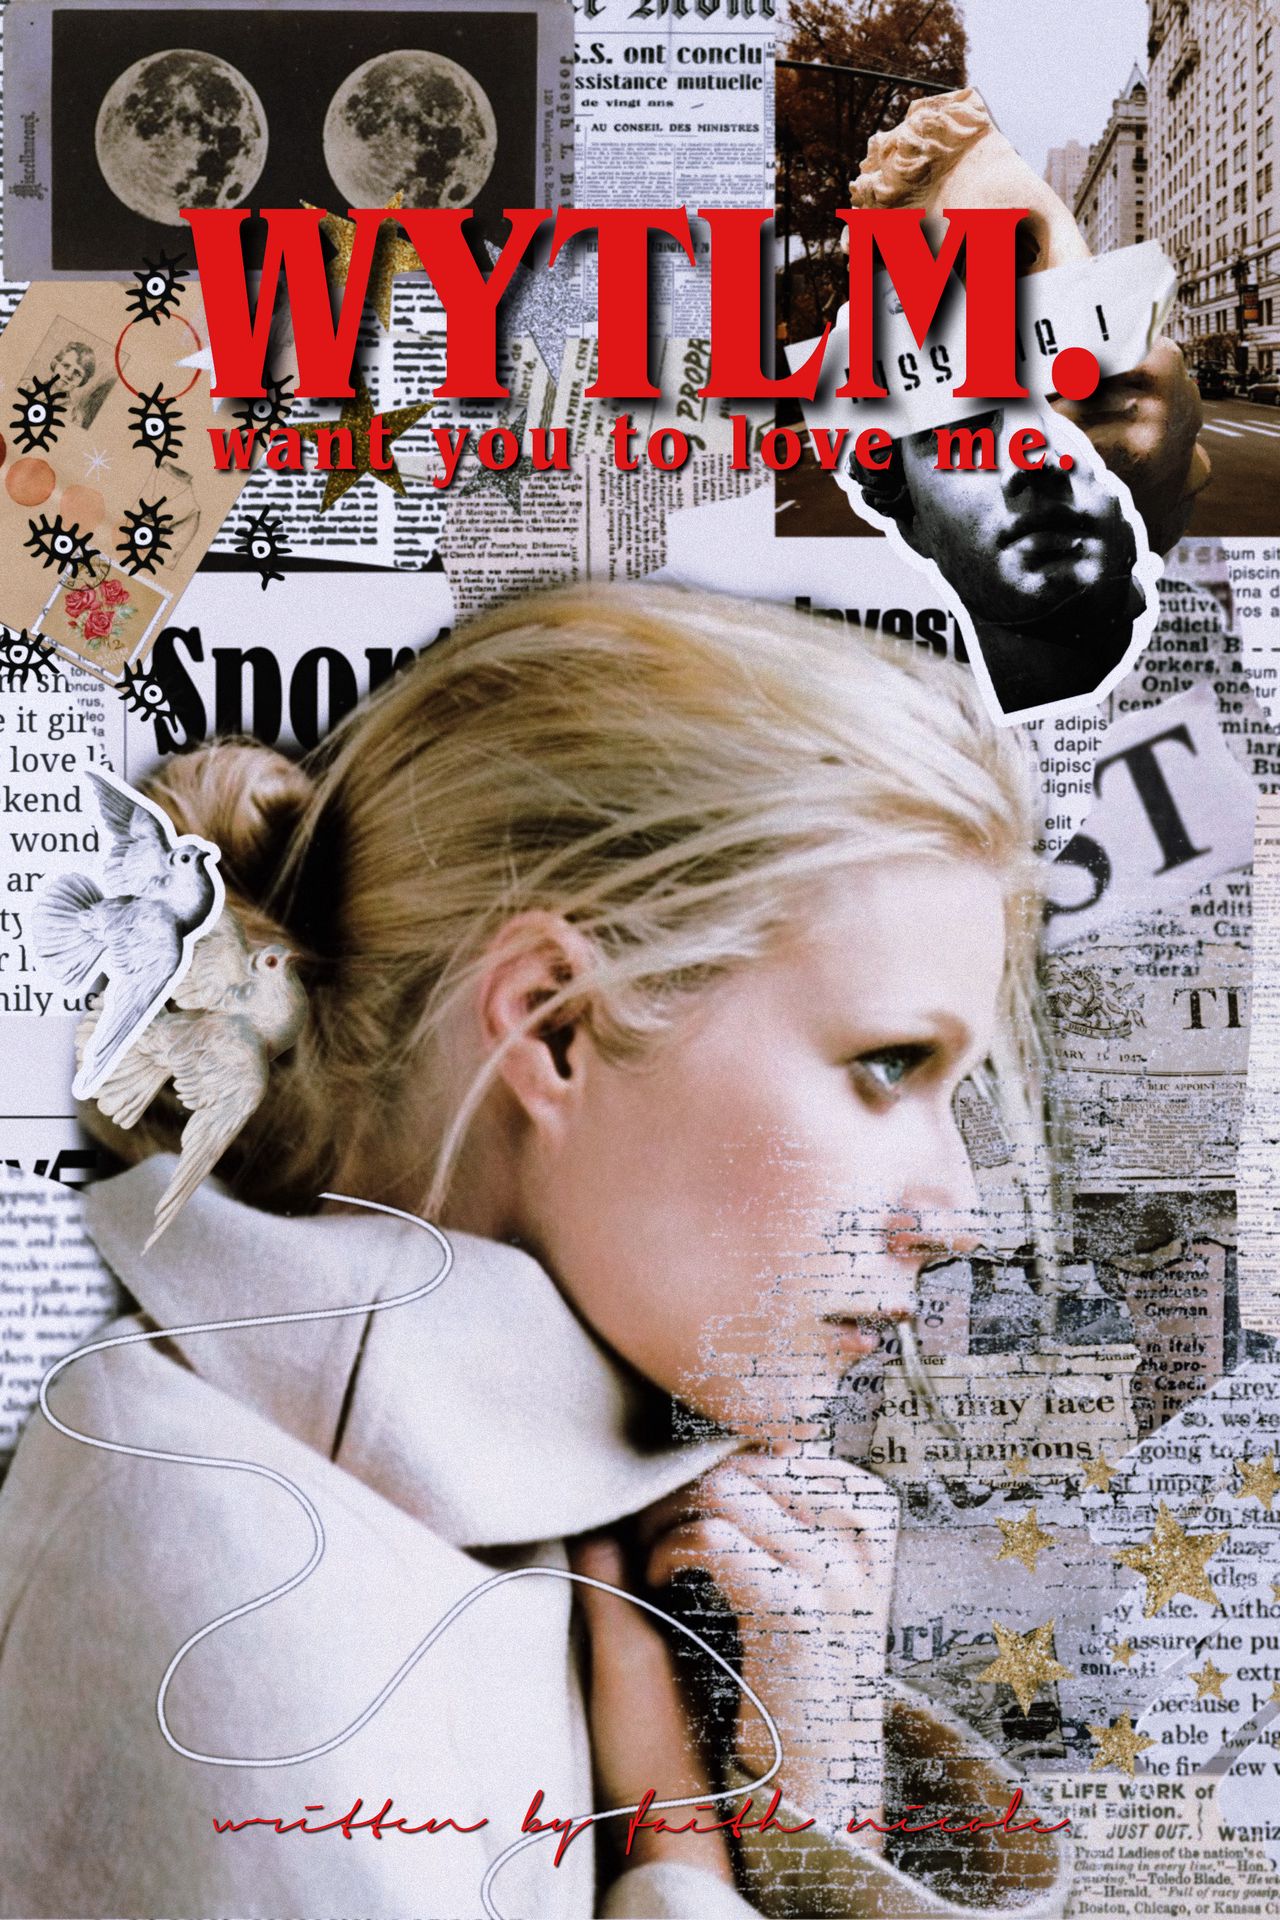
MY FINAL PROJECT
SUGGESTIONS
- play around with the apps and find what you're comfortable with.
- these apps are free, but not all the features are free. if you decide to keep the free version, you can still make a ton of cool stuff.
- play around with everything you can.
- practice practice practice!!!
- if you need more ideas or tips to work the apps, go to google or ask someone! these apps aren't always easy right off the bat. that's okay!!
- don't feel obligated to share your creations with the community, only share if you want too.
- use this app for more than covers! I use PicsArt for most it graphics that I show! my covers, my manips and my banners! (I use Photofy for my aesthetics)
so, if this made any sense, I can do another tutorial that doesn't involve the "replay on my image" and I can show you guys how I make my covers.
Bạn đang đọc truyện trên: AzTruyen.Top