Tutorial Two: Skin Text // PicsArt
Creator of Tutorial: April
Program(s): PicsArt
Time: Um... Fifteen minutes?
Requested by:
1. Get your picture:

And start with a white background:
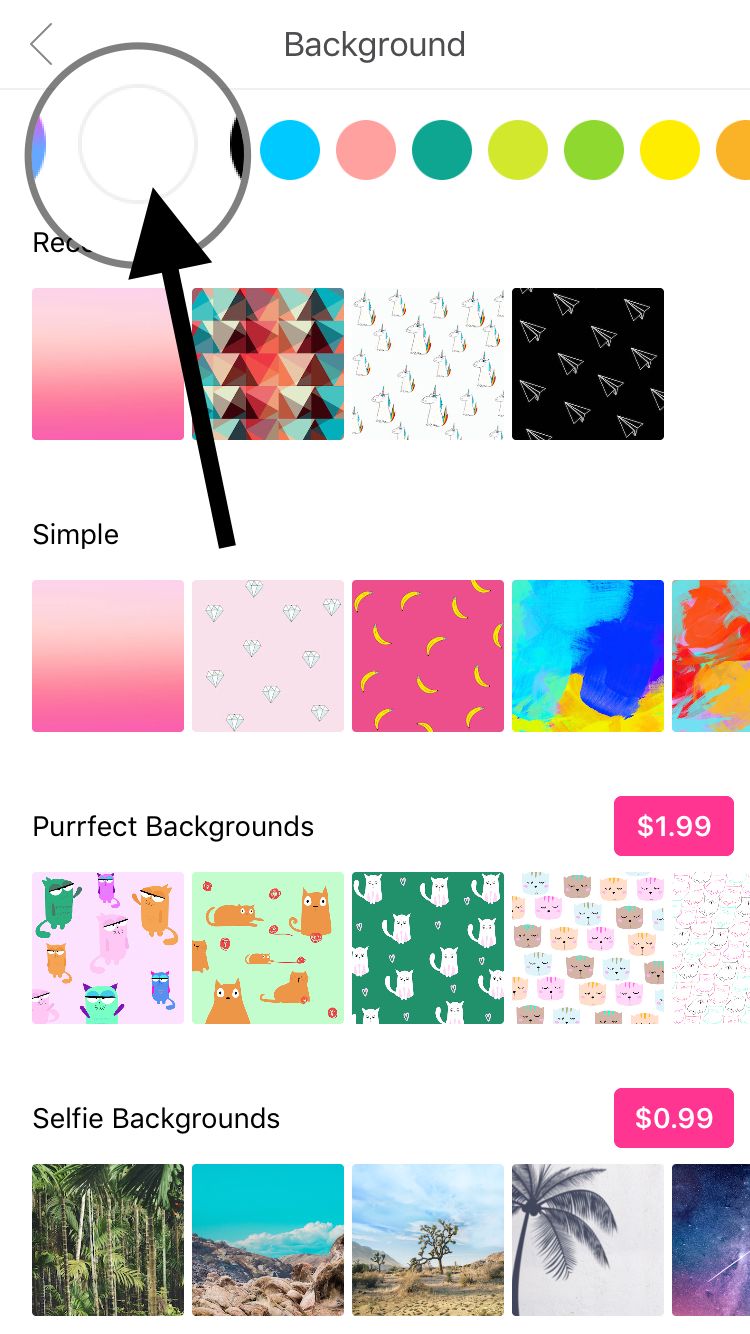
Crop it to 1311x2048. Its the same as 512x800 but larger.

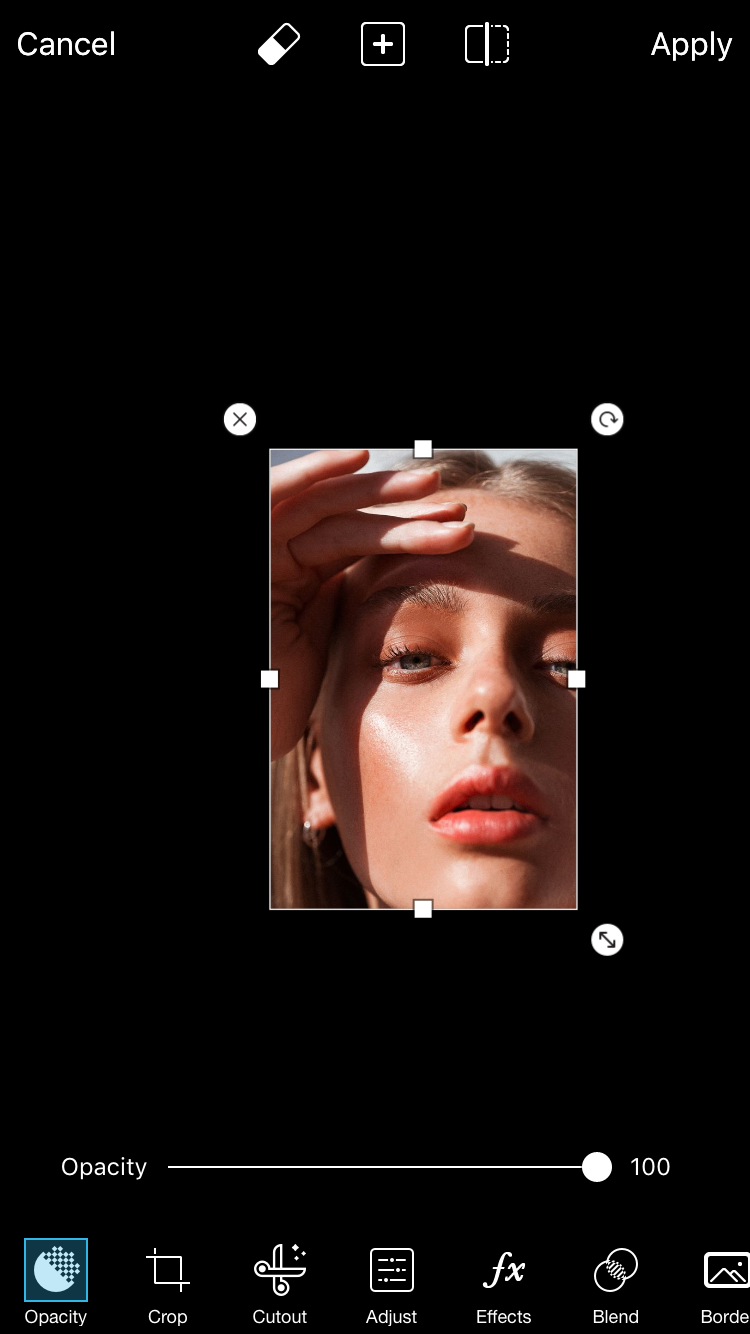
Add your picture:
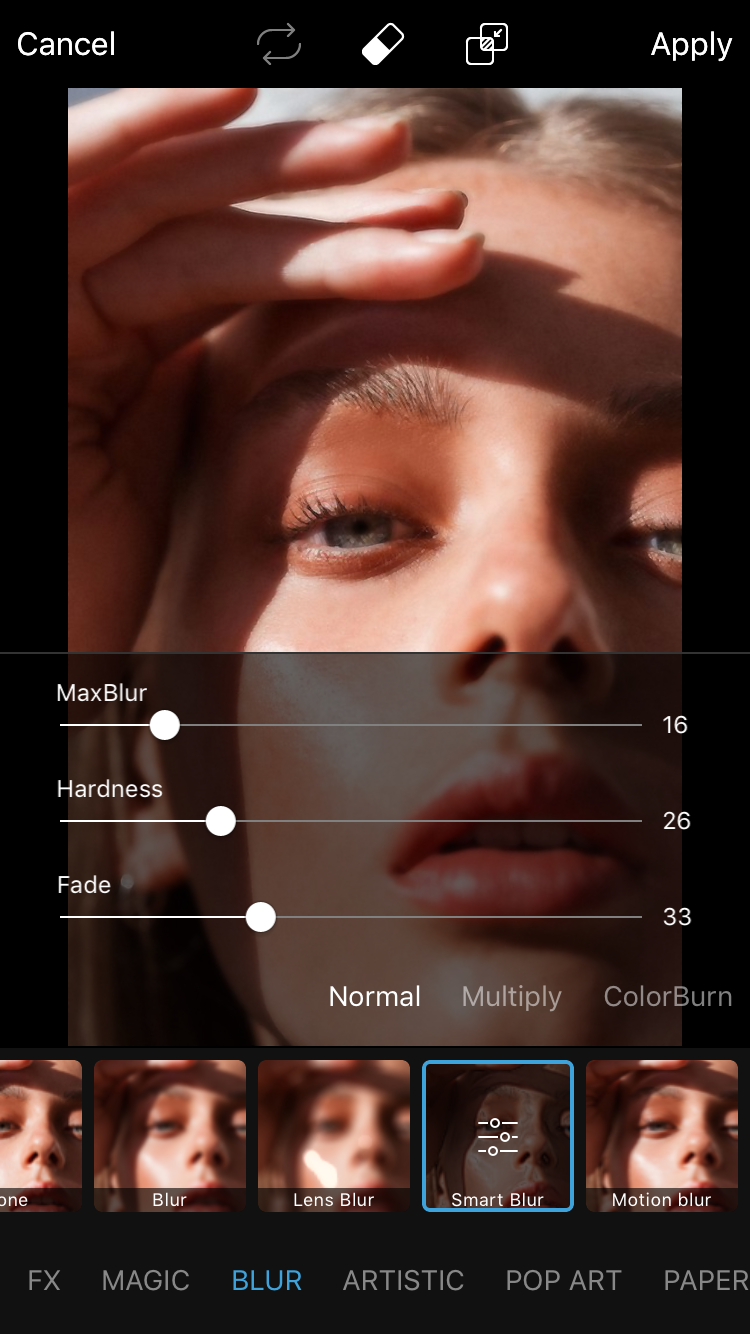
And then add the Smart Blur filter, with the following adjustements:
Now save it. Then just select a picture-any picture, as long as it's big- and go to draw, then draw all over it, and press the mode Xor:
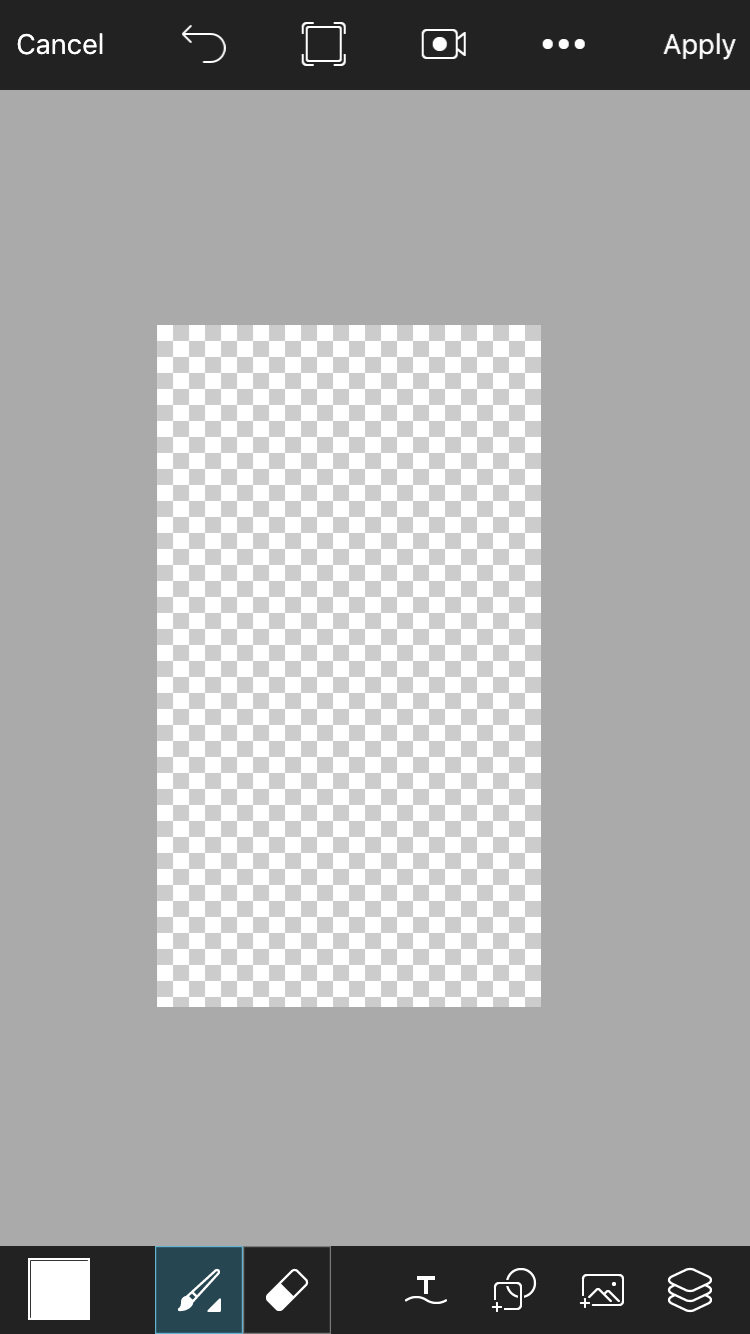
This will make it a blank png. Now save it, go to Phonto, and select that blank png.
Type your text in:

Go to PicsArt and pick your cover and choose your text png and put it on the cheek of the picture:
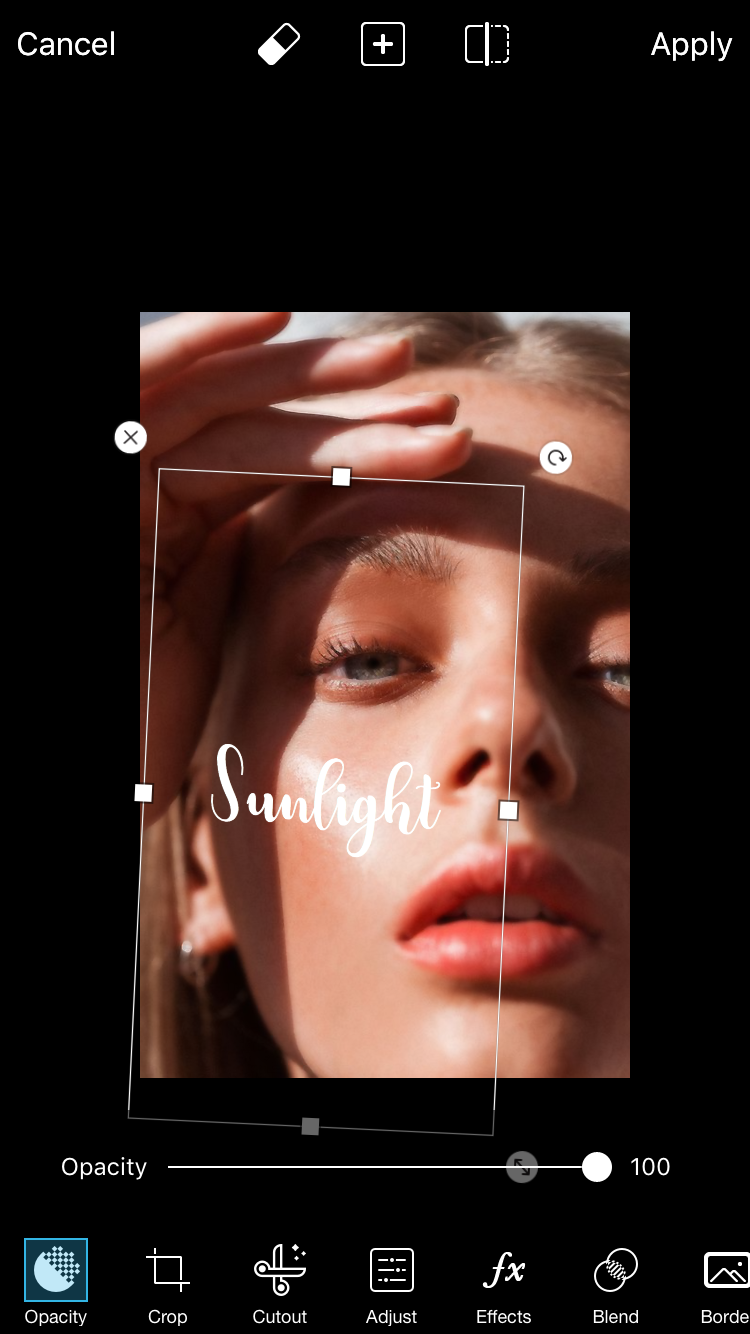
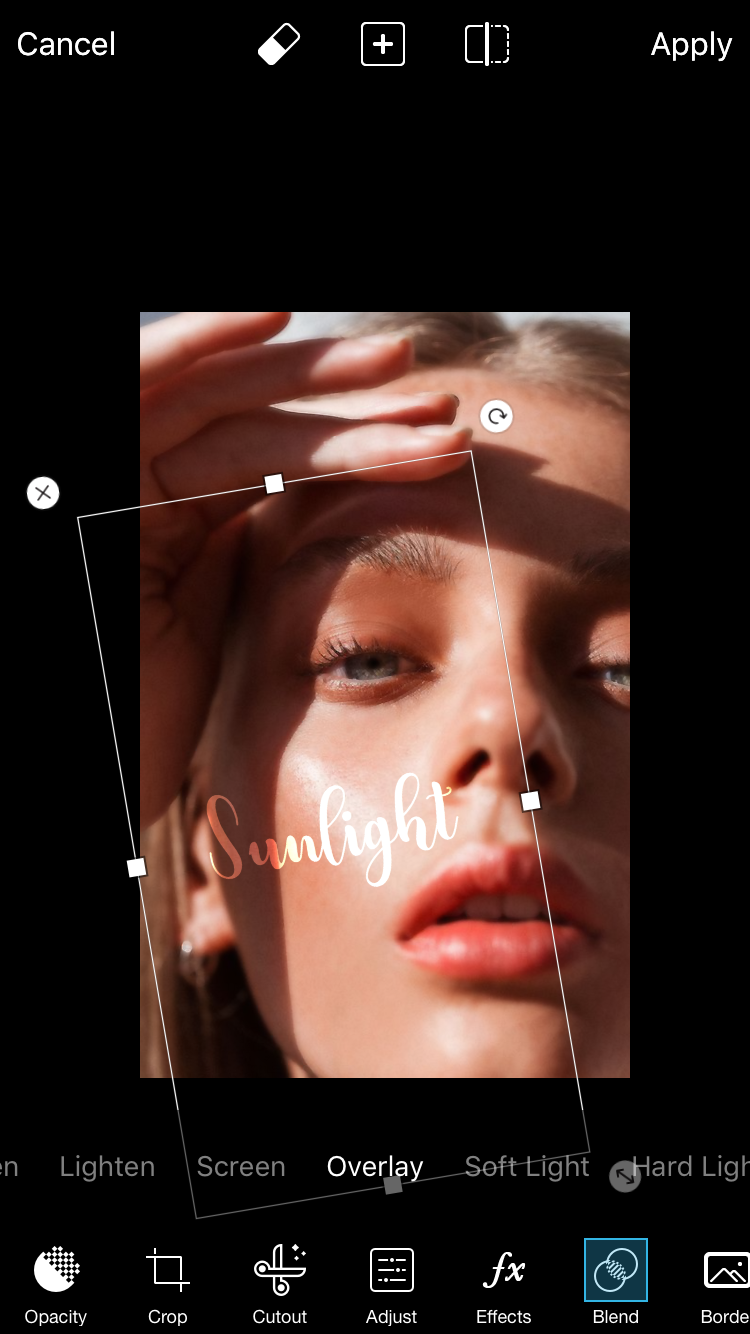
Then choose Overlay for your blend more:
There! You're done. You can see I added a filter and the author's name and my watermark.
I used Cinzel for my watermark and Arial in all caps for the author name. The filter was from Polarr.
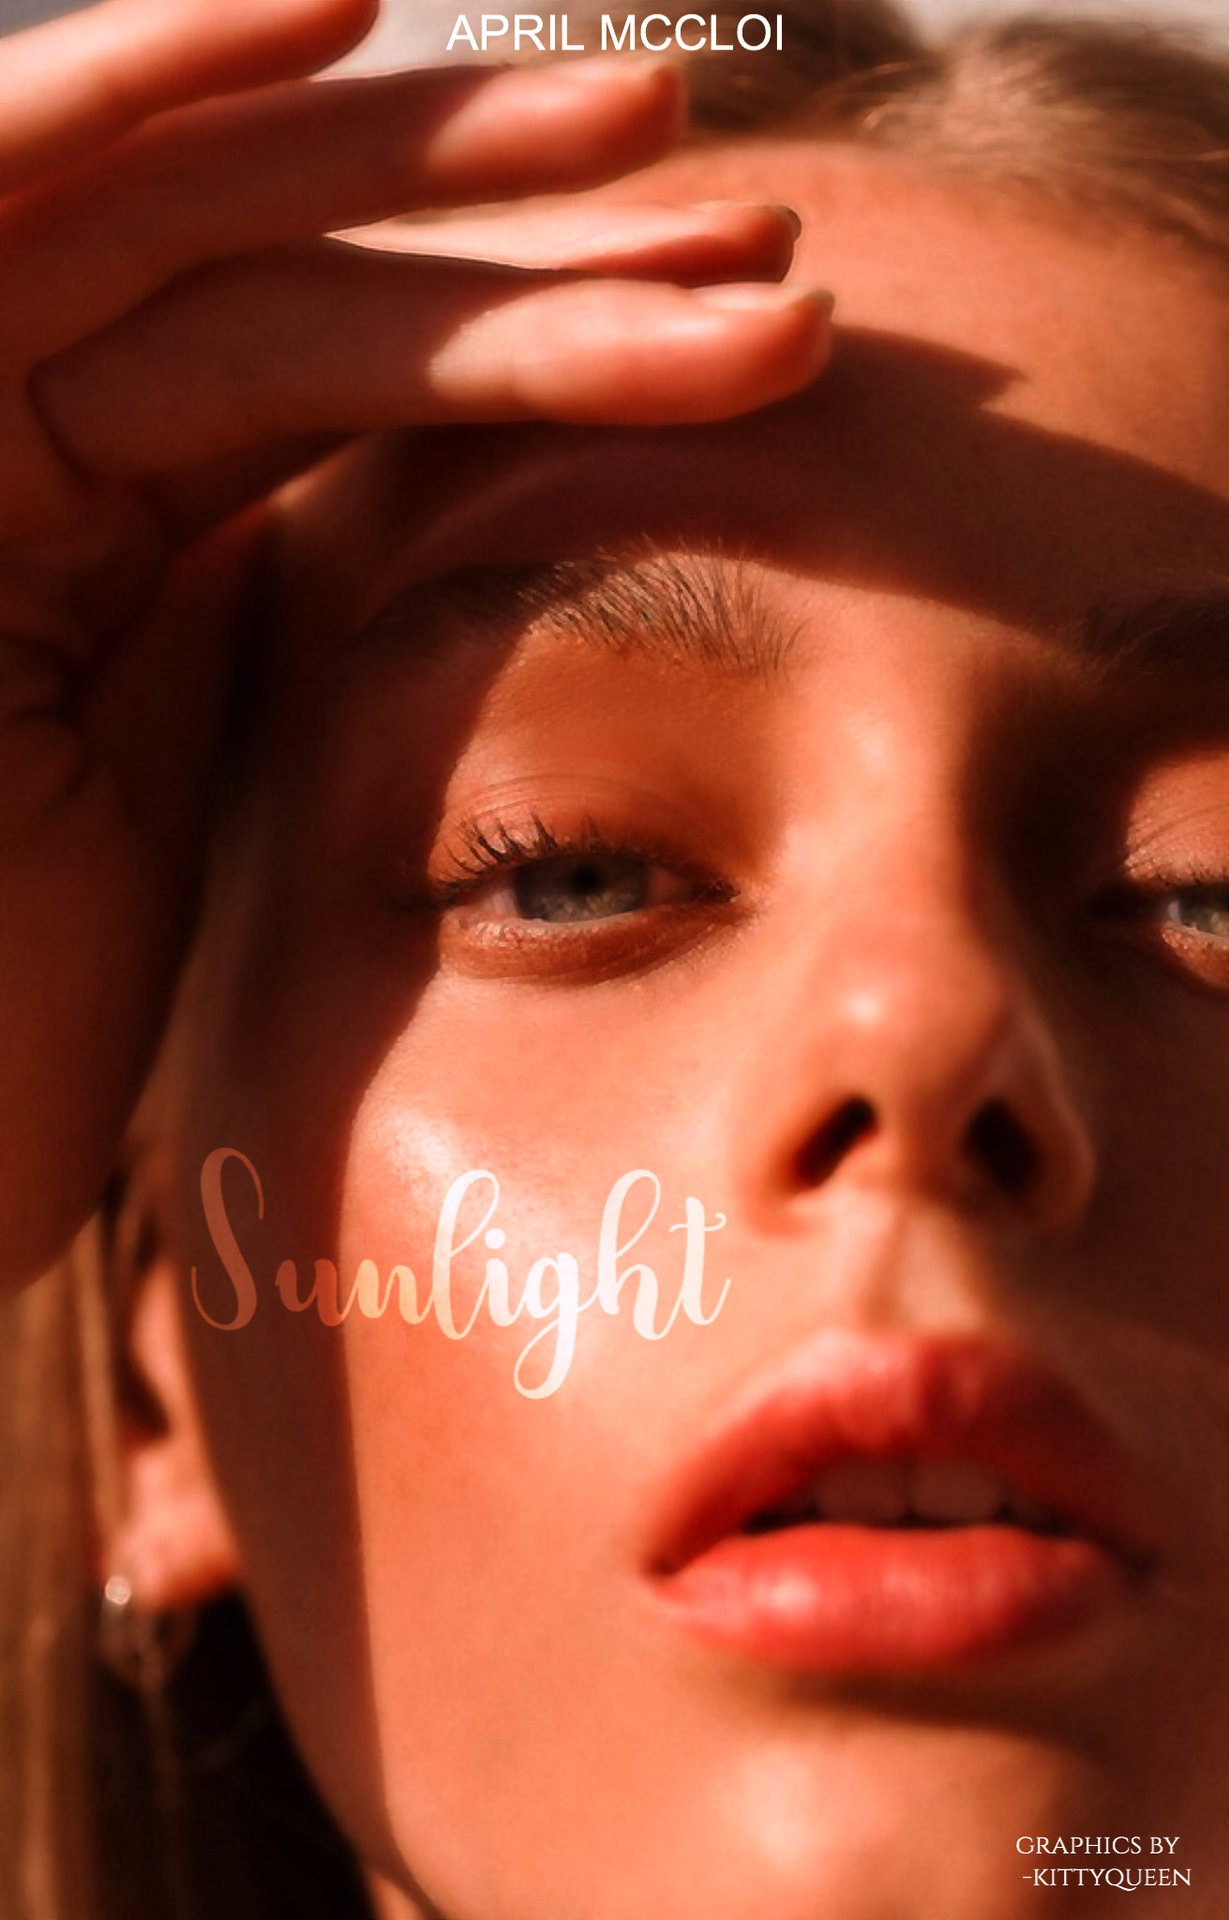
You can see that I'm not the best at simple covers lol
Bạn đang đọc truyện trên: AzTruyen.Top