♕Tutorial I + 100 parts!
I've received a few requests to do a tutorial, so here it is in conjunction of this post being my 100th published part! ^^ This wasn't easy, but I really hope you can all understand xD Ask me if there's anything you don't understand. The picture above will be the cover I'll be making a tutorial of. :) In this tutorial, you just need two applications: PicsArt and Phonto.
First, open the PicsArt app, click edit Edit and choose the base picture which usually, I prefer a blank background.
1st Image: Click the Add Photo icon where there's a "+" sign. Adjust the picture to your liking.
2nd Image: Click a icon which resembles a star, known as Shape Crop.
3rd Image: Choose the shape you wish to crop into. For this cover, I chose the one in strips. Adjust the cropping template according to your liking.
4th Image: Decrease the border size to zero. Then, click the "✔️" button to save it. You'll return to the editing page after that.

Now that you're done with the background, you'll be pasting the character of your choice on your cover. For this case, search for a render.
1st Image: Click the brush icon to transfer your picture to the Draw section.
2nd Image: At the top right corner, you'll see a stack of squares. That will show the layers of stuff on your picture.
3rd Image: The top layer shows grey and white tiles, that means a transparent base. Because it's transparent, you can see the second layer. Click the Add Image picture and select the render of your choice.
4th Image: Adjust your render. If you wish to add a shadow for your image, then go ahead to click the Menu which has three lines at the top right. If you don't wish to add a shadow, you may skip this step and the following steps until we get into the glossy part.

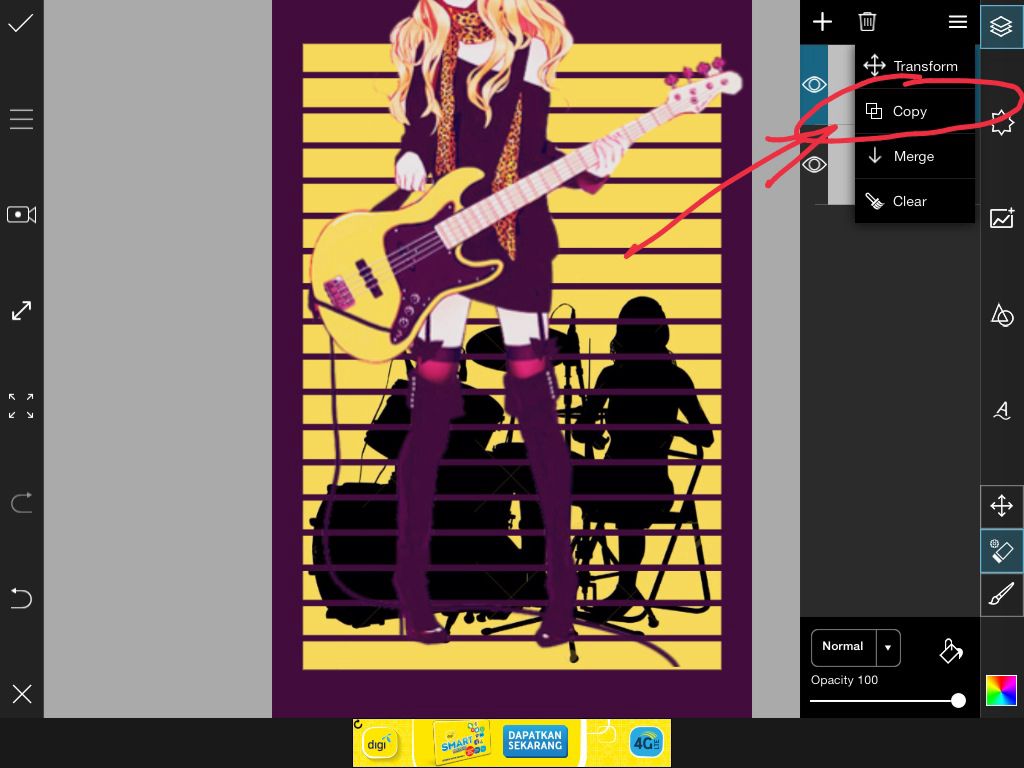
After clicking the Menu, a table will appear as shown below. Click "Copy". Ensure you have already selected the layer which contains your render and ensure that it's the top layer.
Great! Now that you have copied your render, you will notice that there are two similar layers on your table at the right. The second layer will be your shadow. Select it, click "Normal", then click "Xor" at the bottom of the selections.
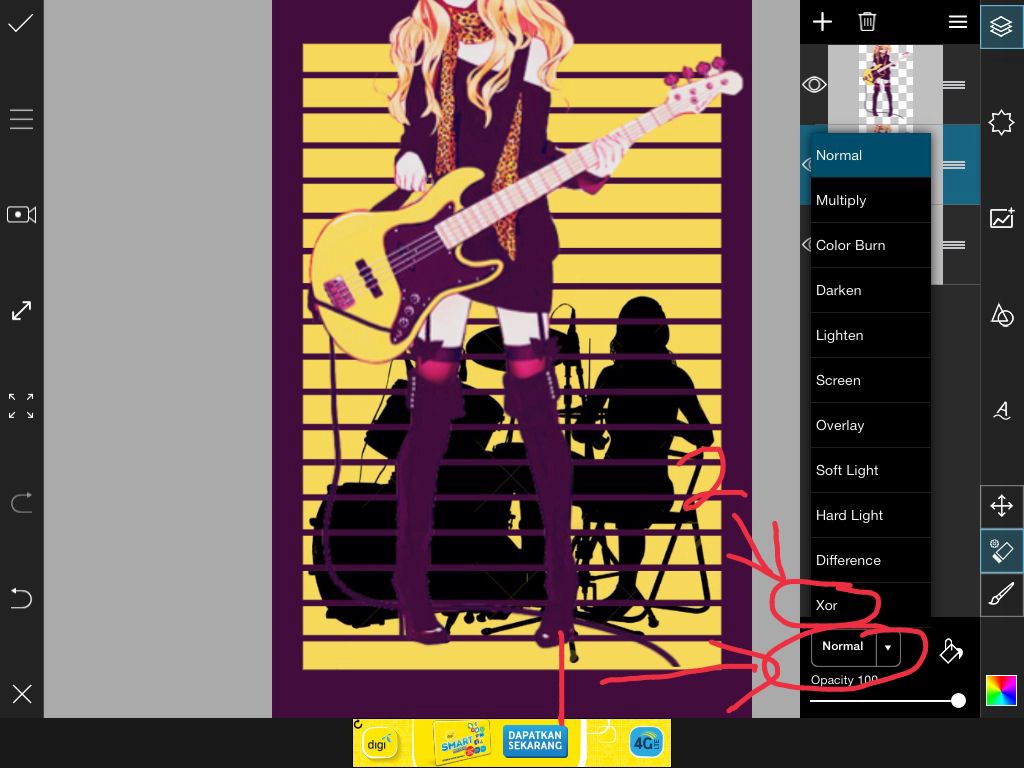
Nothing is supposed to happen yet. Did you notice there's a fourth layer in the picture below where there is a pale yellow screen? It's a step I have forgotten to do before I added the render, but you can always do it now. There won't be any images for this, so please read carefully.
Step 1: At the top left corner of the small table, you will find a "+" button. Click that, and a small table will appear.
Step 2: In the small table, click "Empty Layer". A sheet of grey and white tile will appear in your small table.
Step 3: Move the new layer to the bottom by dragging the side of the sheet which has three lines.
Step 4: Colour the empty layer with the colour of your choice.
Alright, now that the base is done, pick the second layer where you will turn your render into a shadow. Click the Menu again and this time, click "Merge".
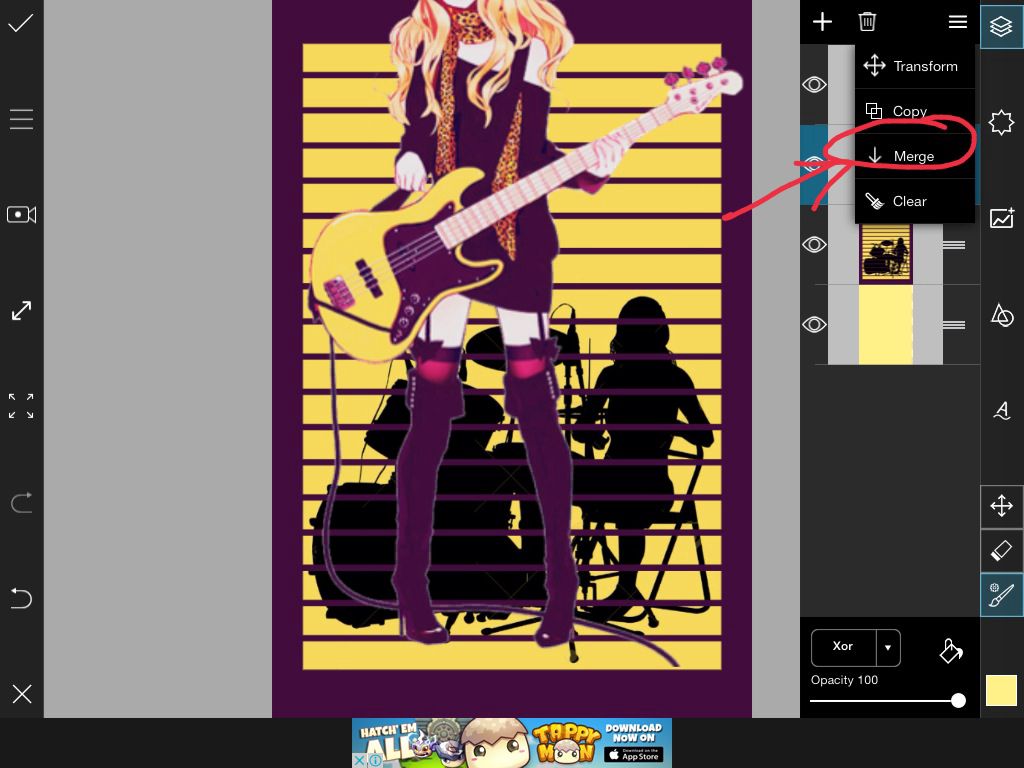
You will notice the changes on your small table. Click the top layer and select Menu. Then, select "Transform" to move your picture around. Move it a little to the side to reveal your shadow. There's no picture of the product because I forgot. :P
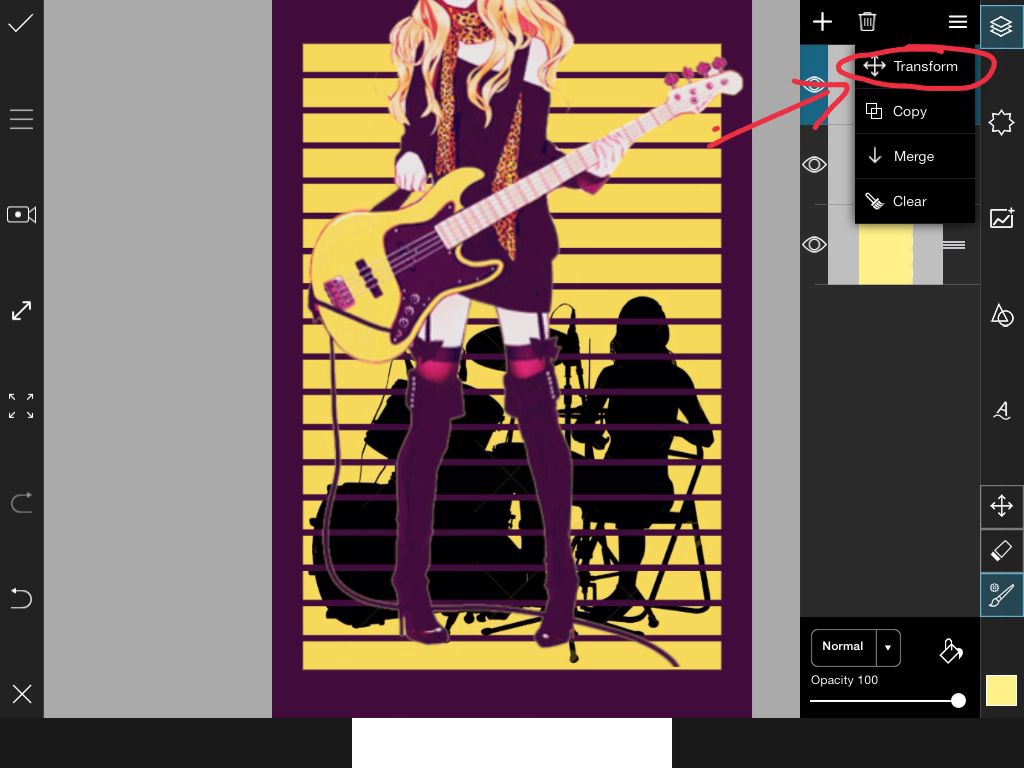
Now that you're done, it's time to apply the glossy effect! If you don't want it, skip this step.
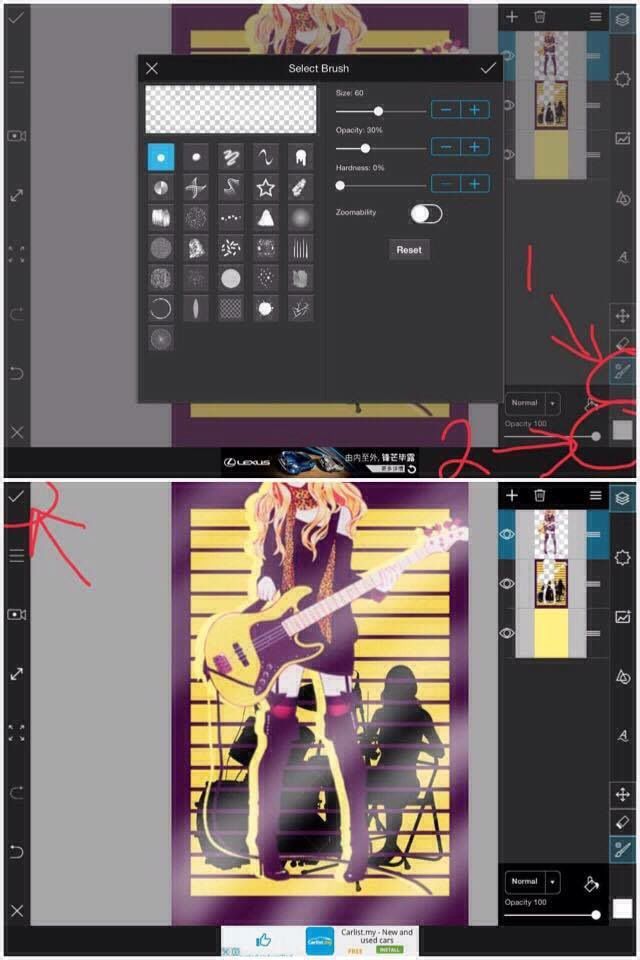
1st Image: Click the Draw button which resembles a brush. Select your desired brush and adjust your brush settings. After that, pick the colour of your choice by clicking the square at the bottom right. Draw streaks on your picture according to your liking.
2nd Image: Click the "✔️" to save your product on PicsArt! You're done! You'll return to the Edit page after this.
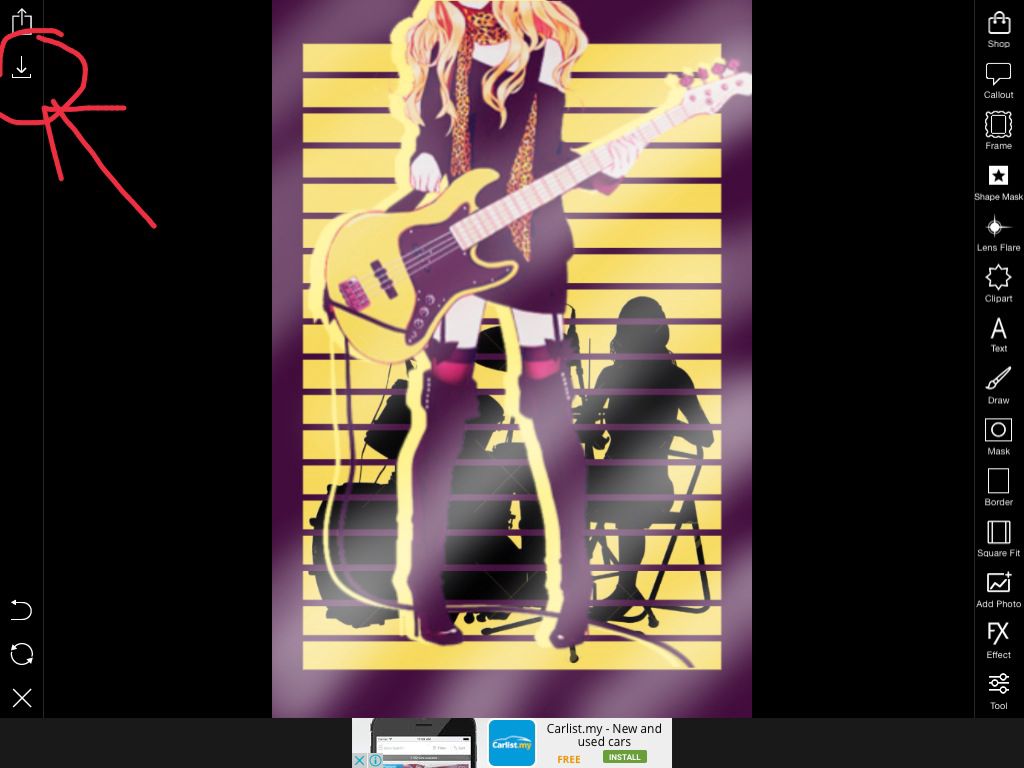
Here you are, back to the Edit page. To save this picture in your album, click the Save button at your left.
Great! Exit PicsArt and go to Phonto. Select the camera button and click "Choose Photo" from the table which will appear.
1st Image: Click anywhere on the screen and an "Add Text" bubble will appear. Click that, enter your text and select your font.
2nd Image: To change the colour of the text your give any effect to it, select the particular text and select "Style".
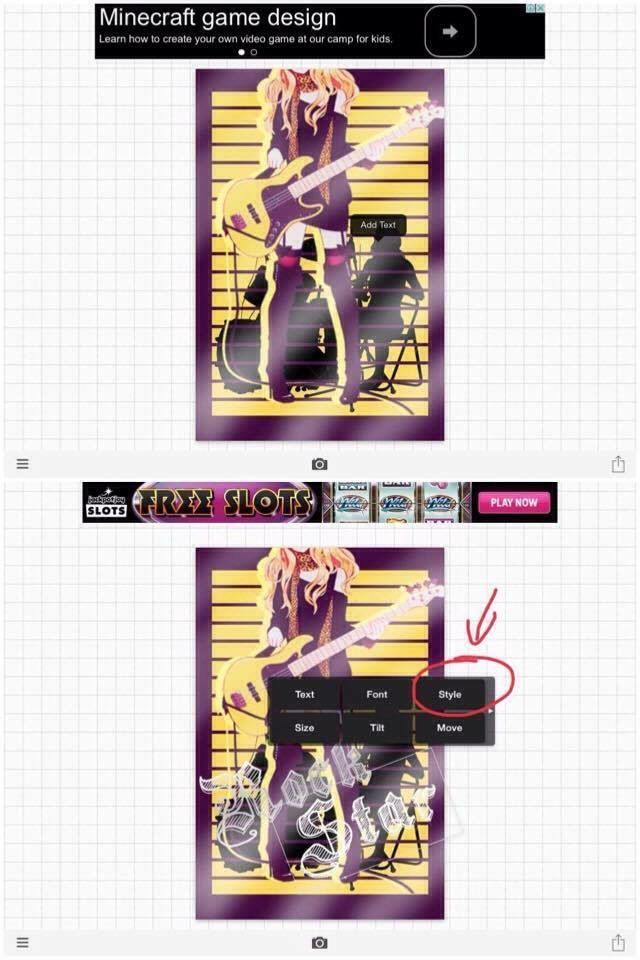
This box will appear. If you just want a solid colour, just go ahead to choose any. If you want a colour pattern, follow these steps.
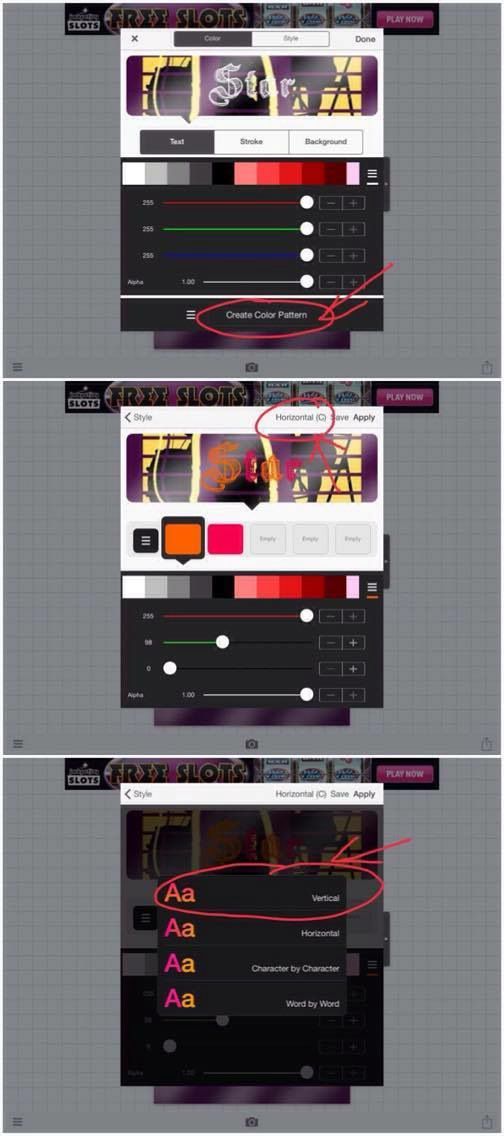
1st Image: Select "Create Colour Pattern" at the bottom.
2nd Image: At the top of the box, click "Horizontal (C)" to change how you want your pattern to be arranged.
3rd Image: For this cover, I'm using the vertical arrangement. You can select the colours you wish for the pattern which I'll not show because I forgot to screenshot that part.
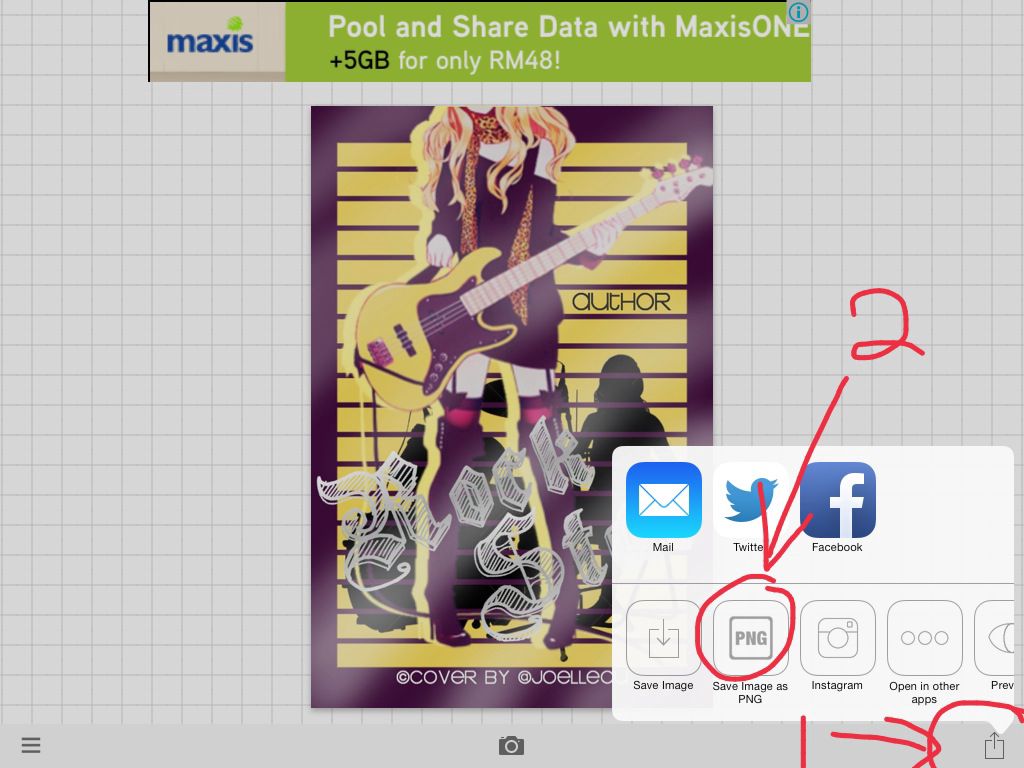
Insert the rest of the texts and you're done! Select the Save icon at the bottom right, then click "Save Image as PNG" for better quality.
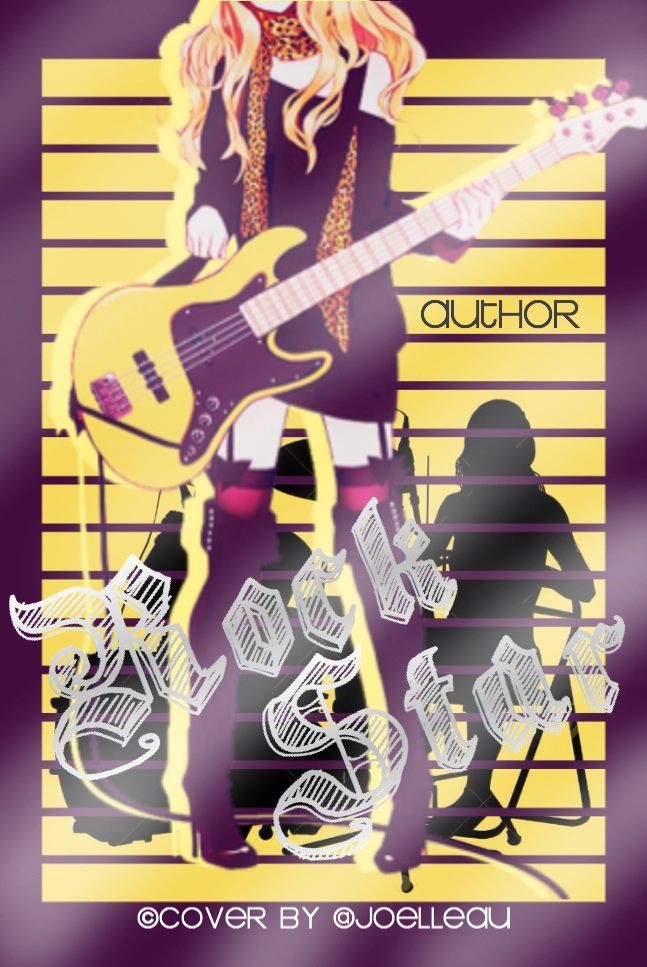
TADAAAAAAA~~! This should be your final product if you followed every of my steps. :)
GOOD LUCK~~!
PS: Please tag me if you're inspired by this tutorial or if you followed these steps to make a cover. :)
Bạn đang đọc truyện trên: AzTruyen.Top