002. Gifs
[ Tutorial type: skill ]
[ Program: Photoshop ]
EDITING GIFS ETC
A few people have asked how to make gifs etc with text, or how to edit them in general. I really hope this helps, and if you need further help after this whayever has an amazing video tutorial (which I learnt from), which I will put in the external link.

STEPS
1. Go to google and find the gif you would like. Save this gif, and make sure that it is saved as a gif image otherwise this will not work (obviously).
2. Open up your gif in photoshop. It should look like the following:
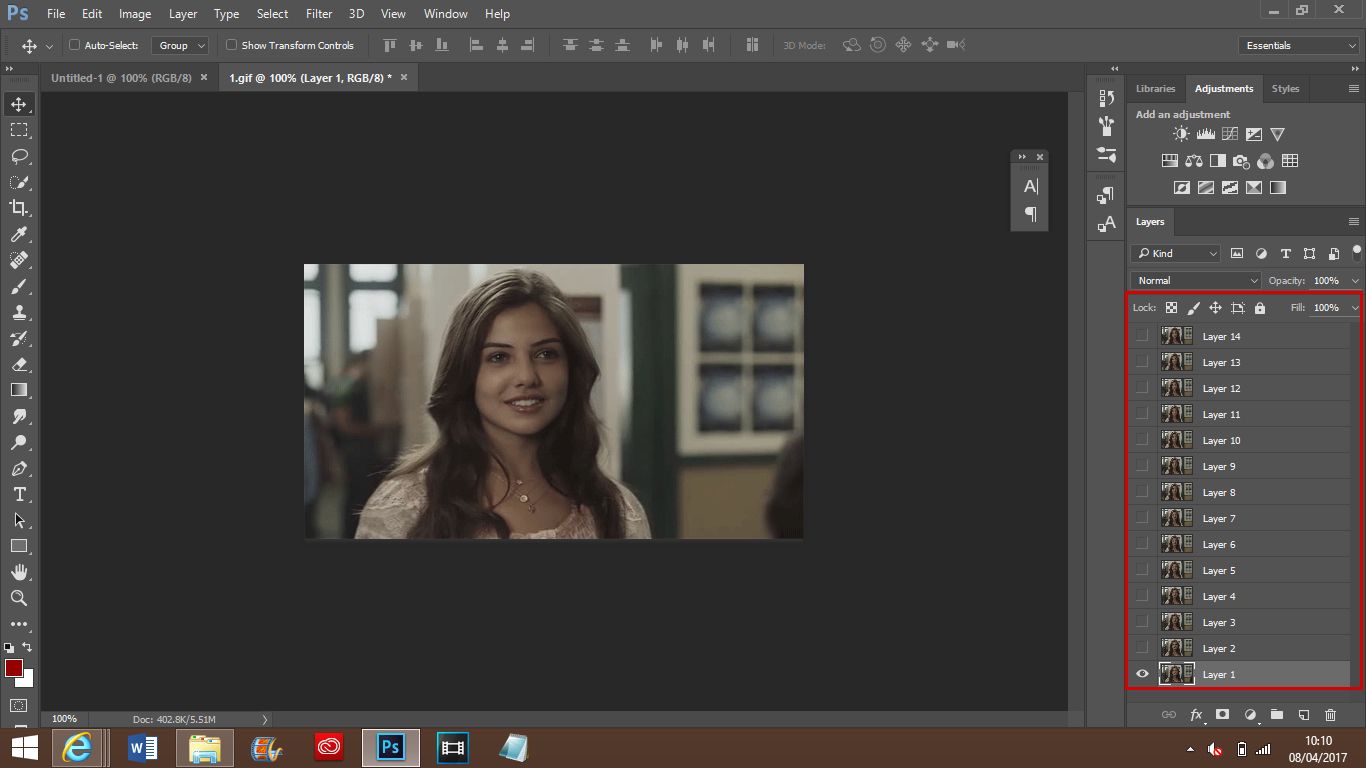
3. Next click the top layer (or whatever layer you would like your gif to finish at), and click this. Then hold down shift and click on the bottom layer. You will now see that all the layers have been selected.
4. In the bottom right corner of the application, there is a little folder icon. Click this, and you will see that the layers have all been placed in one folder. This makes it easier to move to your canvas.
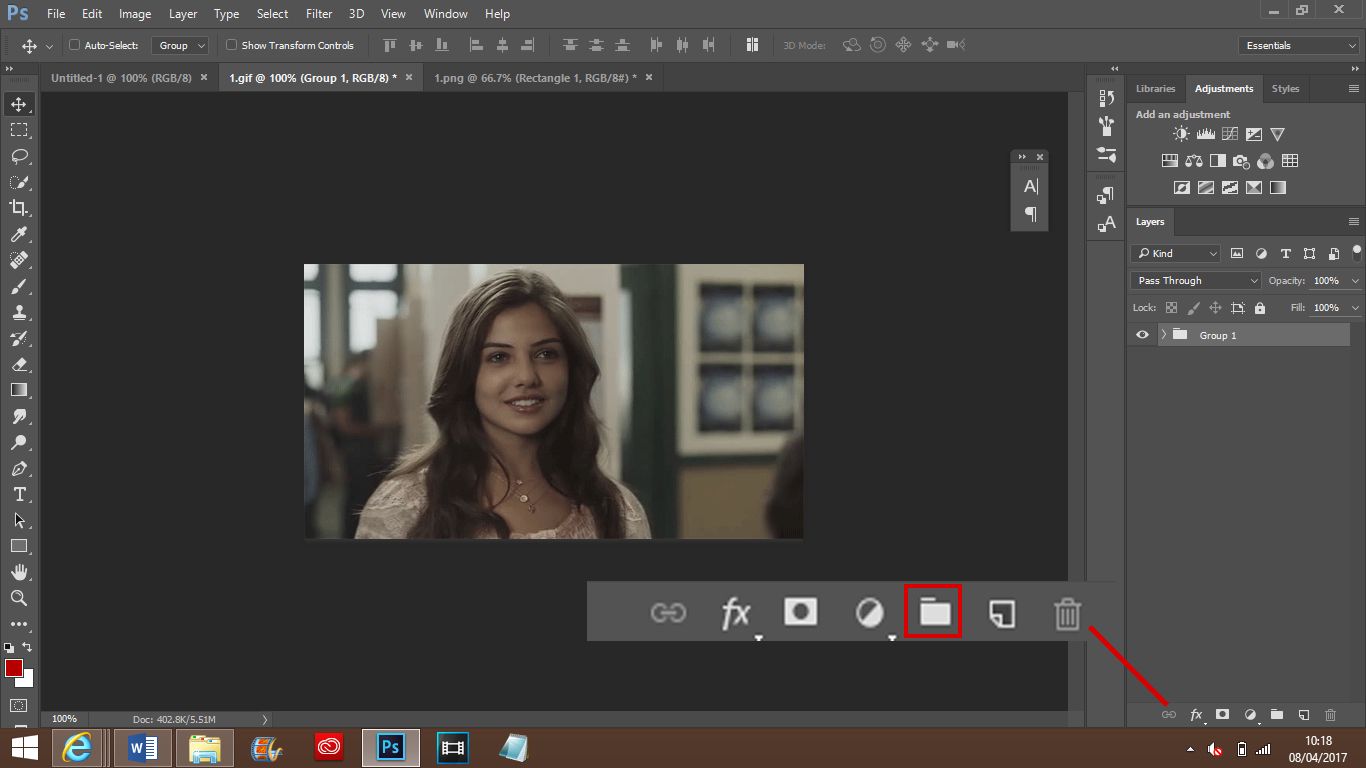
5. Now drag the folder to a new canvas, with the dimensions of your choosing. The canvas size I have used in this example is 400 x 150. Once you have dragged the group, move it as you please. You can also enlarge it/make it smaller by doing control + T.
6. Go to the type tool and type the text you would like. Make sure that this layer is above the gif group. You can also add PSDs to change the colouring, and any other layers you wish.
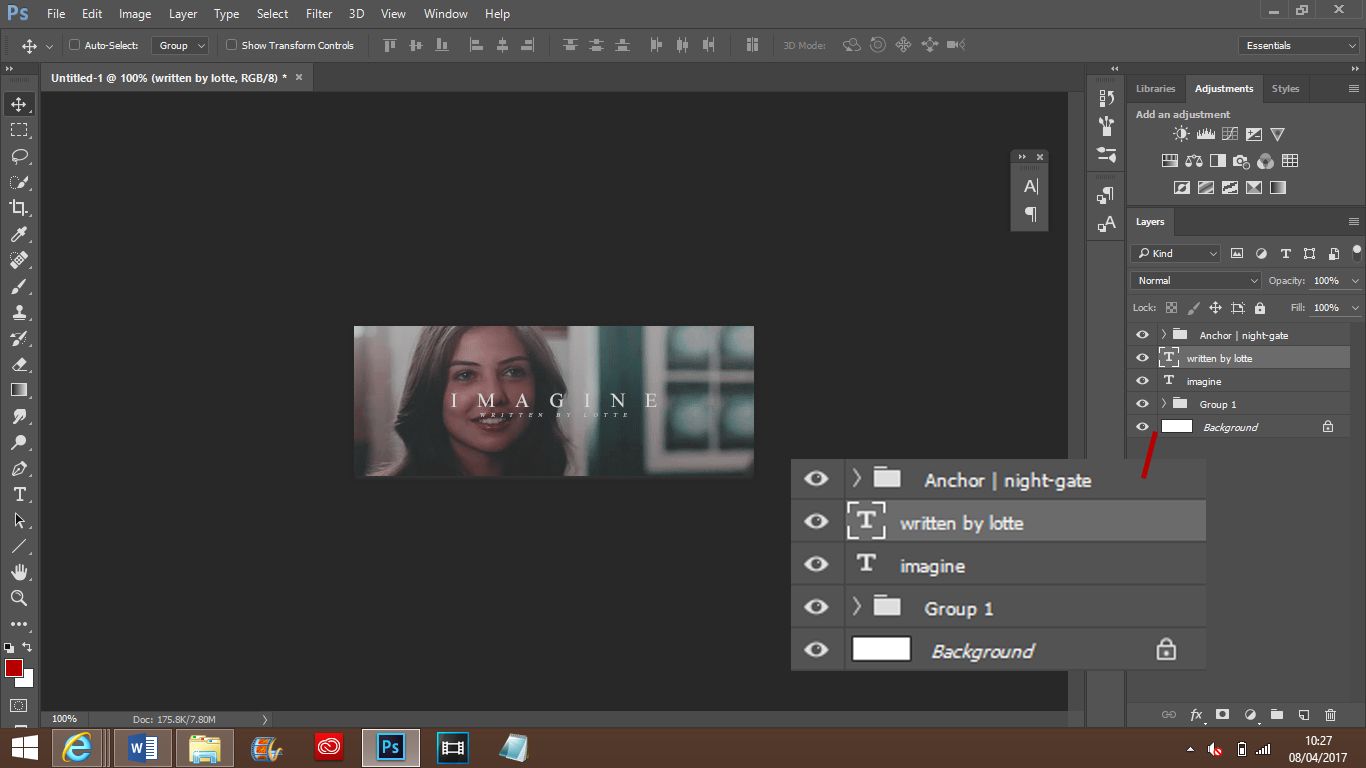
7. Now for the tricky bit. Make sure that you're 100% happy with the look of your 'gif' before you start this step.
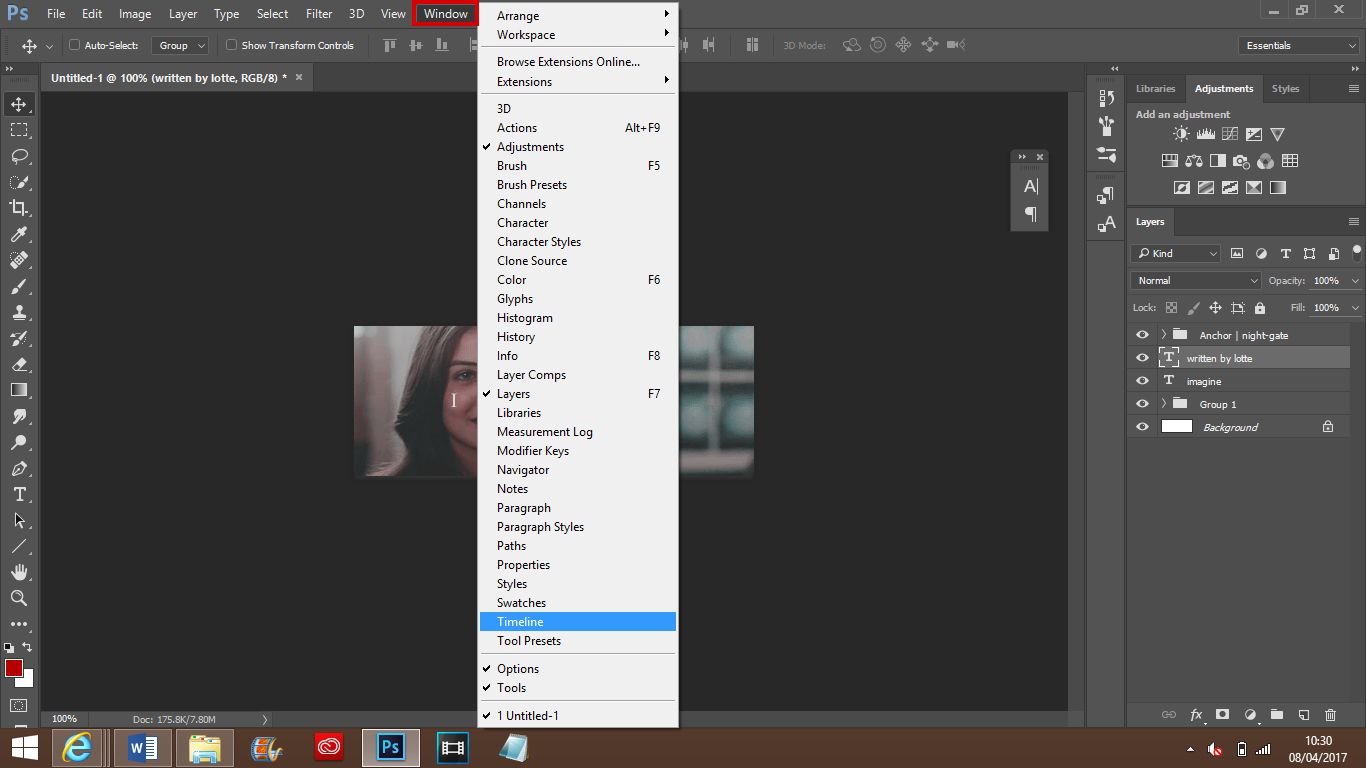
Go to the toolbar along the top, and click on 'Windows,' and then go down and click on 'Timeline.'
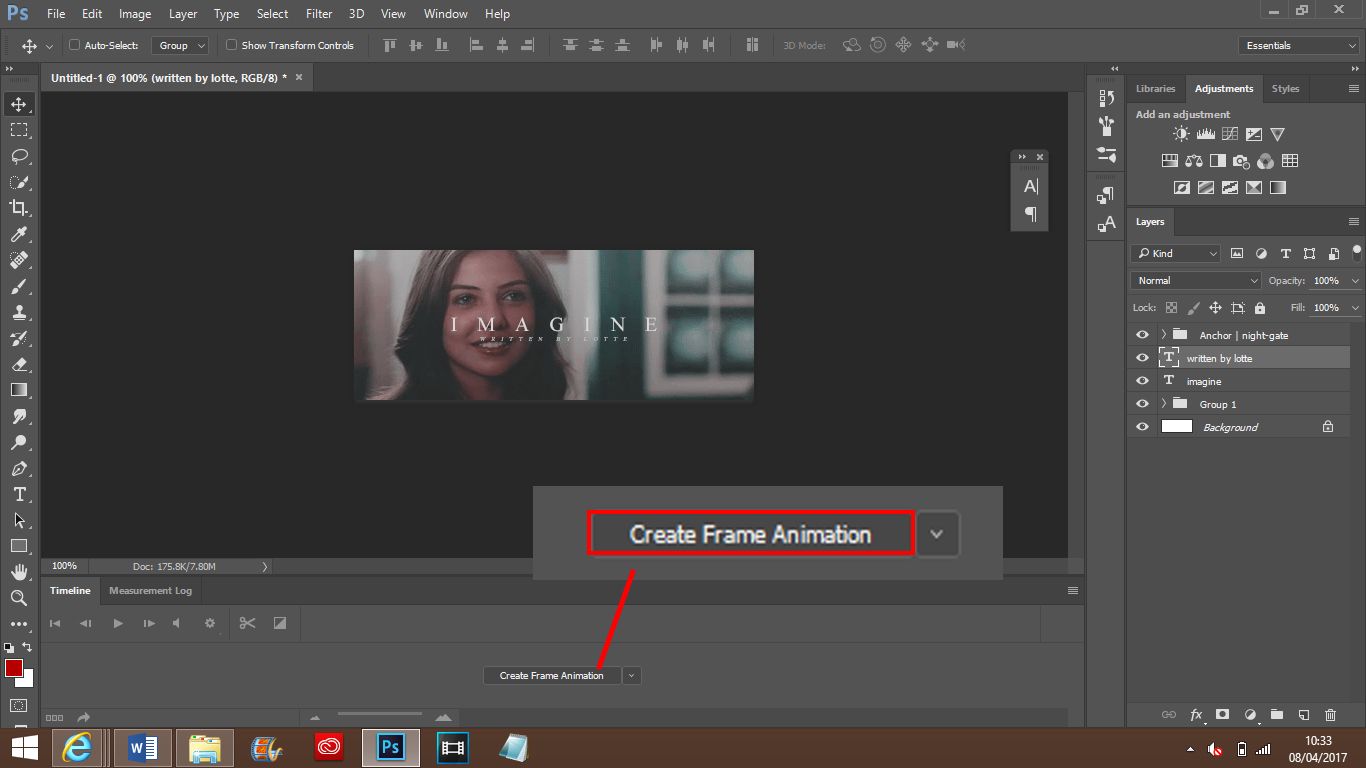
8. The screen will appear as shown below:
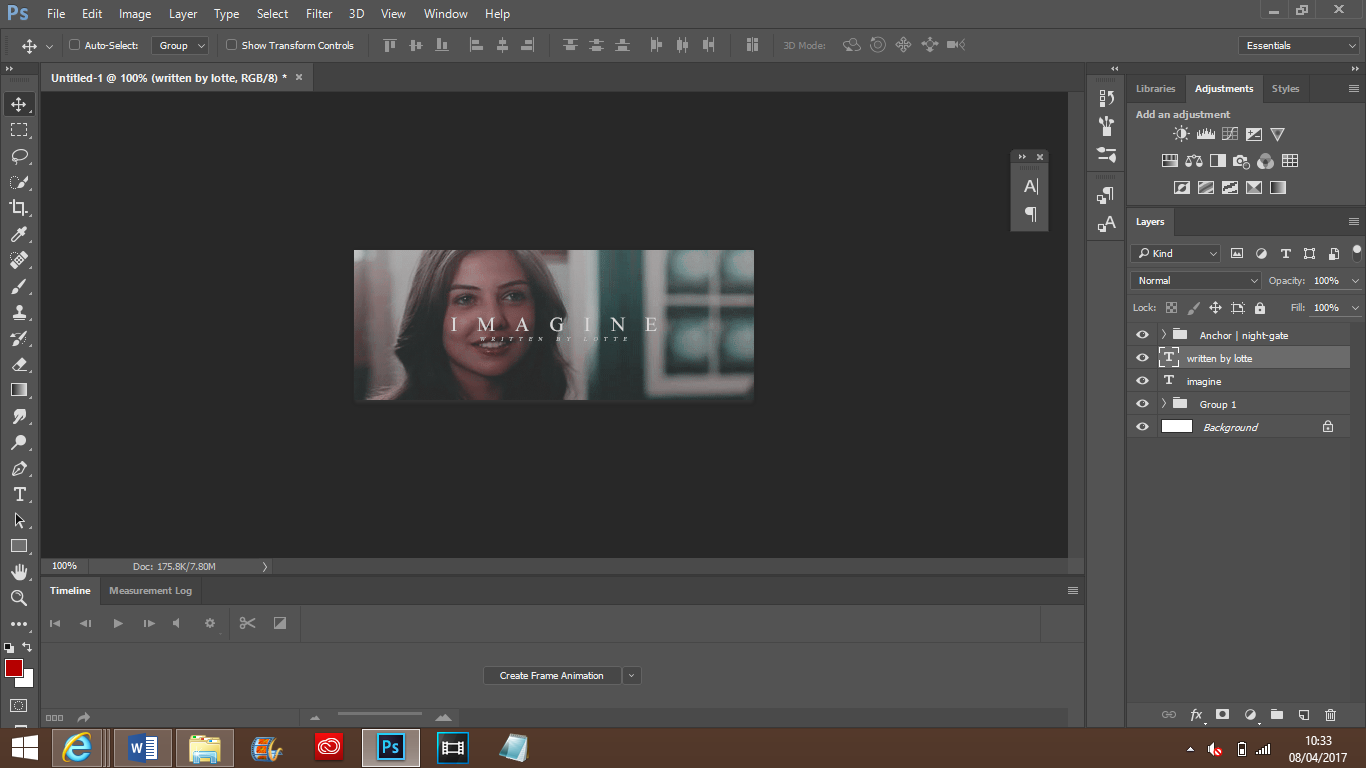
Click on 'Create Frame Animation.'
9. The bottom part of ps should then appear like so:

Now along the bottom of the timeline panel, click the button shown below. This will create a new frame.

10. Now that you have your new frame, expand your gif group folder, and go down until you get to the layer with the view icon on it. Now click on the little eye icon next to the layer above it to make it visible.
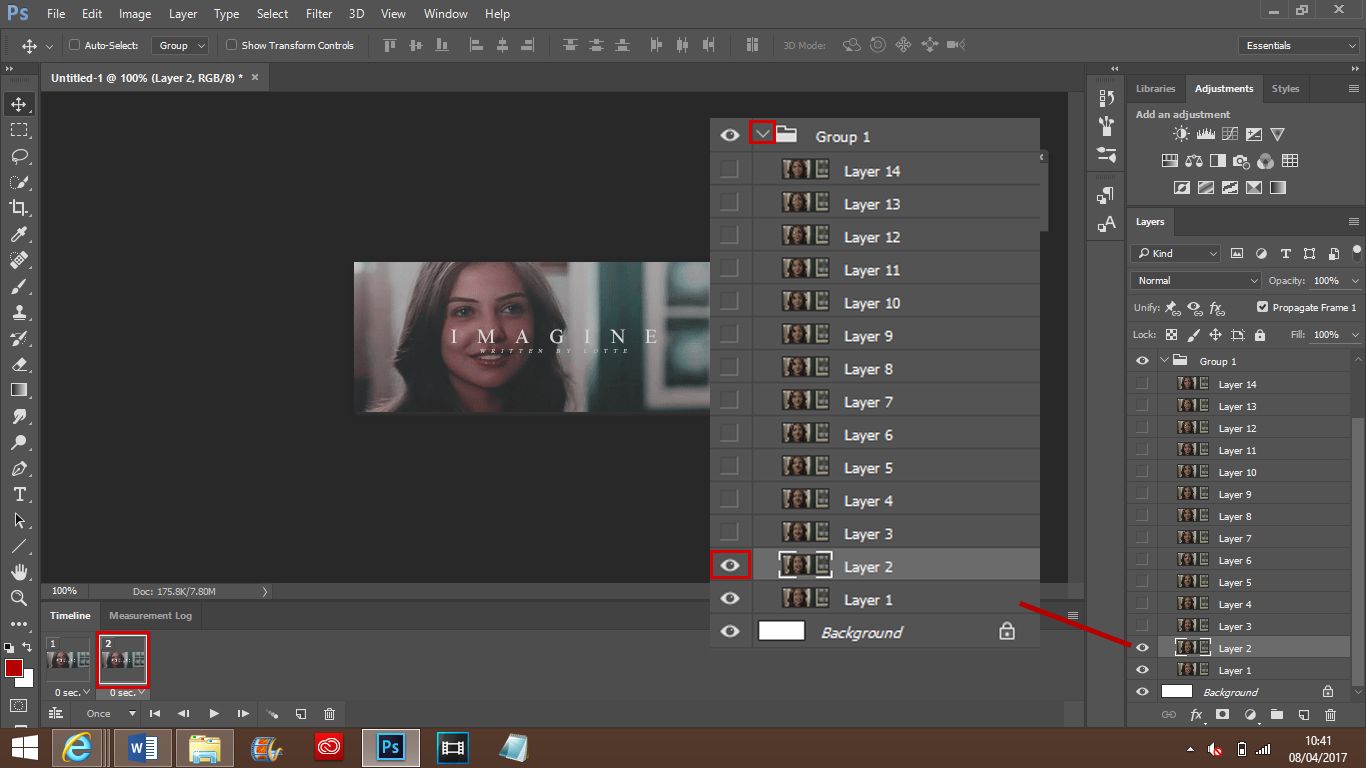
11. Create a new frame and make the next layer in the gif folder visible, and then repeat until all of the layers have been made visible.
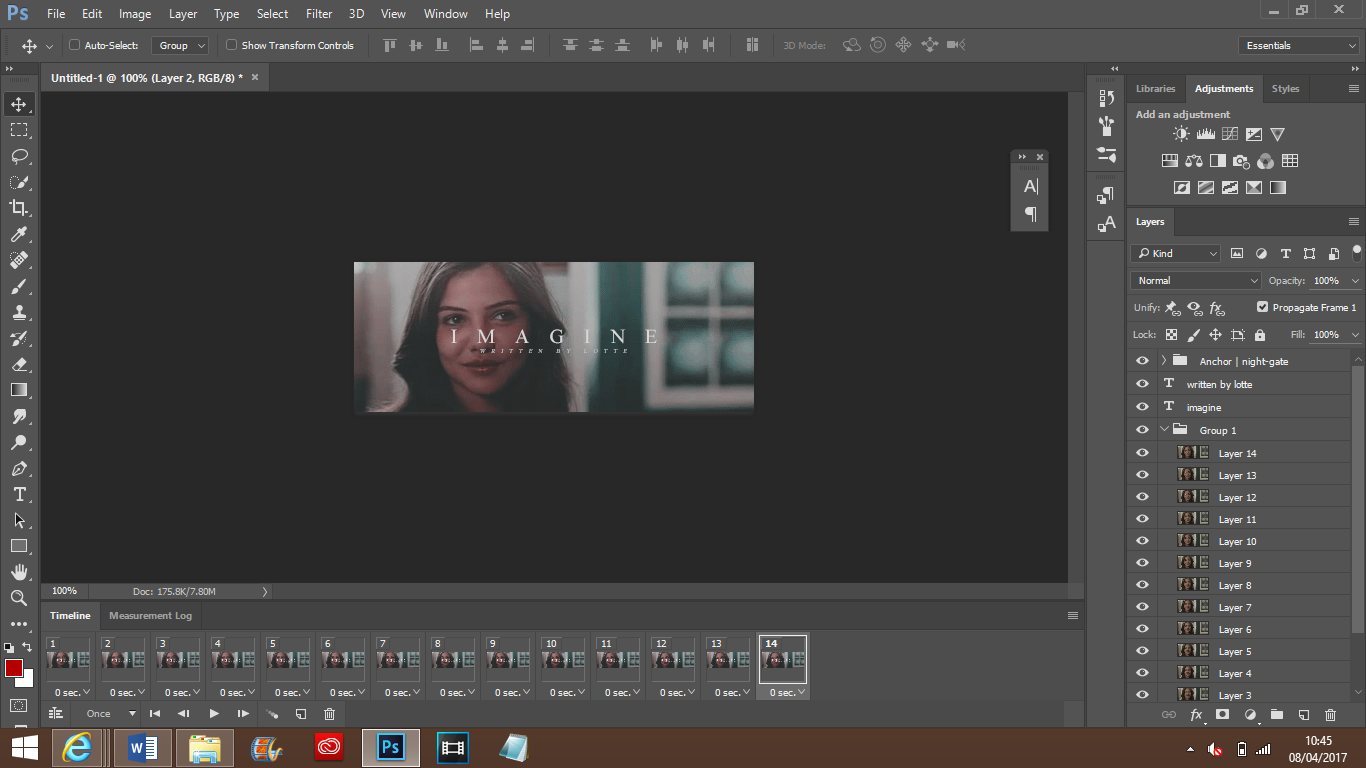
12. Now for saving the gif. Go to the toolbar along the top and click on file, then export, and save for web (legacy).
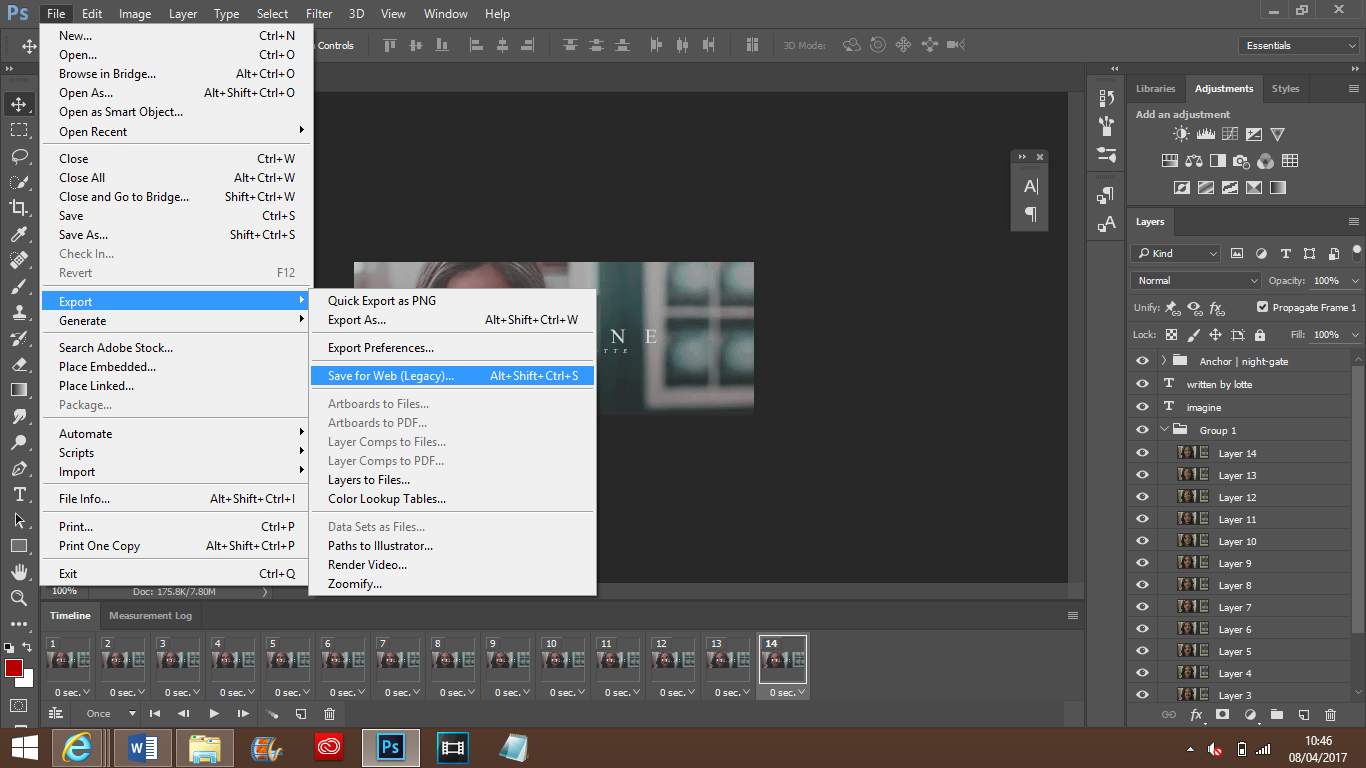
13. A screen will pop up. Make sure that you have the gif repeating forever instead of 'once.'
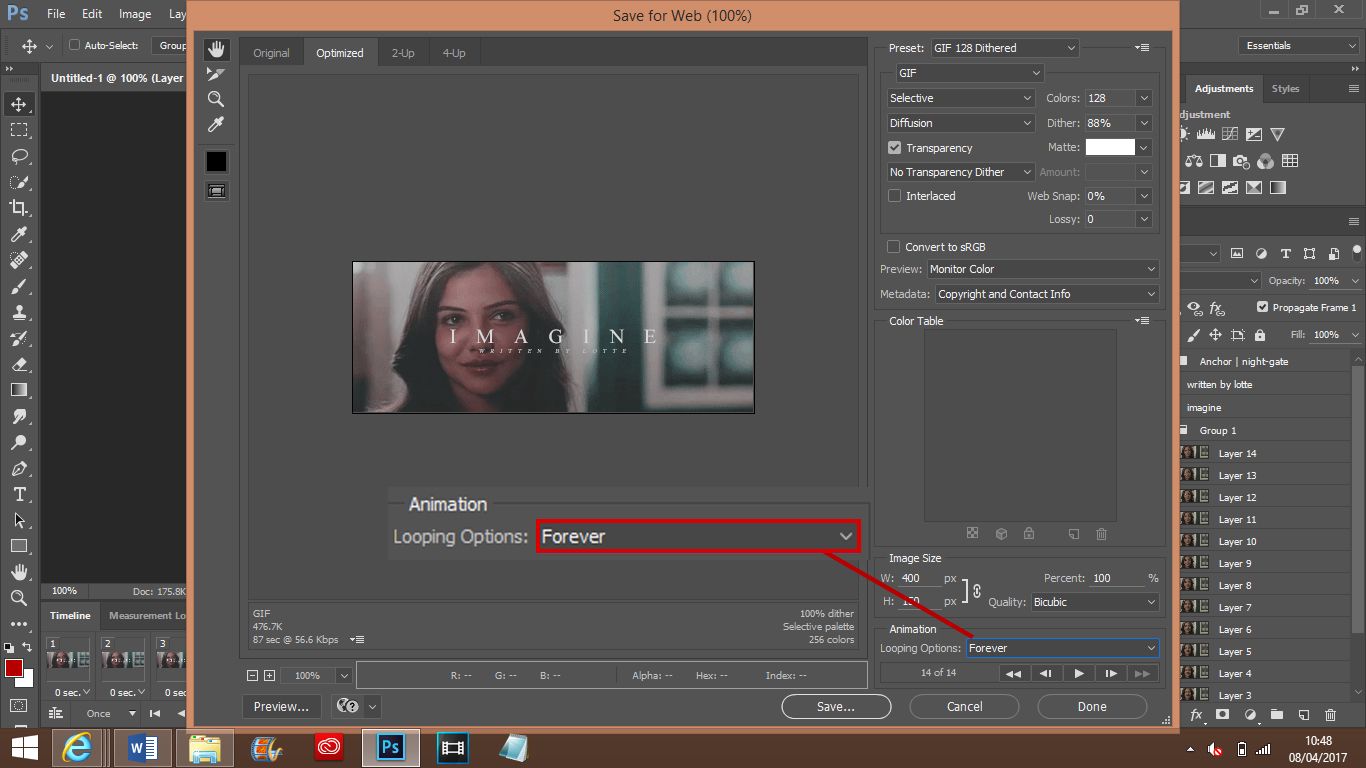
14. Press save, and make sure that it has .gif at the end of your finished product. Then you're done!!

Hope this helped! Any requests, inline comment here! I really want to do a cover tut next, so if there's any specific one you'd like me to do, let me know c;
Bạn đang đọc truyện trên: AzTruyen.Top