Step 1. Measures

Welcome to step 1 on your journey to become a graphic master! The first subject we'll be talking about is measures.
It sounds really boring: What is there to know about measures? But there is a lot I can tell you about it!
Step 1
A wattpad cover is approximately 256 by 400, or 512 x 800 pixels. I won't explain to you what a pixel is. It's just a type of measurement, like cm, mm, dm, inches etc! This is the size you want to have to create a fitting wattpad cover.
It doesn't matter what kind of software you use when you want to change the measures of your file. You will always have an option for that.
Step 2: Creating a 512 x 800 file
You might be thinking: What is this simple shit? I don't need this! That's allright. If you know how to do this, just leave it be and move on to another tutorial!
For all of you that have no idea what is about to happen. It is easy! You are just going to create a white base for your cover.
I'll use paint, photofilter studio x and photoshop cs2 for my explaination. Paint? Yes, I hate it. But everyone's got it!
Paint
1. Open up paint like usual
2. Click here to change your measures:
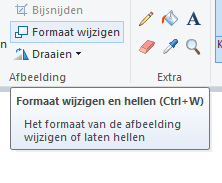
3. You will find yourself here now:
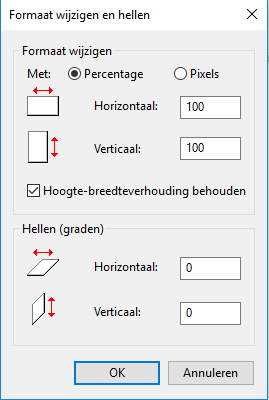
4. You are now on the setting: Percentage. Change to pixels like so:
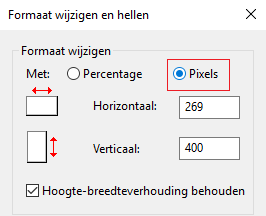
5. Change the numers to either 256 by 400, or 512 x 800 pixels. 512 x 800 will be bigger than 256 x 400. I prefer to use the first one, because your covers wil be of a better quality.
Make sure you undo the hoogte-breedteverhouding behouden button! It means you can change the size how you want it. Click on OK if you have this:
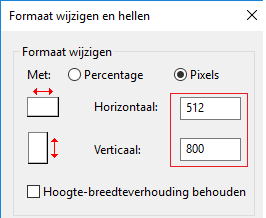
6. You wil end up with a white block like this one:
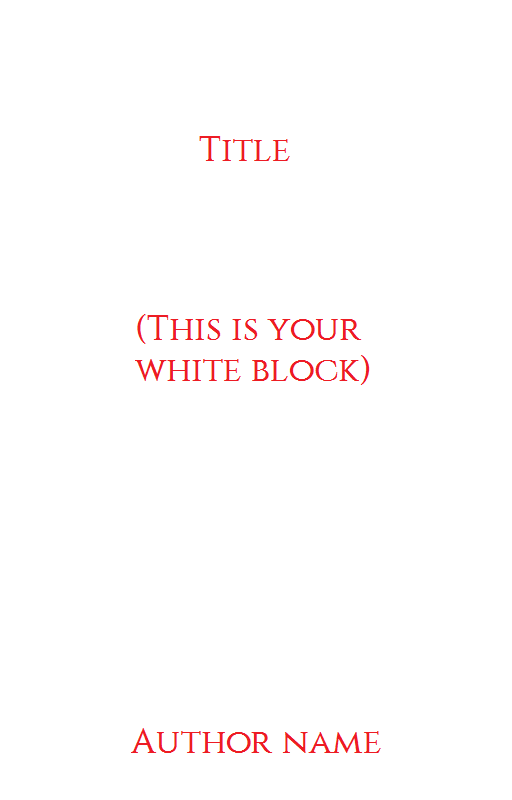
7. You did it! Now save the file as a .png!

8. You can always work from this file from now on. You open it and start!
Photofilter studio x ( you should be able to download it for free online!)
1. Open up Photofilter studio x like usual
2. Click here to change your measures:
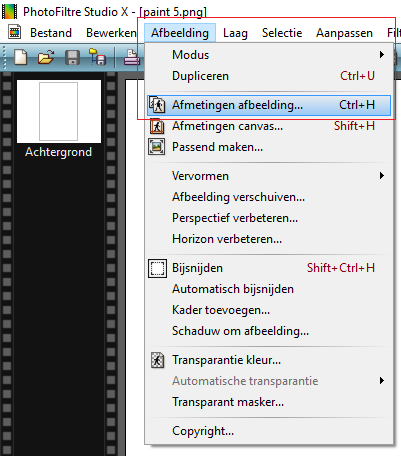
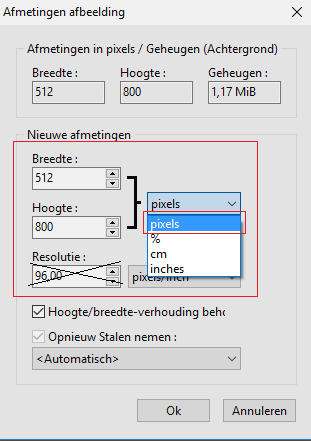
3. Change the numers to either 256 by 400, or 512 x 800 pixels. 512 x 800 will be bigger than 256 x 400. I prefer to use the first one, because your covers wil be of a better quality.
Make sure you undo the hoogte-breedteverhouding behouden button! It means you can change the size how you want it. Click on OK if you have this:
4. You wil end up with a white block like this one:
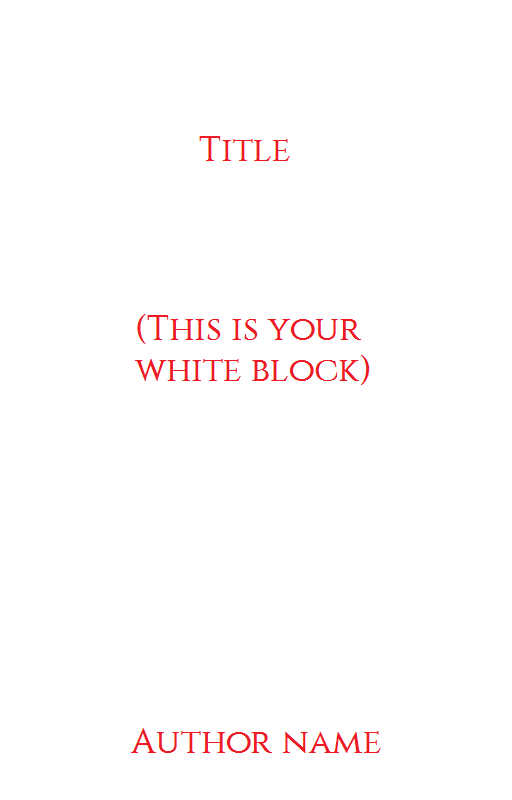
5. You did it! Now save the file as a .png! File -> save as or Bestand -> opslaan als

6. You can always work from this file from now on. You open it and start!
Photoshop cs2 (You can download it for free on the official adobe website!)
1. Open up Photoshop cs2 like usual.
2. Click here to change your measures image -> image size
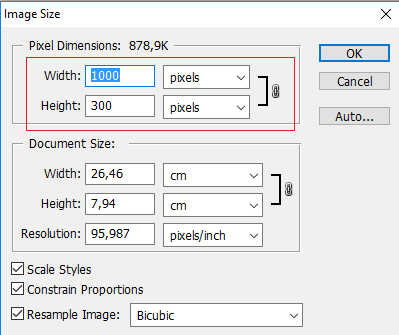
3. Change the numers to either 256 by 400, or 512 x 800 pixels. 512 x 800 will be bigger than 256 x 400. I prefer to use the first one, because your covers wil be of a better quality.
Make sure you undo the contain proportions button! It means you can change the size how you want it. Click on OK if you have this:

4. You wil end up with a white block like this one:
5. You did it! Now save the file as a .png! File -> save as or Bestand -> opslaan als

6. You can always work from this file from now on. You open it and start!
Thanks for looking at this first ( really easy) tutorial. I know this is probably not what you wanted for a first tutorial. But we have to know the basics before we start.
Next up will be some graphic tips! I'll be working with photofilter studio x, and explain a lot of the software ;)
Bạn đang đọc truyện trên: AzTruyen.Top