How to Make A Cover (Photopea)
Here is how you can make covers with photopea:
Photopea link>>>>>>>>>>>>>>>>>>>>>
Number 1: the dimensions:

After filling in those dimensions, click create.
If you already have a picture for the background, go ahead and use it. You can either choose to make a simple cover like on canva (if you choose to make a simple cover do not use photopea because you will find yourself struggling. Also, photopea is good for manipulative covers) or if you are deciding to make a manipulative cover use photopea.
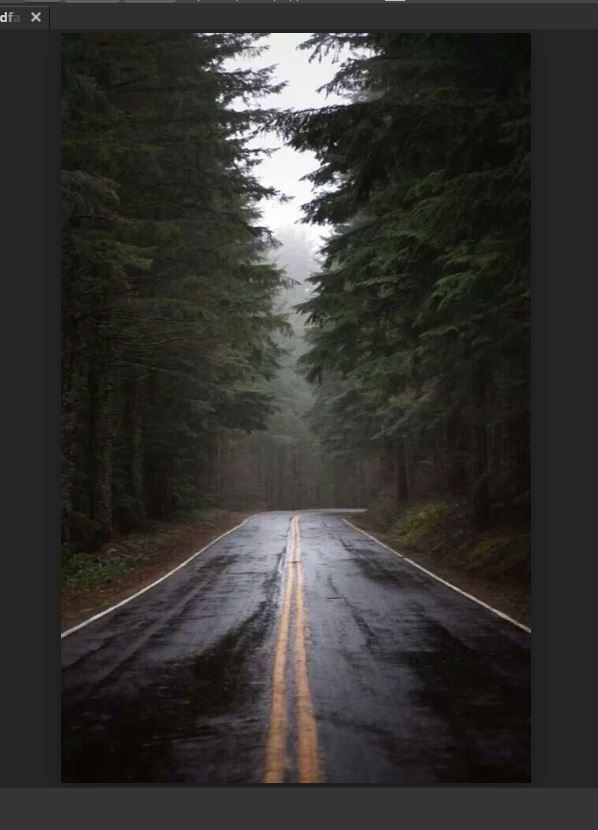
So below I chose a picture I want to use. But it is not the right color. Let's learn how to change the color of your picture to make it match the color theme you have chosen for the book cover:
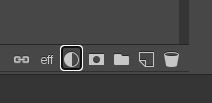
First you will go at the bottom right, and click on the button indicated below. Then you click 'color balance.'
Play around with the lines until you like how your picture looks:

My cover base now looks like this: (you can scroll up and see the difference.)

It is your choice if you want to add a person or not. But here is how I do it:
First find a girl or boy, make sure the background is transparent. A quick and easy way to make the background transparent is to use a website called remove.bg. Link >>>>>>>>>>>>>>>>>
After making the background transparent, you can bring it in to your picture. (go in files and click open.) Then we will have to work on the shadows and lighting of the person you just added.
Add whatever you would like on your cover. I have added as so:

Make sure the color balance layer is on top of all the pictures in order to give them all the same tint.
Next we will make the butterflies glow. Click a new layer (at the very bottom right beside the trash.)
Click the brush on the left near the other tools and left click on the picture. You should get this:

Click the brush that looks glowy and use it for the glow for the object you want. Fix the size of the brush and start. Make sure the clear (new) layer is first below the object layer. Like this:

As you can see under each butterfly there is the glow. Once you are satisfied with your glow, click the object. (Meaning the butterfly layer in this case) and lower your opacity of your brush and make the brush smaller. Now on top of the object, add some glow. (lower the opacity to around 50-60. Or whatever suits your liking.)
Now the glow is under and on top of the object, making it more realistic. The cover now looks like this:

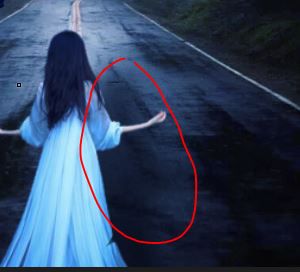
WAIT! ALSO don't forget the shadow for the girl. I nearly forgot lmfao. Double click on the girls layer and you will get that box shown below. Click the check for drop shadow and fix it accordingly: Click OK to save!

The shadow in the cover:
I know this isn't my best cover lol, but this is just for an example so don't attack me. ANYWAY, after you are done that and you like how your cover looks, blah blah blah, you can now add the title. Woohoo!
I use dafont to download my fonts. dafont link>>>>>>>>>>>>>>>>>>>>>>>
(If you need help with downloading fonts I'll do another chapter just comment or dm me)
After you are done with your title (I'm too lazy to show) then save it and you are done!
Photopea does so much more. If there is something else you want to learn comment or dm me. Other things I could teach you about are: how to make your font metallic and cool, how to blend, how to idk whatever you need help with lol.
Anway, I hope I didn't miss anything. Let me know if I did thanks.
Ok byeeeeeee
Bạn đang đọc truyện trên: AzTruyen.Top