the curse of lycaon
[remember, anything that belongs to me must be credited, if you don't, then it will result in me hunting you down and finding you]
Heyyy my dah-lings! Today we are going to do a tutorial requested by my ultimate twin, Kelsea [-midnightwishes]! Hope you all enjoy! Any questions will be answered right away.
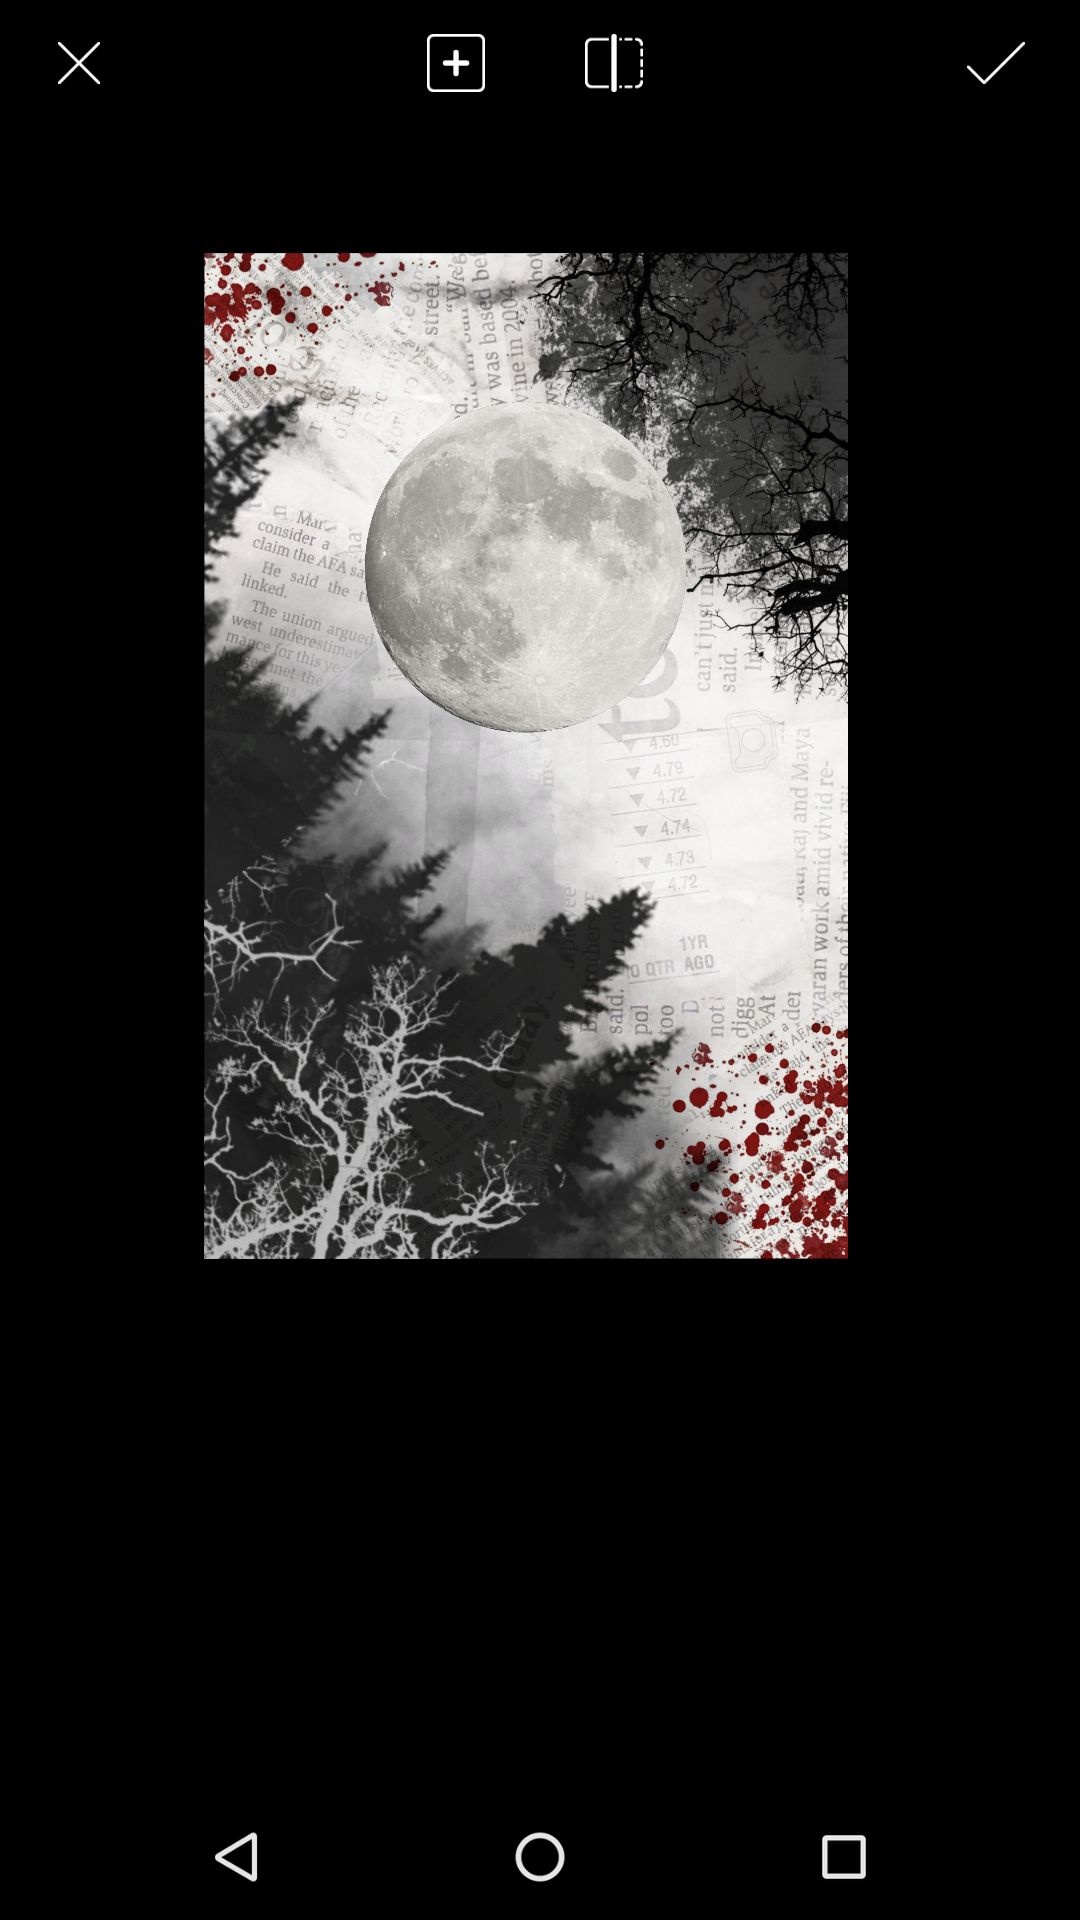
1. Start off by opening the texture below in PicsArt. Make sure you crop it to the right cover size (I use 256x400 as it is the best).

2. Open up your dark forest texture. Click on Blend and tap Multiply. Move the texture to where you want it. Makes sure to lower the opacity as you don't want it to be too overpowering.

3. Then add your other textures as you like. Place them accordingly.
For the blood: tap Blend and then choose Multiply. Place them where you'd like.
For the splatter: go to Effects and click on Colors. Then choose Negative and press the check. Change the Blend to Multiply.
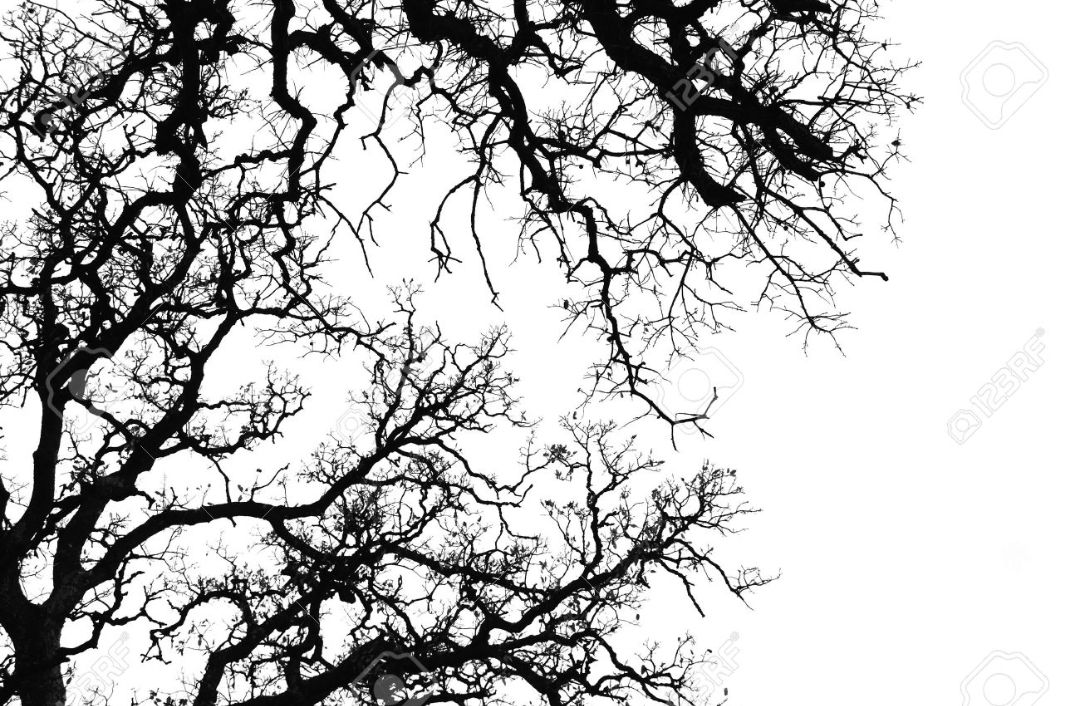
For the trees:
To make black ones- click Multiply in Blend
To make white ones- go to Effects and choose Colors. The select Negative.

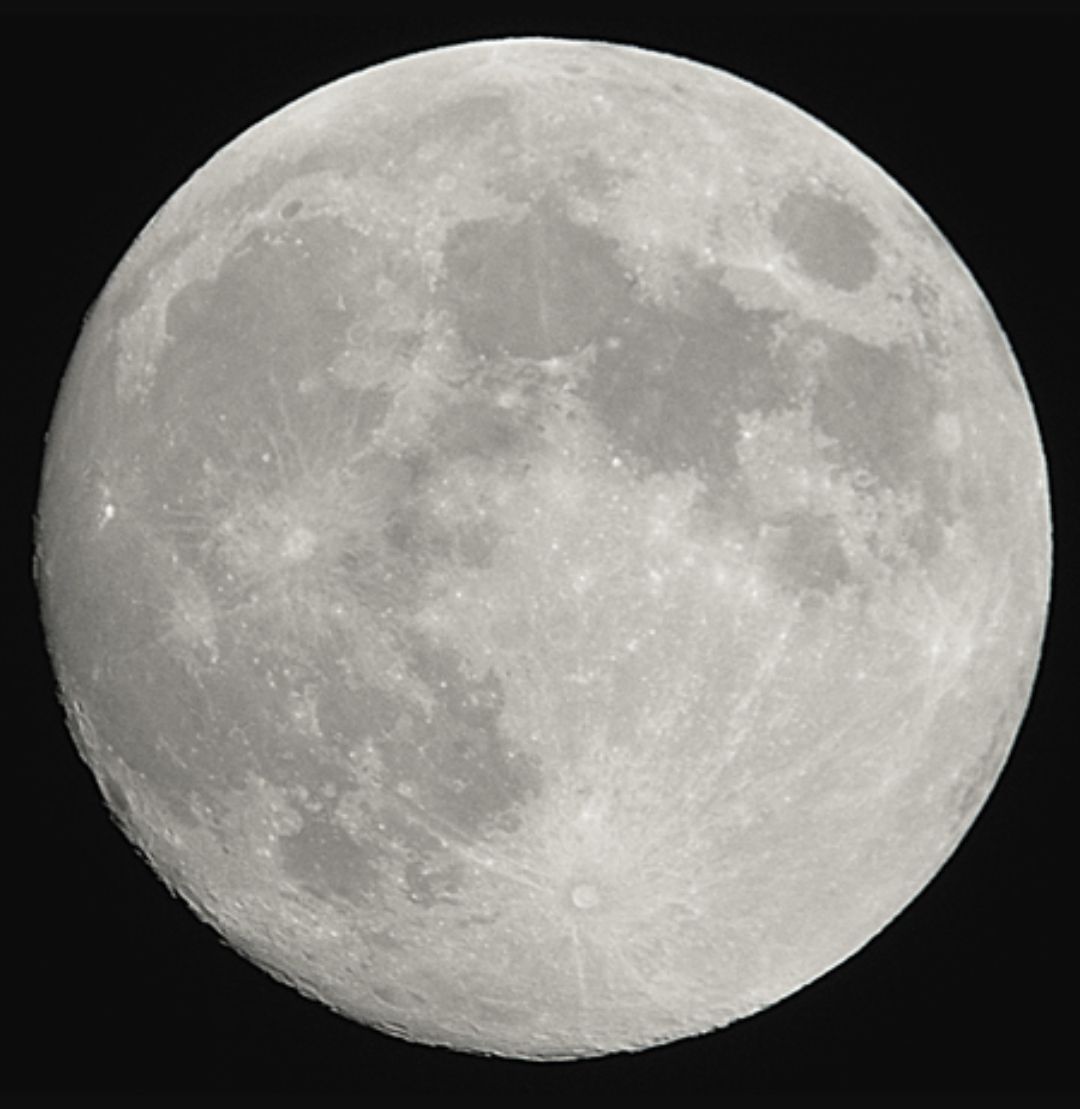
4. Add your moon. Use the Shape Crop tool to crop it.
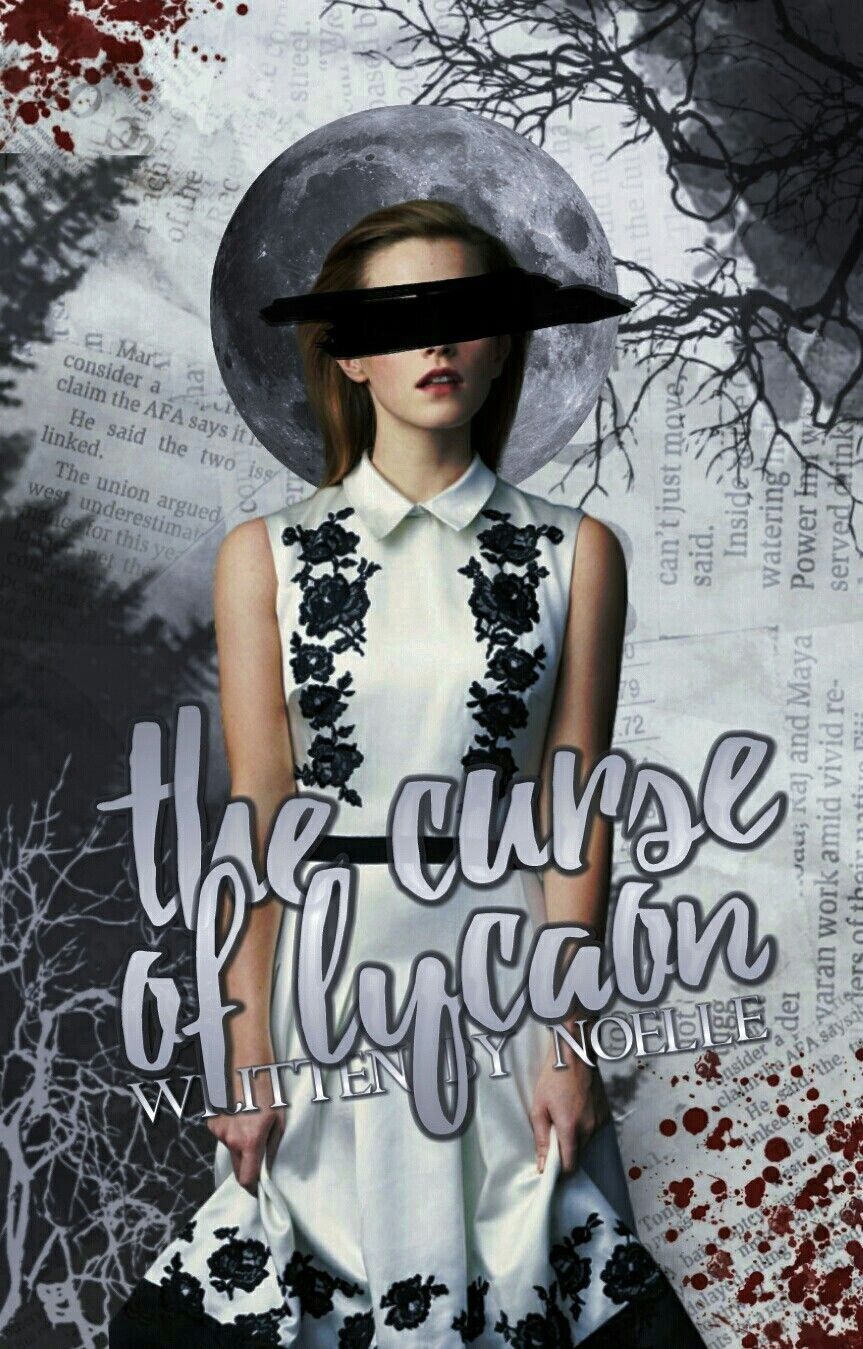
5. Add your PNG and your paint stroke. Adjust them how you'd like. For the stroke, press Multiply.

6. Once you adjusted it how you want, you can save it, add a filter and/or add your text! And voila, that's how you do it!

⬇️⬇️⬇️⬇️⬇️
So, this tutorial was on how to blend and make add PNG's to covers. Well, adding PNG's are pretty easy, it's the adjustments that are kinda tricky. Same goes with manips & blending. You just have to use your eyes, and definitely look for inspiration if you need it. I was inspired by the amazing LotteHolder. Her cover for Icarus (one of the many) inspired me so, so much. Thanks Lotte!!
Anywho, here are the resources:


_______
What do y'all think? Easy to understand? No? If it is, make sure to tag me if you use this tutorial! Love you all 😘

Bạn đang đọc truyện trên: AzTruyen.Top