PICSPAMS (Part 1)
Hewo! 👋👋
GUYS !! I REACHED 500 FOLLOWERS!!!!
IKR! IT'S CRAZY!
So we are gonna learn to make picspams on picsart today! I know you are pretty excited. Y'all be like
Lol!! Remember I'm no expert and I have done this only a couple of times. If you are aware of an easy or better method, do let me know, I will wuv to try it out!
Let's get started!
Step 1:
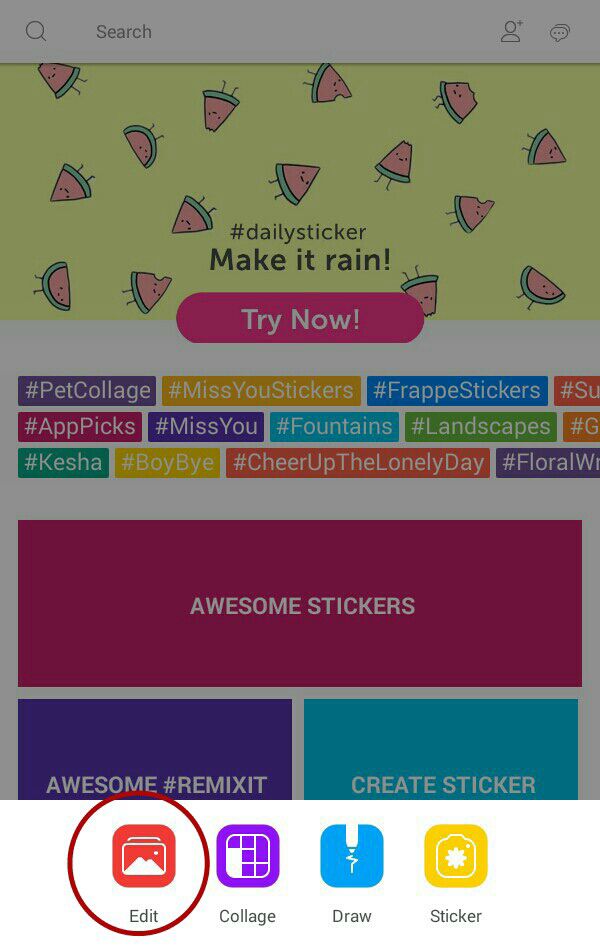
Open picsart. From the bottom bar, click on the + which will open a pop-up.
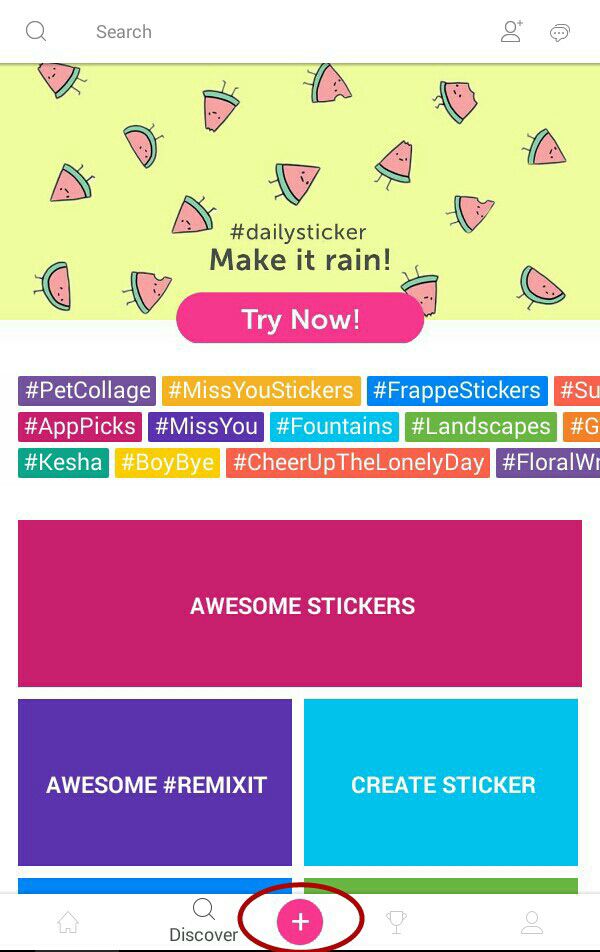
Select 'Edit'.
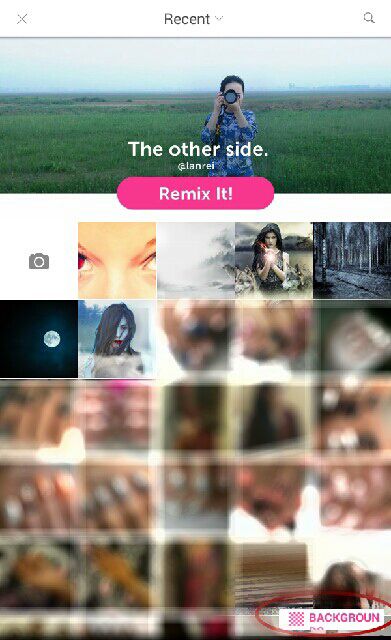
This will take you to such a screen with all your images. (I purposefully blurred my pictures). On the bottom right corner there will be an option to select 'background'.
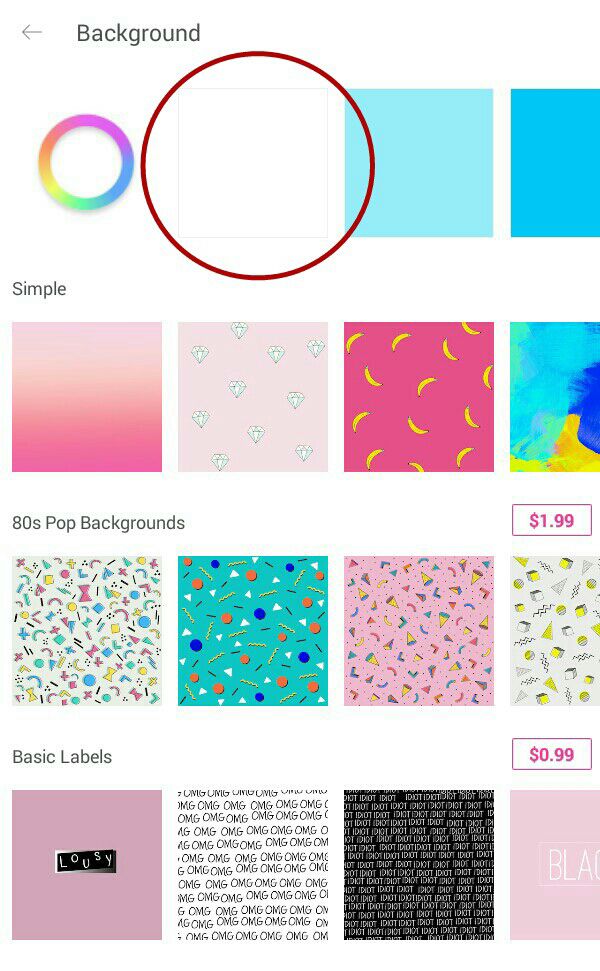
Select the plain white one. There are a lot of options available, both paid and free.
The selected background will open in the editing screen.
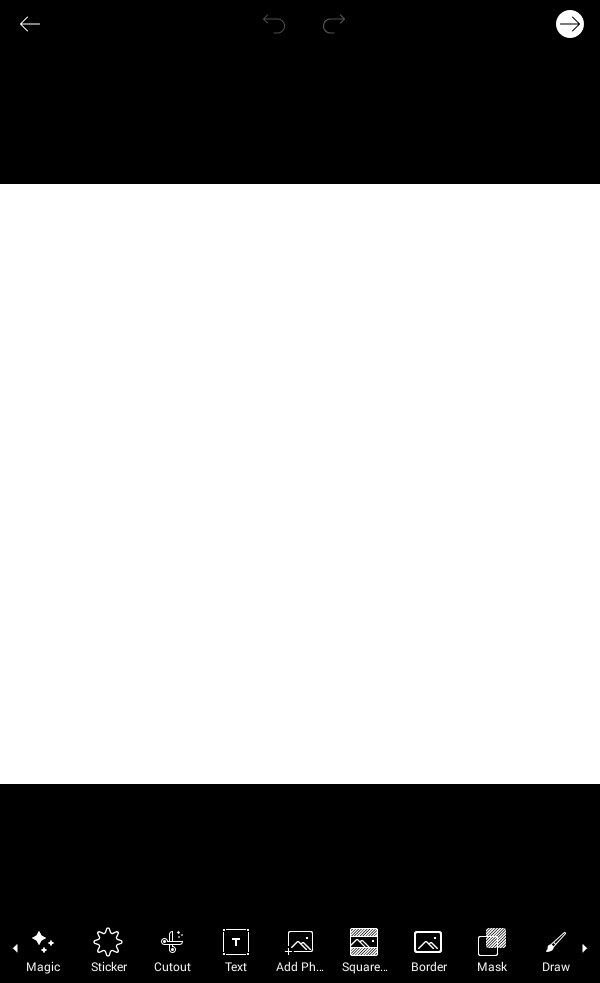
Step 2:
Now we add images. If you scroll down on the tool bar at the bottom you will find the 'add photo' option with an icon representing a scenery and + (as shown in the figure above.)

A picspam usually have 6 pictures, there can be more or less. Make sure that the images are complimenting each other or there's a theme going on. For example, I have a paranormal or supernatural theme here.
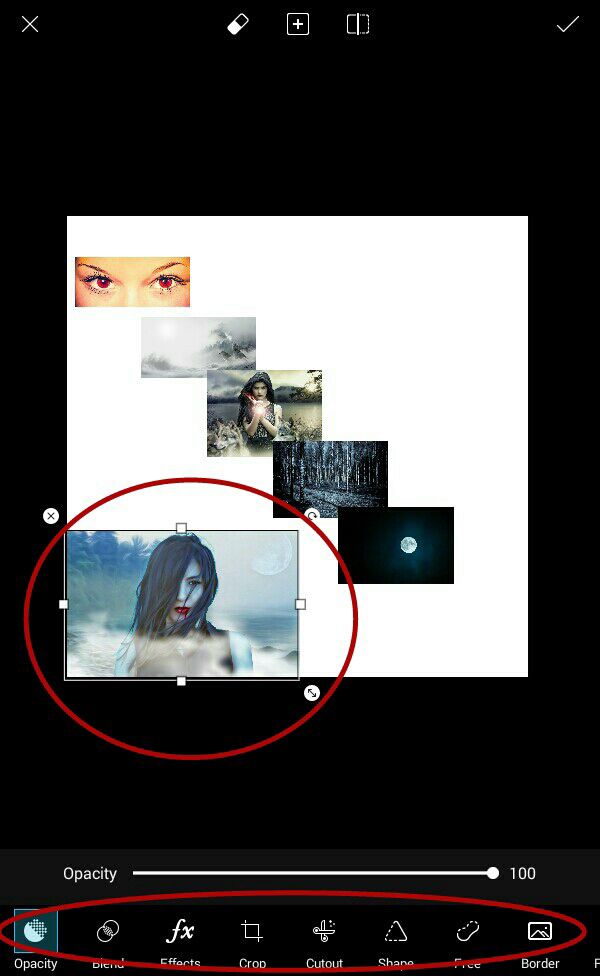
If you want to edit an individual image (change opacity or blend mode, add effects or crop) select that specific image.
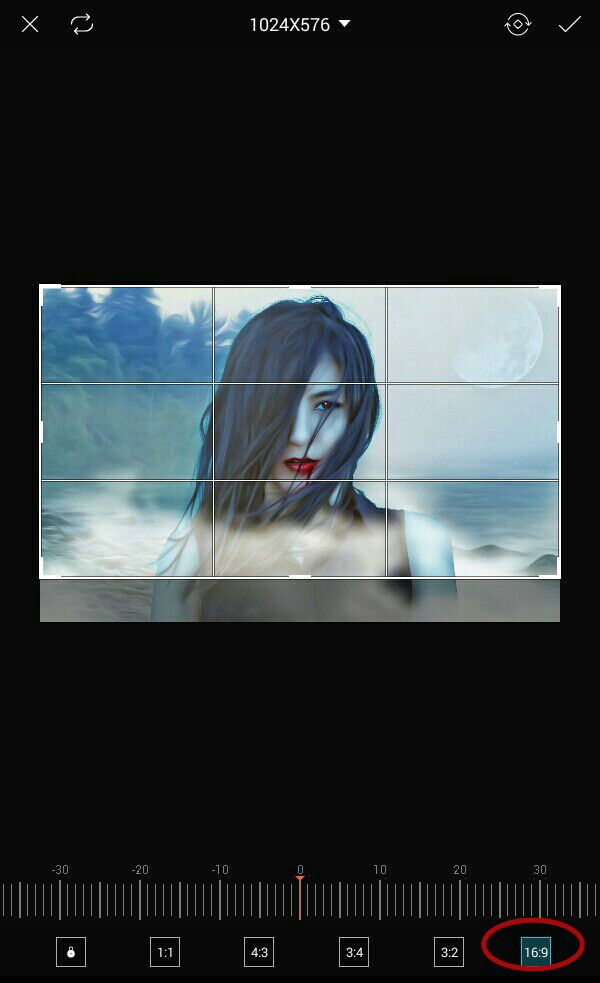
I cropped all the images to 16:9 to make them all a similar size. Then you align the pictures in a manner shown below.
You might feel that one image (or maybe more) is standing out. So you select that particular image and apply desired effects to make it look similar to others.
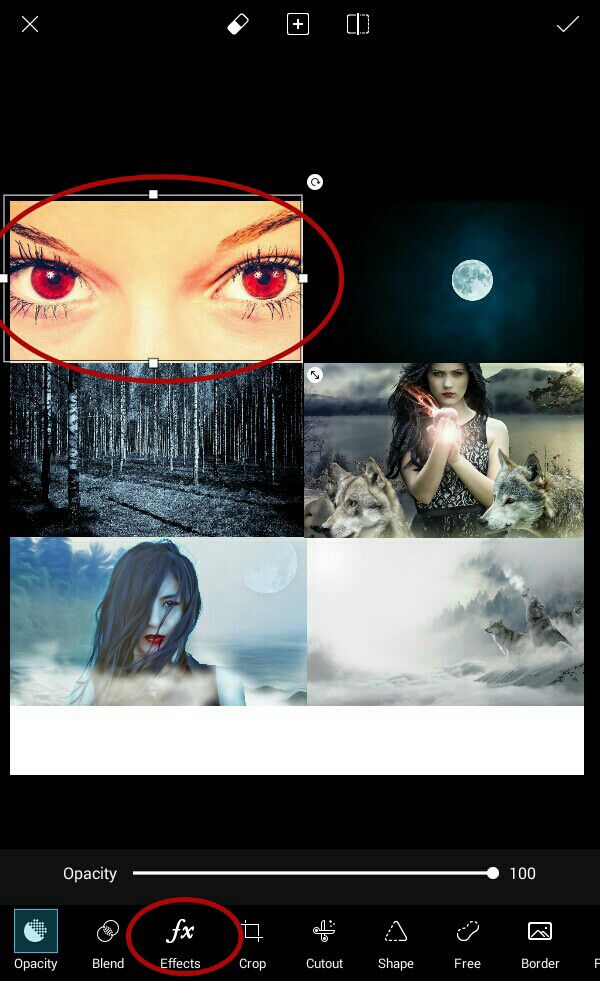
Here I added a b/w effect or filter to this image cebause I think it's too bright as compared to the rest.

Then I erased the parts where the eyes were as I want to keep the red.
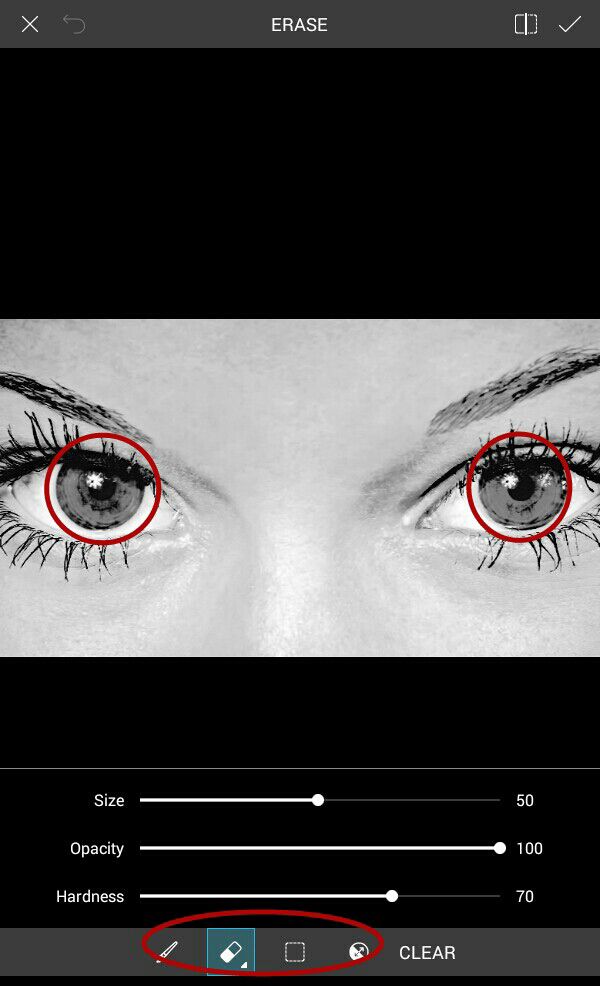
You see now it looks better. When you are satisfied with everything (your alignment, placement and filters, effects) press the tick mark.
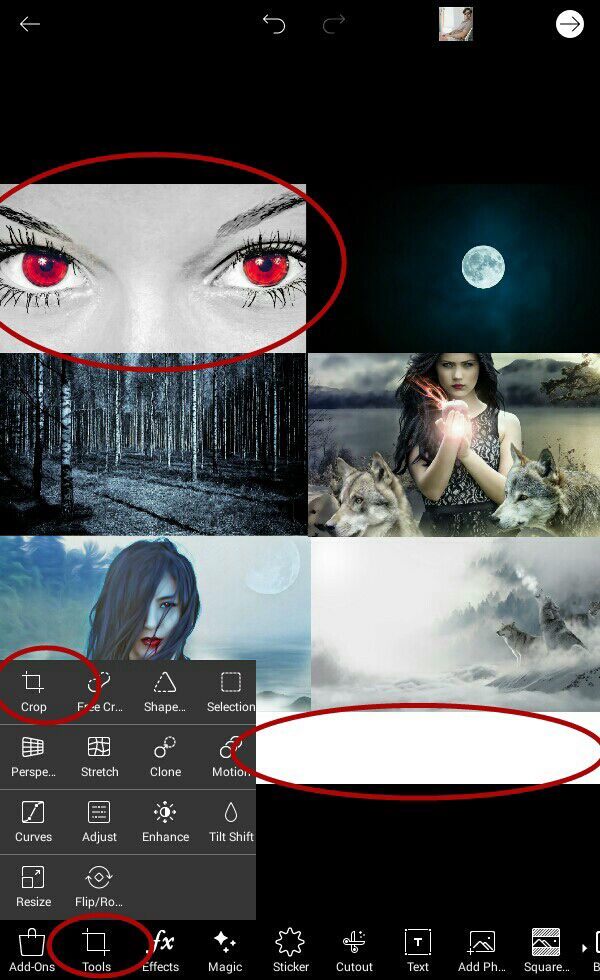
Now as you can see there's a little white part left at the bottom. We are going to simply chop it off!
From the tool bar at the bottom you can find the crop option.
Step 3:
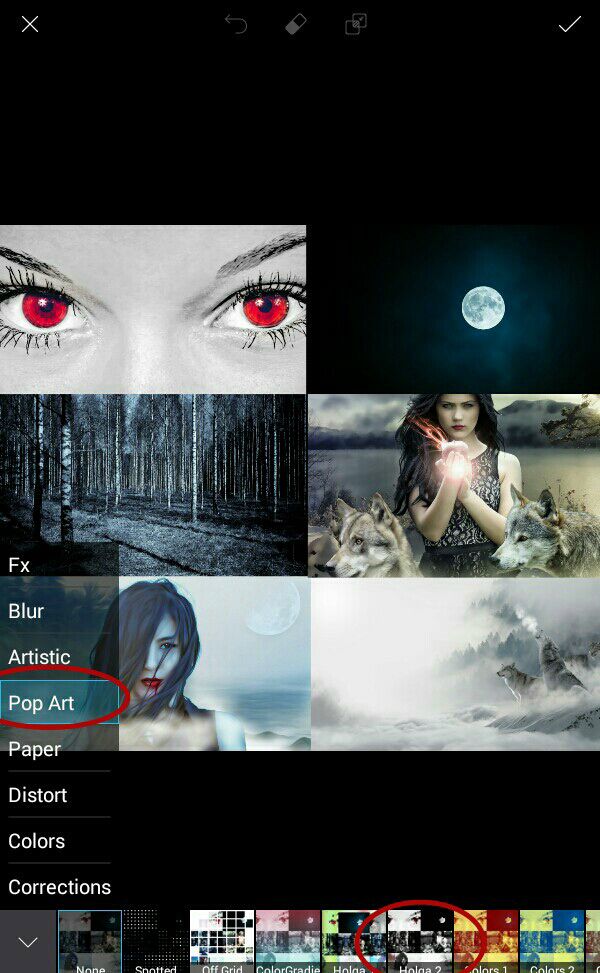
Now is the fun part! Adding the filters and colorings.
So for this graphic, I decided on 'Holga 2'. You can find this effect in 'pop art'.
Make sure to keep the settings as shown below (or similar to these) otherwise it will just look weird.
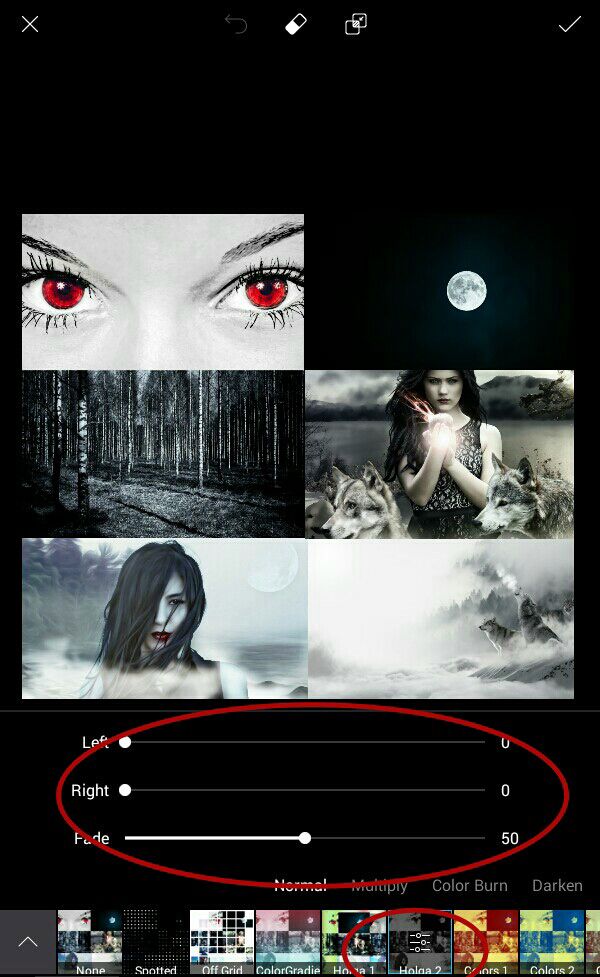
Let us add a coloring next. It's totally optional but recommended as it brings everything together.
The coloring I used is 'Rogue' by yours truly. It's a solid color jpg you put all over your image. I suggest keeping the opacity between 50 to 80 and the blend mode to overlay but you are free to experiment!

When you are happy with your result. Press tick.
Here's how my final product looks like:

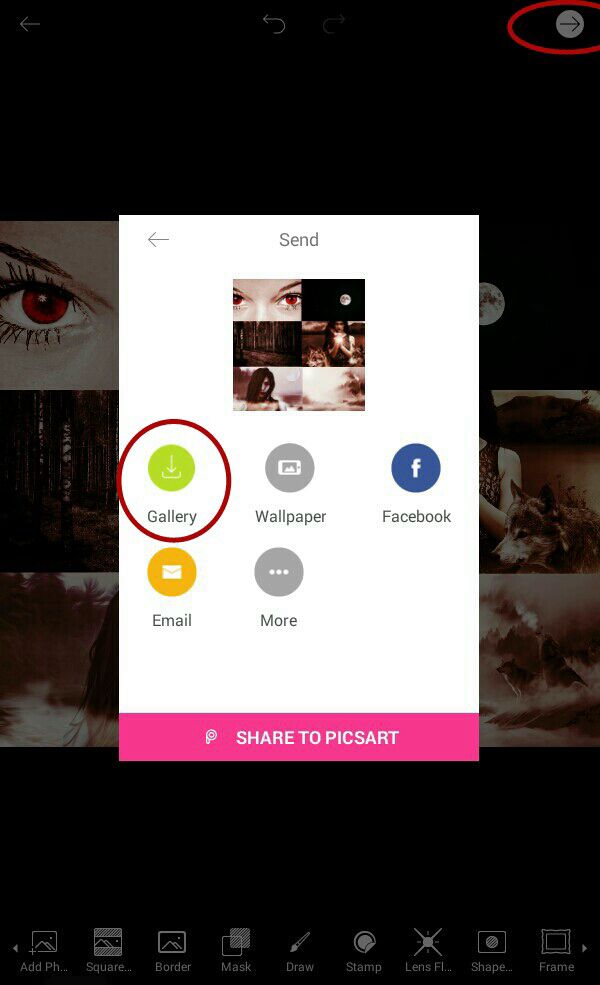
Last thing to do on PicsArt is save your graphic.
(Continued to the next chapter.)
Bạn đang đọc truyện trên: AzTruyen.Top