GIF CHARACTER CARD [Part 1] + How To Add Glow in Ibispaintx
Whale Hello there! 👋
So today I'll be teaching you how you can make your very own animated character banner on your mobile device.
This banner is like a virtual introduction of your story cast. See example in multi media section above.
For this project we will be using the following apps and website. And of course internet connection will be required for some parts.
• ibispaintx (for editing the actual graphic)
You can use whichever editing program/app you usually design with.
• picCollage (for adding gif)
Both of these apps are available on Google play and I'm pretty sure on iOS store too.
Now you see, picCollage actually makes mp4 videos and has a watermark on the end result, in order to convert it to gif and remove the watermark, we'll be needing access to ezgif website.
It isn't that complicated! Really!
I always download and if needed, extract all my resources before hand.
I'll list the resources that I used here and where I got them:
• All base images, (enchanted forest, moon and Galaxy overlay from pixabay.)
• Kaya Scodelario png by madaw on DeviantArt.
• Gif from giphy.
Disclaimer: The purpose of this graphic is purely educational and all resources used in it's creation are property of their original owners. There's no intention of copyright infringement!
There is a mini tutorial on adding glow in ibispaintx towards the end of the chapter. I will be writing it in cursive if you are interested in just that.
Now that's out of the way, let's get started with the banner...
If you are using ibispaintx, open your app and go to my gallery. The app doesn't need internet connection to work.
If you are using some other editing app, make your base graphic like you normally would and you can skip this chapter and move forward to Part 2 of the tutorial.
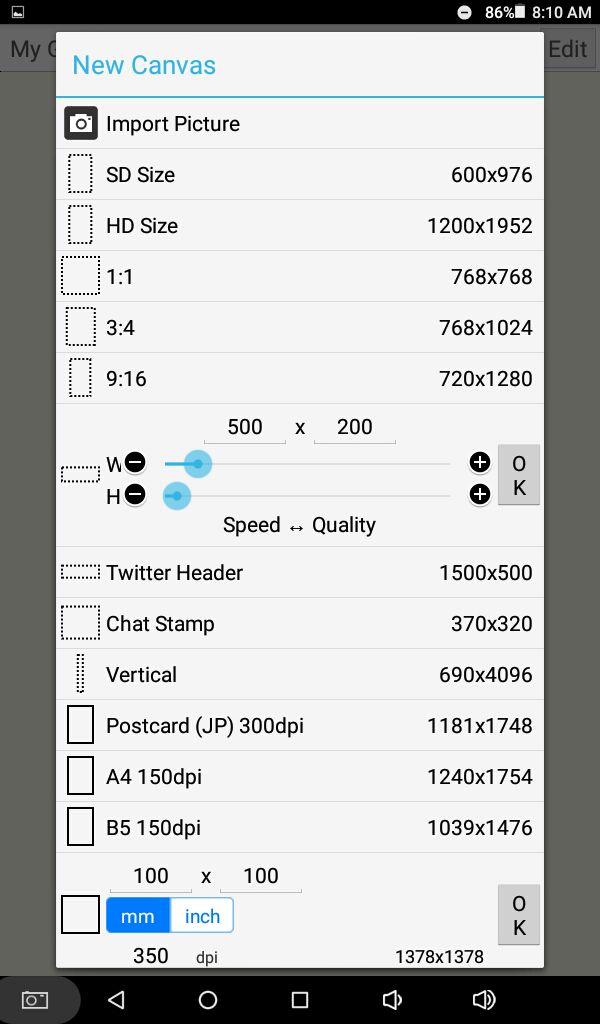
With the '+' icon on the top tool bar you are able to create a new graphic.

A screen will pop up, here we will choose our dimensions. I went for custom measurements (500x200) but you can choose one of the presets too! Press ok once done.
The app will take you to the editing screen. It should look something similar to this, depending on the version of the app you got and operating system of your device.
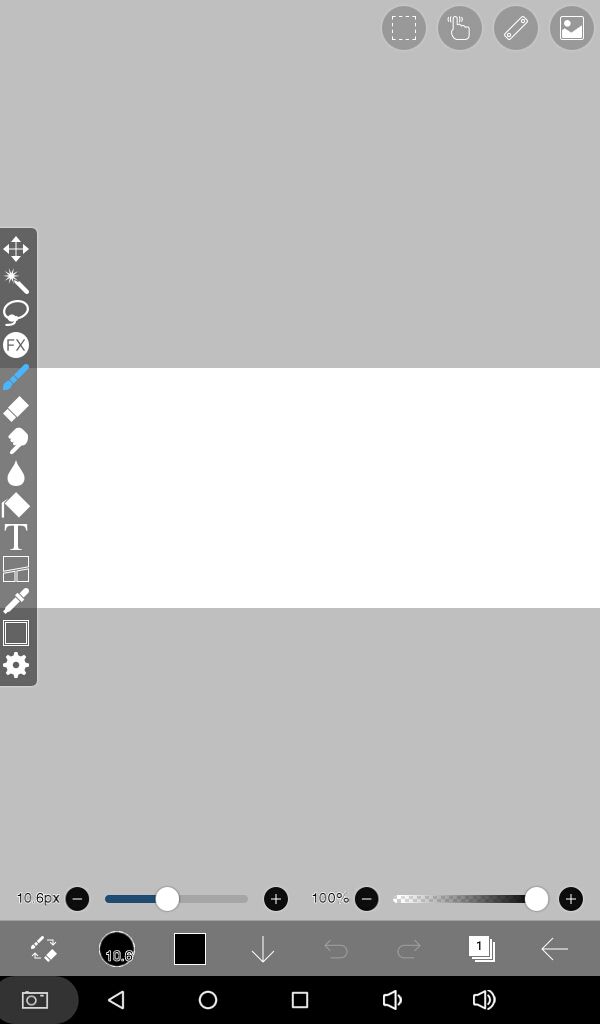
We will be making the base of the graphic now. From the bottom tool bar, select the layers. It is the icon next to '←'. Three papers stacked on top of each other, with 1 written on it. It indicates the number of your selected layer.
Also you see three square boxes near the bottom in the layers panel. One's a solid white, next to it is checkered grey-white and next to that checkered black-grey square. Select the middle one and your layer will now be transparent.
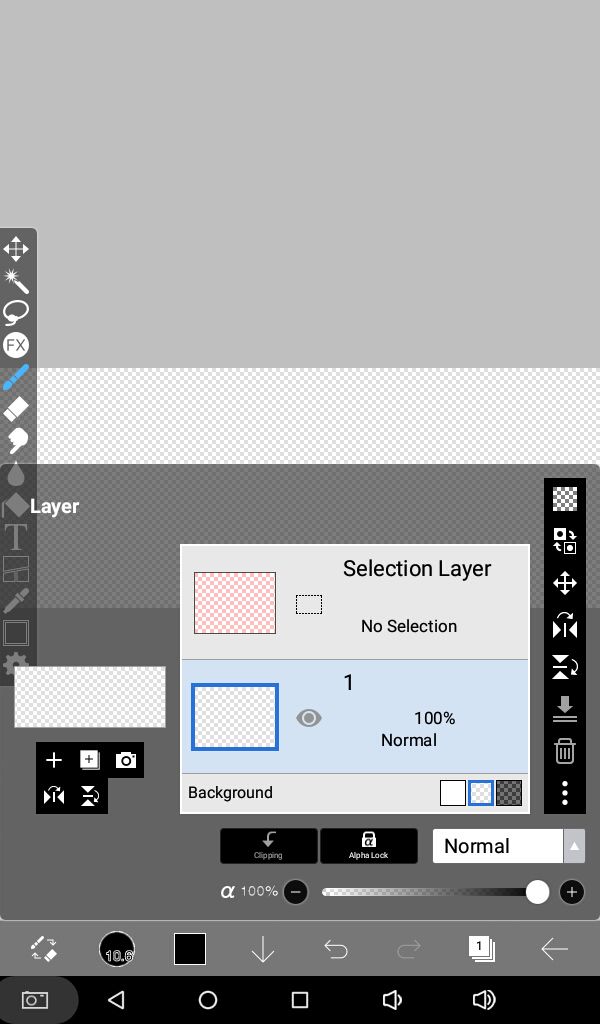
In the above image you can see a camera icon on the left side. From that you can add an image layer from the gallery of your device.
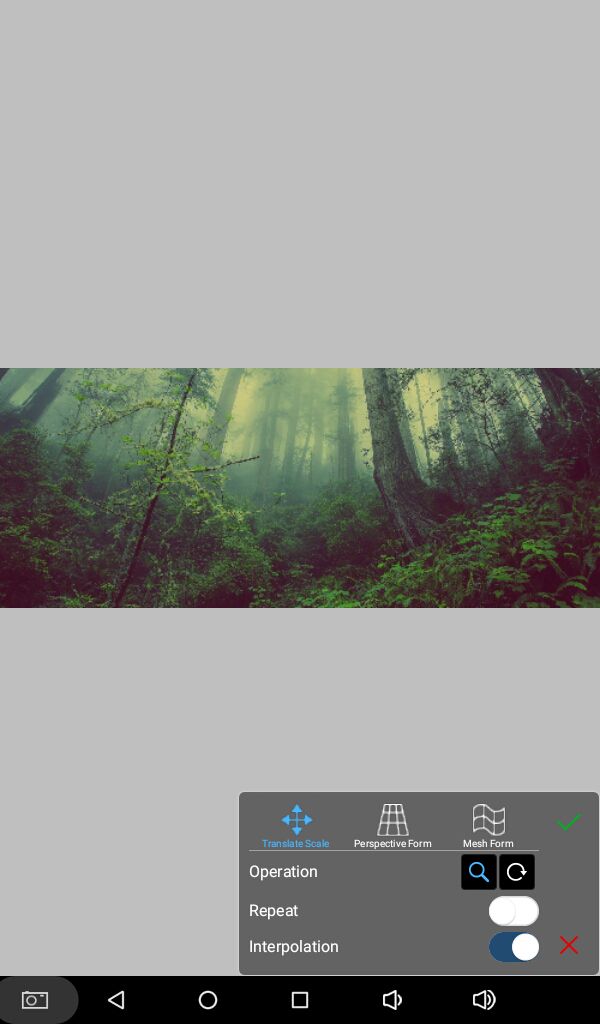
If needed, move the image around using your fingers. Zoom in, zoom out as per your liking. And press the green tick mark on the bottom.
If you want to change the color of your image, go to the effects/filters icons on the side tool bar. It's highlighted blue. From there, select hue saturation lightness. It's the third option from top.
Always remember to select the correct layer. The ↓ icon at the bottom can be used to get out of layers panel at any time.
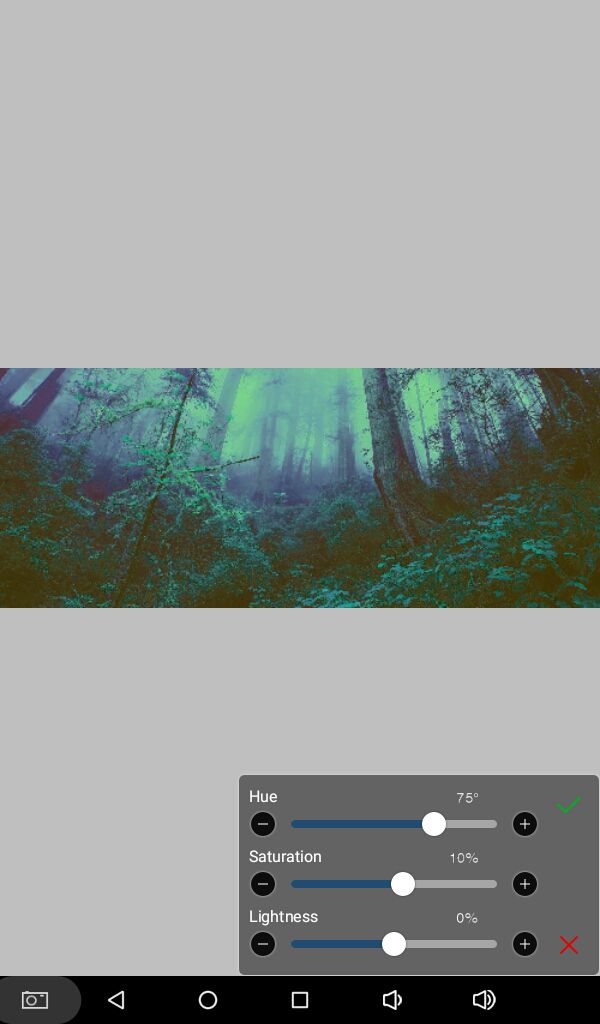
With the help of the sliders adjust the colors according to your liking and what color scheme you are going for. And of course press the green tick mark once satisfied.
Then go ahead and add some other images to complete the base, in similar fashion. In my case, a moon. Any thing you add will be added in a new different layer by default.
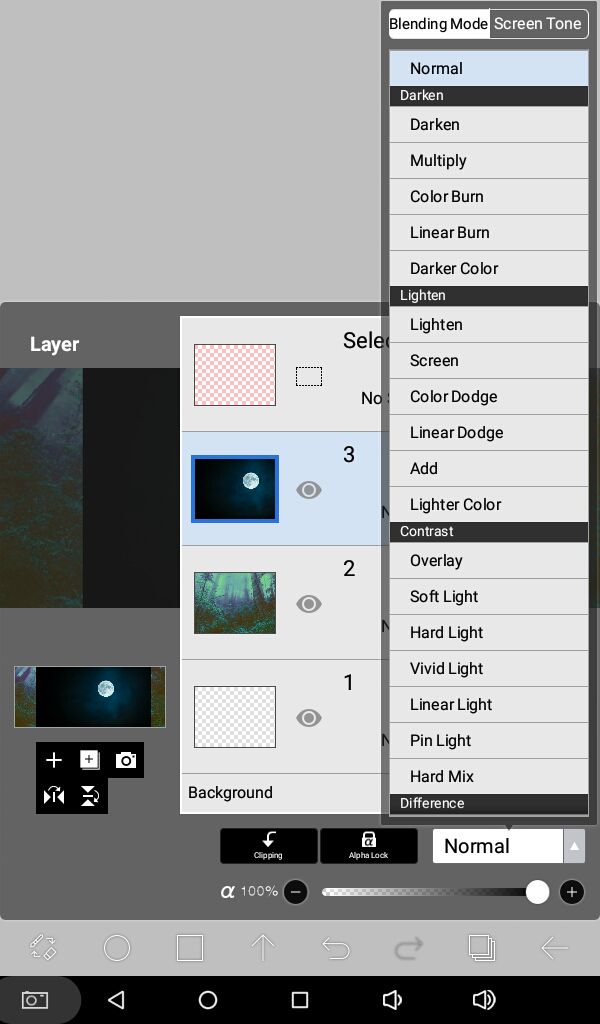
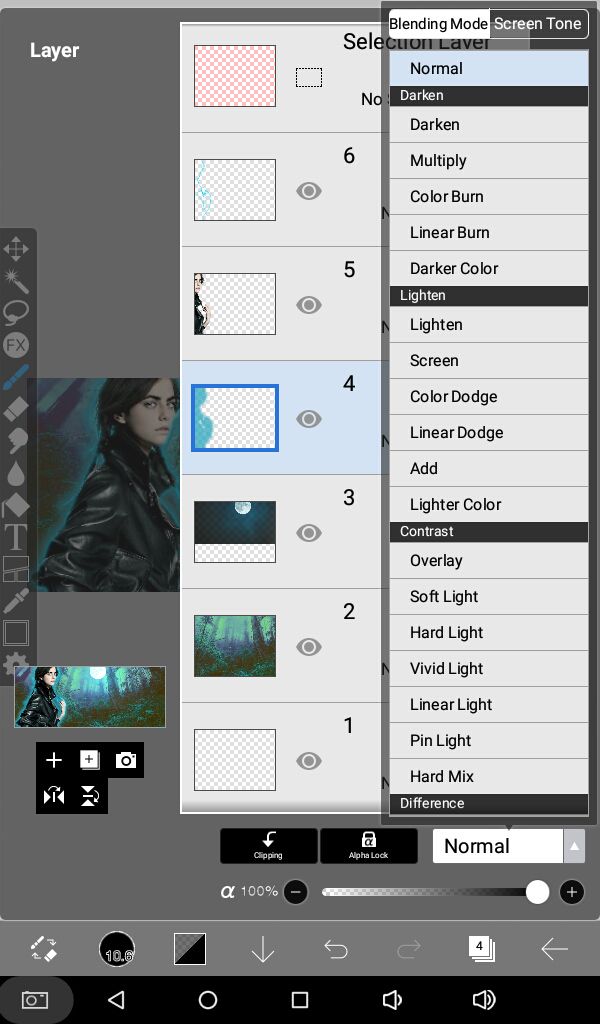
You can change the blending mode in layers panel, as shown below. I went with 'Add.' The slider at the bottom with the alpha symbol next to it can be used to increase/decrease opacity of a layer.
Now the base is done. Let's add our face claim like we added all other images from our gallery. It will automatically be added in a new top most layer.
Please it towards a side because we have to leave room for the gif.
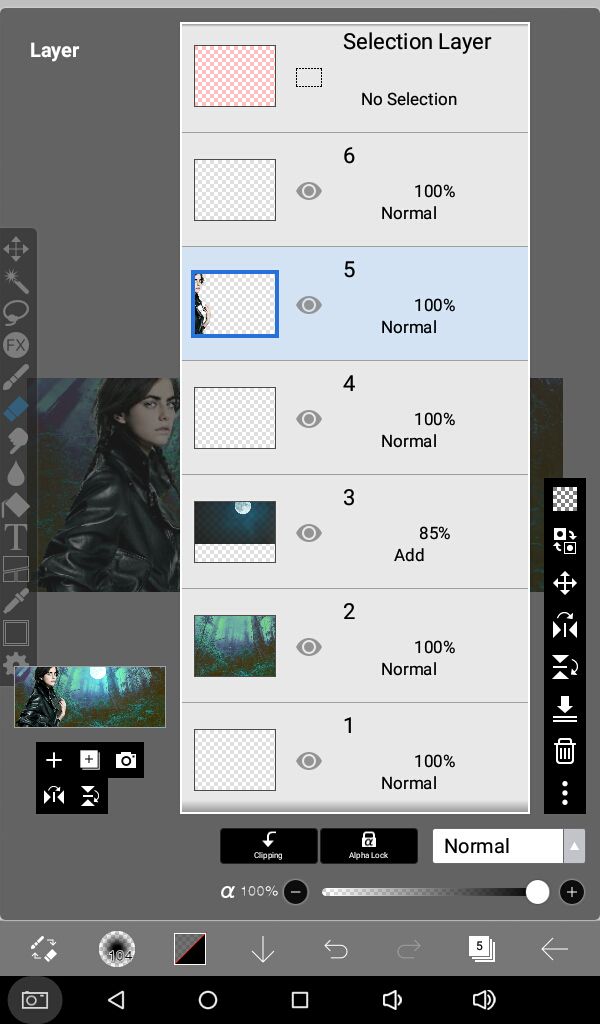
So, in ibispaintx you can add an outer glow and inner glow to the selected image with very little hassle. For that you need to add two layers. Let me tell you how, in the image below you see a + icon on the left side of layers panel. Press it twice and it will add two blank layers. Move one of them below the image, here the model, by long pressing on the left side towards the eye and sliding it downwards with your finger. That shall do the trick.
But if not, don't worry. To add a layer below your model, you can also add a layer above the last image added before the face claim, here the moon. See in image below.
The trash can icon, second from the bottom is to delete a layer if you make a mistake. Make sure to select the correct layer though! But if you accidentally delete the wrong one, just press the undo arrow on the bottom. Fourth one from the right. The fifth one is redo.
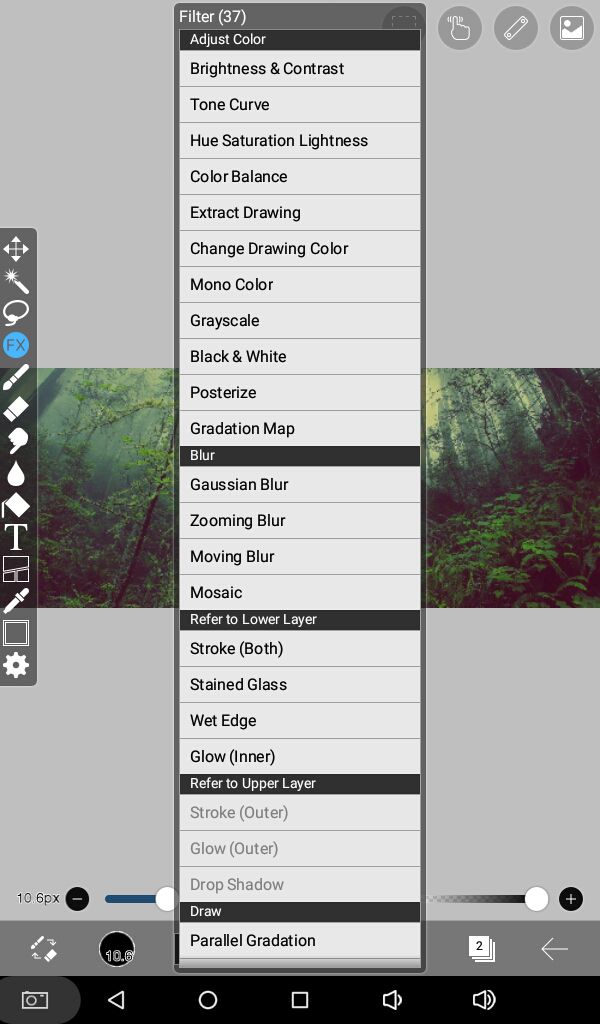
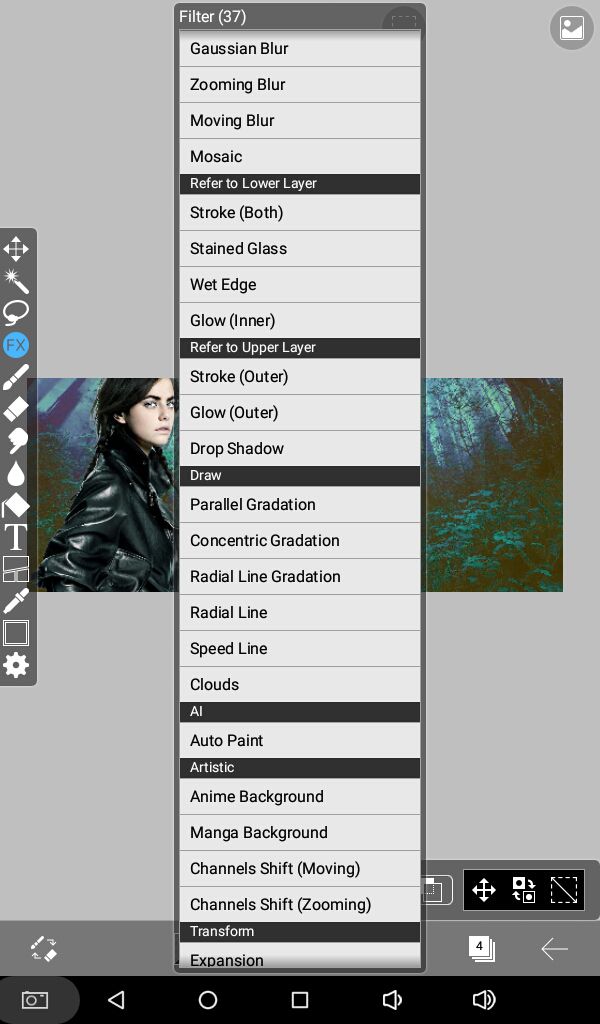
Now again from the main tool bar on the left, select fx. Scroll down a bit and you shall be able to see Glow (Inner) under 'Refer to Lower Layer' and also Glow (Outer) under 'Refer to Upper Layer.'
First we will add inner glow. For this, select the layer ABOVE the model.
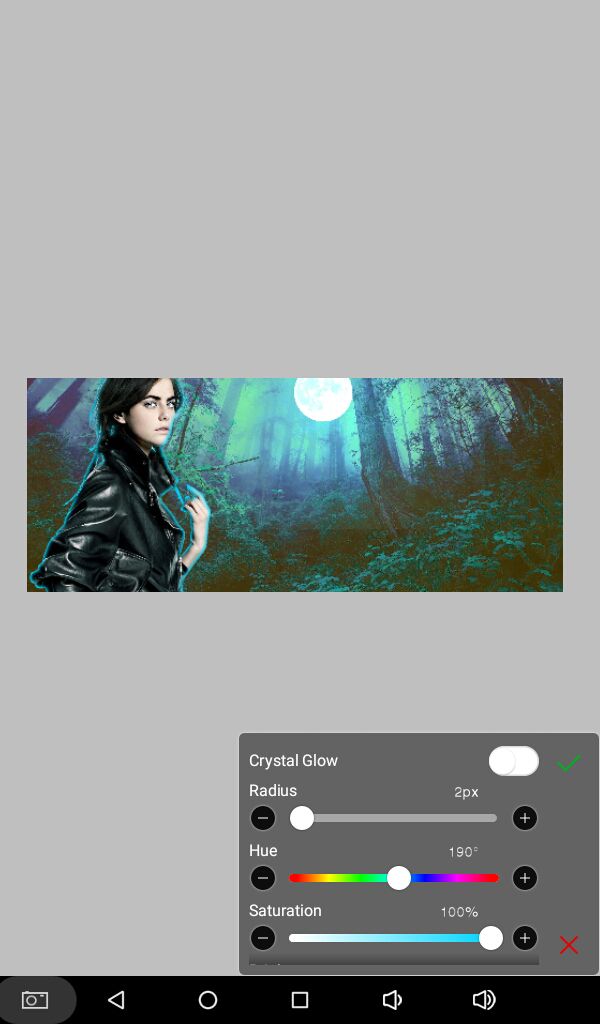
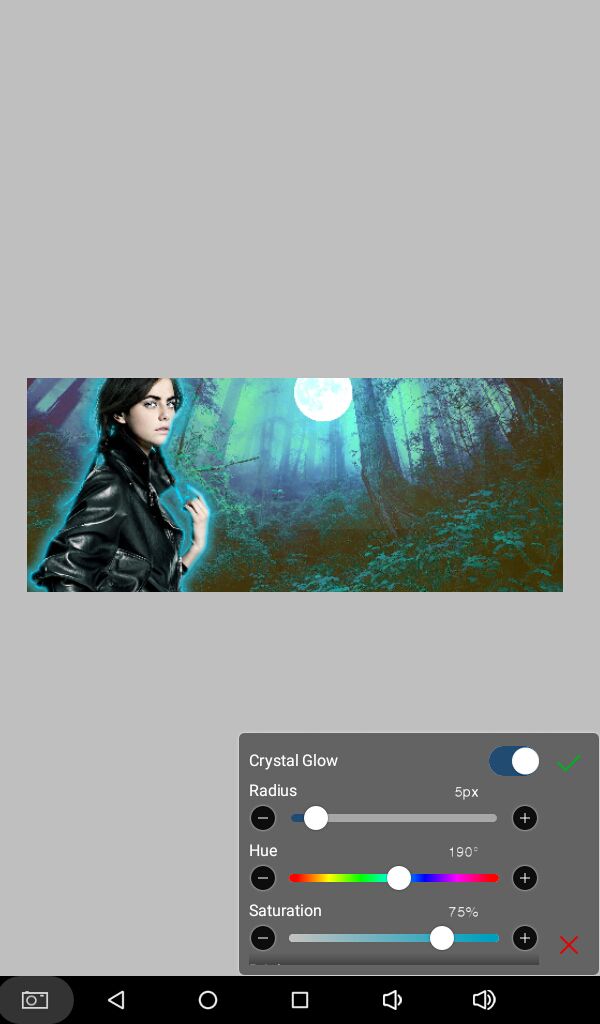
Play around with the settings and press green tick mark once happy. There's more sliders, just scroll a bit down on your screen.
Similarly, add the outer glow. This time select layer BELOW your model. And again, there are more options. Scroll down on your screen to access them. Once happy with your settings, press tick.
Make sure to identify the light source and select the color of your glow accordingly.
I also like to change the blending modes. I went with 'Add' for inner glow and 'Screen' for outer glow. And decrease the opacity a bit as well to make it not stand out a lot.
Now we will add highlights. It's completely optional but makes a big difference!
Add a new blank layer with the + icon on the left side, see below. It should be on the very top. Change blending mode to 'Add.'

Press the ↓ at the bottom to get out of layers panel and from the main tool bar on the left choose the paint brush. The icon is highlighted in image below.
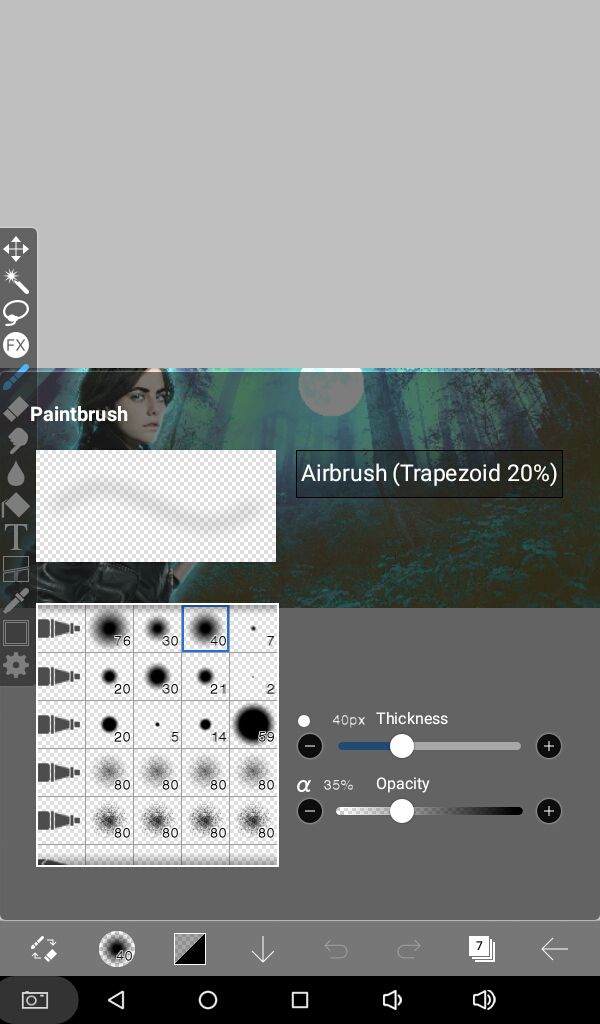
From the tool bar at the bottom you can select brush type and color. The second icon from left is brush selection and the third is color selection.

Select a brush that has smudgy edges. And with a color closer to the model's, paint over the areas that are facing the light source. You can zoom in for better precision.
Just be sure to lower the opacity and choose correct brush size. Both of which can be done with the sliders at the bottom.
I also like to go over the eyes with white and whatever their eye color is to make it pop a little bit more.
Once that is done, change your brush to a thinner one with defined edges. I like to use Pencil #1. To get it for free though, you'll have to watch an advertisement so internet is required. But when you are done watching the ad, you can turn your WiFi off and continue to edit offline. And for watching one add you can use all locked brushes for 18 hours for free.
On the top right corner of the main editing screen, there are four icons. Select the second from the left. A drop down menu will come up. Enable force fade and move both sliders all the way down. Also change the shape of fade if you want to.

Then choose a color that looks exactly like the one of the light source and draw outlines on the curves. Like the models face and jacket creases. I also like to do the surrounding, like trees etc.
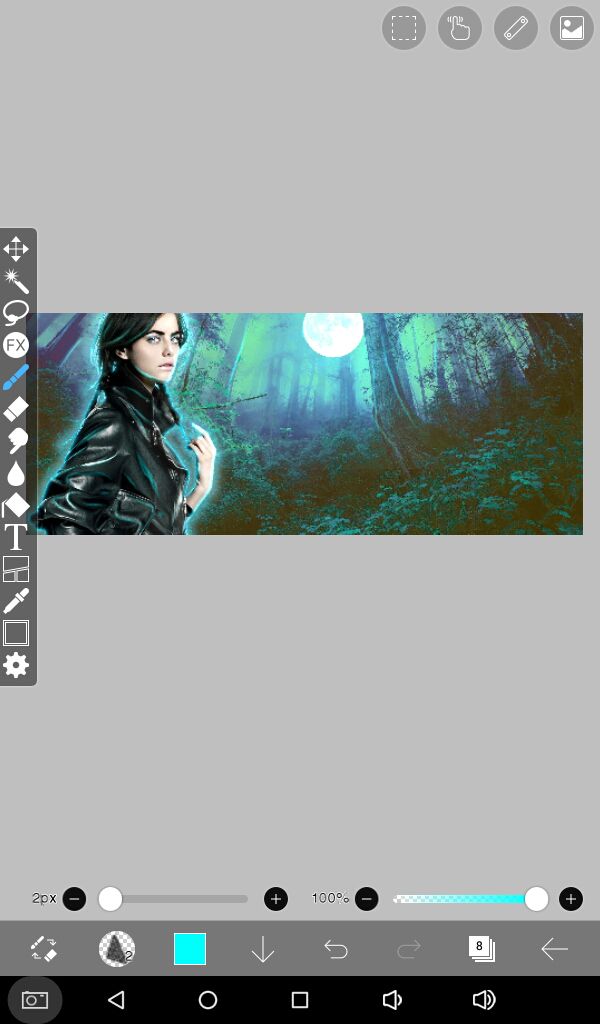
I added a galaxy overlay on top to blend everything together. You can skip it though.
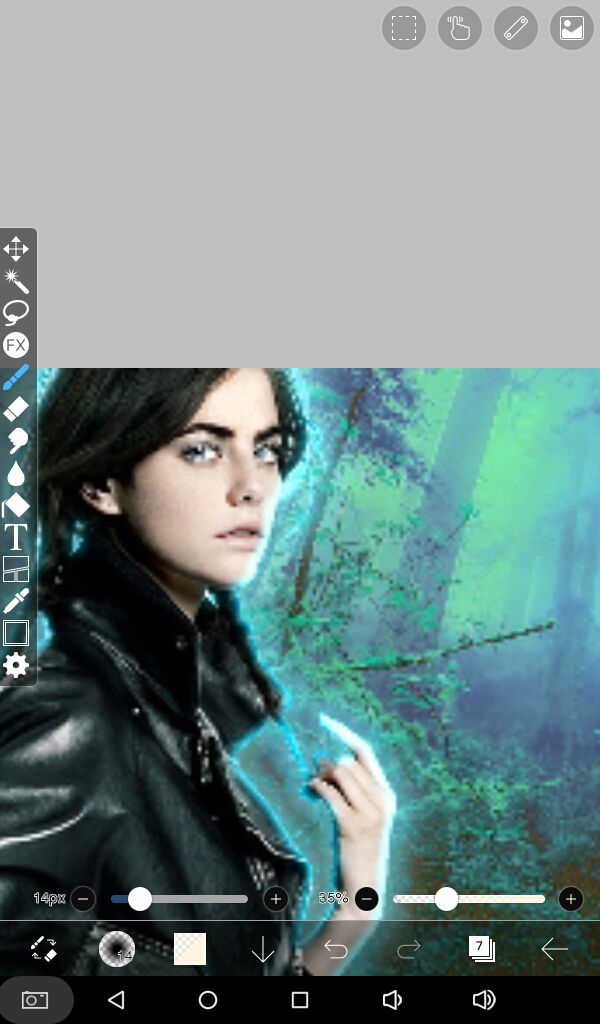
And here's a little before and after adding the glow and highlights...
... See what a big difference it can make!
To be continued...
Bạn đang đọc truyện trên: AzTruyen.Top