GIF BANNERS
A lot of you peeps ask me how I make my gif banners so in celebration of 500 followers, here's a tutorial on that (as promised.)
YAAAY!!
Remember I'm no expert and I have done this only a couple of times. If you are aware of an easy or better method, do let me know, I will wuv to try it out!
We will be using two websites ezgif.com and gifntext.com. I must warn you though that these sites can get extremely laggy so a high speed internet and a lot of patience is a must!! :")
Disclaimer: If your phone/whatever device you are using gets infected with a virus or you loose some important data due to using these sites, I will not be responsible.
That being said, let's hop on to the tutorial.
We will start with ezgif.com. Open your browser and type the site address in the URL box.
This is how the site's home page looks like.
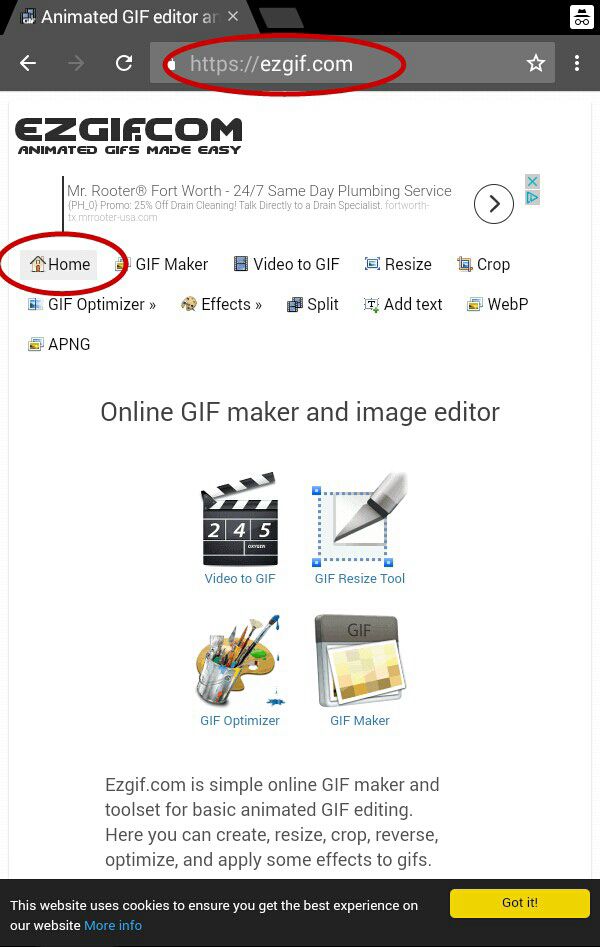
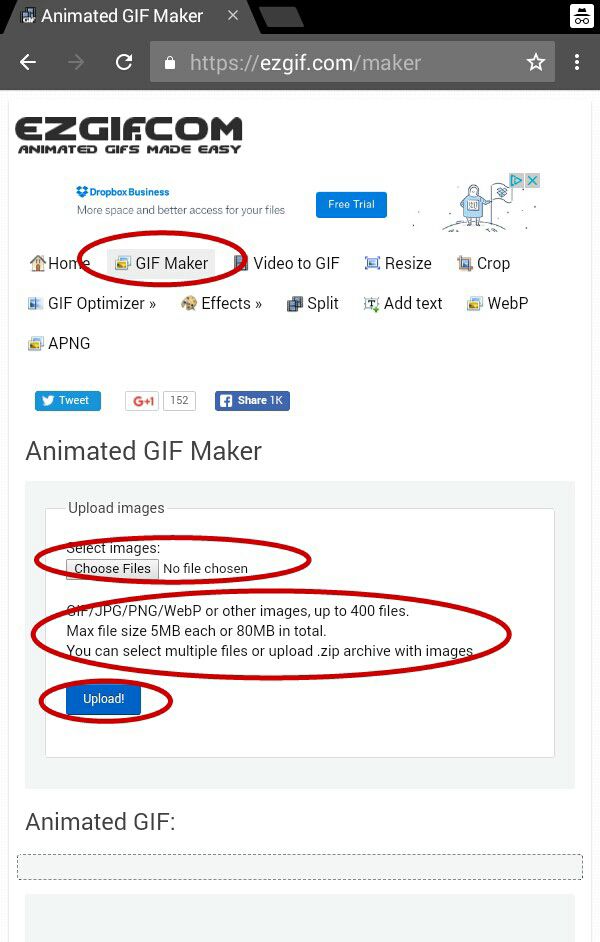
We are gonna select 'Gif Maker' cebause we will combine two gifs to make a new one, our very own spectacular gif as we want it!
As you can see in the image below you can select multiple files at once or even upload a zip file which is seriously cool!
I was making a gif for Burningbrightfire 's book 'Of Ashes' so I used gifs of her main cast (Gabriella Wilde and Tyler Posey) downloaded beforehand from Google.
It's recommended that you use all the gifs of same color.
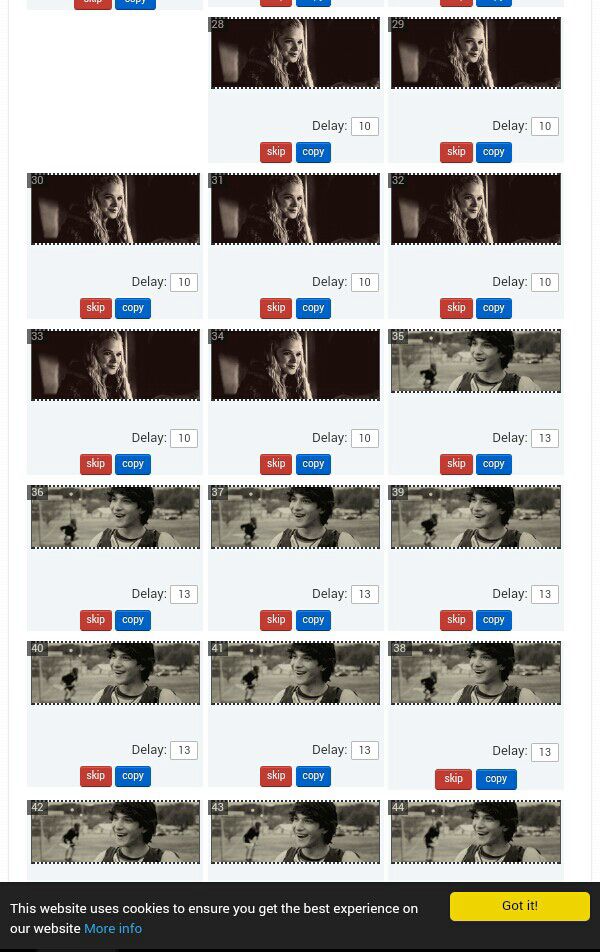
The website will automatically split the gifs into different frames as such.
If you scroll down you will see that it also gives you an option to automatically resize all images to the size of the smallest one. Please accept it.
There are a few other technical choices available but I like to leave them on their default settings.
Press 'Animate It' when you are happy with your settings.
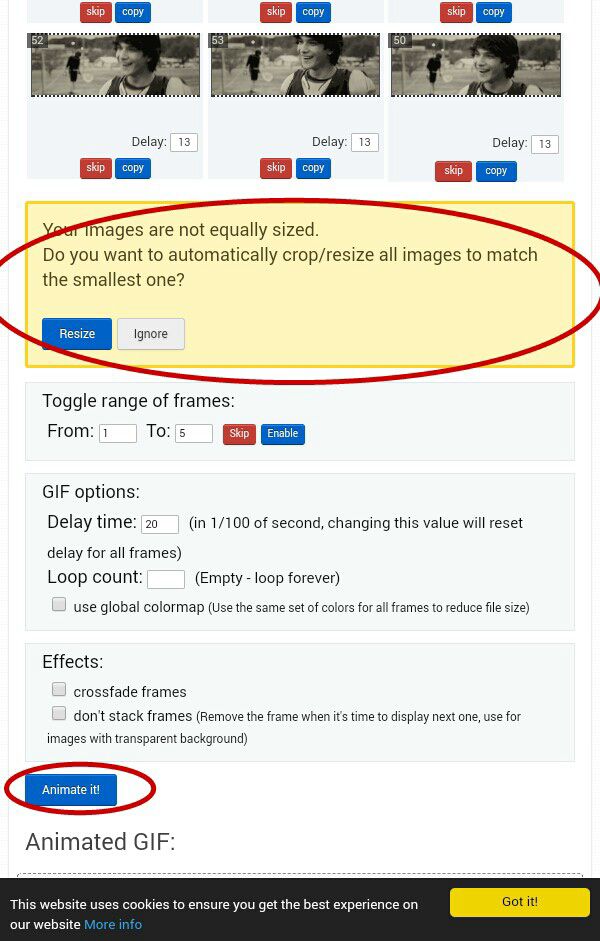
Scroll further down and you will see the combined gif. (Obviously it's not moving here cuz it's a jpg image but it should move for you, both selected gifs joined as one.)
As you can see below, the site clearly states that the created gif will be deleted from their server after sometime so it's better to save it right away.
You might have noticed that there are other options like adding overlay and text but this site does not let mobile users use these as it requires dragging and dropping images which is impossible without a mouse.
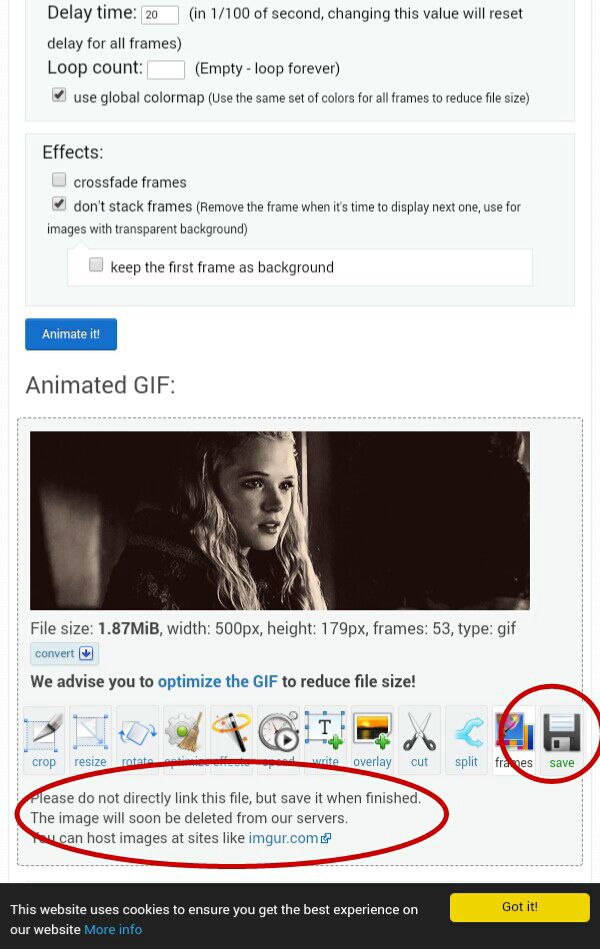
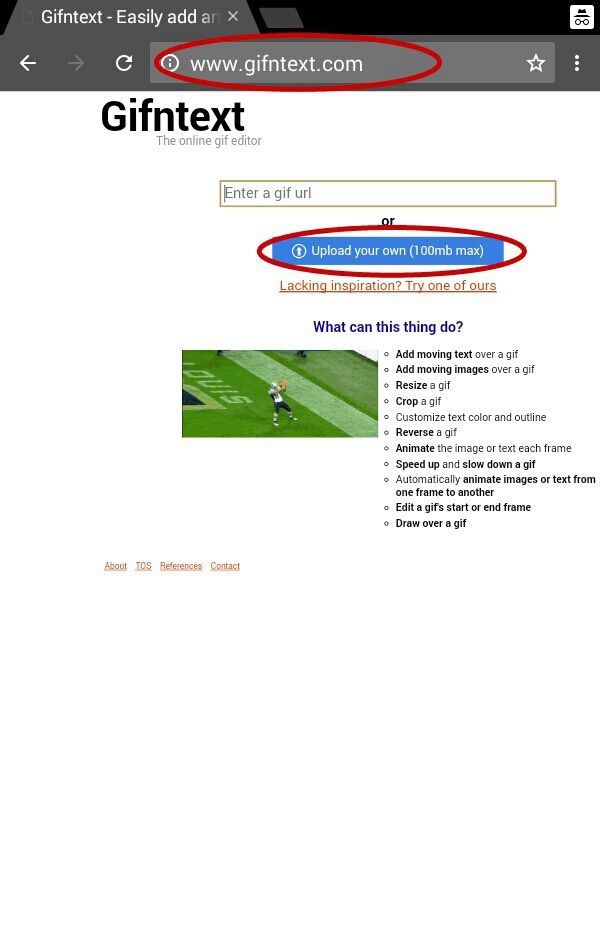
That's why we use gifntext.com.
Upload the saved gif from your gallery in the next site on your browser. This is how the homepage for this site looks like.
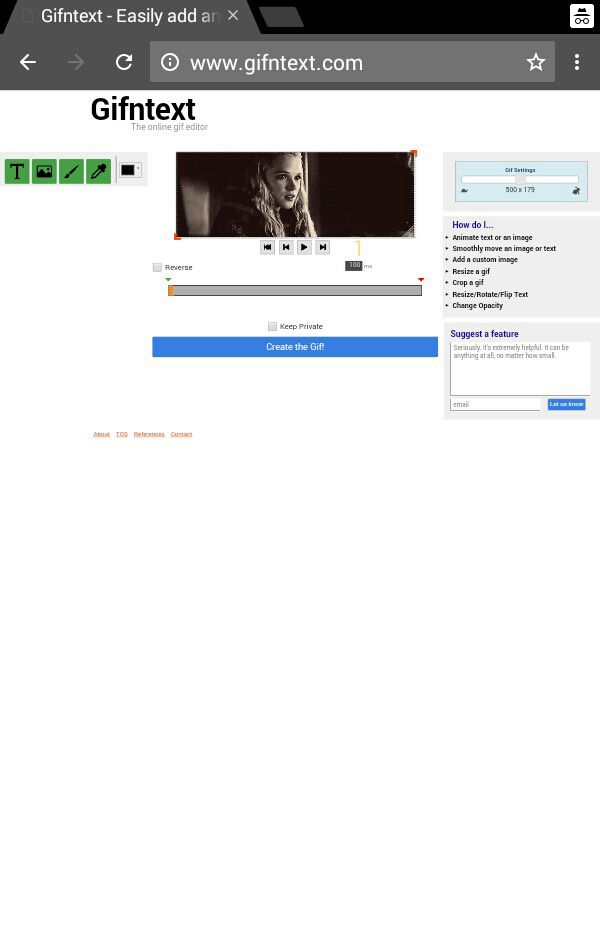
The gif will take quite some time to load so don't panic, it's normal. Once the gif is uploaded successfully your screen should look like this.
We will add pngs now. Like we did before, you need to have all the resources pre downloaded in your device.
From the options available on the left (T is for text, the scenery image is to add images, the paint brush is for drawing and the dropper is to correct red eye), upload the first png from your gallery (it can be a character or a decoration.)
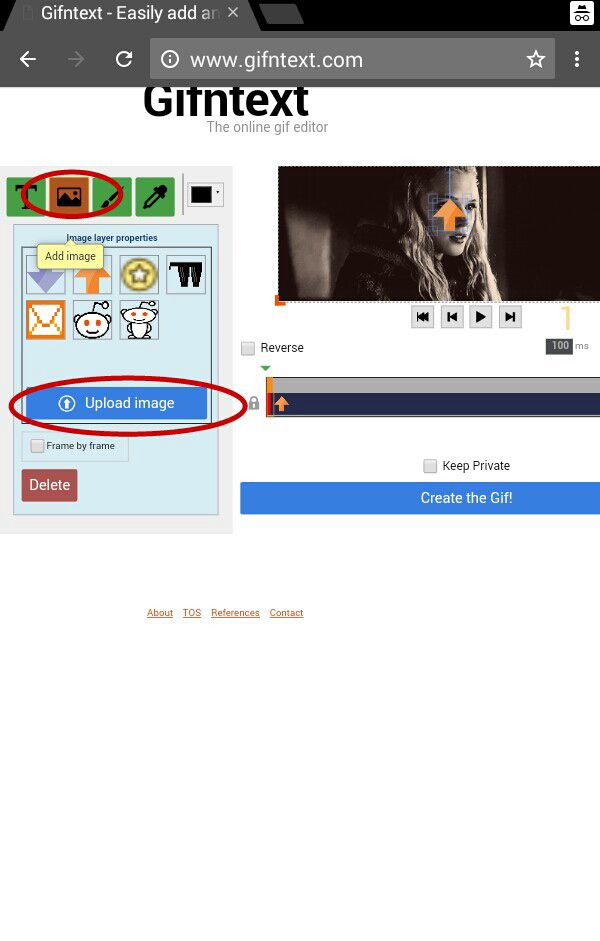
The selected png will appear in the centre of the gif. To increase or decrease its size we are gonna use the squares in the corners and sides.
Zooming in helps to get precision.
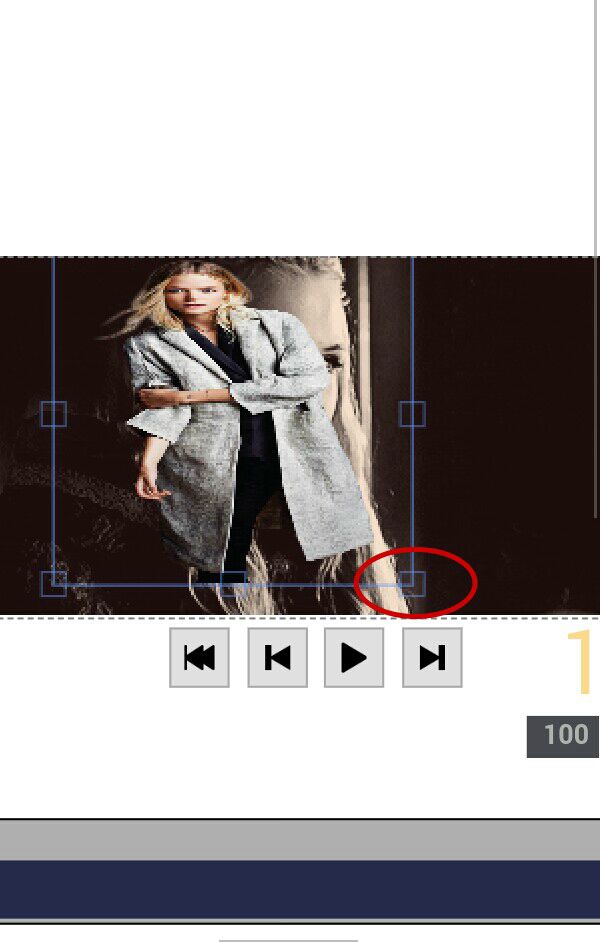
Add as many pngs as you like (but make sure not to make the gif too crowded, remember it needs space to move.)
Next we add text.
There's option to change color (you can create custom color), font (there's enough choices available) and style (bold/italic.)
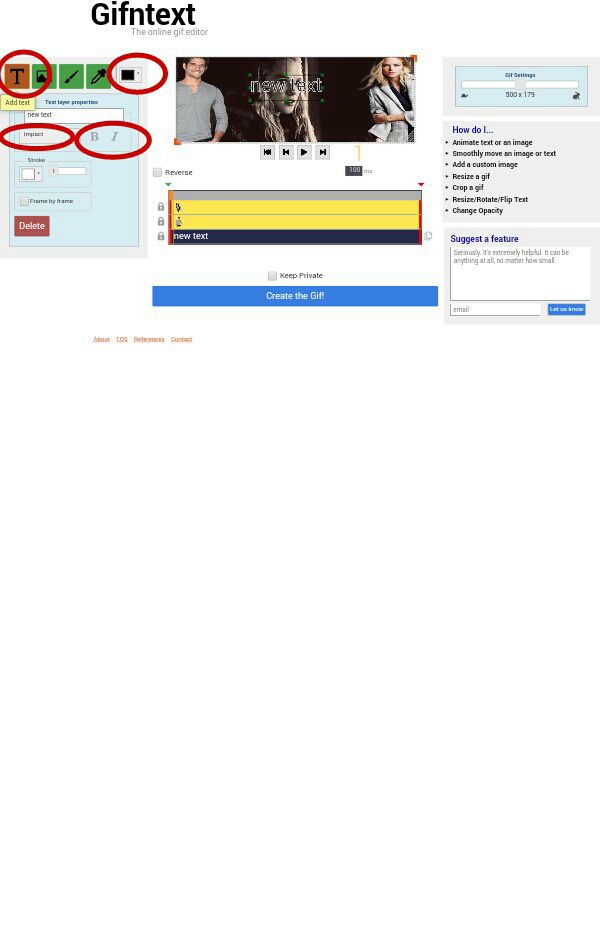
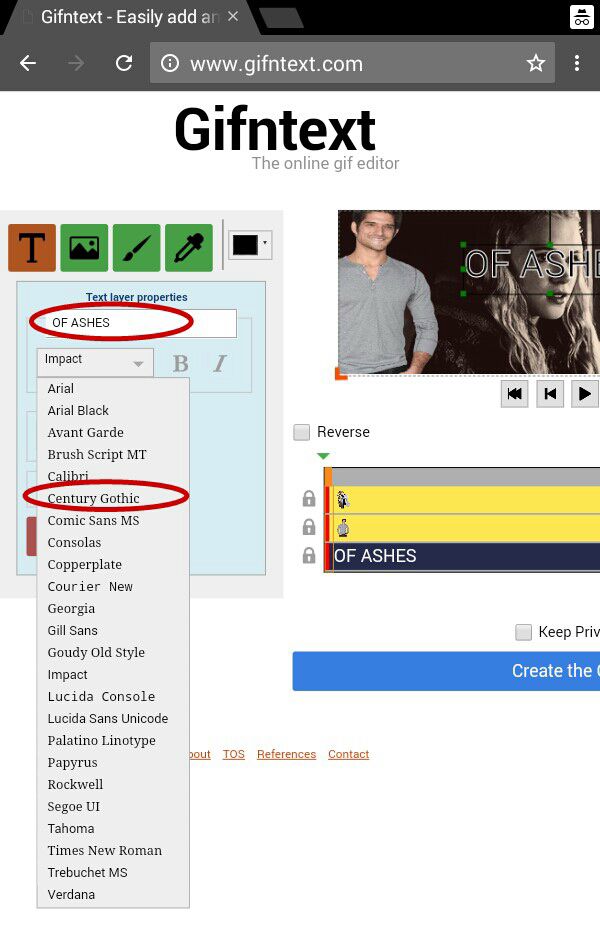
Type your text in the designated box. And select font. I went for century gothic in italics.
Similar to the pngs, the text will appear in the center of the gif and the squares can be used to increase or decrease its size by dragging a certain corner with your finger.
Again, zooming in is recommended.
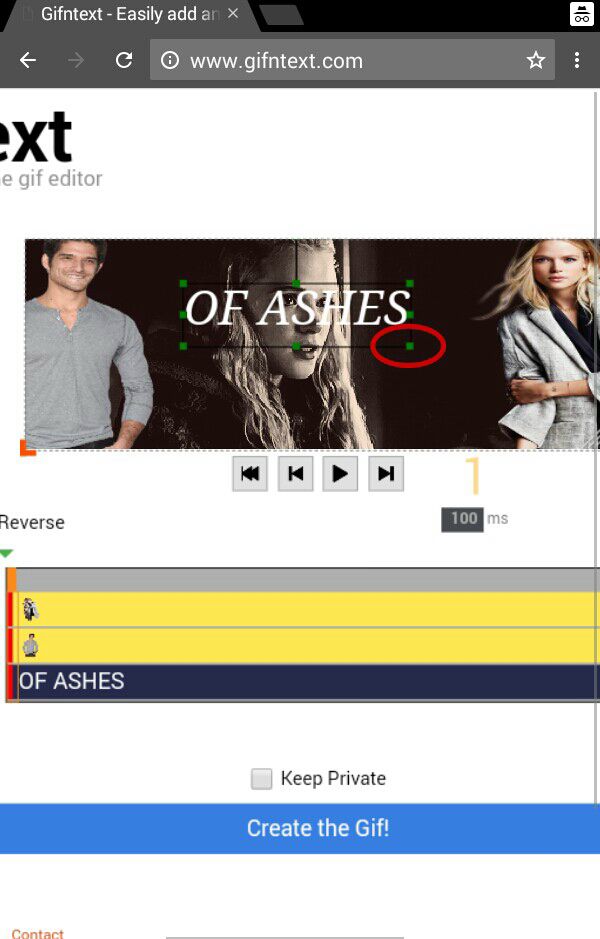
After adding all the text and images, your gif should look something like shown below.
I added a color overlay over it on a very low opacity in a similar fashion as we added all other images but it's not necessary. I edited the coloring on PicsArt and saved it to my gallery before hand.
There's an option available to look at your gif playing before you save it. You know, you might want to change placement of a certain png as it was blocking your cast.
When you are satisfied with your creation, press the 'create the gif!' button.
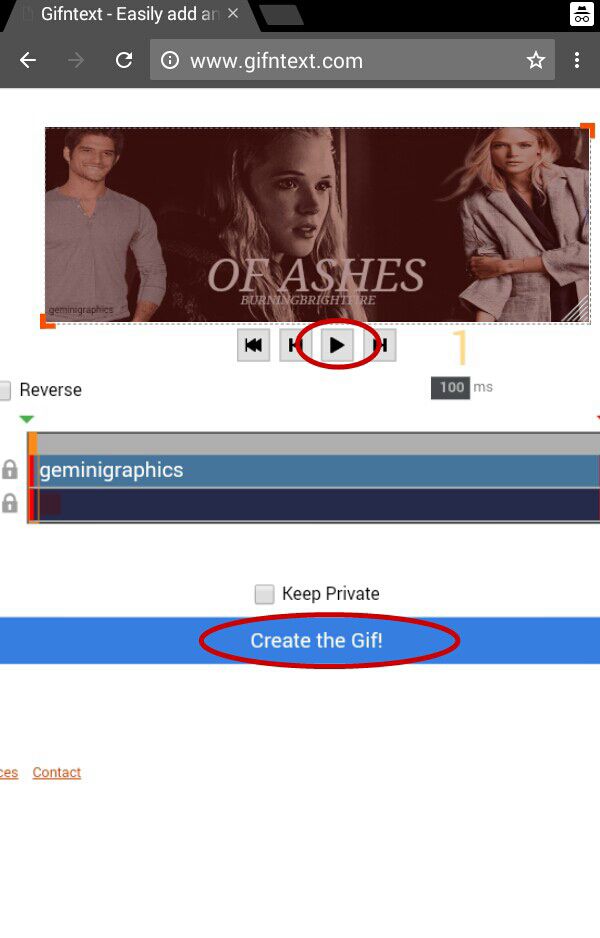
The gif will take some time to load.

This website also don't save gifs on its servers for long time so download it right away!
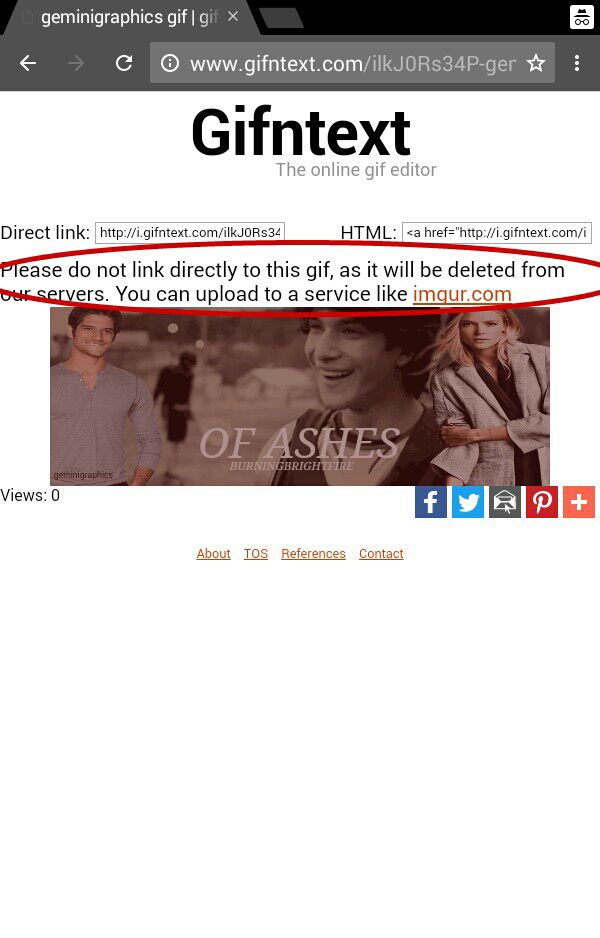
The final gif result can be seen in the media section above because apparently I made it too big for Wattpad and I realized it too late! *facepalm*
Well that was it!
Hope you guys find it useful.
Got any questions?! Ask away in the comments.
If you try this out, do tag me. I'll lub to see what you came up with.
Bạn đang đọc truyện trên: AzTruyen.Top