STOP 001. CONTOURS
GUIDE: noestalgia
Hey guys! This is Eva and today I will show you how to create contours on a person's face for your cover!
APP USED - PICSART
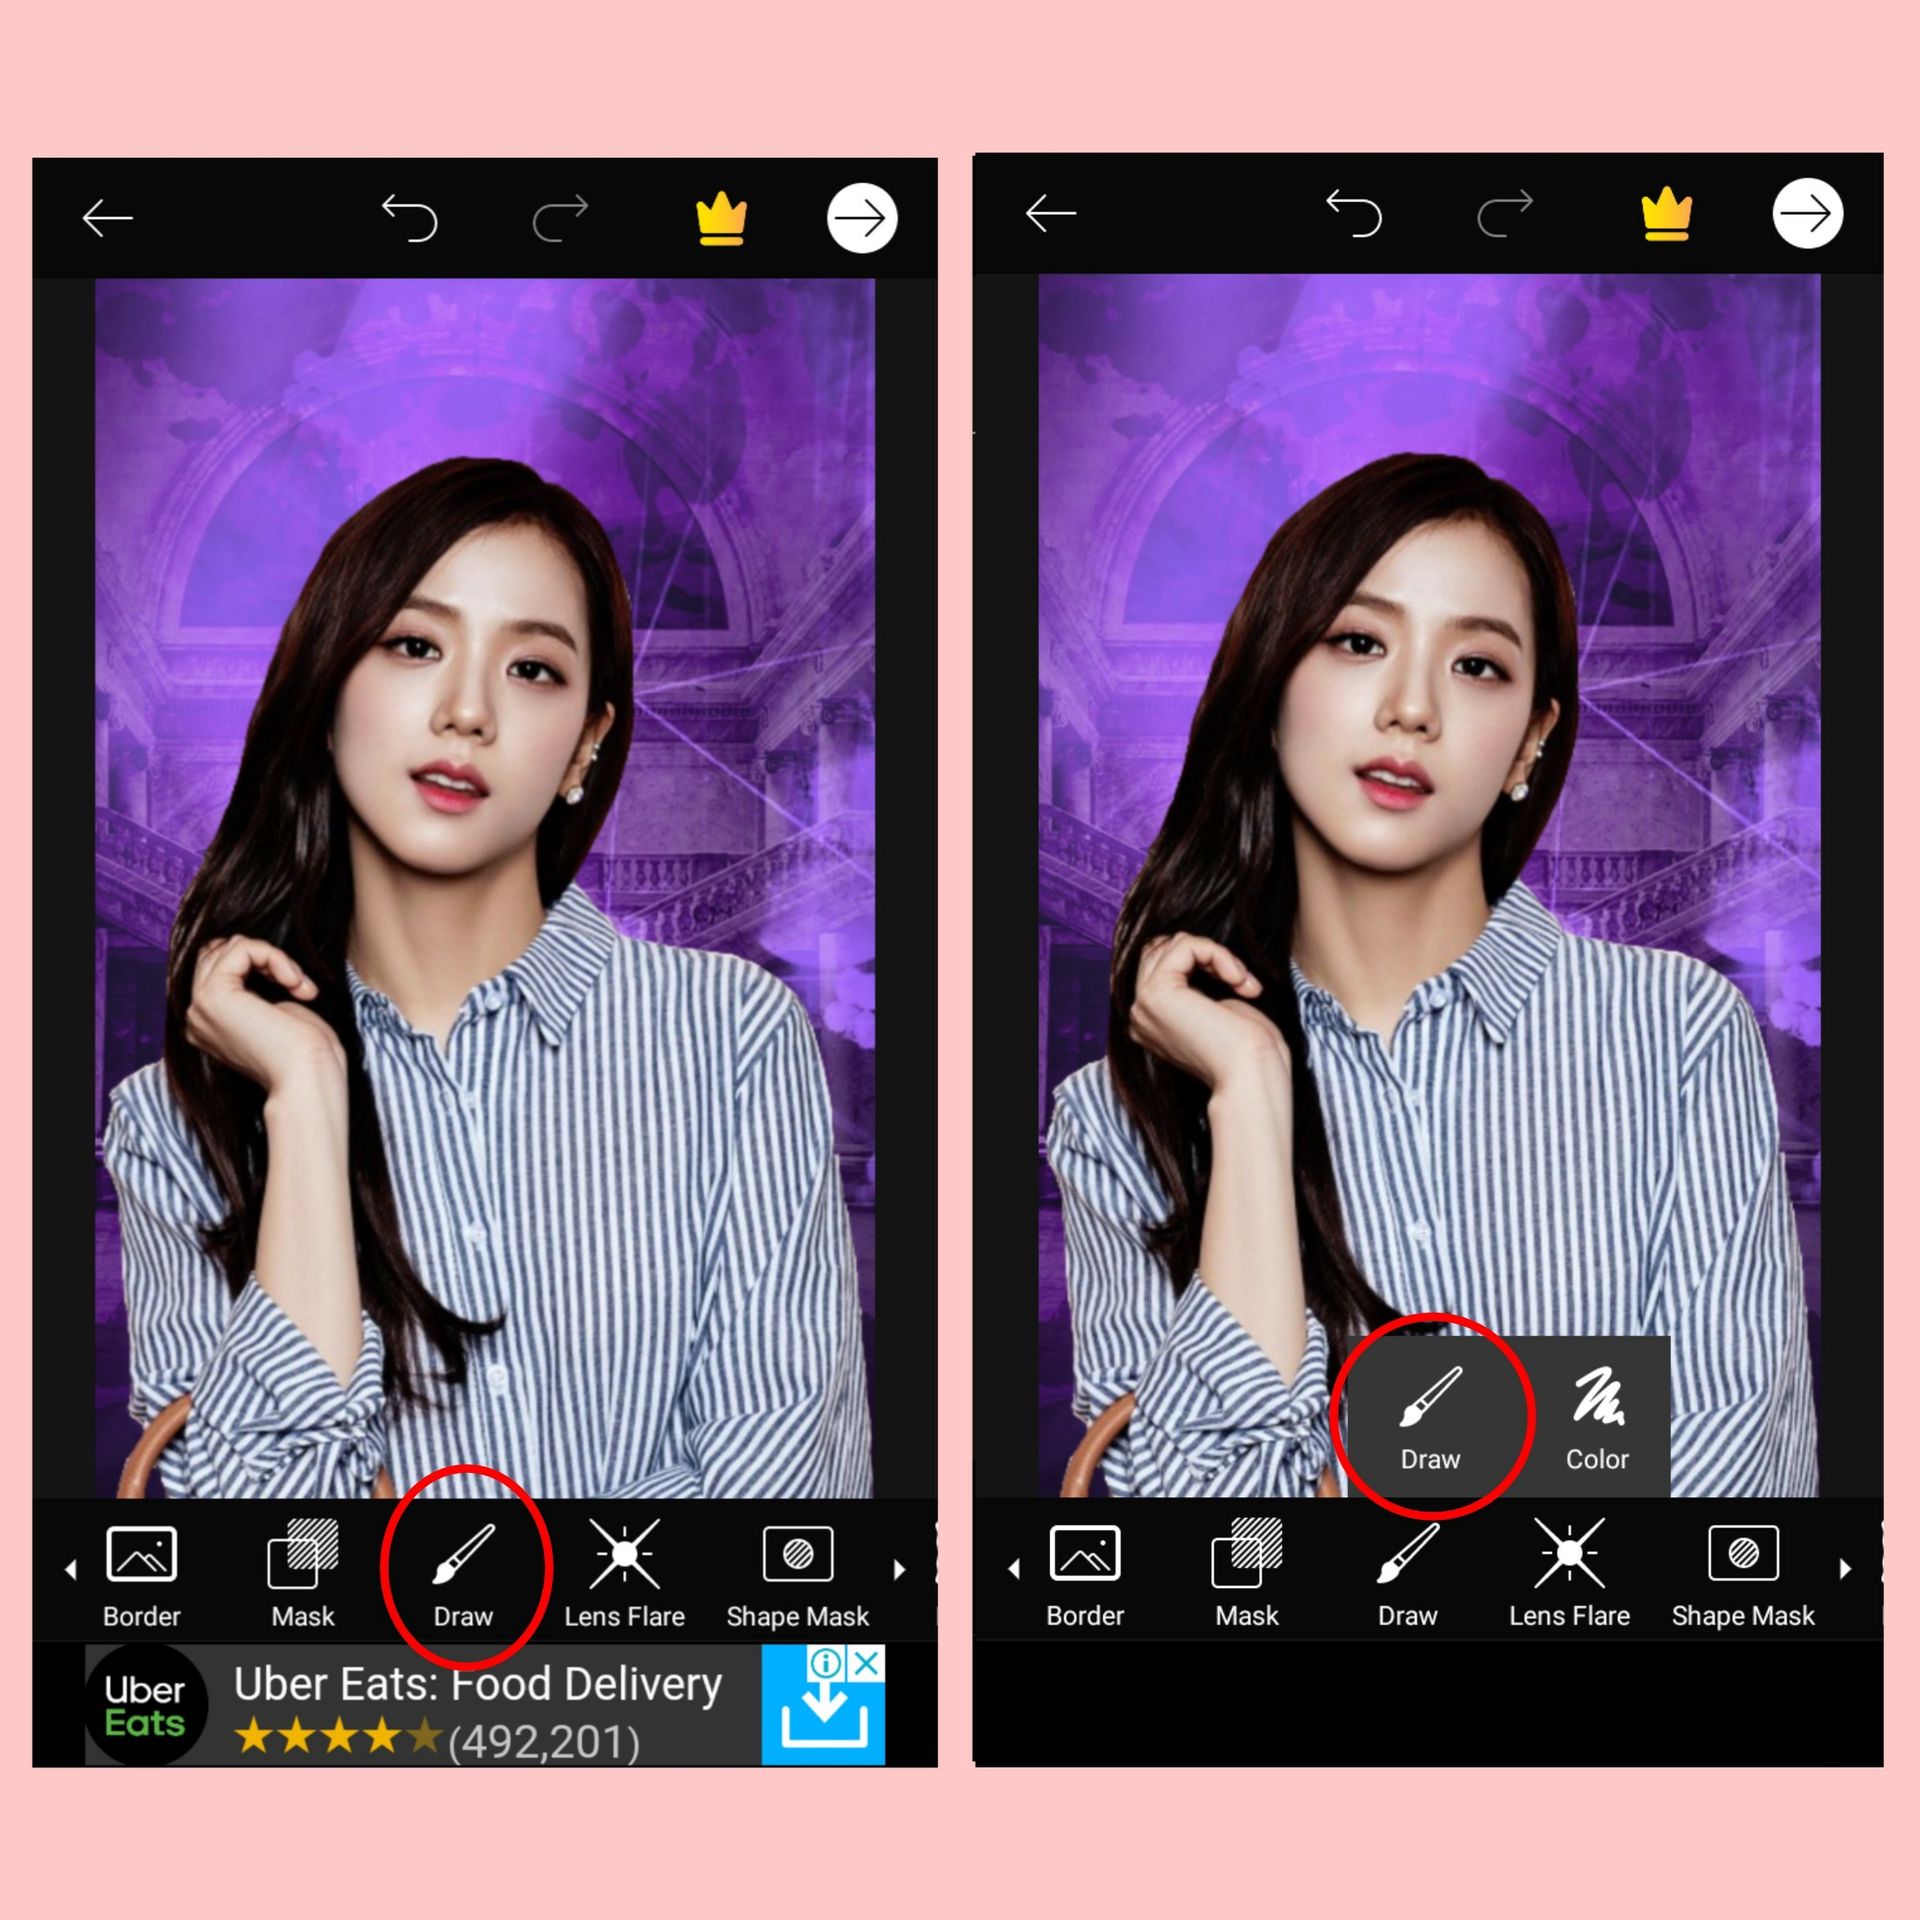
STEP ONE : Open PicsArt and upload a background for your cover. Then add a png of the person who will be the main face claim of the cover and who you will be contouring later.

STEP TWO : Next click the option 'Draw' and then two options will appear - Draw and Colour. Click Draw again.
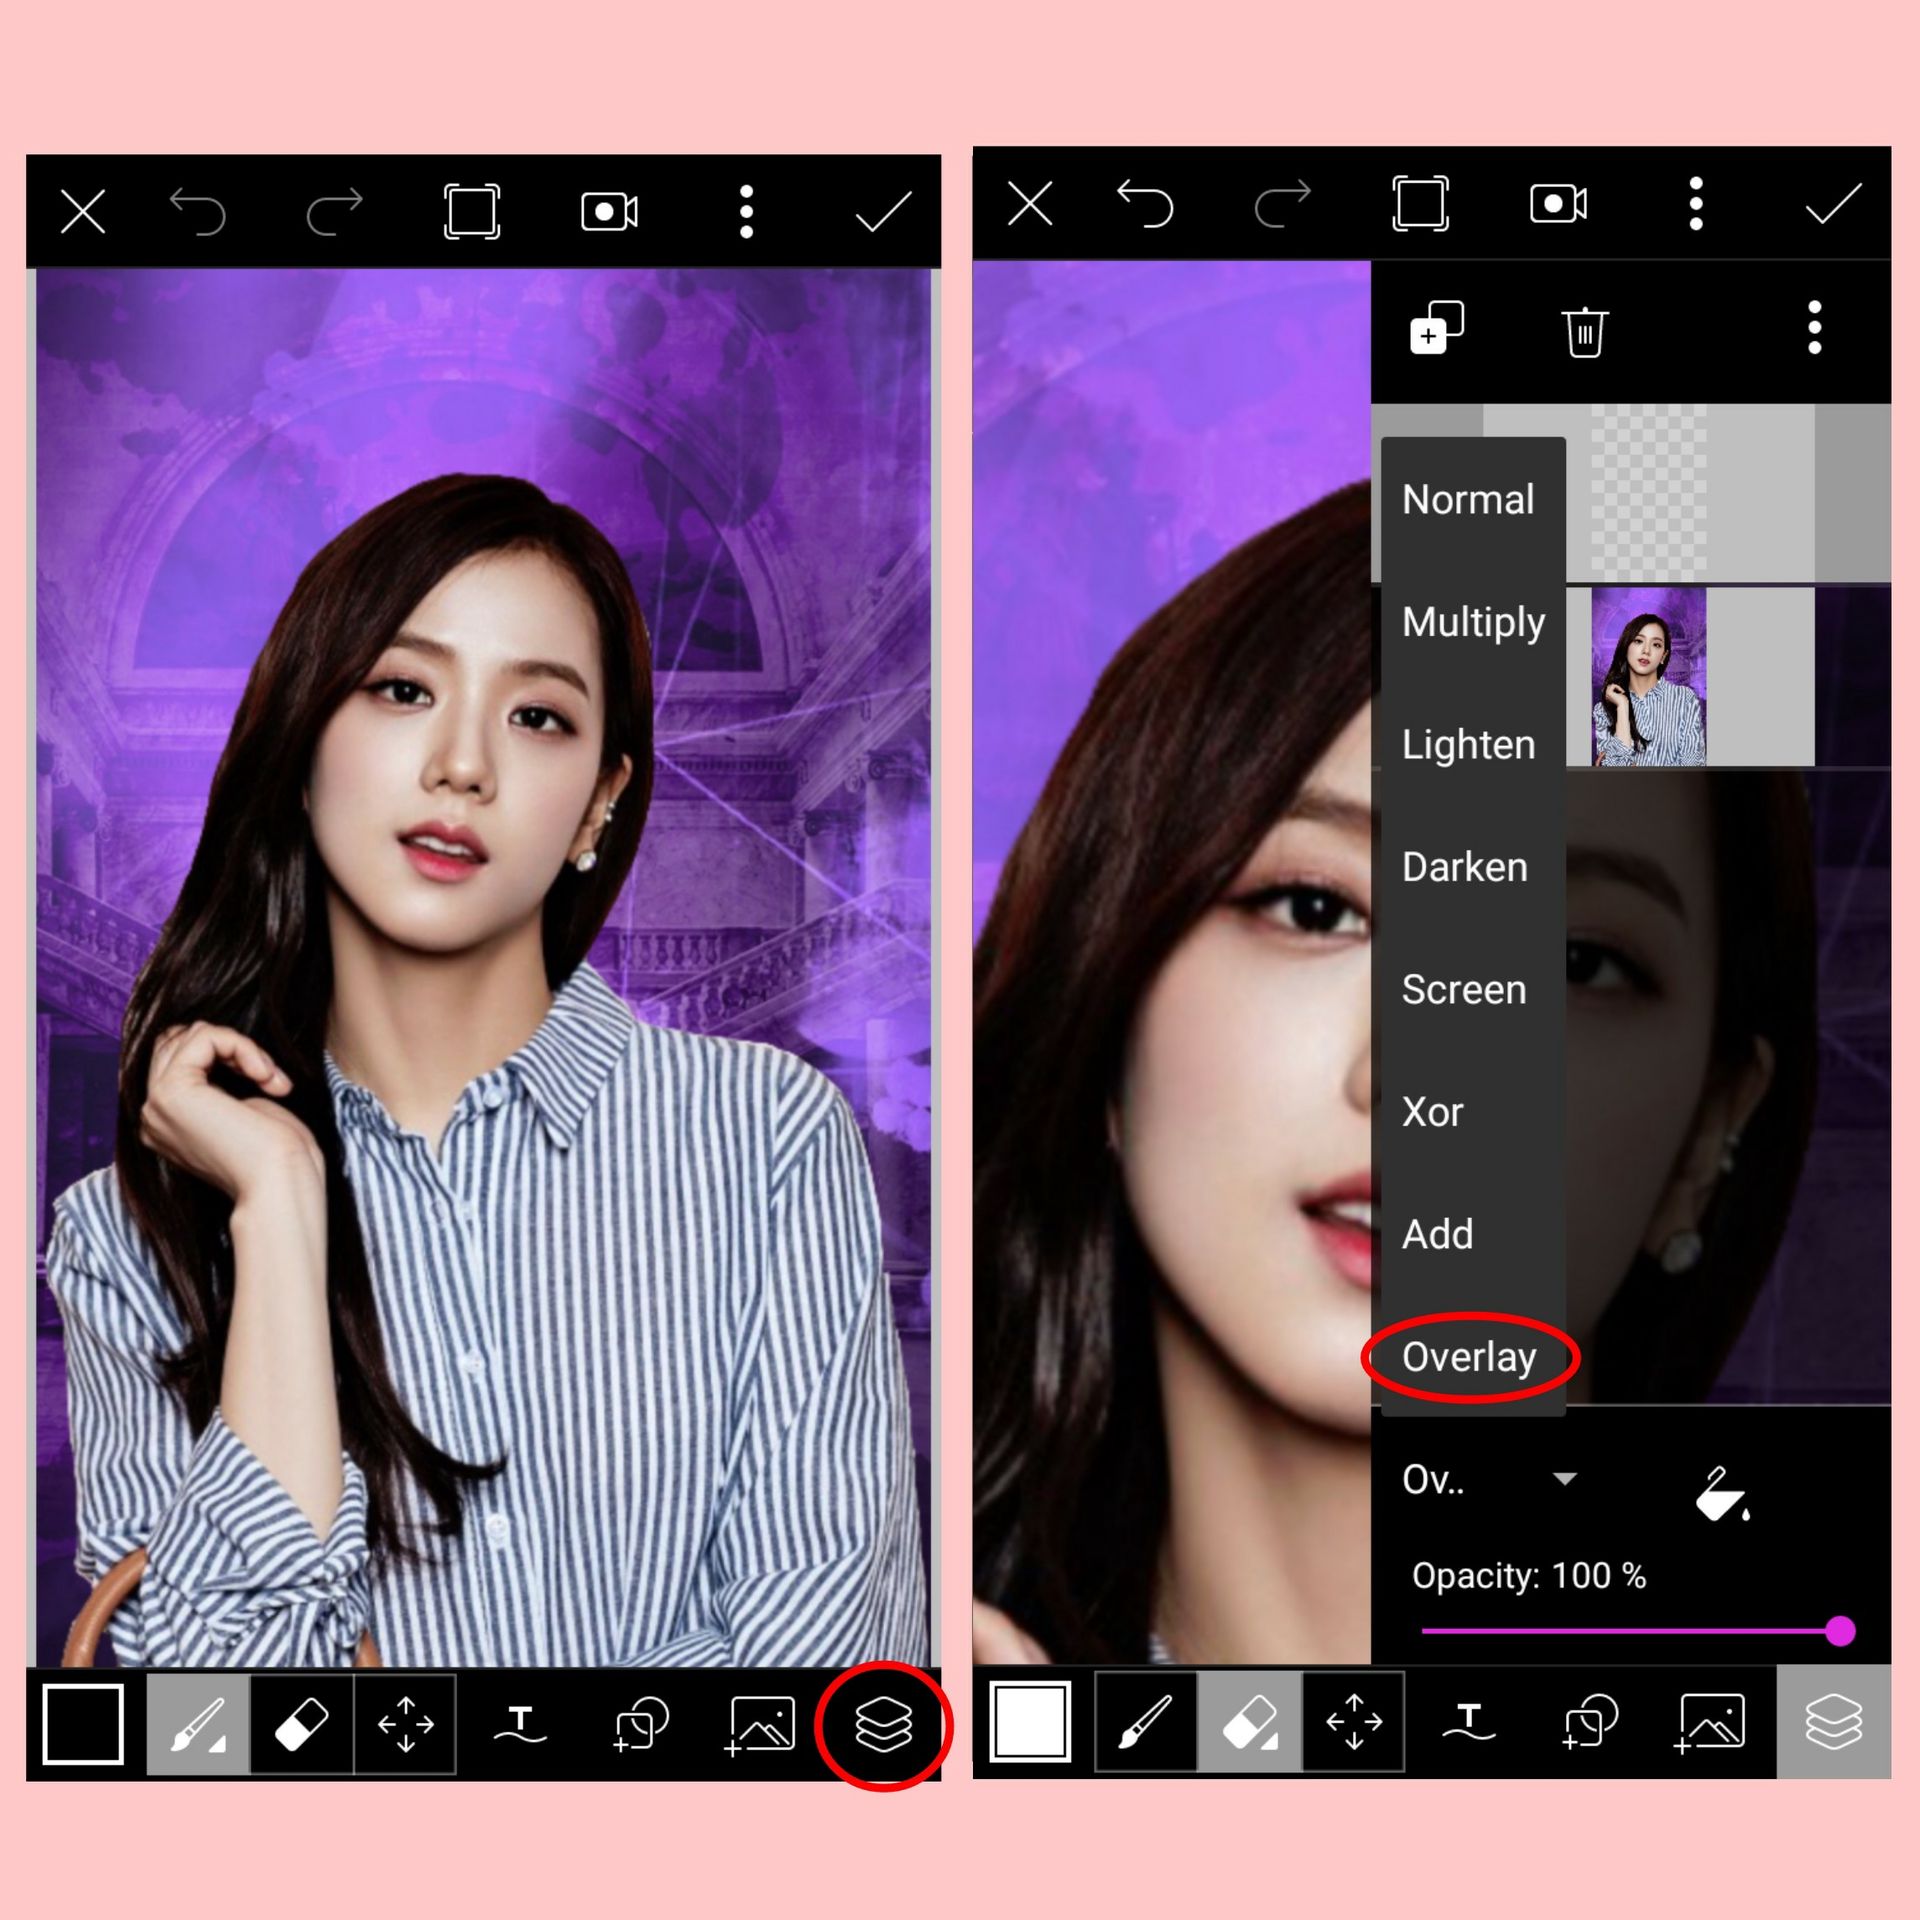
STEP THREE : Now, press the last button at the downright corner. It looks like three layers stacked on top of each other. A box will pop up which is the layer box. Here you can see all the layers. Now select the new layer which is already there and click the blending settings. Choose Overlay.
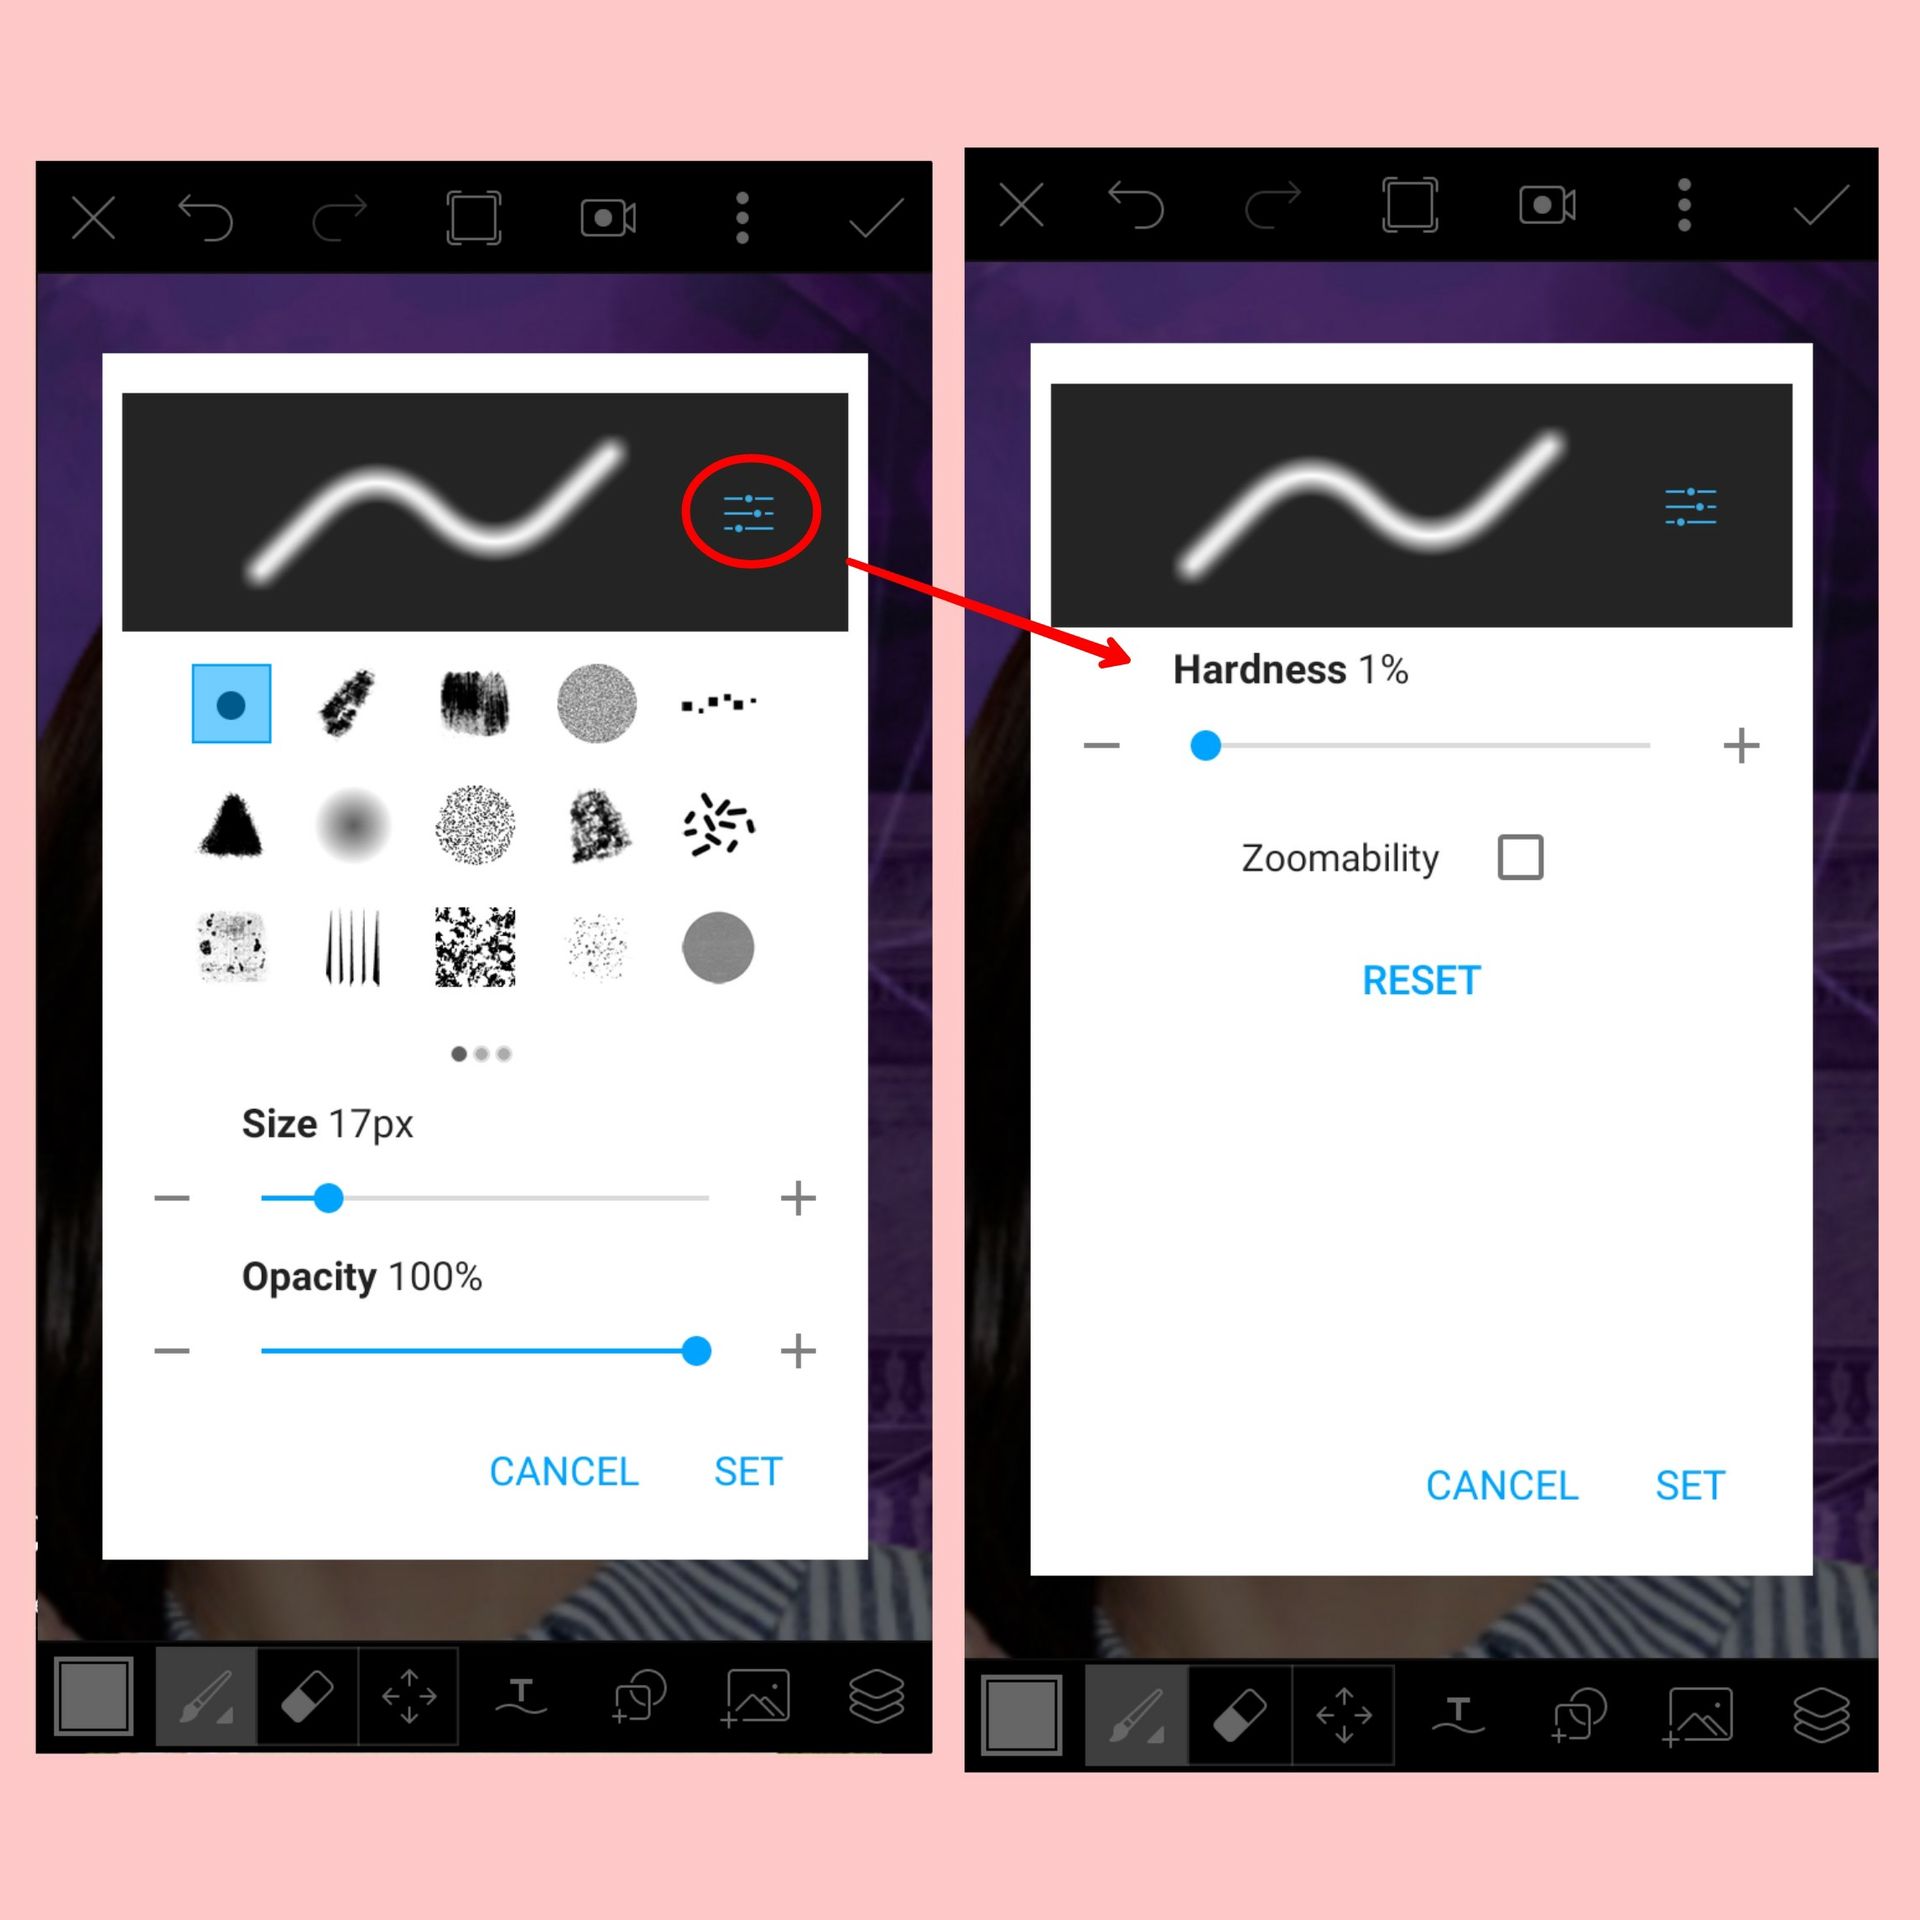
STEP FOUR : Now select your brush and adjust it accordingly. Make sure to make the hardness 1% to make the brush smoother. To do that, click on the circle and the hardness setting will appear. When you are done, click Set.
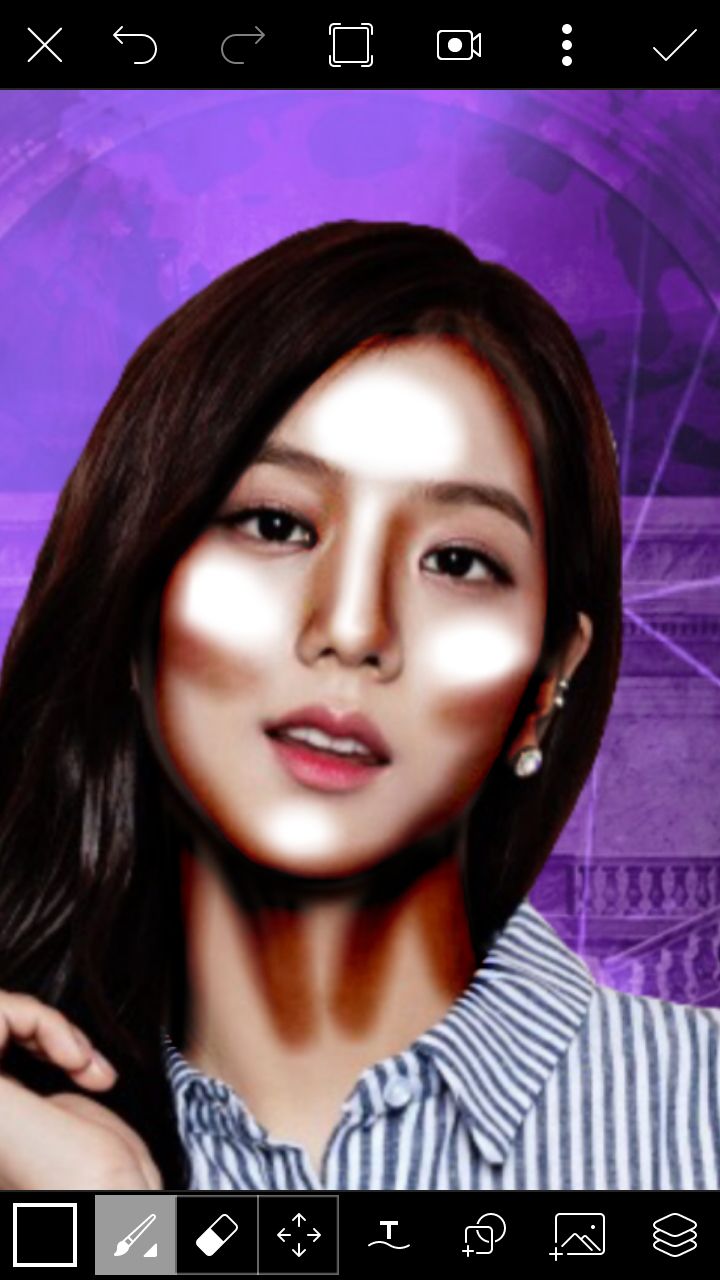
STEP FIVE : Now time for contouring! First, set your brush colour white and highlight the following places the nose, the area under the eyes, the chin, the forehead and the neck if you want to.
Once you are done, change the colour to black and contour the following places: the sides of the nose, the cheekbones, chin, outline of the face and the neck if you want to.
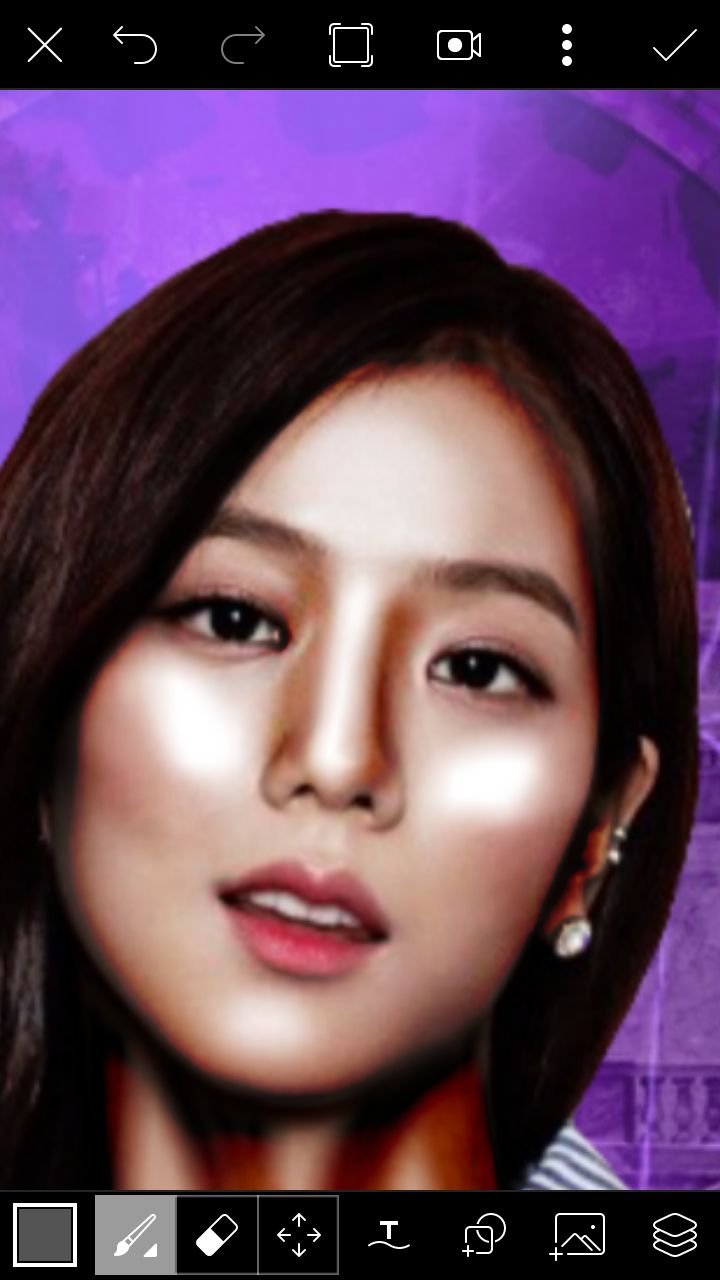
Now the face will look something like this :
STEP SIX : Now we have to blend the two colours to make the skin look smoother. Many people skip this step because this will take a little bit of your effort but I think it is important.
So change the colour to a lighter grey and decrease the opacity of the brush.
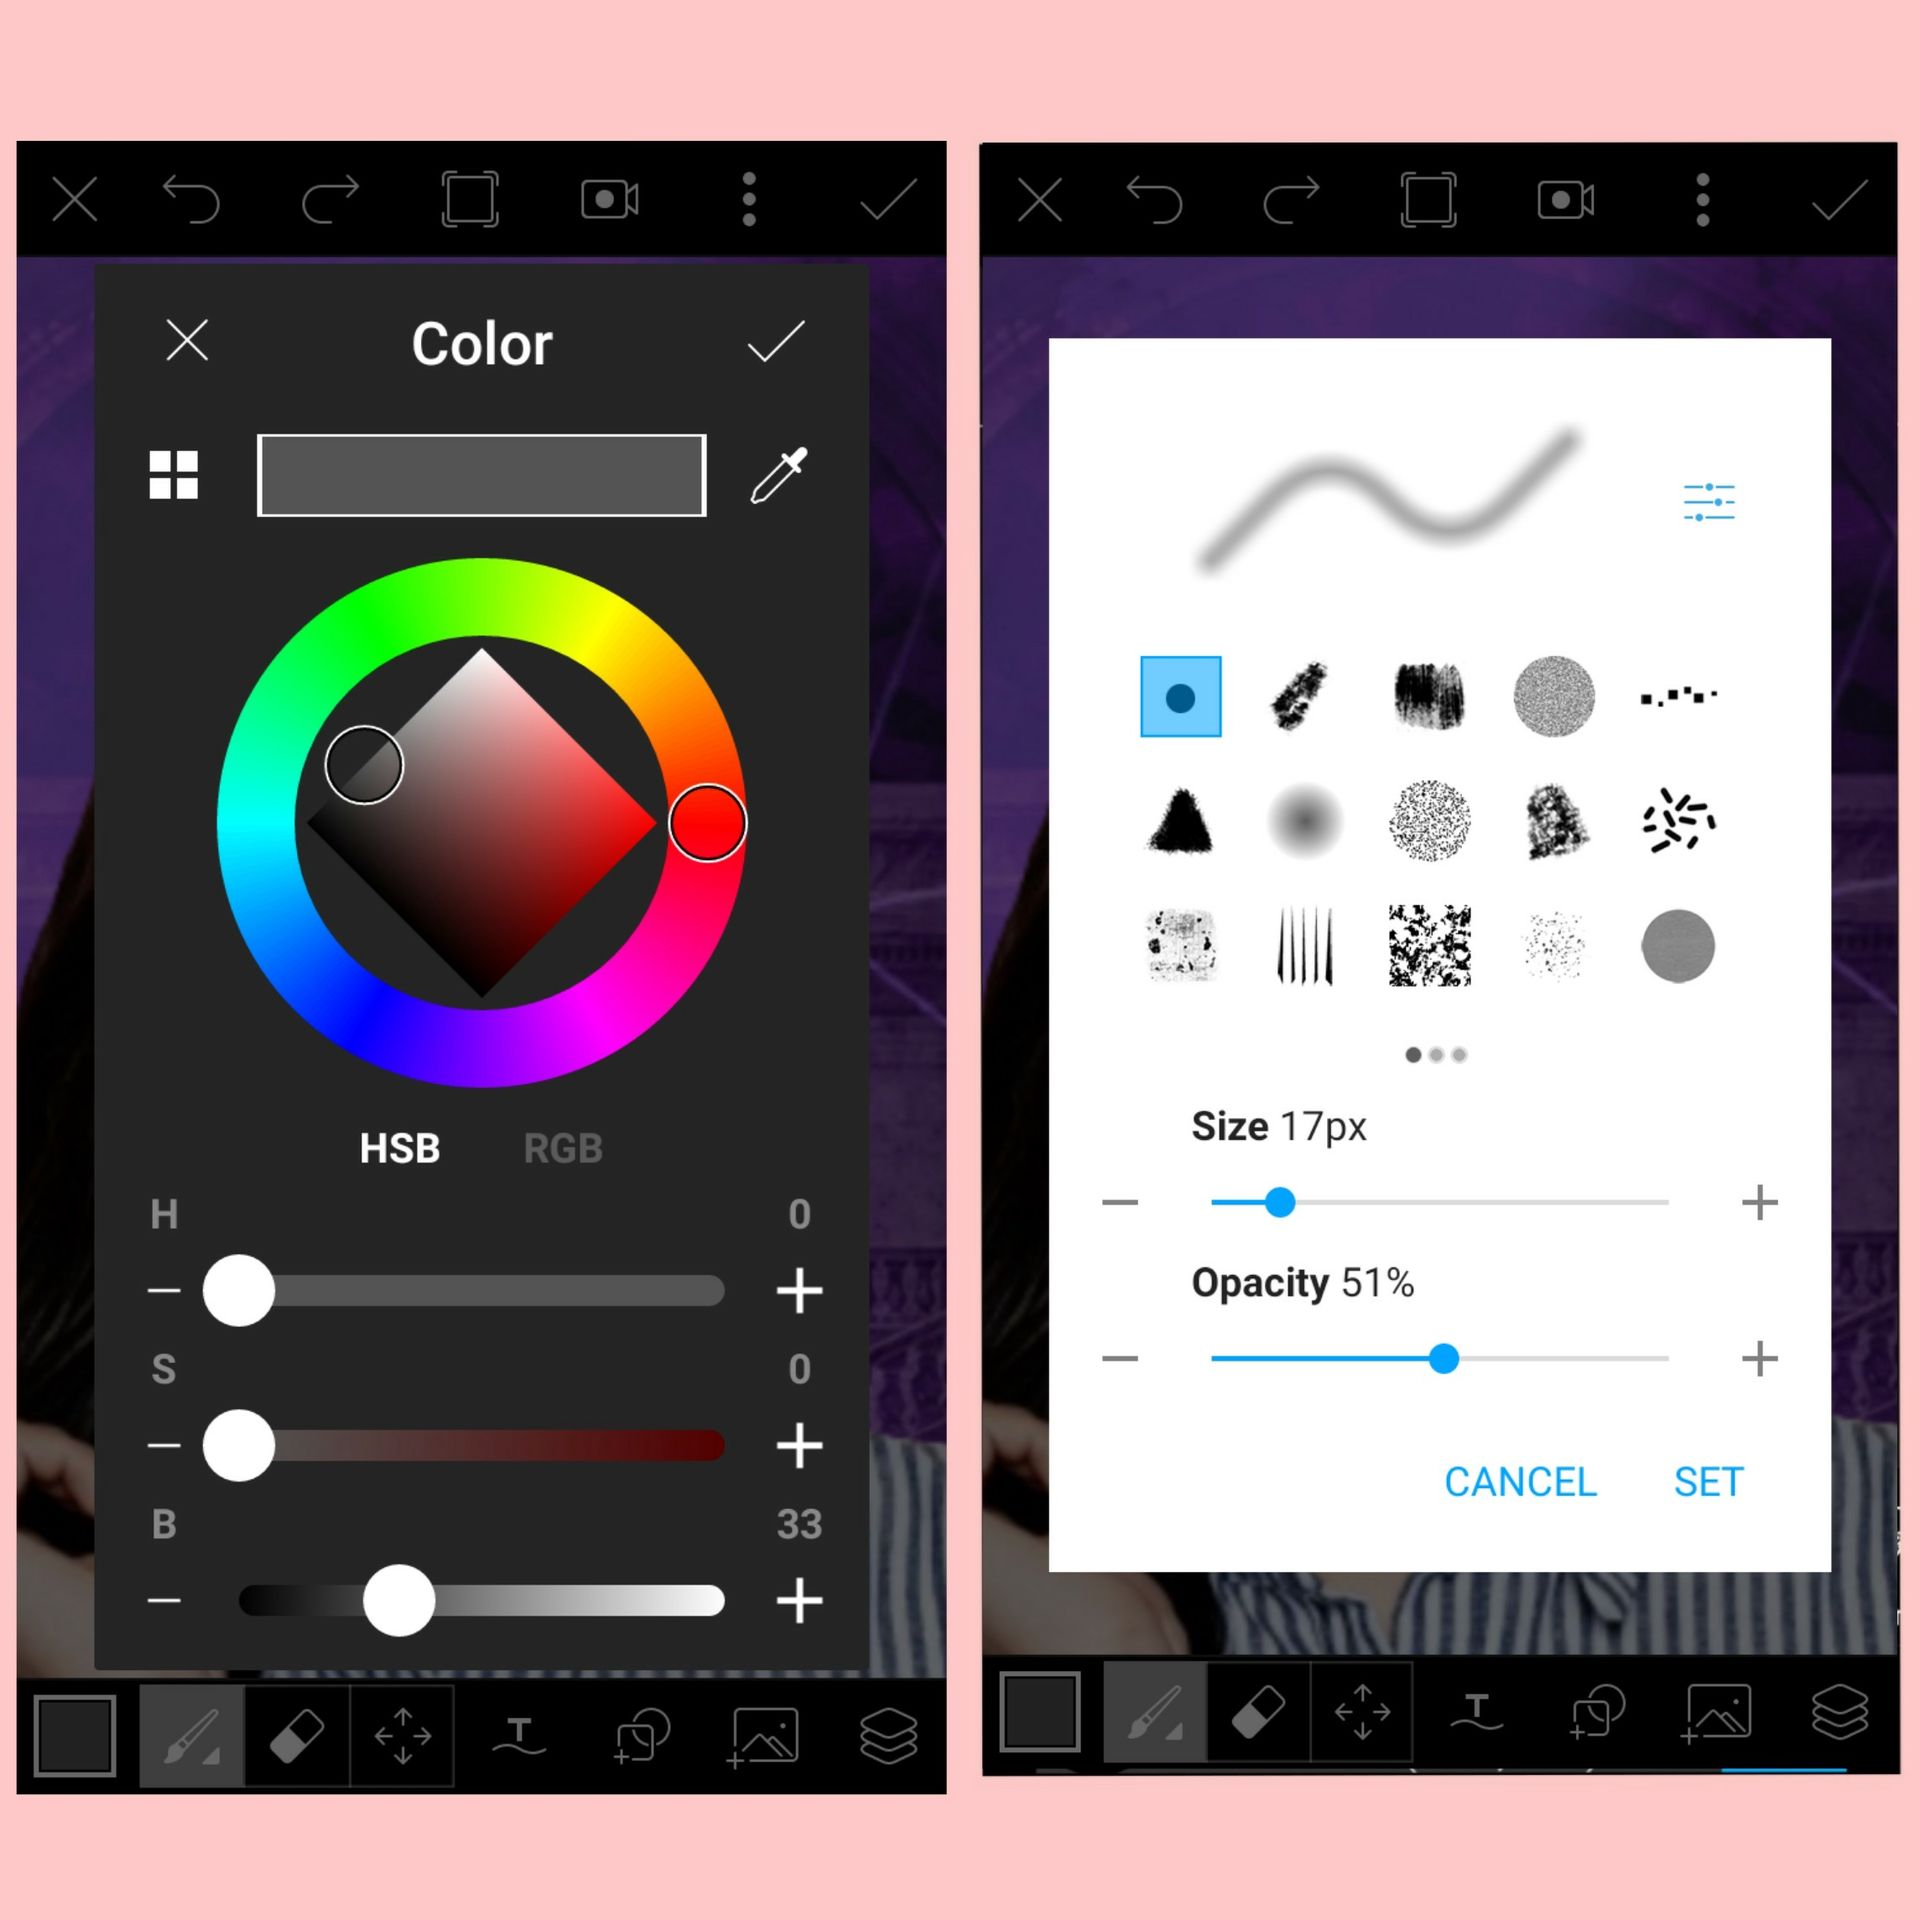
STEP SEVEN : Now slowly brush the sides of the highlights and then the contours and you will see it will slowly start blending. If you feel some area is too dark, brush on top of it to lighten it. If some area seems too white, then brush on top of it also.
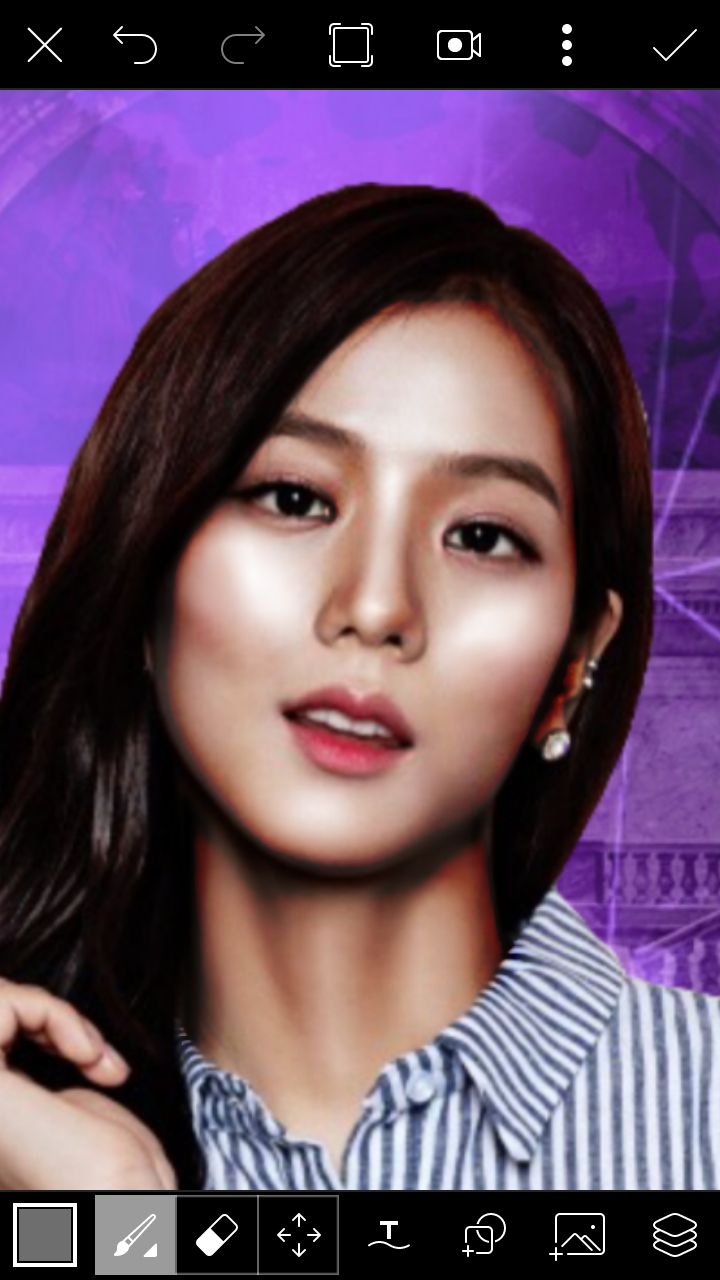
This will be the end result.
STEP EIGHT : This step is not necessary but if you want you can make the grey a little bit more lighter and brush over the highlights and spread it. Basically it will smoothen the skin and give it a glow.
STEP NINE : Now click on the layer button again (I don't know what to call it) and adjust the opacity of the layer accordingly.
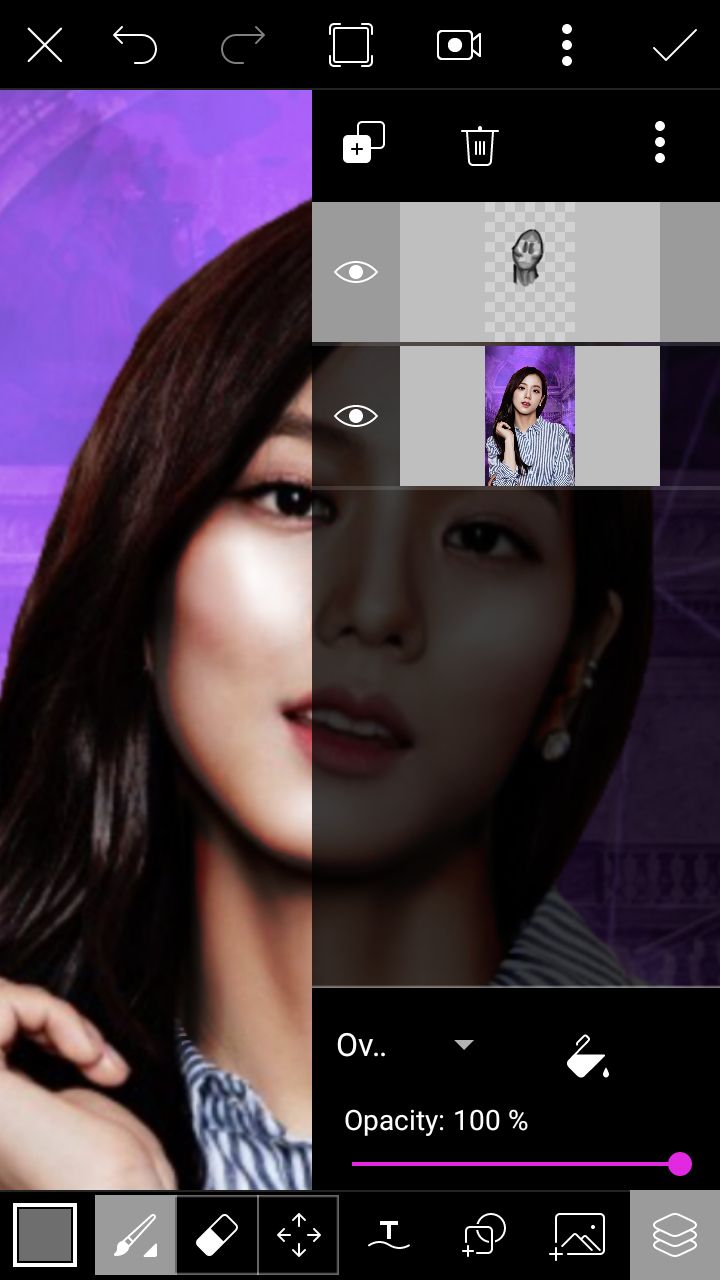
And then click the tick at the upper right corner and YOU ARE DONE MY FRIEND! You have successfully given your model a nice contour.
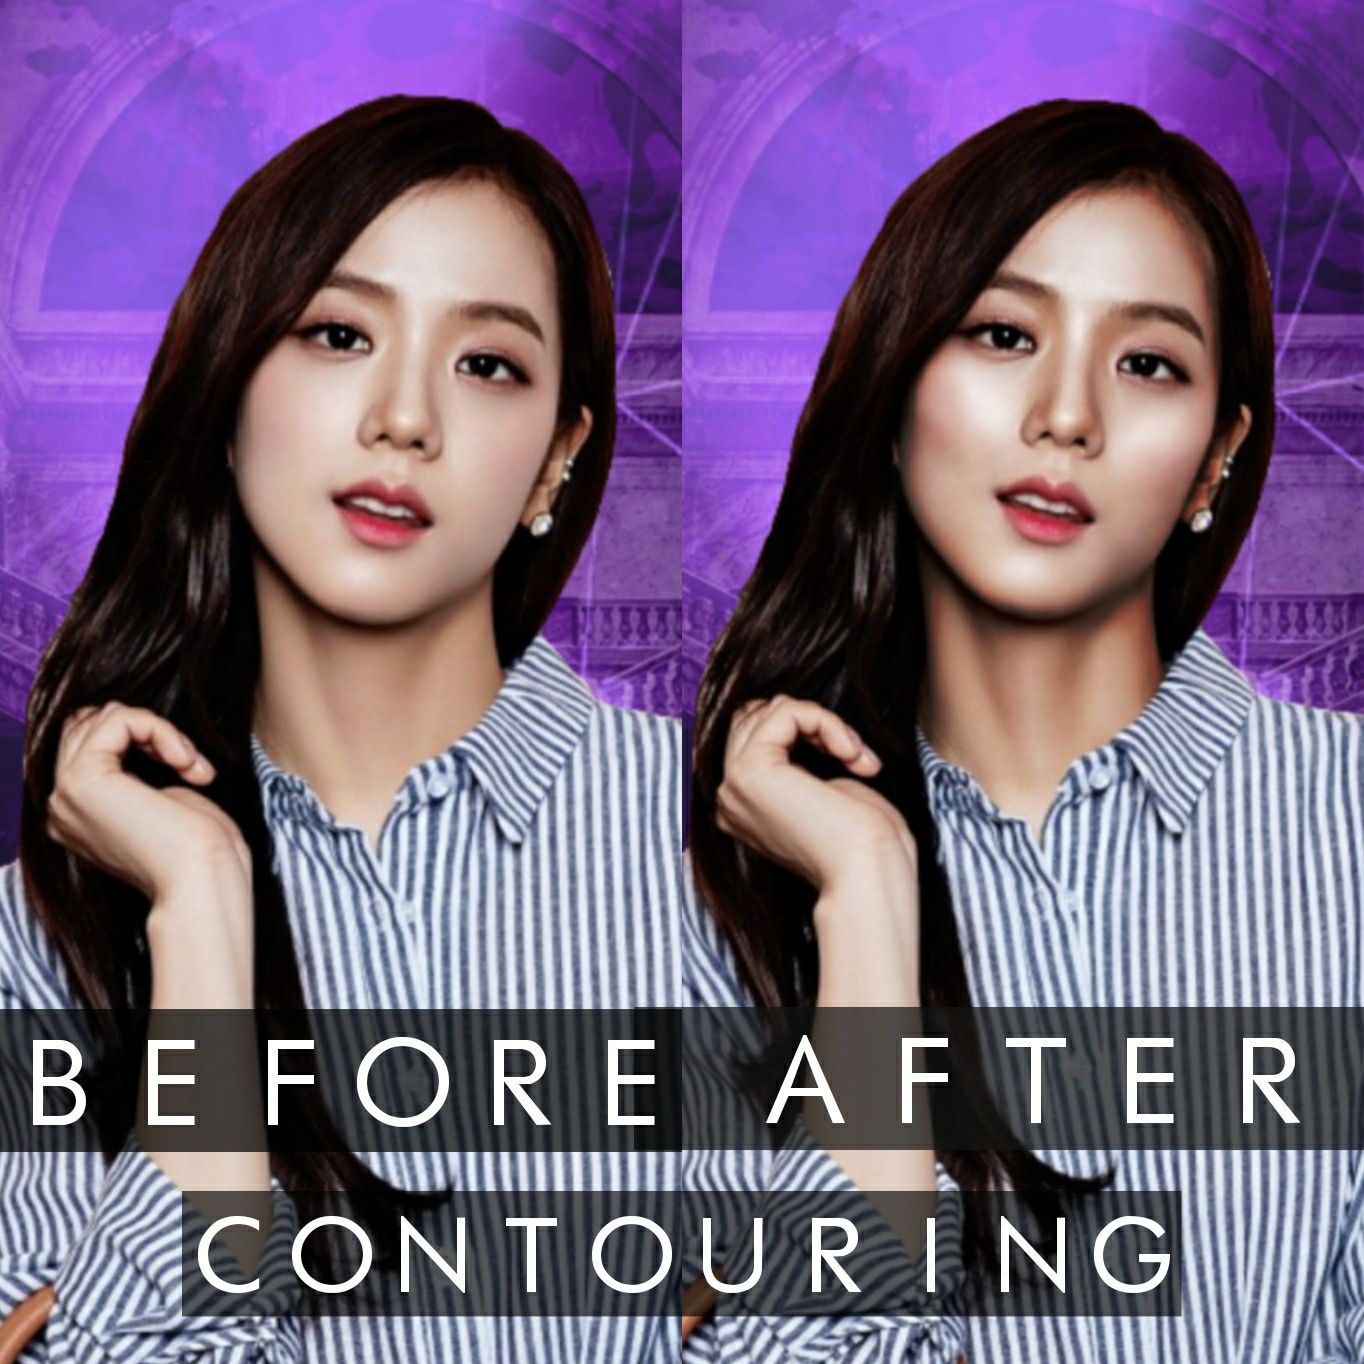
I hope I didn't sound too confusing and really hope this helped! Feel free to ask any doubts you have.

Bạn đang đọc truyện trên: AzTruyen.Top