How To Do Blend Edits

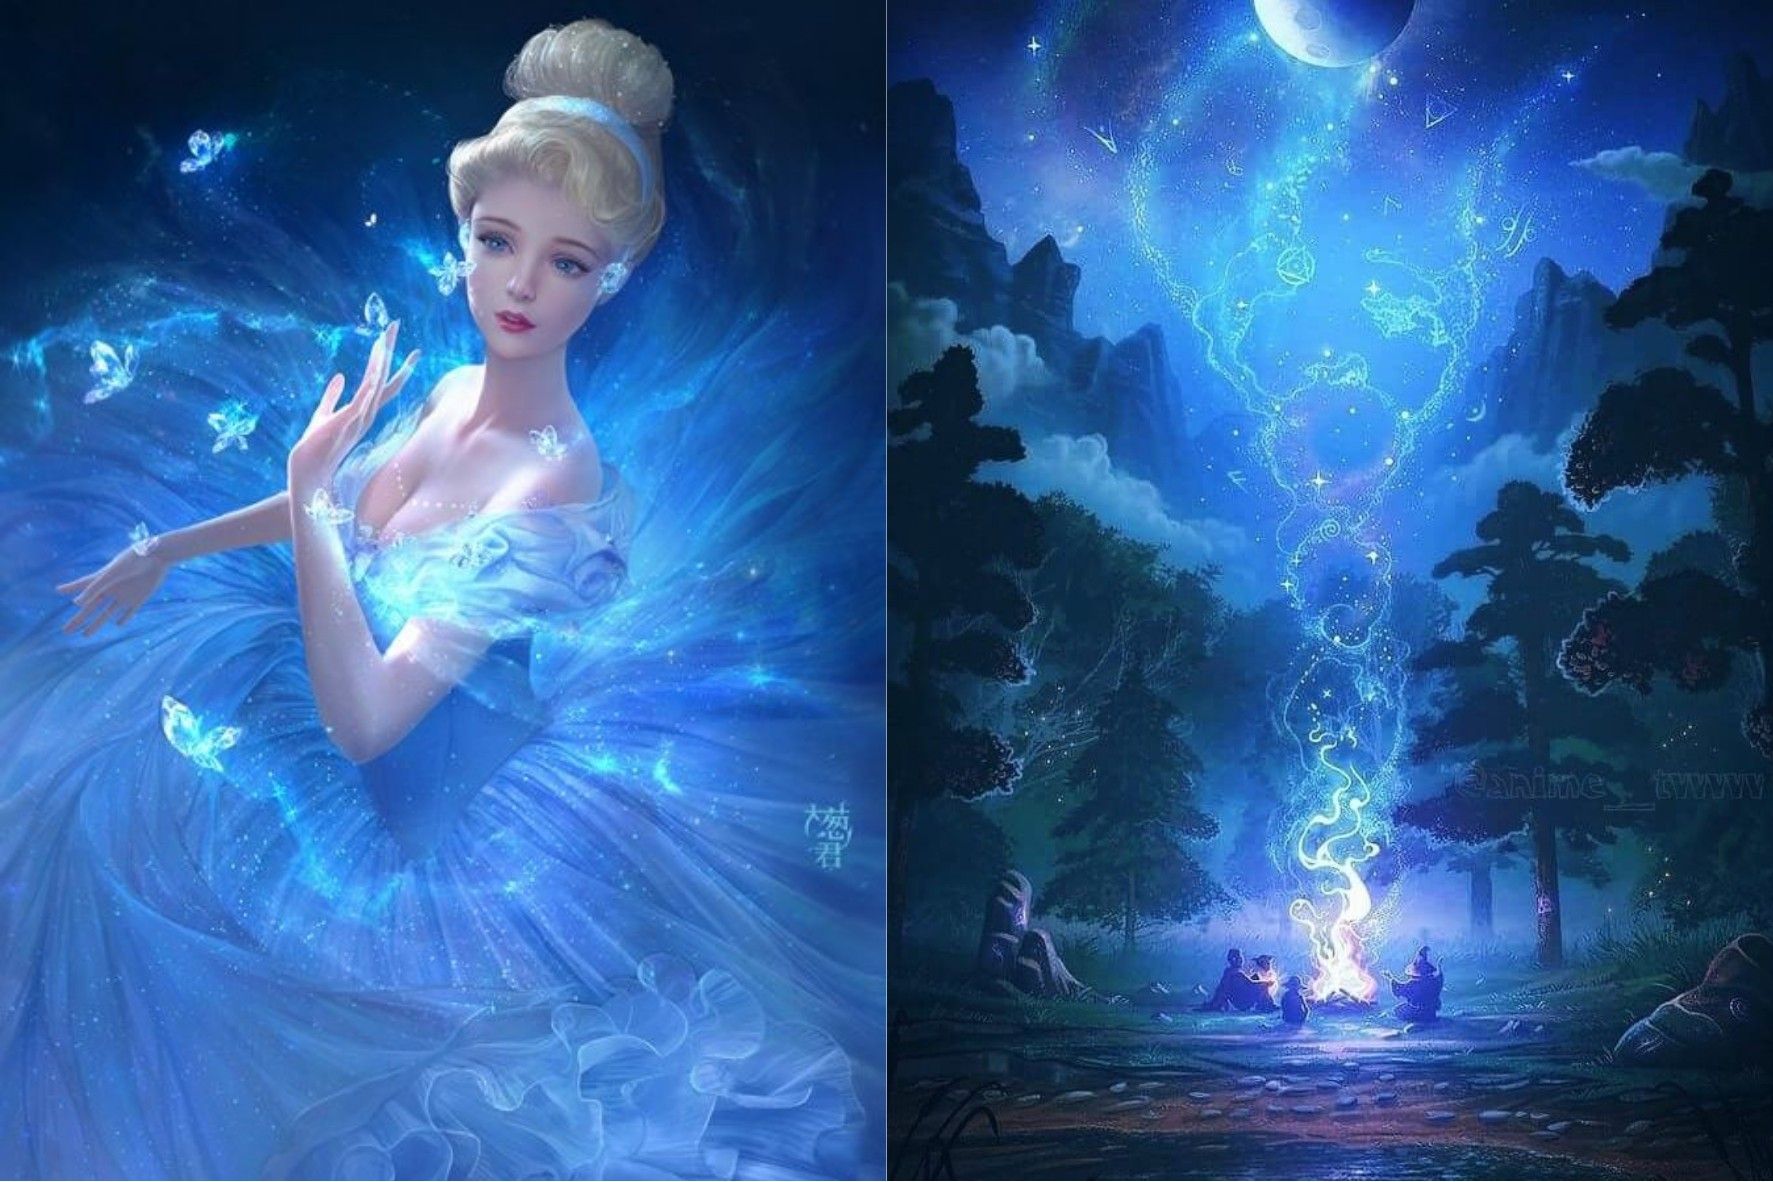
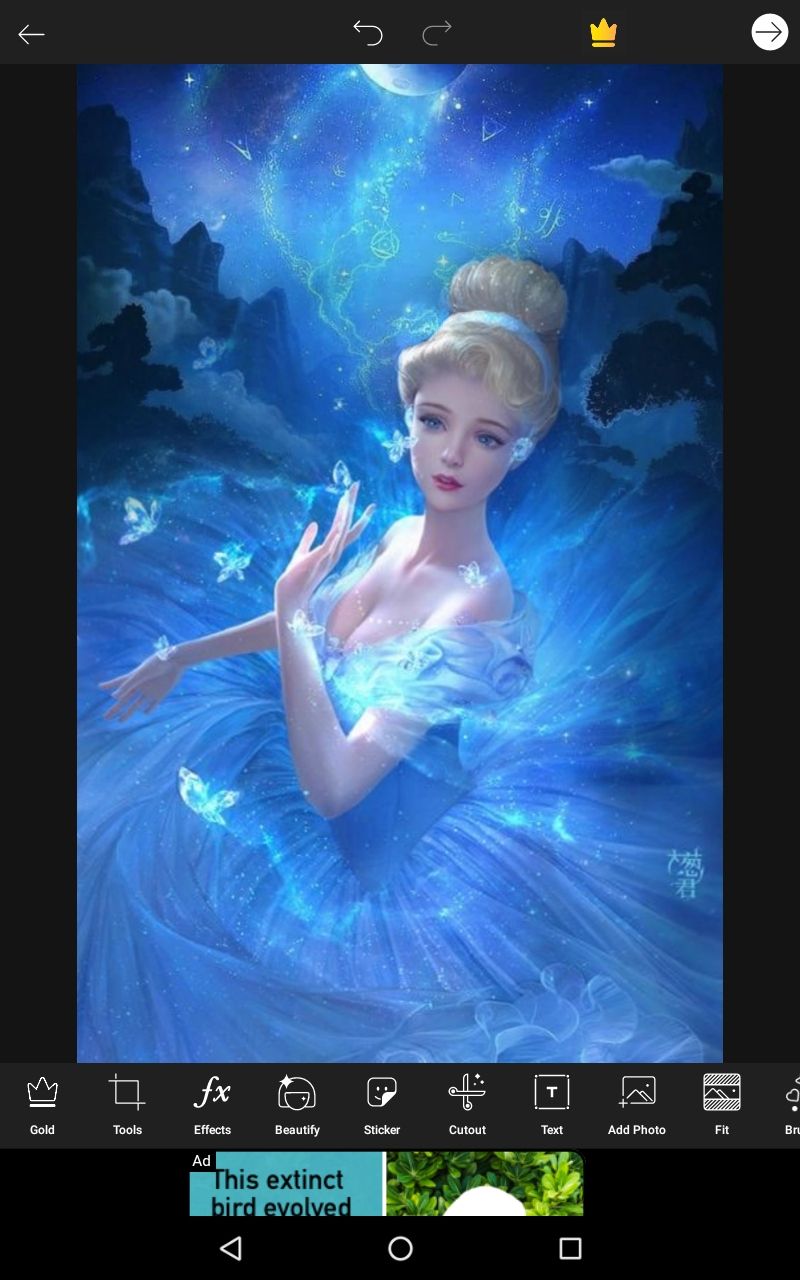
This is the final product after blending two pictures.
So, the theme is here is a fantasy one. So I chose a fantasy girl and a fantasy background.
Pictures Used: I downloaded both the pictures from Pinterest.
Steps:
1. Open the picsart app.
2. Click on the + symbol below.

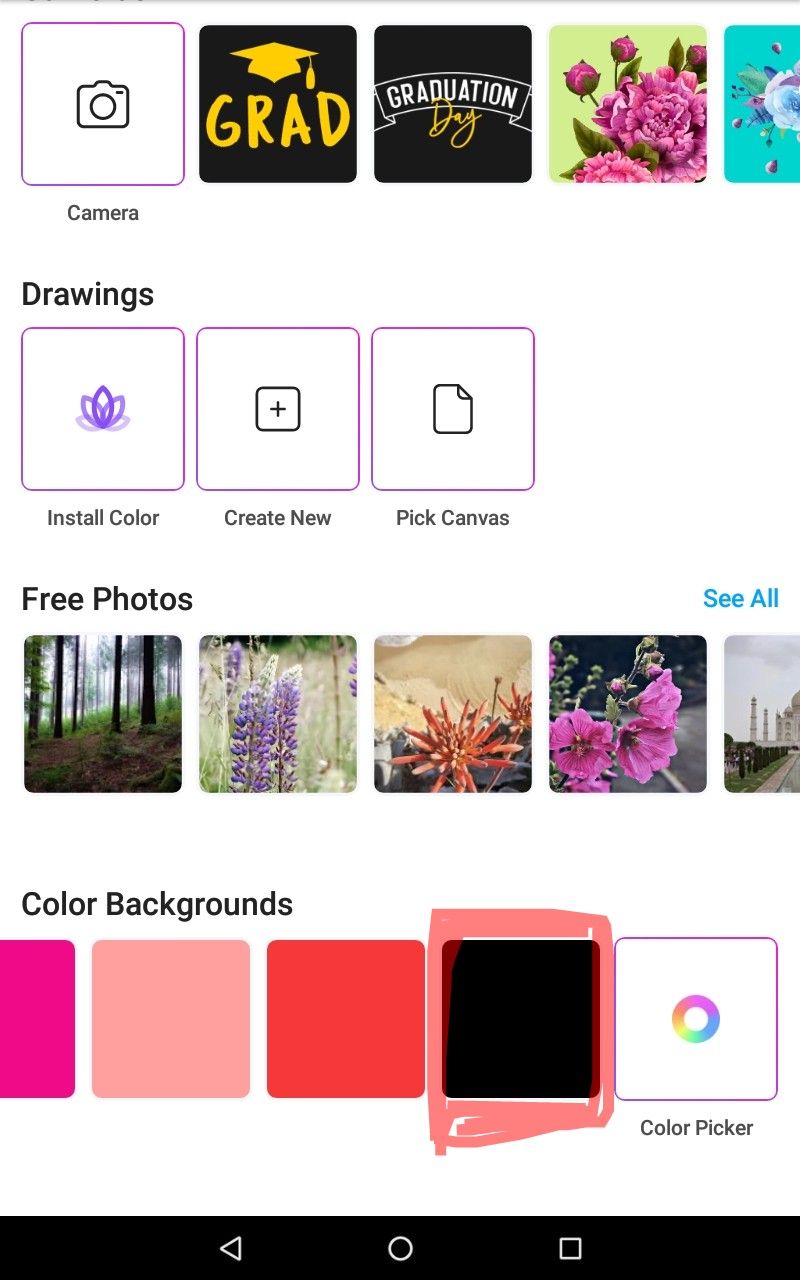
3. Then scroll down until you find color background. Then choose the black color background.
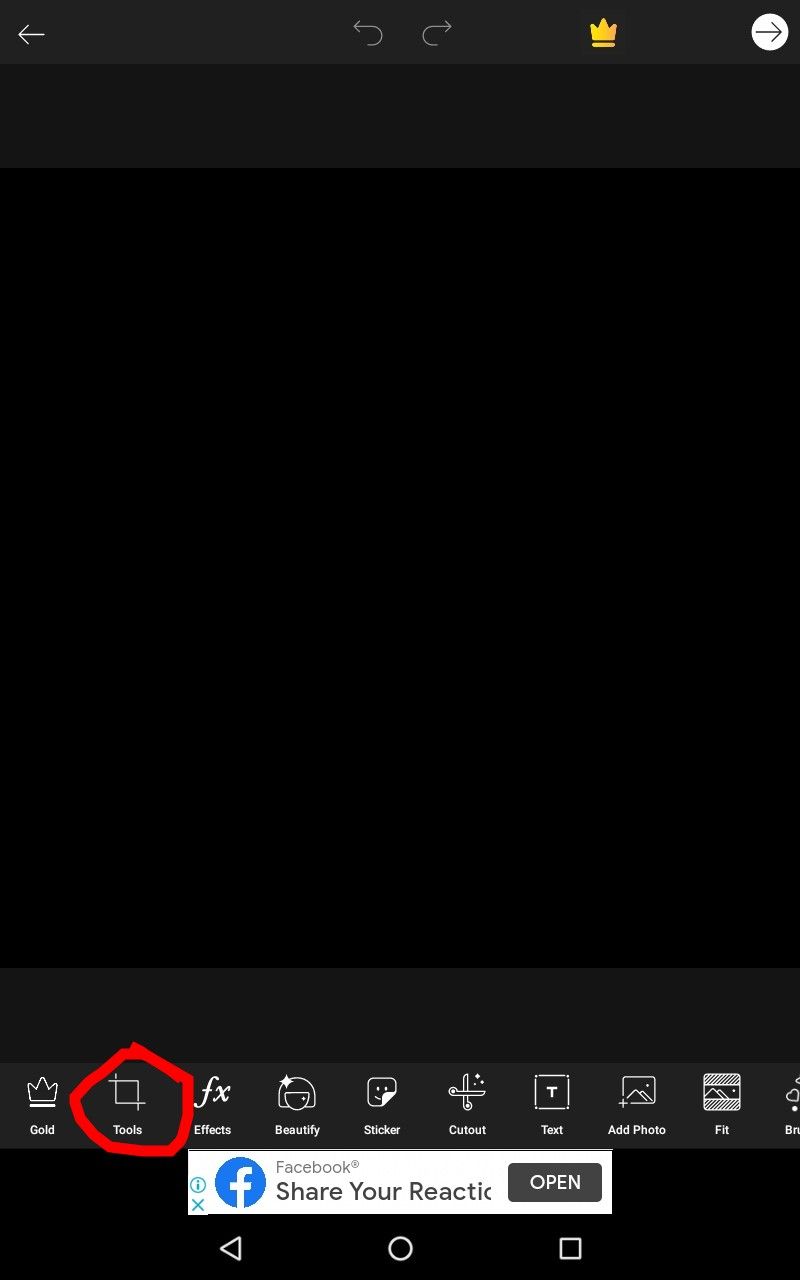
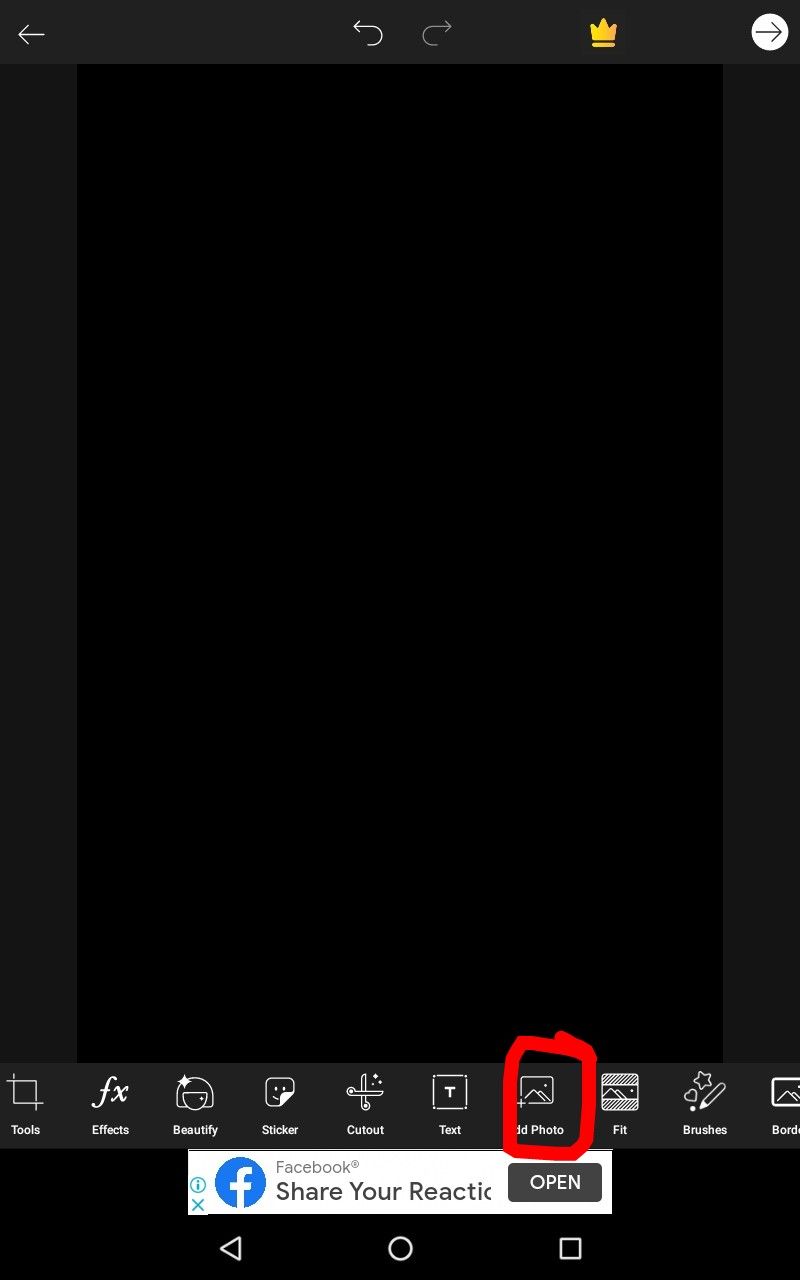
3. Then click on the square shape symbol called tools.
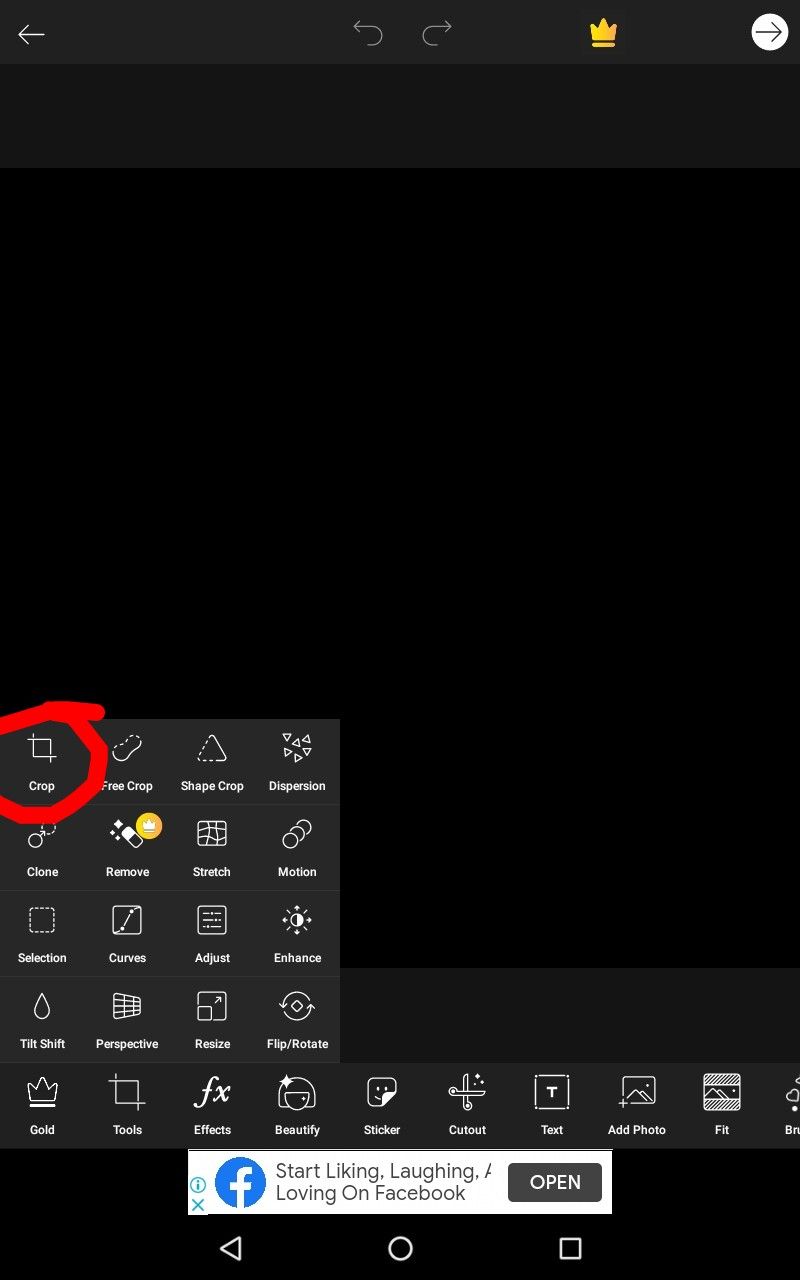
4. When you click on tools, something like below will appear. Then click on the crop
5. Then click on the dimensions at the top and change it to 512 and 800, since it's the size of the book cover of wattpad books. Then click on save.

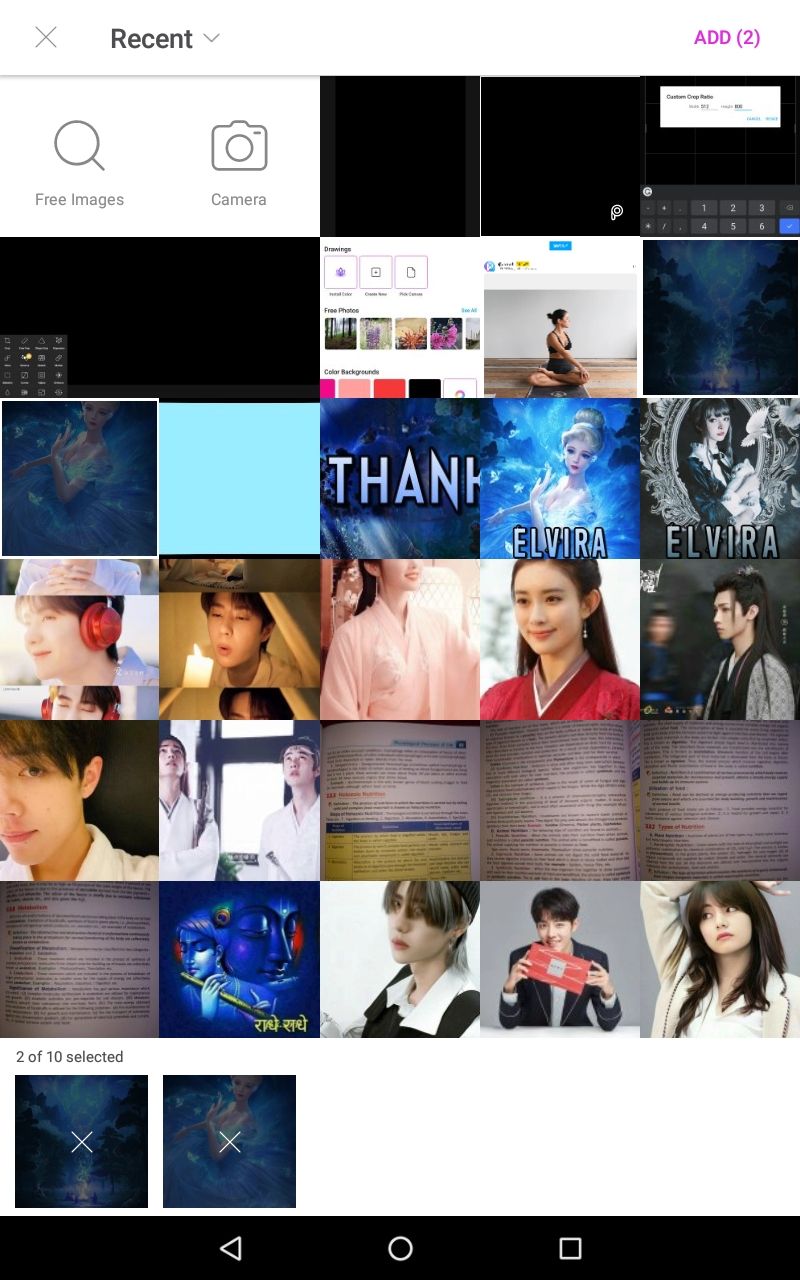
6. Then click on the photo.
7. Then select the required photos. Keep in mind, select all the photos which you want to blend or edit together.
8. Then increase the size of the pics and place then below each other like given below. You need to adjust the girl such that it looks perfect.
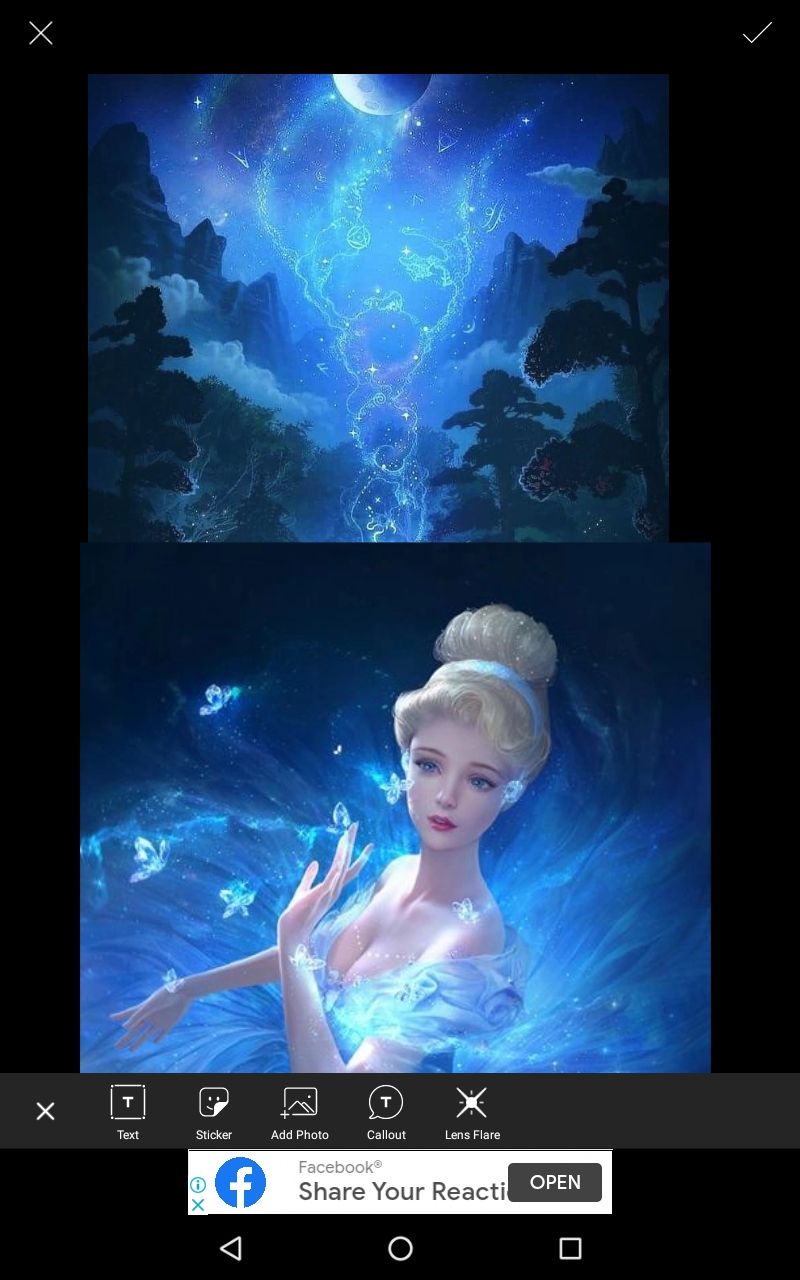
9. I have pulled the picture of the girl a little above so that when it gets blend, it would look beautiful. Then click on the eraser symbol.

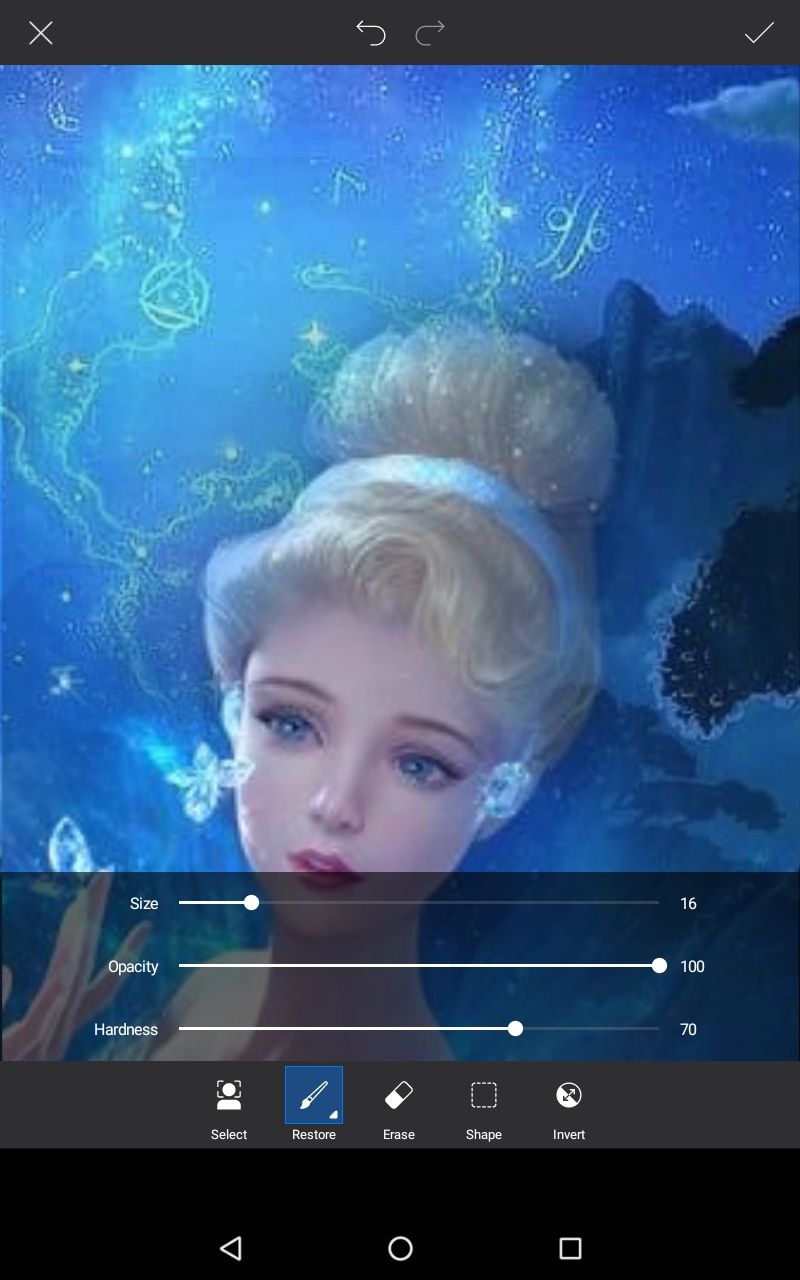
10. For blending, selecting the size and opacity of an eraser is an essential thing. I generally use very low opacity and high size of eraser because it helps to erase the excess part and helps the pic to get blend easily.

11. You have to decrease the size of the eraser when you are erasing the crucial parts like near the hair of the girl, etc.

12. While erasing, some part of the girl's hair also got erased, so we need to fix it. So click on the brush symbol and adjust your opacity and size as given below. After that, you need to paint that part of the girl's hair which became blue.
13. So after painting and erasing things, click on the tick symbol at the top right corner and save it. This is the result of erasing and blending.
14. After that, you need to play with filters. Click on fx effects and then on FX. You can change the intensity of the filter by increasing or decreasing the fade as given below. After clicking again on the same filters, the fade as given below appears.
Now you have to find out yourself which filters will look good. You can play with as many filters as you want. After applying each filter, you need to click on the tick(✔) symbol at the rightmost corner and save the filtered edit before trying on another filter.

15. So this is the final product!

I hope you found editing this type of edit is easy and you didn't find any trouble while editing.
If you want to ask me any questions or anything, then please feel free to ask. I am here to explain 😊

Bạn đang đọc truyện trên: AzTruyen.Top