-1.2, The Basic Tools
the main interface can be quite overwhelming, but once you get the hang of it, it'll be a breeze!

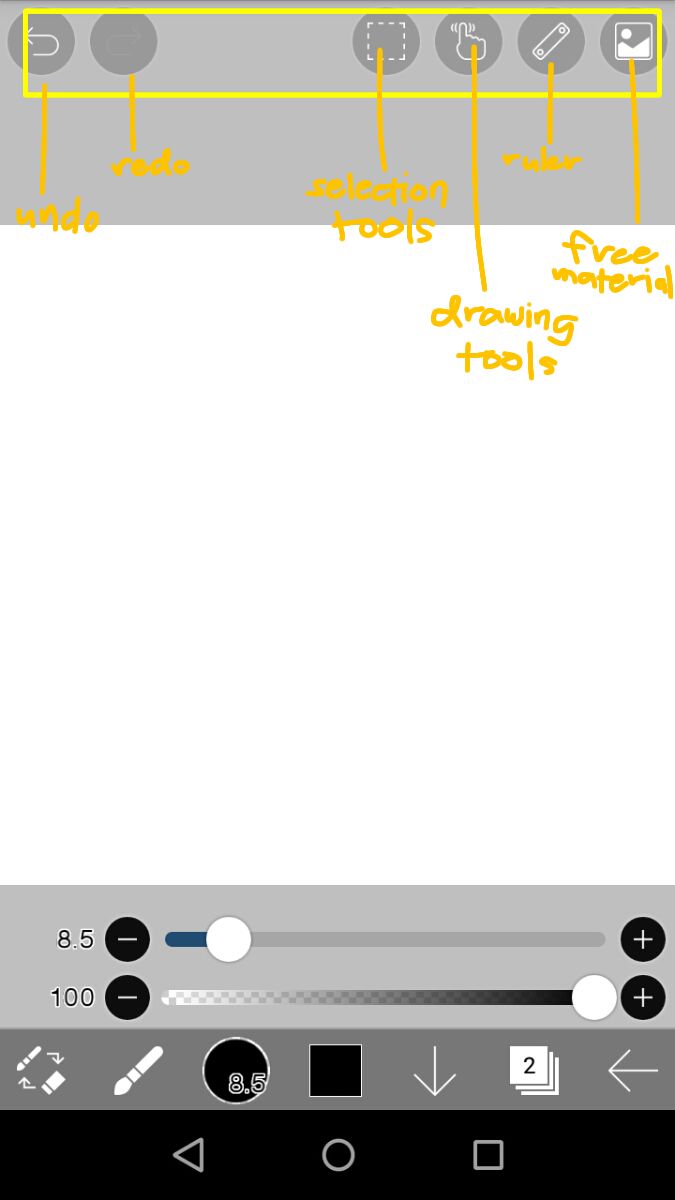
I'll start with the tools located above and try explaining them to my best capacity from left to right!
UNDO & REDO
located at the upper left corner!
it's pretty self a explanatory so that's that :P
a shortcut for undo is by tapping two fingers at the same time anywhere on the canvas :))
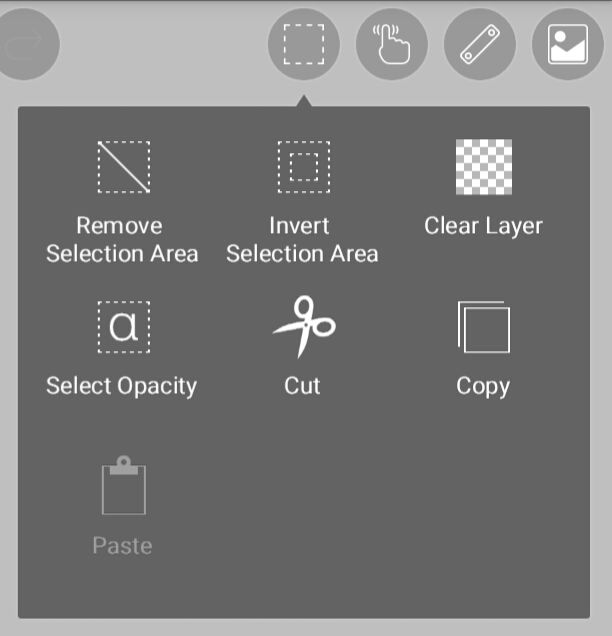
SELECTION TOOLS
I don't usually use these but they are NOT uses to select areas, instead they are used to modify the area selected!
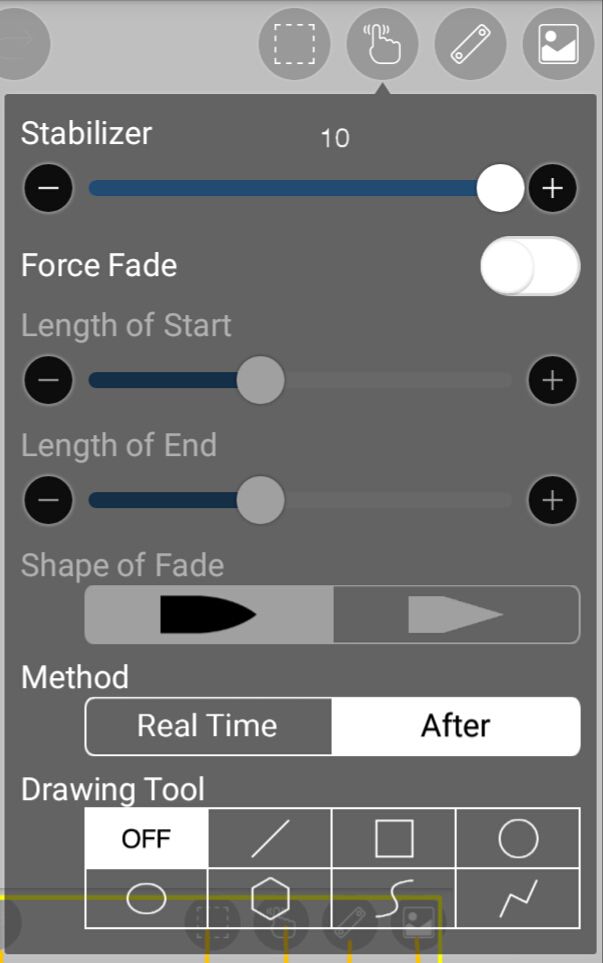
DRAWING TOOLS
here are some of my most used tools in editing! first, the STABILIZER stabilizes the lines that you draw. (basically makes your lines less crooked). then the FORCE FADE tapers and fades the start and end of a line that you draw when turned on. METHOD is how your settings affect your performance whether as you do it or after. I prefer putting it on after as I noticed it straightens the lines more.
RULER
by clicking that icon you'll have access to a variety of rulers and mirrors
FREE MATERIAL
are basically textures that ibispaint provides and is more catered towards manga creators
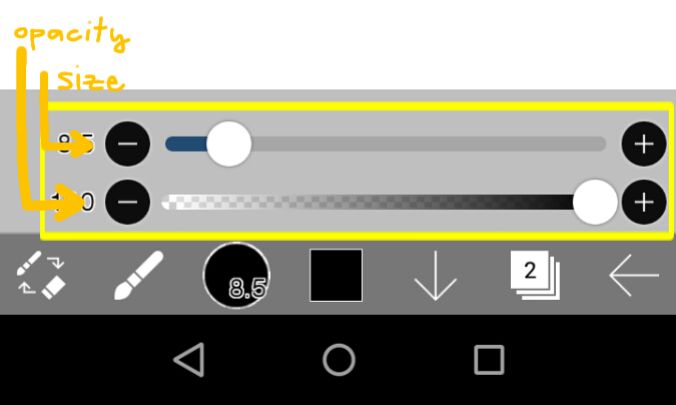
these sliders are only present when you are using the brush or the eraser. you can use this to adjust the size of the brush and it's opacity.
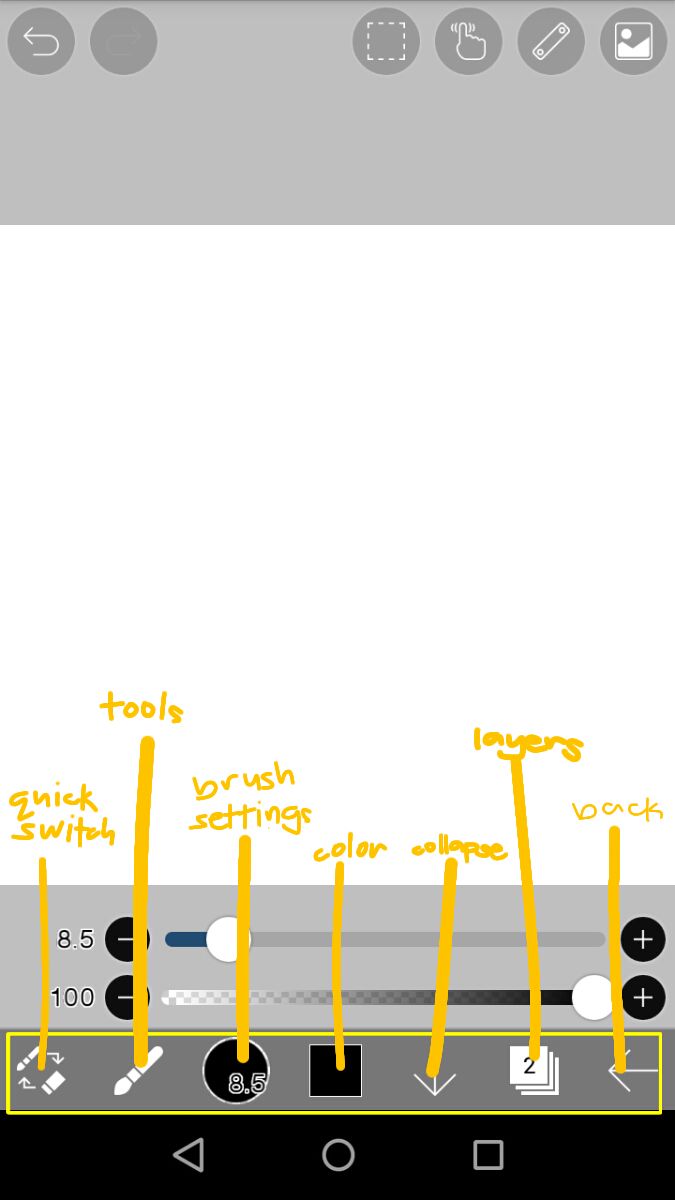
next, these tool below!
QUICK SWITCH
allows you to easily switch between the brush and eraser. if you are using a different tool then you press that, you'll be switched to the brush
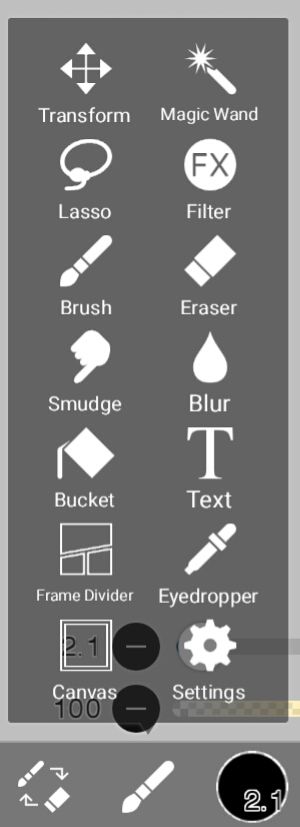
TOOLS
okay, so you can access these array of tools by pressing the second icon from the lower left corner.TRANSFORM allows you to move what ever is present on the layer you are currently on.MAGIC WAND selects an area with similar colors just by a tap. LASSO also allows you to select an area but with a bit more control. FILTER allows you to add effects and mess with the coloration of the layer you are currently on. BRUSH and ERASER are pretty self-explanatory albg with the BLUR, SMUDGE, BUCKET, TEXT AND EYE DROPPER. a short cut for using the eye dropper can be accessed using the brush tool then tap and hold then you can drag your finger wherever you want to select the color of your choice.
BRUSH SETTINGS
you can choose and switch between the many styles and types of brushes that are available. the are locked brushes that you can use temporarily use through watching ads or permanently by purchasing the remove-ads.
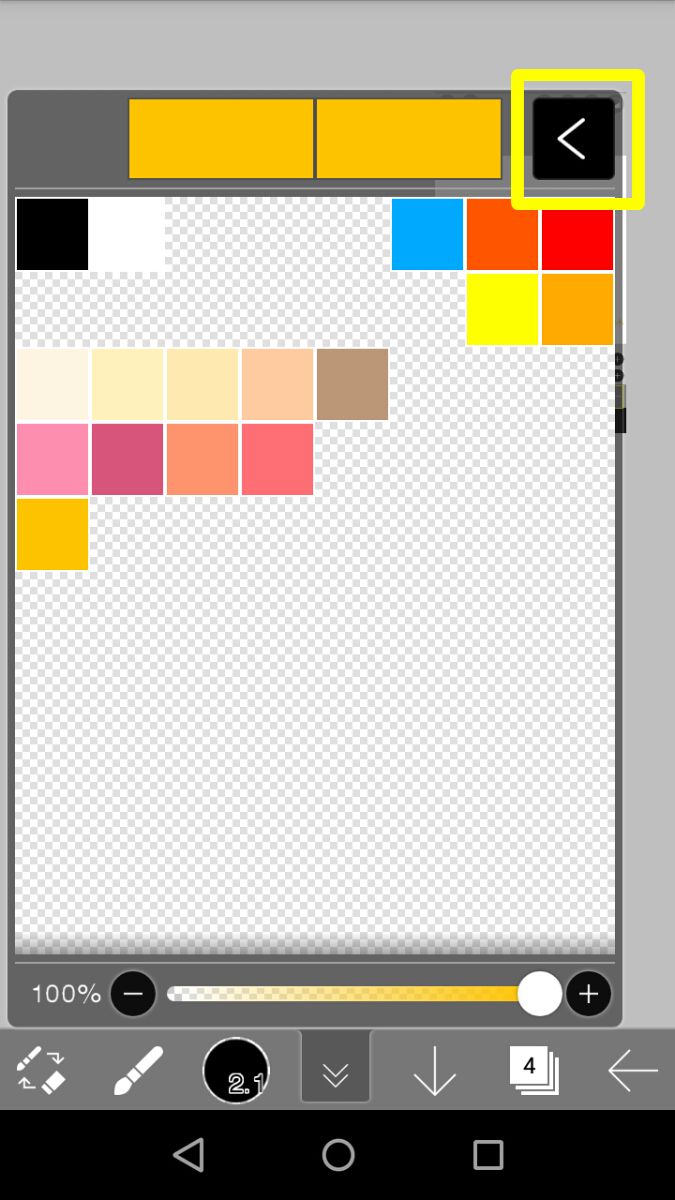
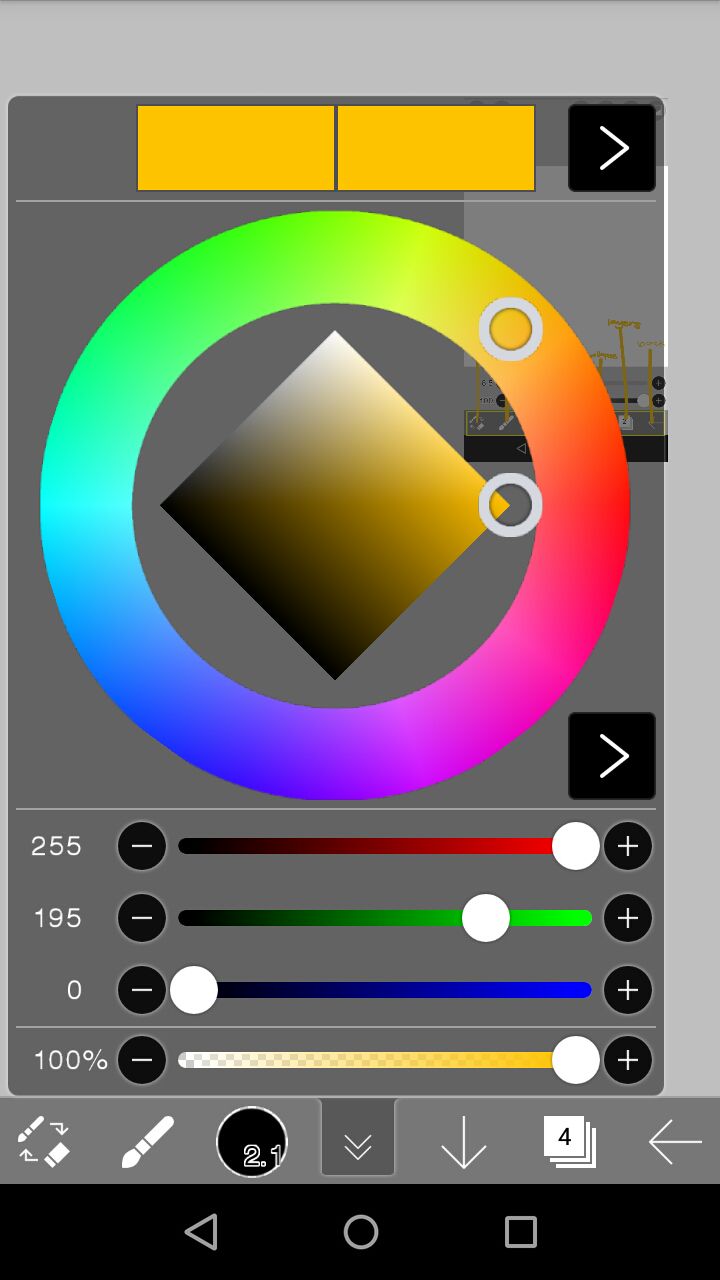
COLOR
by clicking i
t, you be opening a palette where you can add and remove your own colors. by clicking that arrow on the upper right, you can switch to the color wheel

COLLAPSE
this turns the bottom and top icons into these minimal and less intrusive ones in order to see your canvas better. however this also removes the slider for the brush and eraser
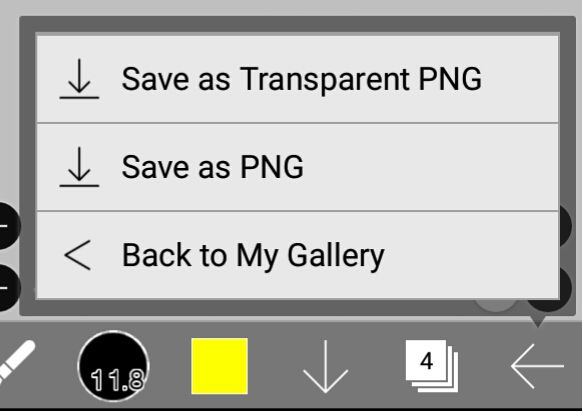
BACK
clicking the back button opens up this small window that us pretty self explanatory.
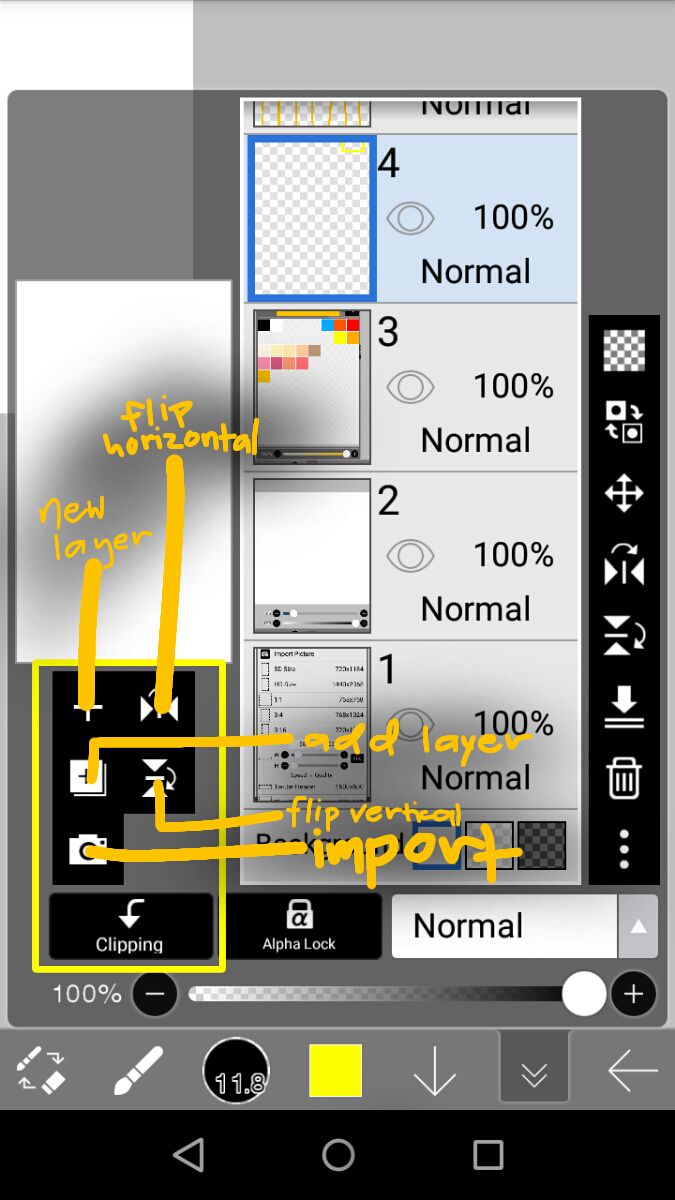
when you open the layers, you'd be surprised that there are more tools. so we'll start with those on the left side!
NEW LAYER
adds a new empty layer
FLIP HORIZONTAL
flips your current layer horizontally (aka landscape)
FLIP VERTICAL
flips you currently layer vertically (aka portrait)
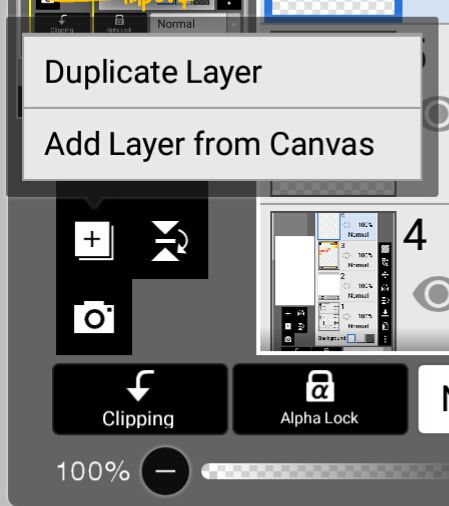
ADD LAYER
clicking that icon, you'll see these two options. DUPLICATE LAYER means that your current selected layer will be doubled w/ the same settings as the original layer while ADD LAYER FROM CANVAS adds a new layer that has whatever is currently present in you canvas (doesn't matter what layer you are on)
IMPORT
allows you to add an image to the app.
CLIPPING
clips the current layer to the layer underneath that ensure what ever you draw on the clipped layer will only be on top of the layer it was clipped on.
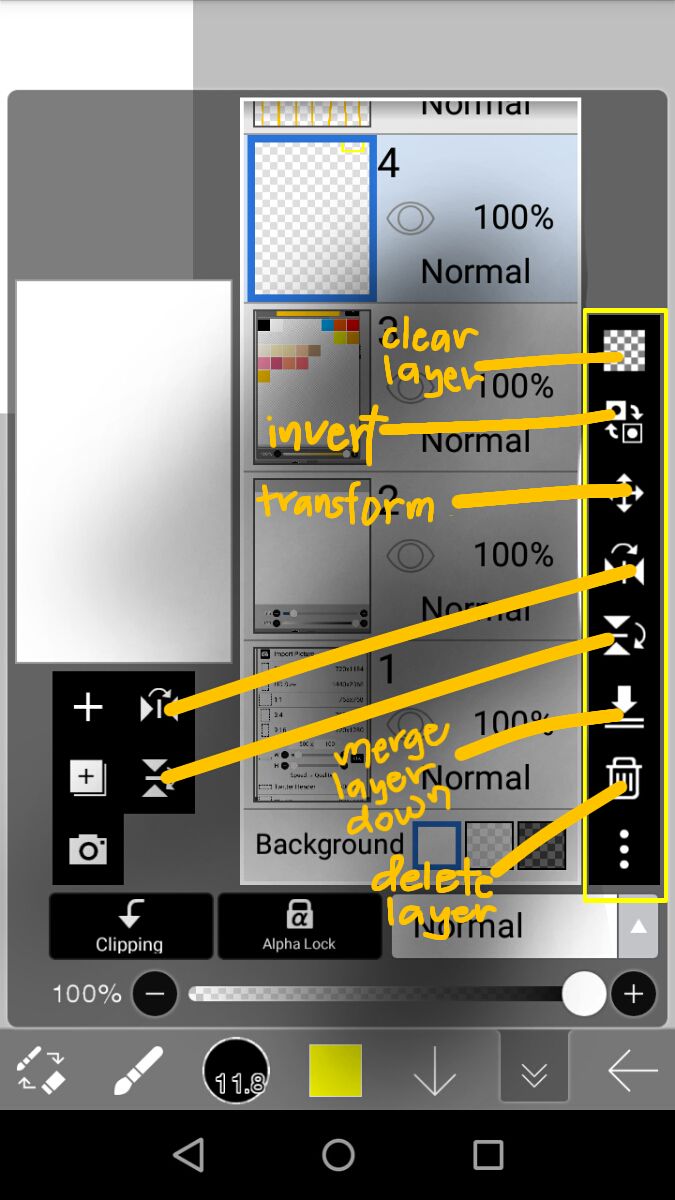
those are the tools left and I'm pretty sure they are self explanatory!
thankyou so much for joining me in this tiring and long chapter that's all about the basics of the tools in ibispaint!
Bạn đang đọc truyện trên: AzTruyen.Top