[Tutorial] Chapter banner (1/2)
I've been asked by a bunch of people how I made the banners for The Winter Princess.

And I thought, why not make a tutorial? So here it is.
Before you ask, yes, the design is inspired by the title tiles of Game of Thrones.

Before we begin, a quick note about software first: the program I'm using is called GIMP. It's very similar to Photoshop, but free.
If you are already familiar with editing, some of these steps might be a little too detailed to you, but I wanted to describe things as thoroughly as possible so beginners can follow as well :)
Part 1: The background
Step 1:
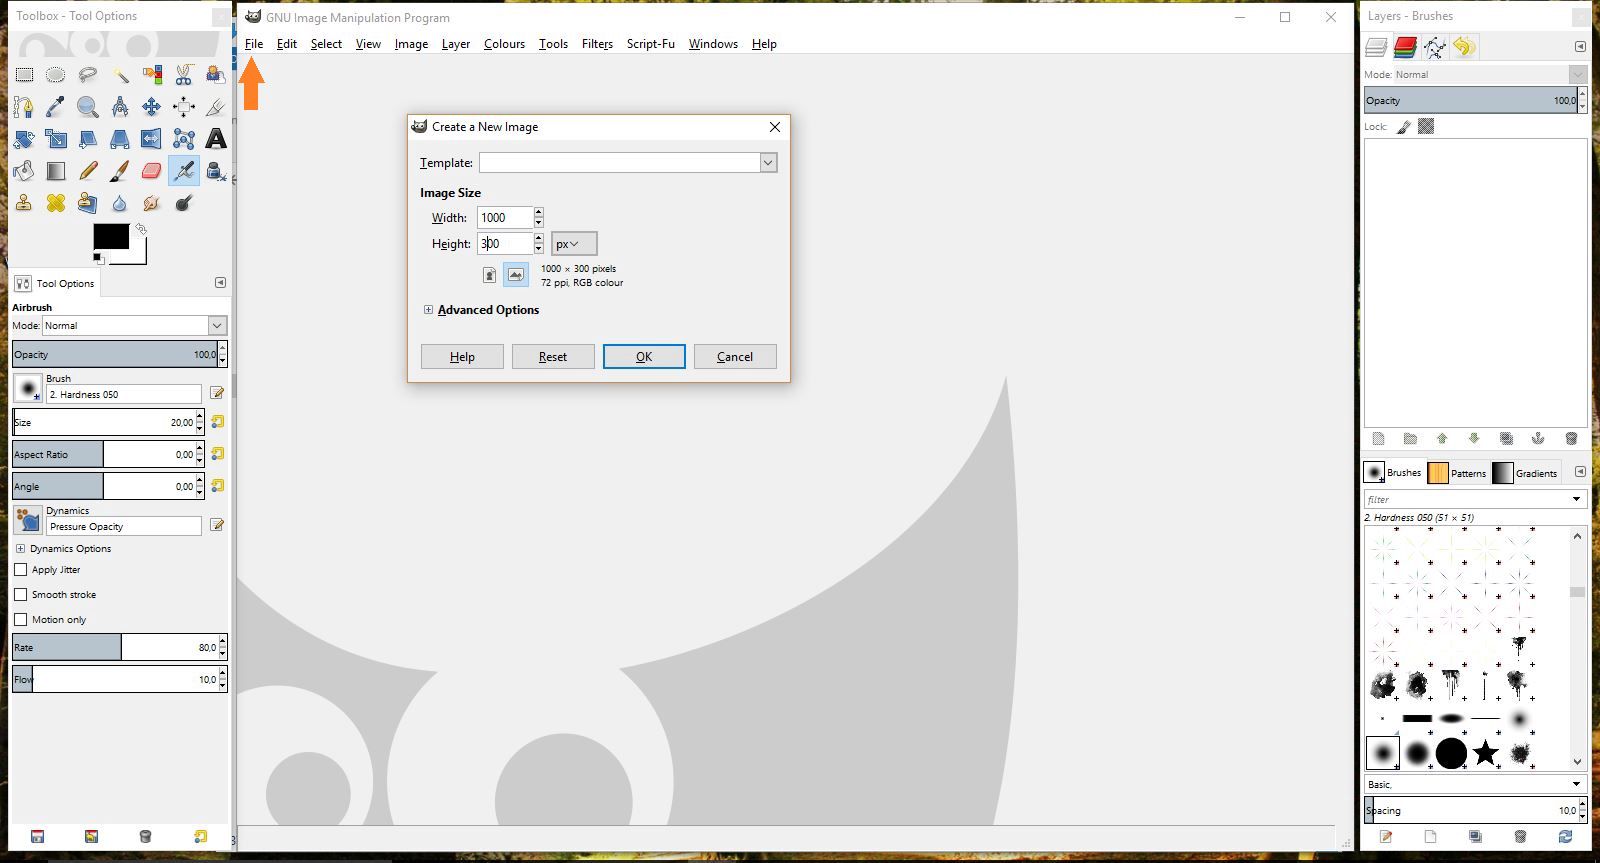
Create a new canvas by clicking File and then New in the top left corner of your window.
I made mine 1000x300 px since it's only a banner for a chapter, but you can go with any measurements you find look good.
Step 2:
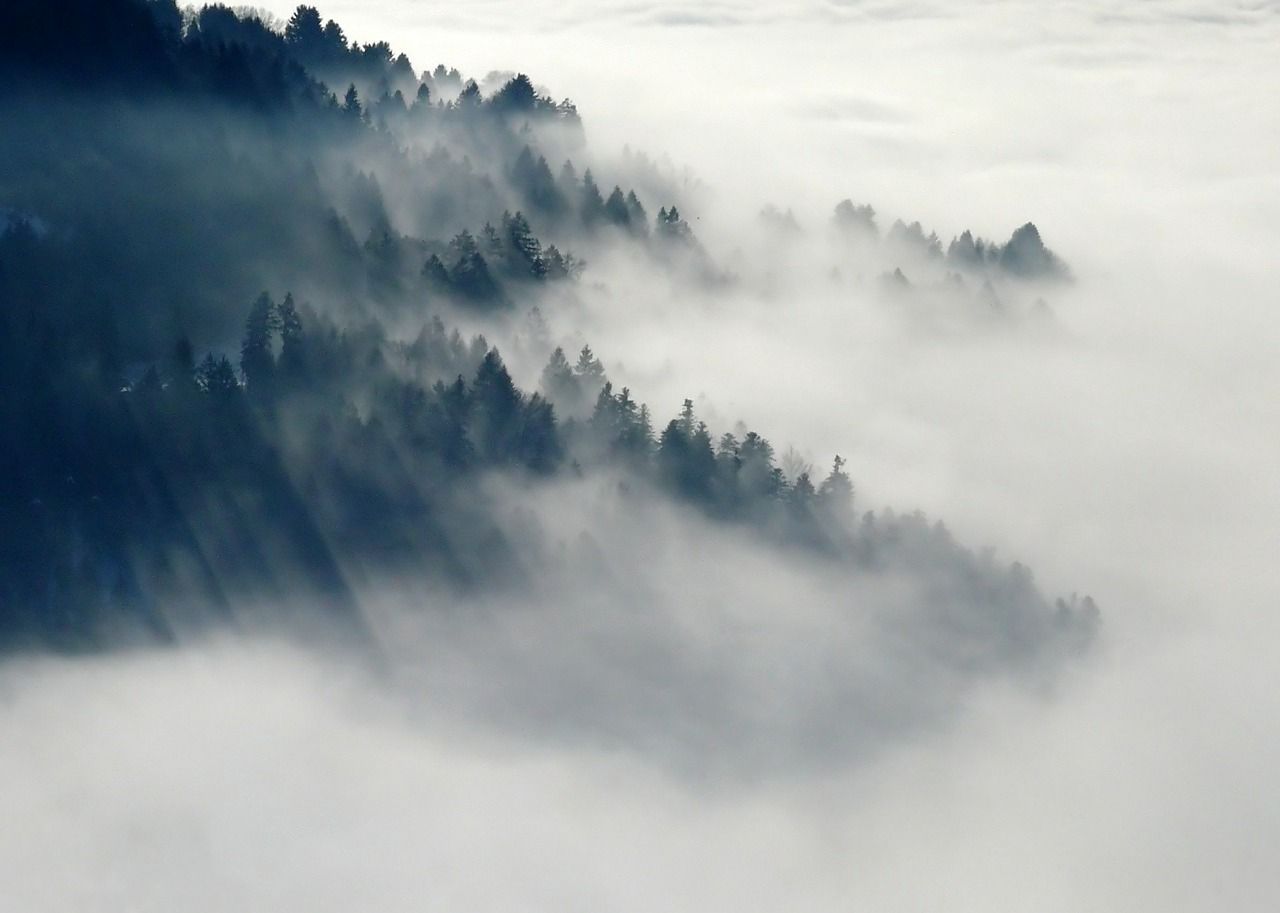
Pick an image you'd like to use for the background and drag and drop it into your newly created canvas.
I used this one:
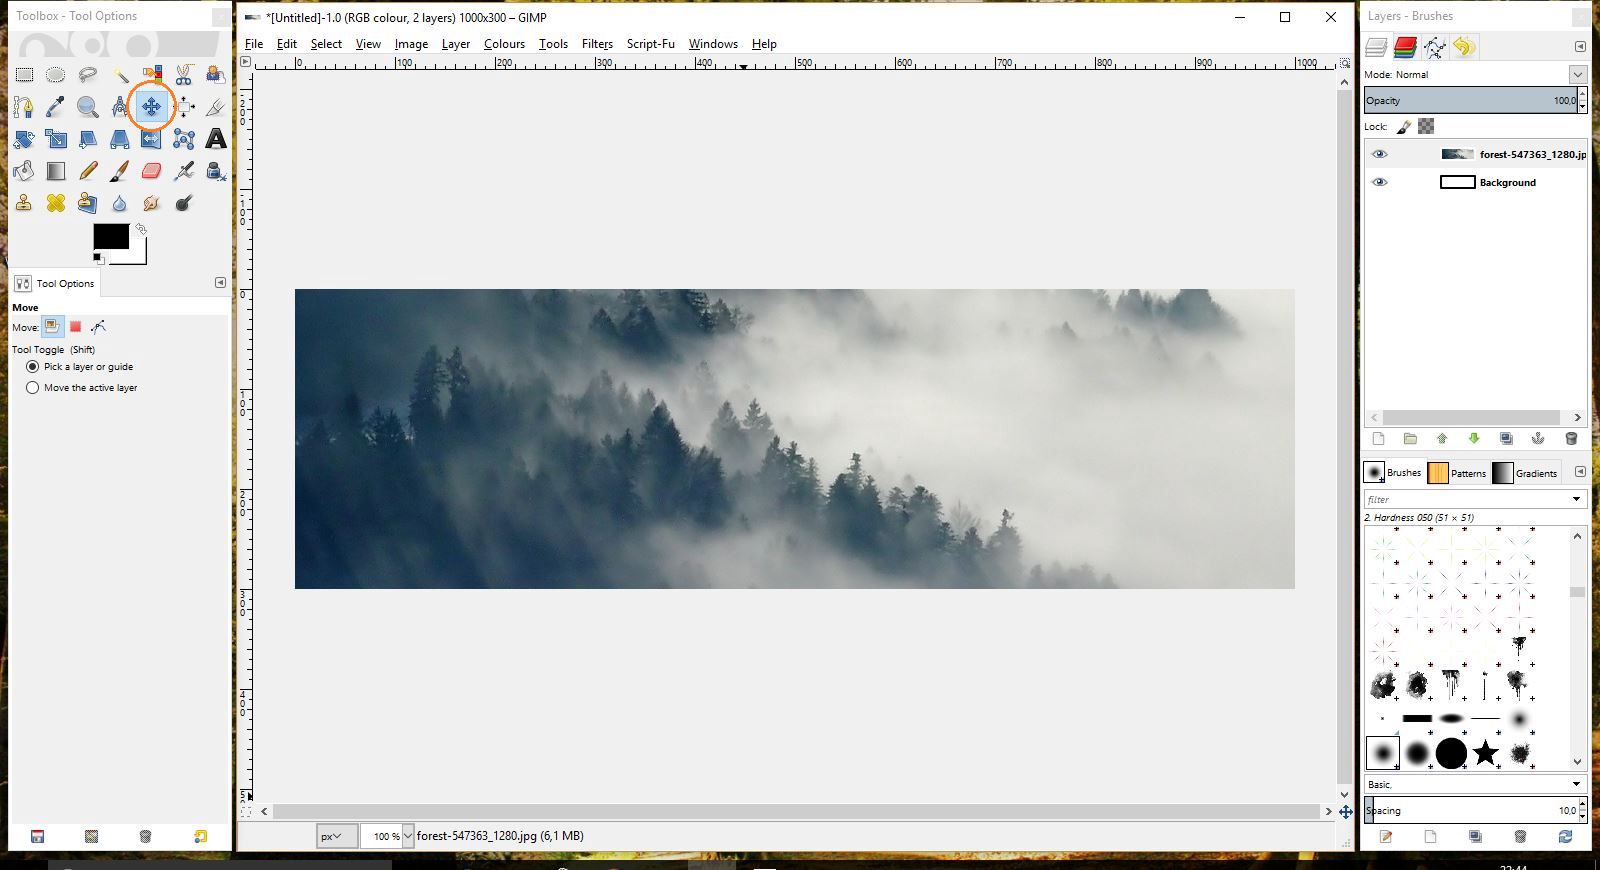
Use the move tool to move it around until you're satisfied with how it looks (you can also scale and rotate the picture using the respective tools)
Step 3:
Create a new transparent layer by clicking Layer in the top of your menu.

(Also, you can now delete that white layer (background)underneath your picture, we won't need it anymore)
Step 4:
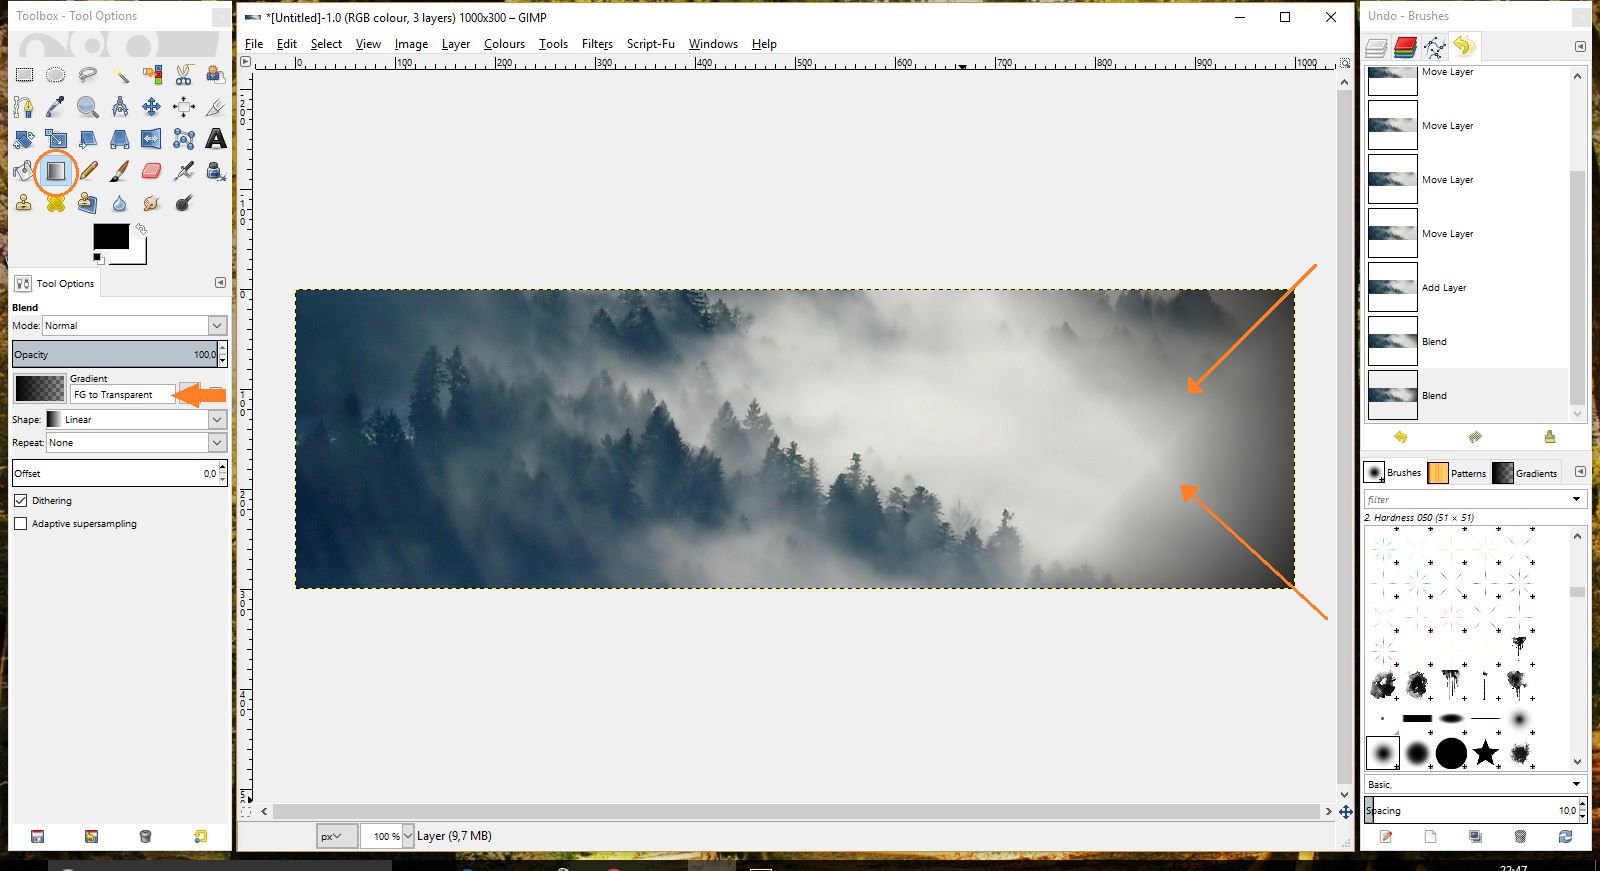
Select your transparent layer. Set your foreground colour to black if it isn't already.
Click the blend tool on the right side of your window.
Set the option for your gradient to FG to Transparency
Darken the corners of your banner by dragging your mouse over the picture as shown in the picture below, creating a gradient in every corner.
Step 5:
Play around with the Layer Mode and Opacity of your gradient layer until you're satisfied with how it looks.
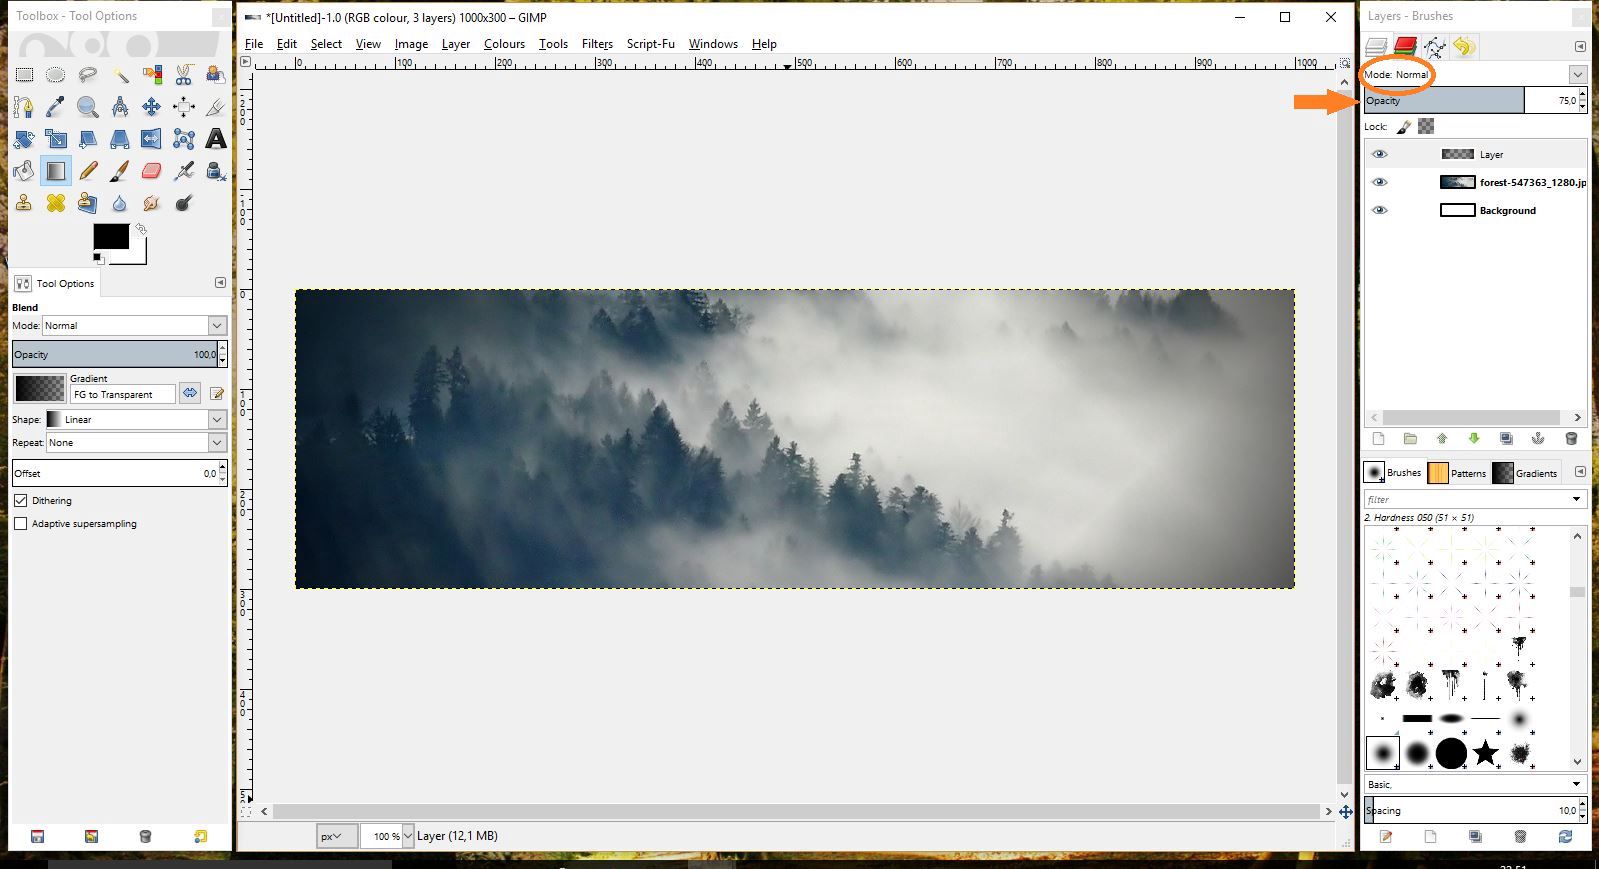
Step 6:
Right click the image layer and click Layer to Image Size to adjust the picture to your banner size and delete all the outer areas.
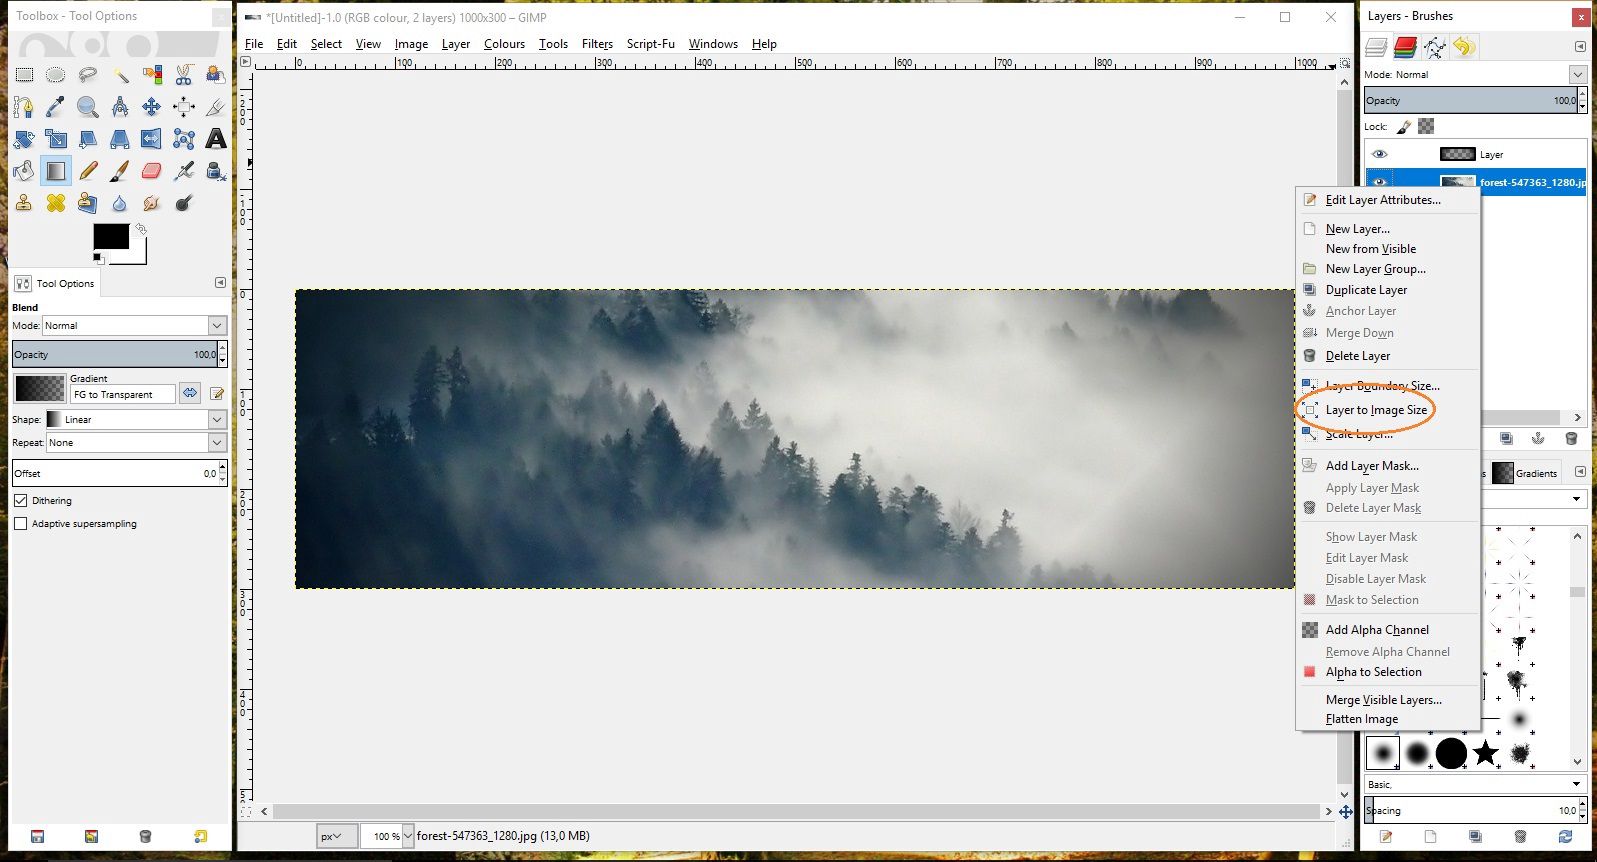
Part 2: The bevelled text
Step 7:
Create a text layer.
The font I used is called Cormorant SC Light. I picked a medium dark grey colour (#808080) and set the font size to 200px.
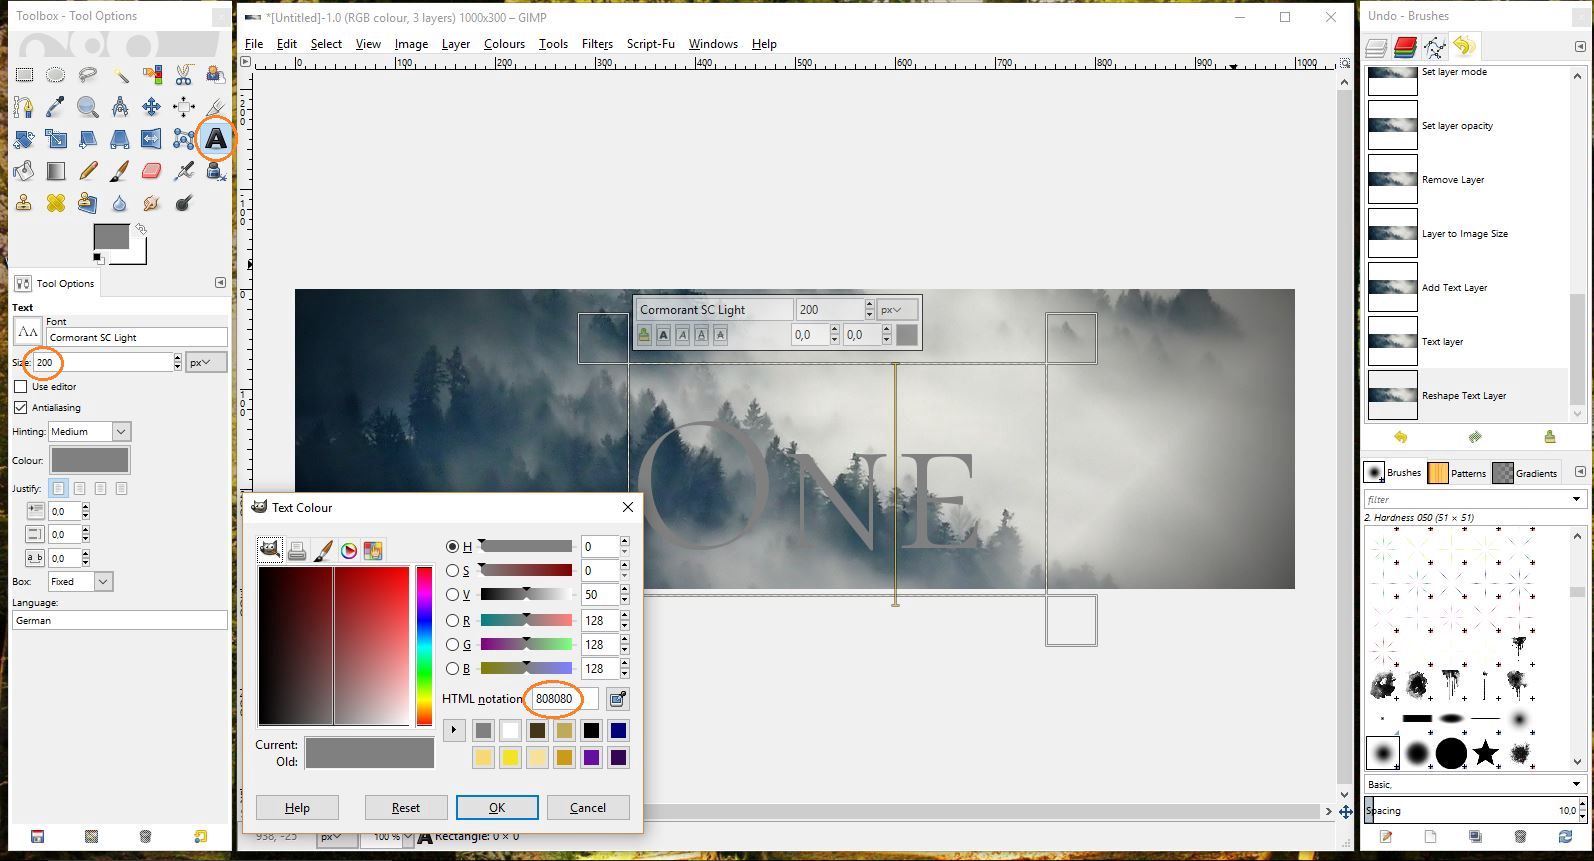
Step 8:
Use the Align tool the center your text.
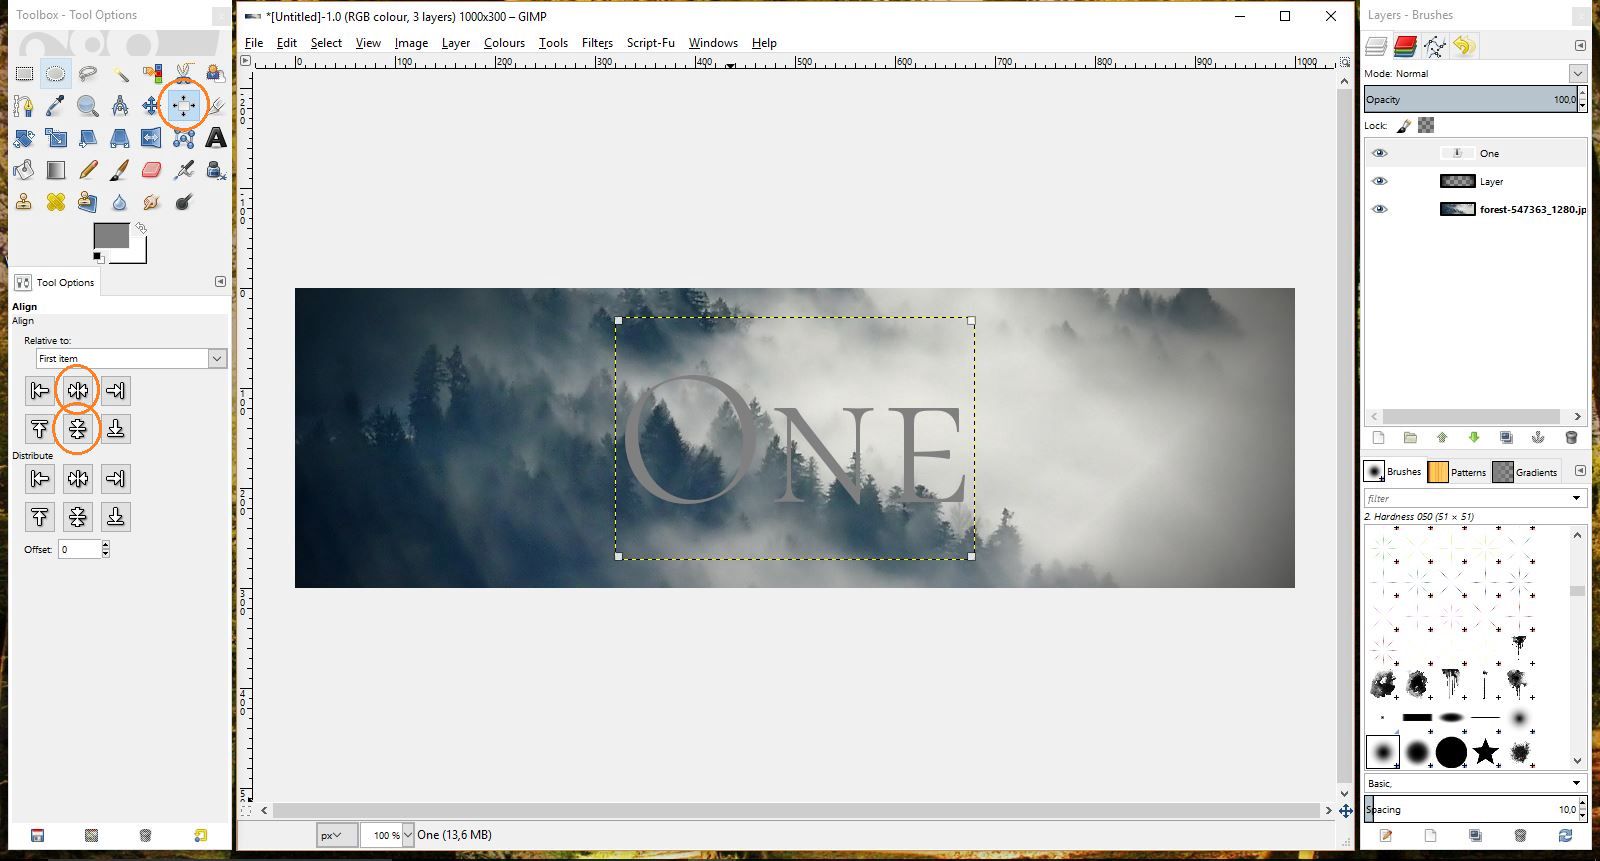
Step 9:
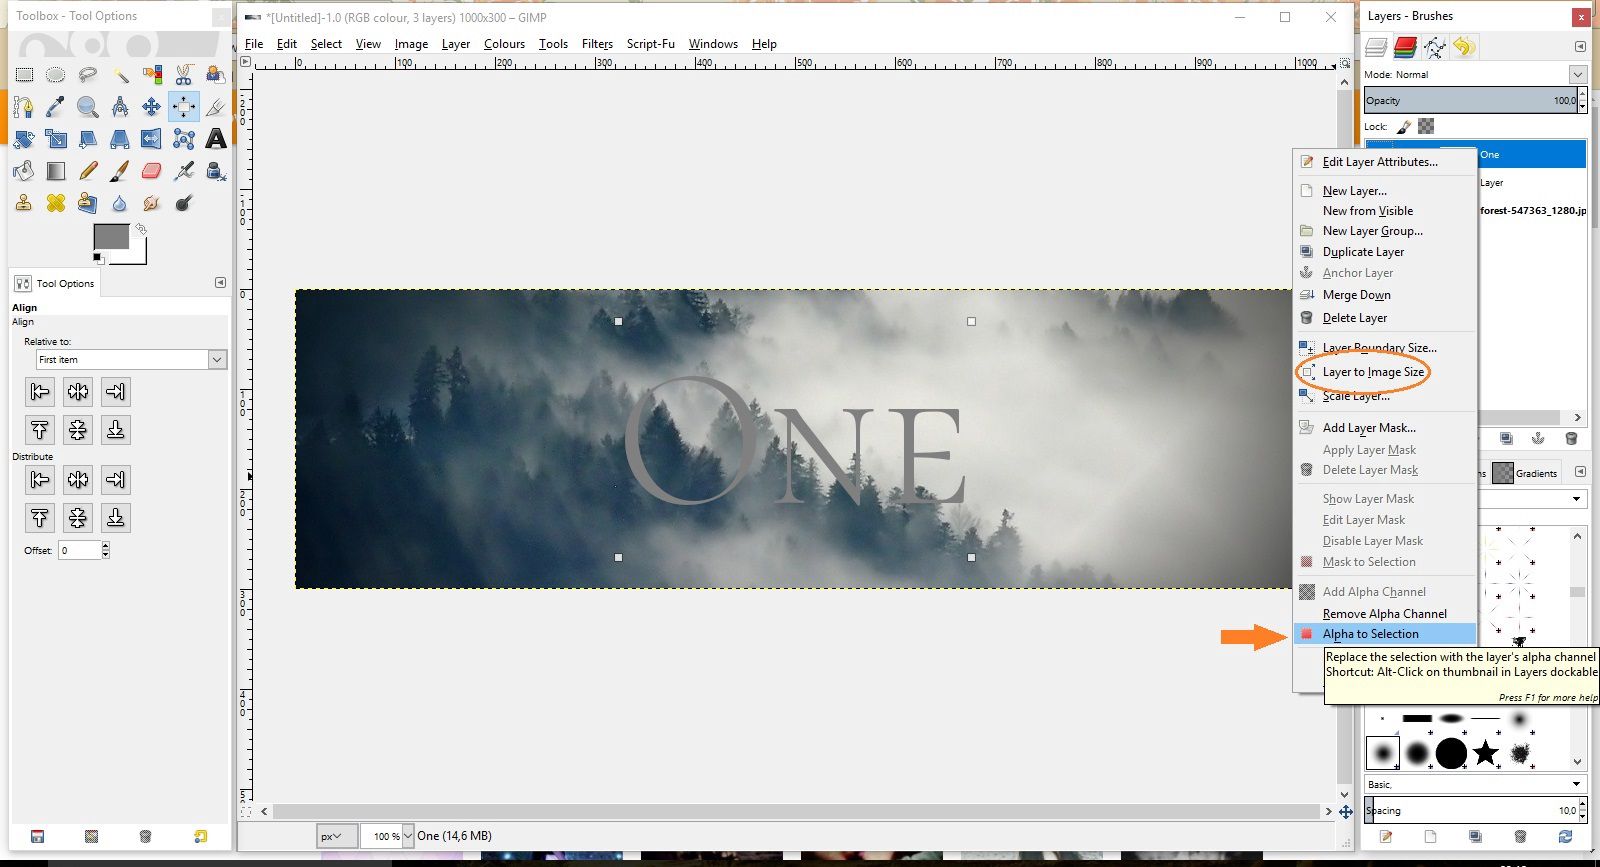
Adjust your text layer to your banner size by clicking Layer to Image Size
Then, click Alpha to Selection.
This will select your letters only.
Step 10:
Now comes the 'tricky' part of this tutorial, bevelling the text and giving it a metallic look.
Click on Select in the top of your menu, then select Feather. A little window will pop up, type 15 into the dialog box and click OK.
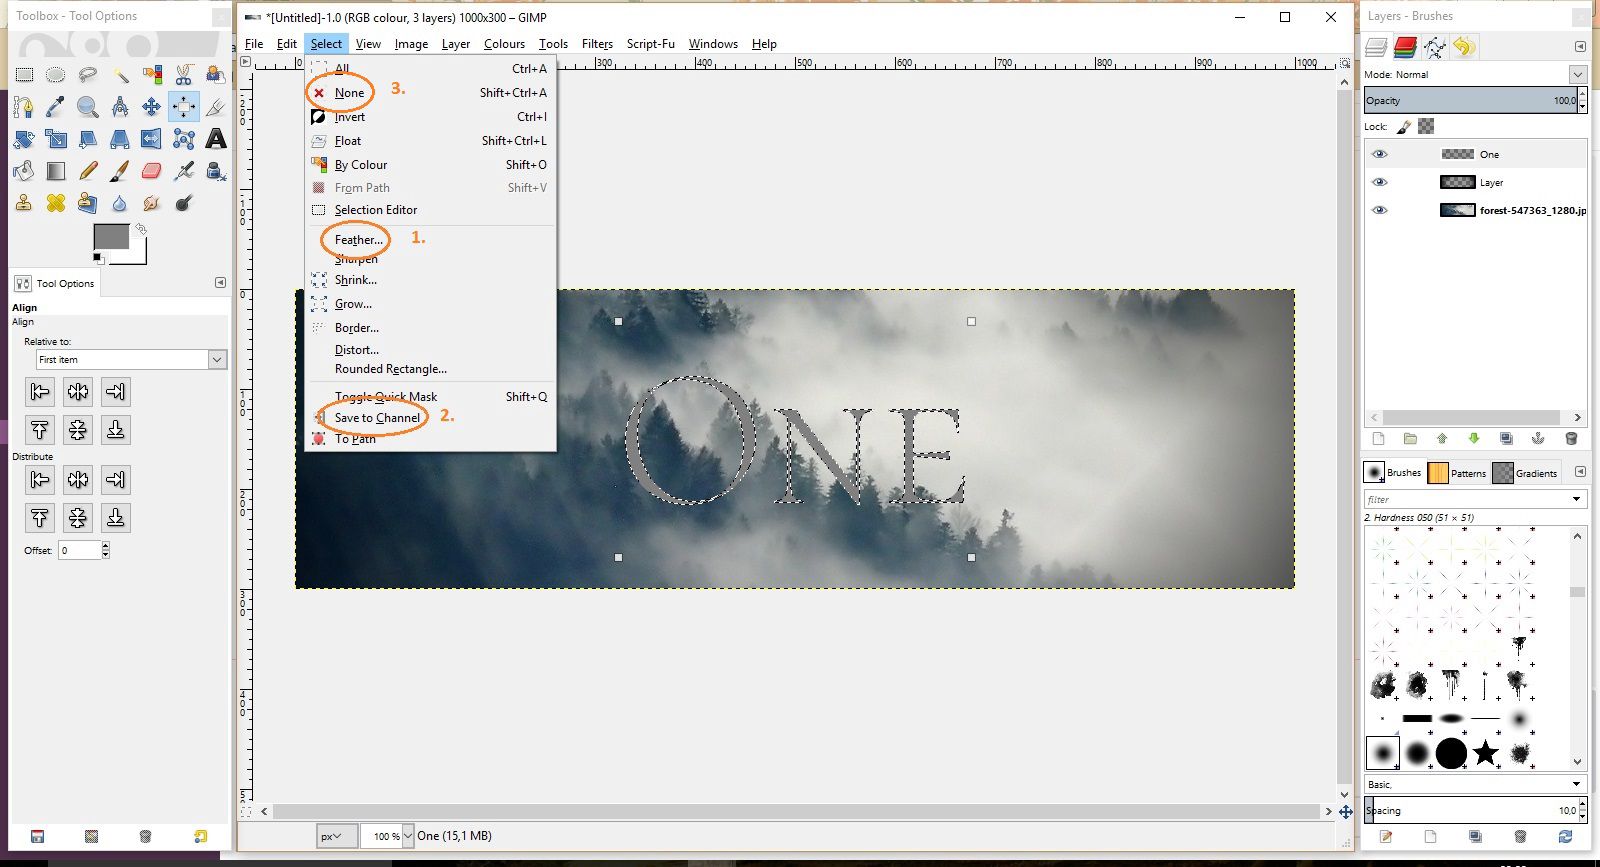
Click on Select once again and then Save to Channel.
Click Select a third time and then None.
Step 11:
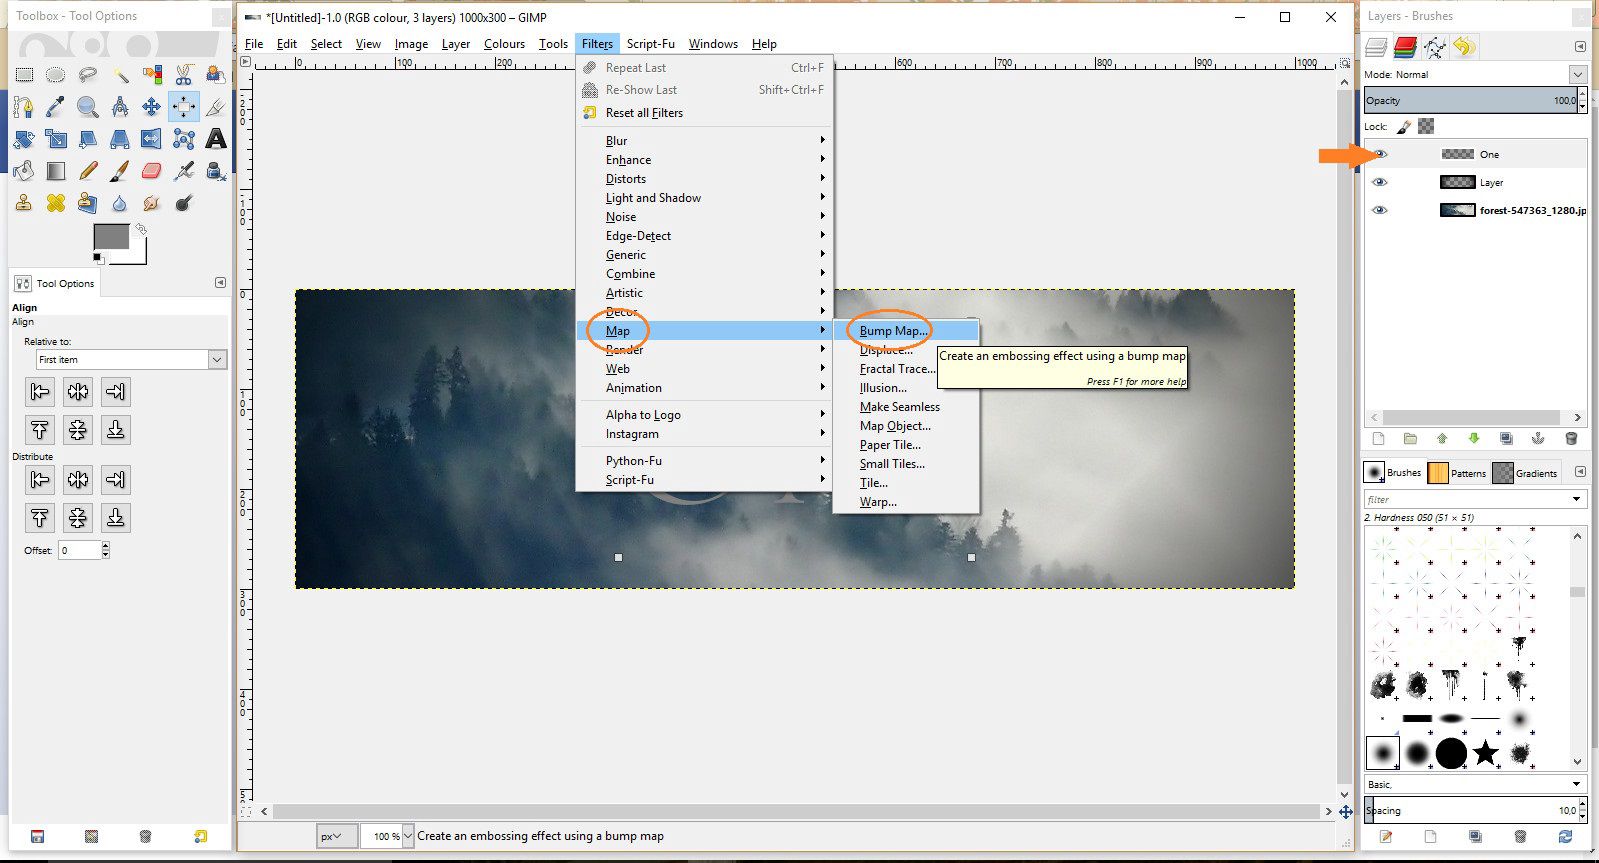
Make sure your text layer is selected.
Then click on Filters, go to Map and then Bump Map
Step 12:
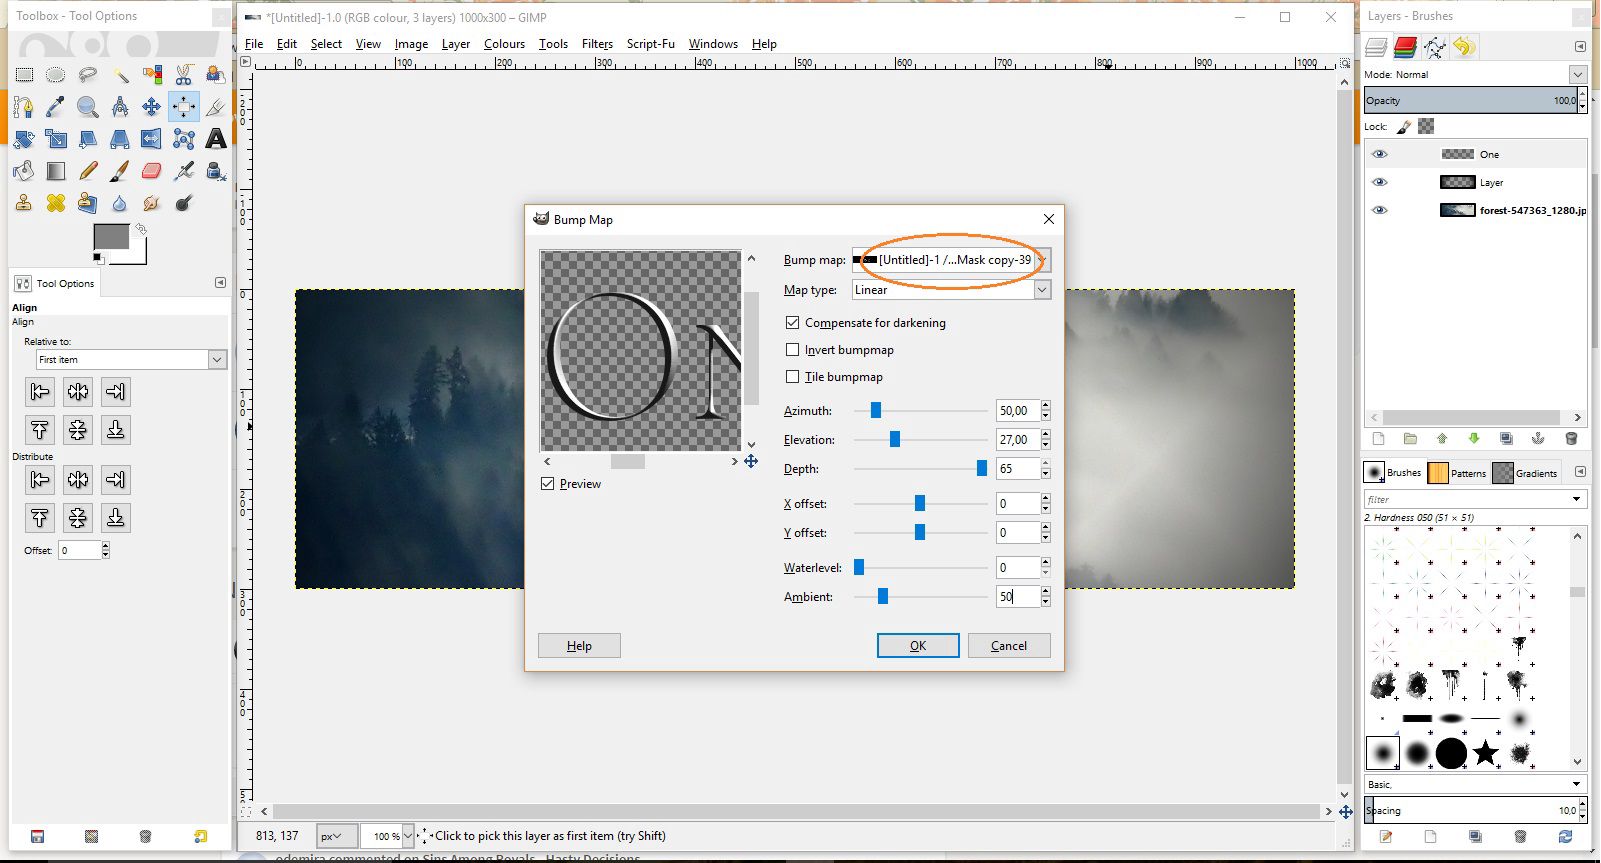
Make sure you have selected the right channel in the drop down menu (it should contain the name of your file and something like mask copy and a number)
Play around with the settings until you're satisfied, I ended up using the following numbers.
Bạn đang đọc truyện trên: AzTruyen.Top