➵ t h e m e ( 2 )

requested by: @awstwid
apps used:
• picsart
• canva
header
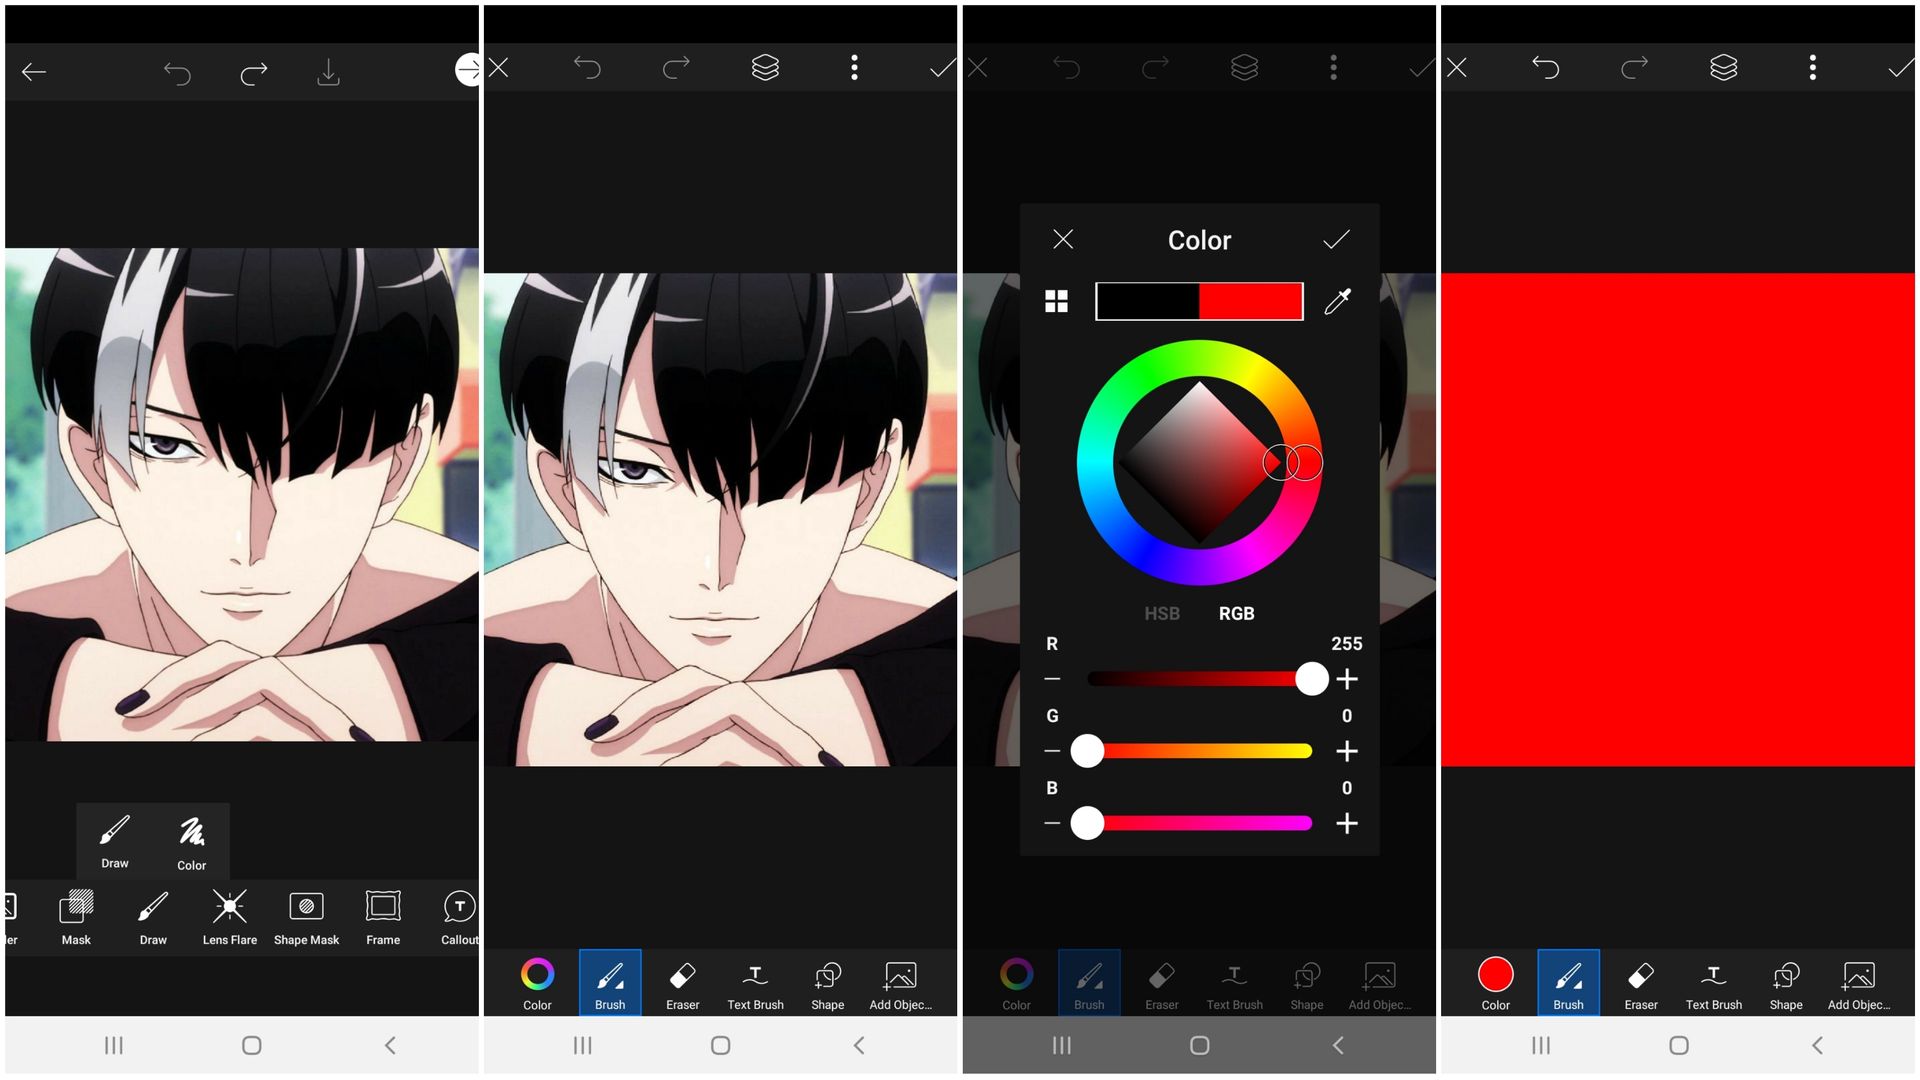
01; go to picsart
and choose an image.
then click draw.
02-03; pick a color.
04; color the whole
canvas.
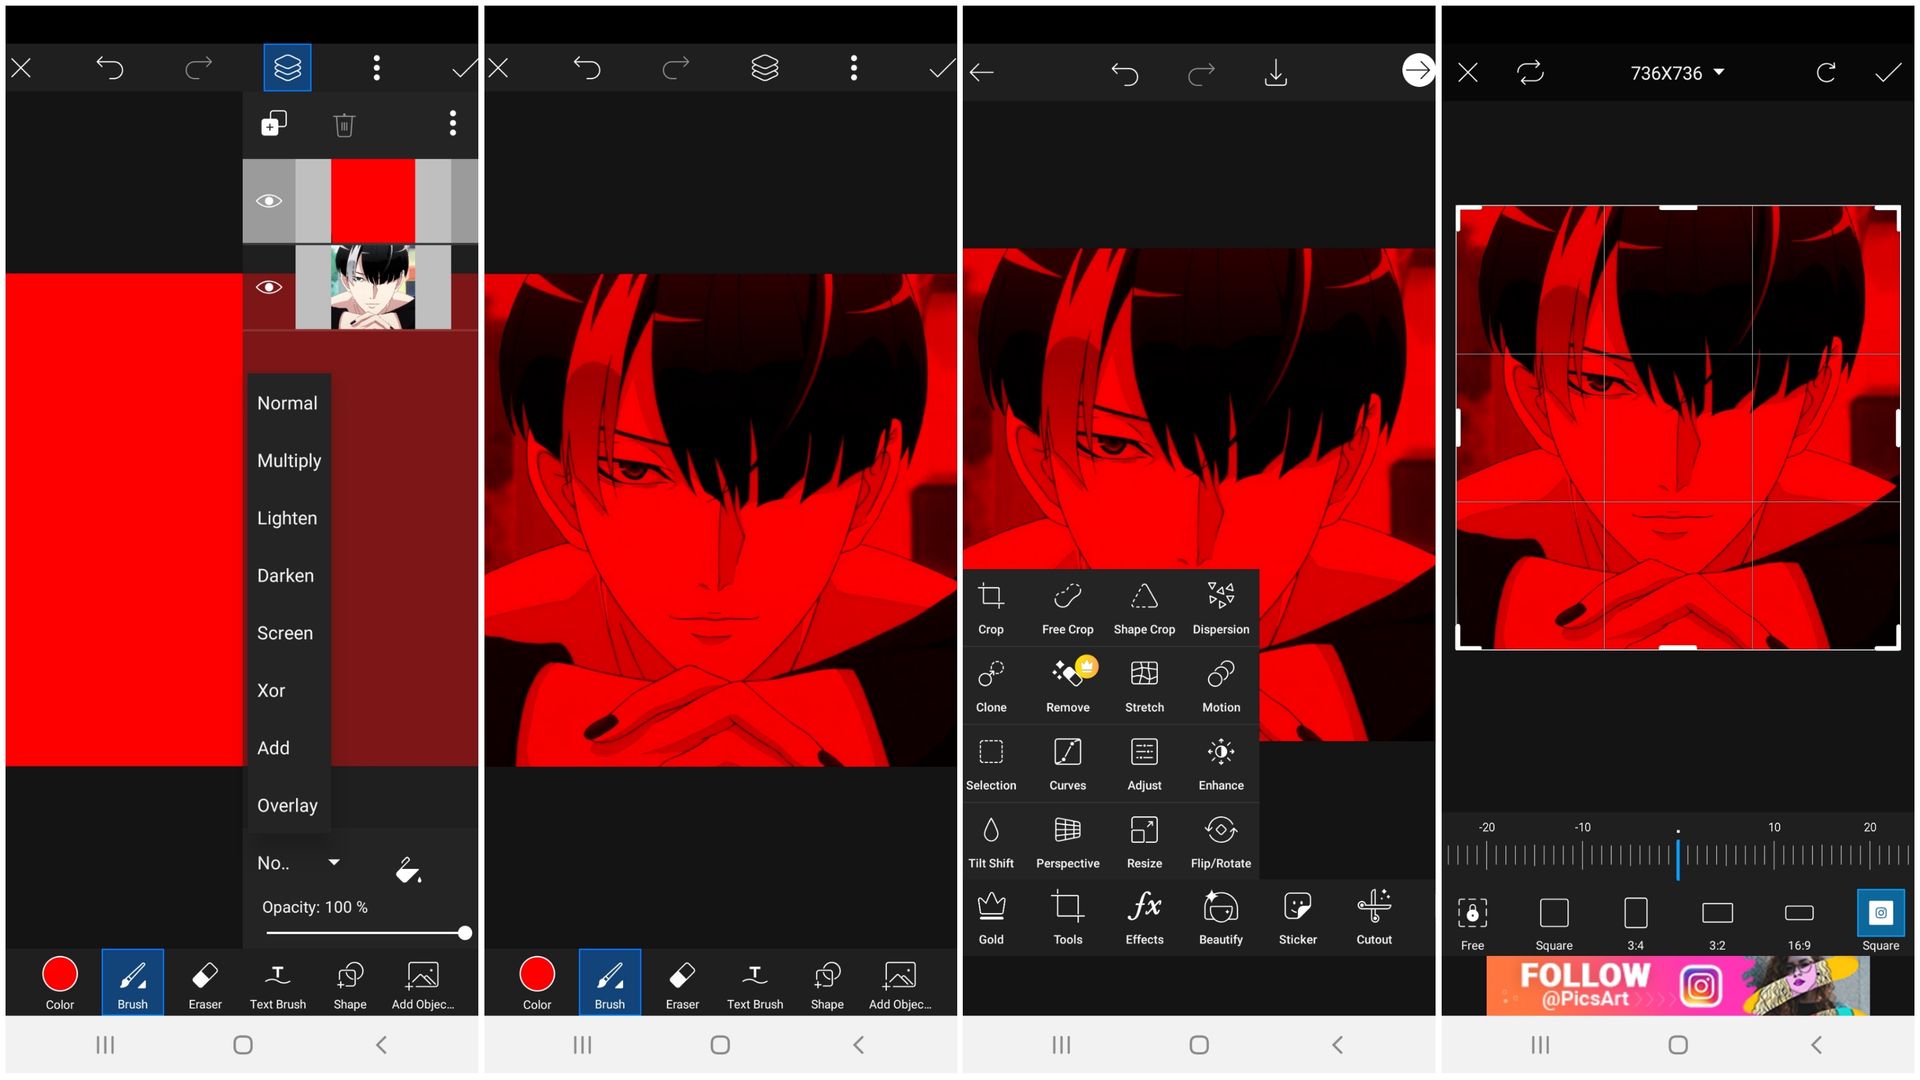
05; click on multiply.
06-07; save it!
click on crop.
08; choose 16:9.
[ it's fine even if you didn't do 6-8 ]
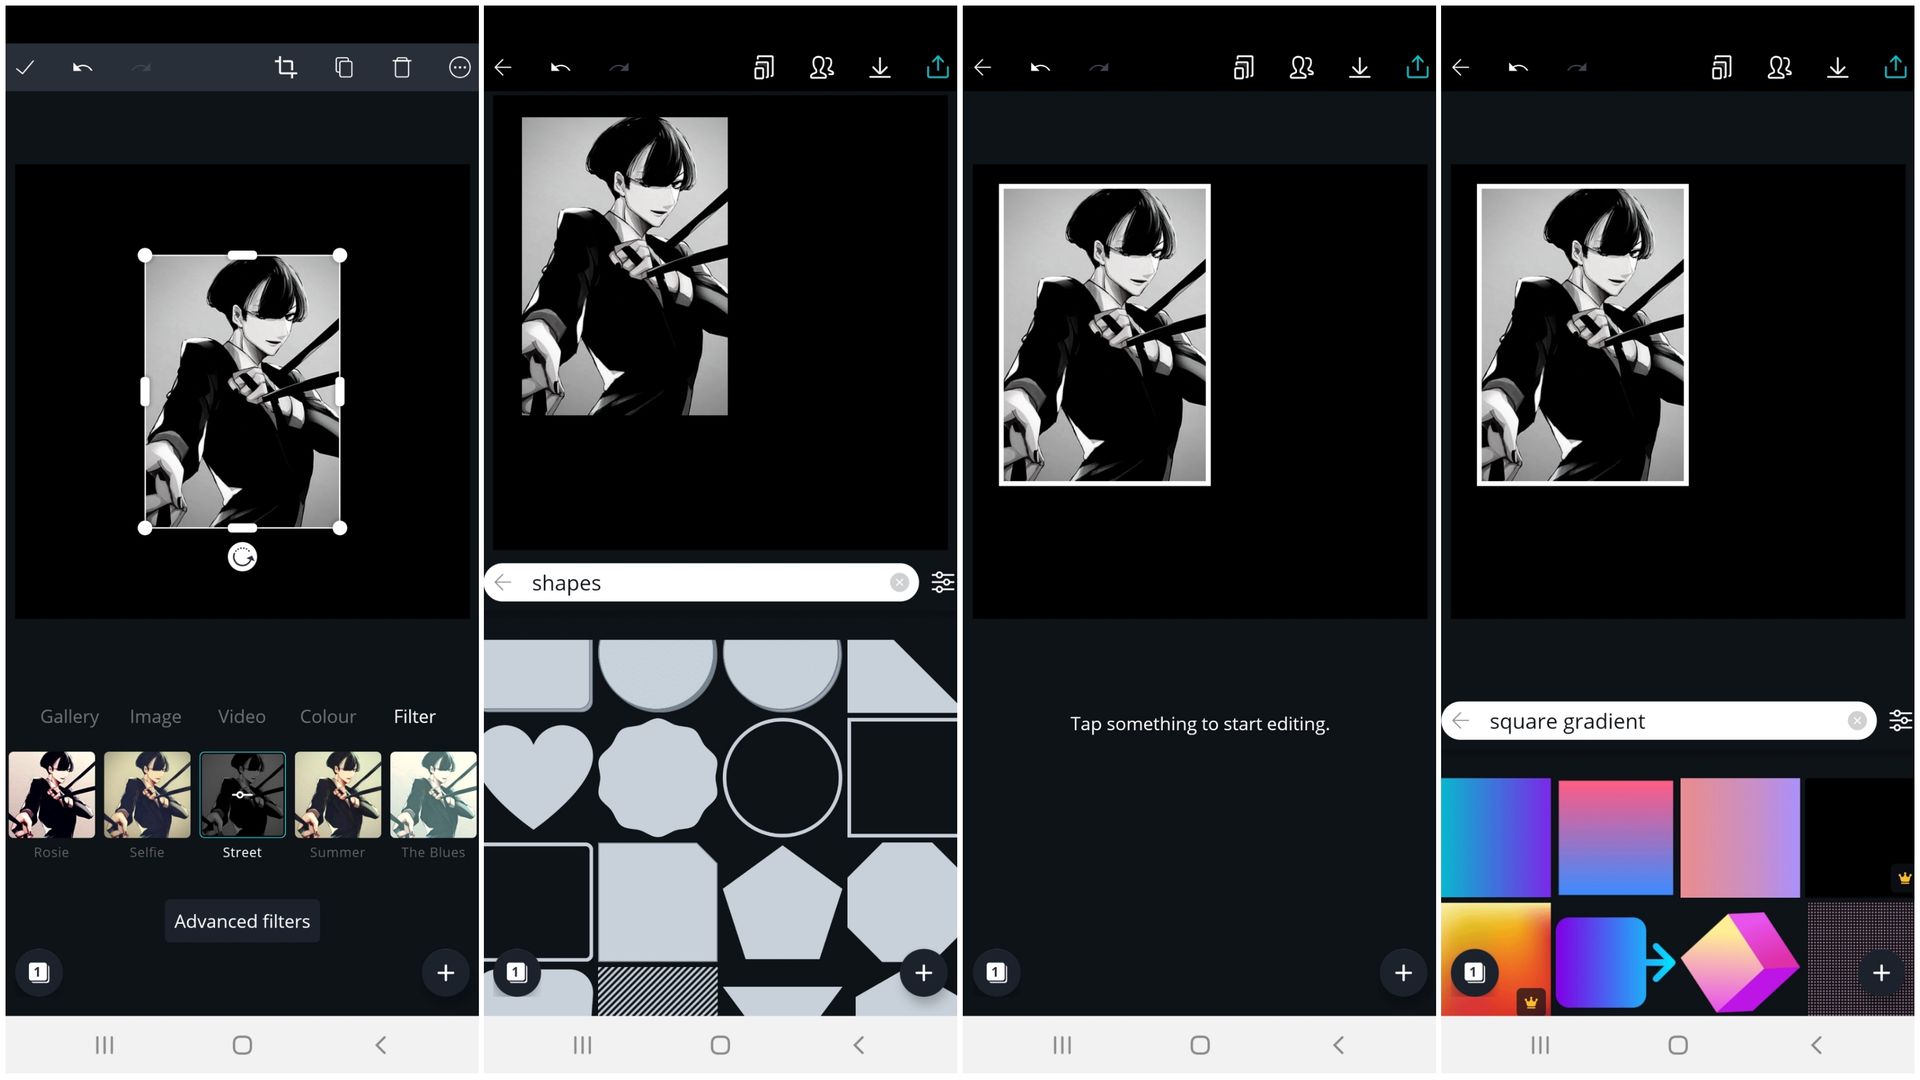
09; pick an image
and use the filter street.
10-11; click on illustration
then shapes. choose the
square borline and
spread it around the image.
12; search on square
gradient on illustration
and change it's color
if you want.
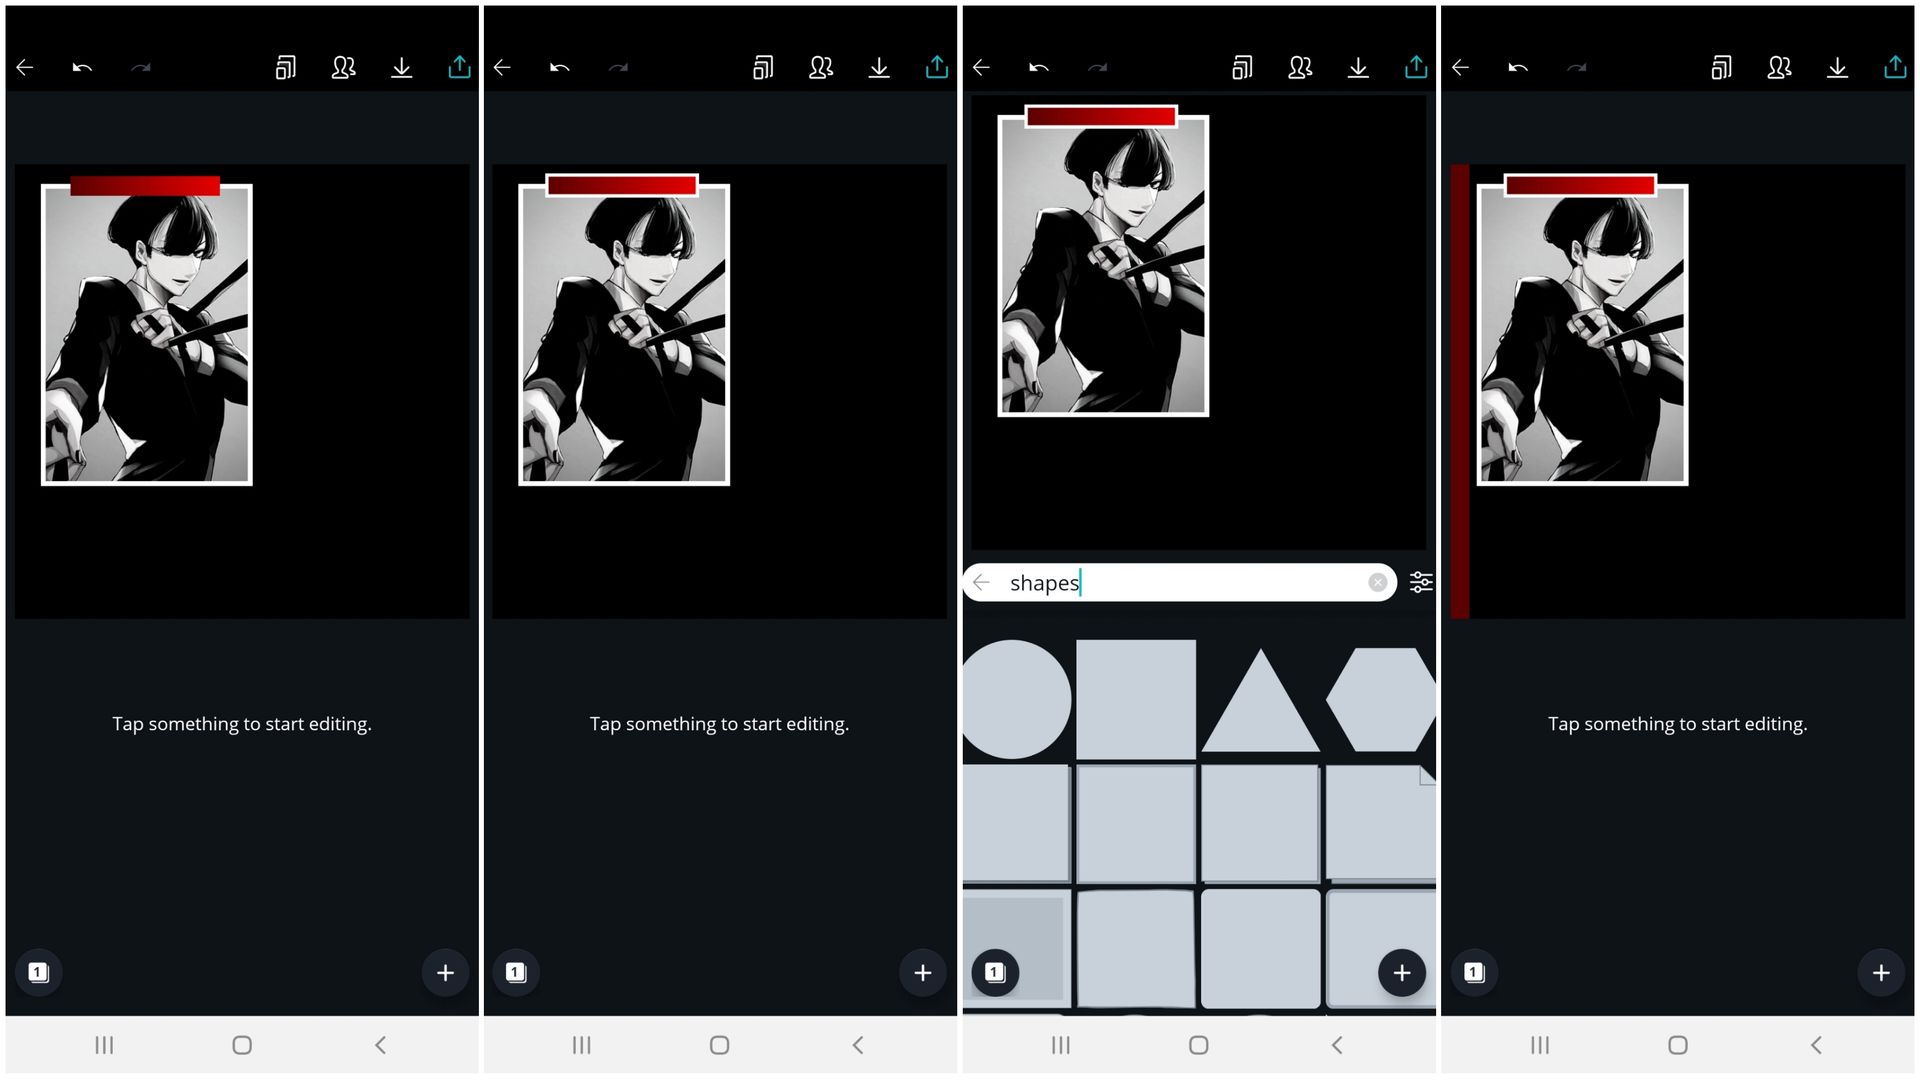
13; make it longer
and shorter place it
on the middle top of
the image.
14-15; place a border
around the square
gradient. click on
illustration then shapes
and choose square.
16; place it on the
left side and change
its color ( optional ).
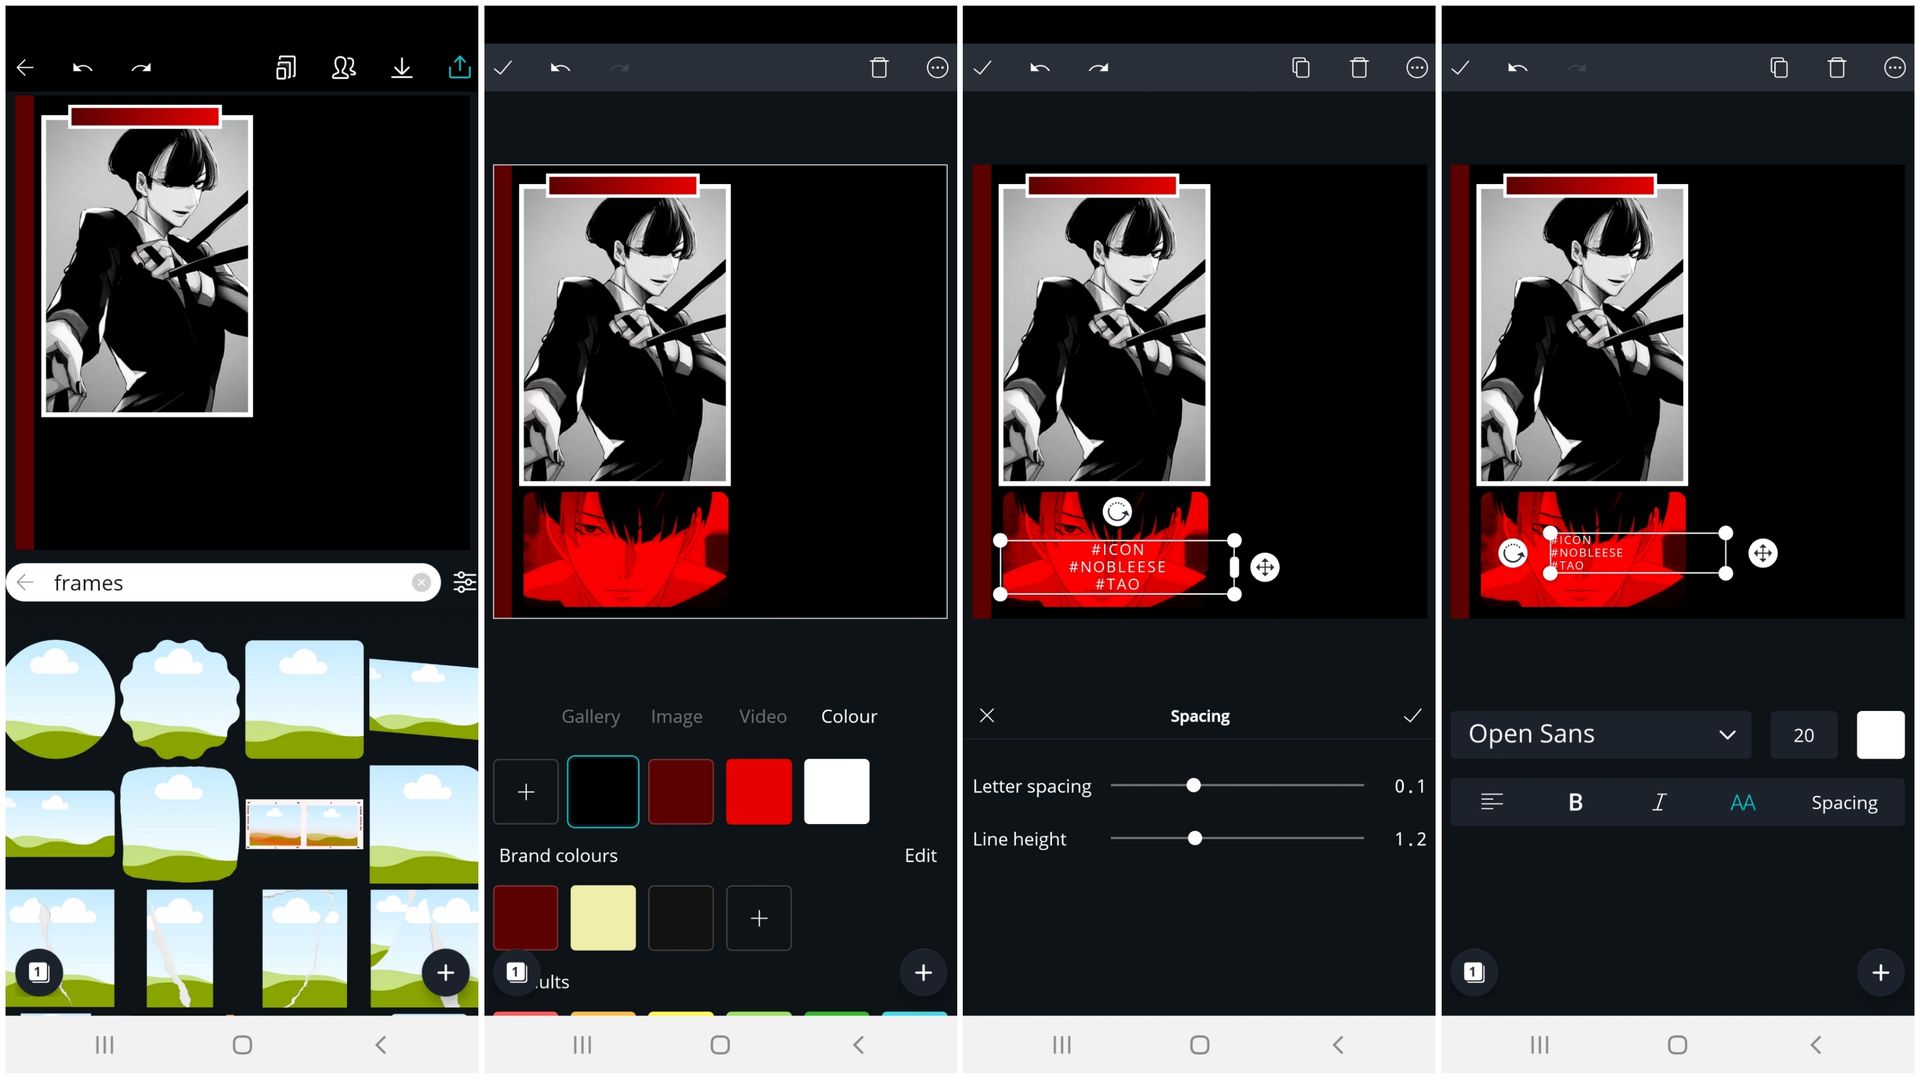
17; click on illustration
then frames and click
on the frame on the
middle left side.
18; place on the picture
you edited on picsart.
19-20; type anything you
want. copy the format.
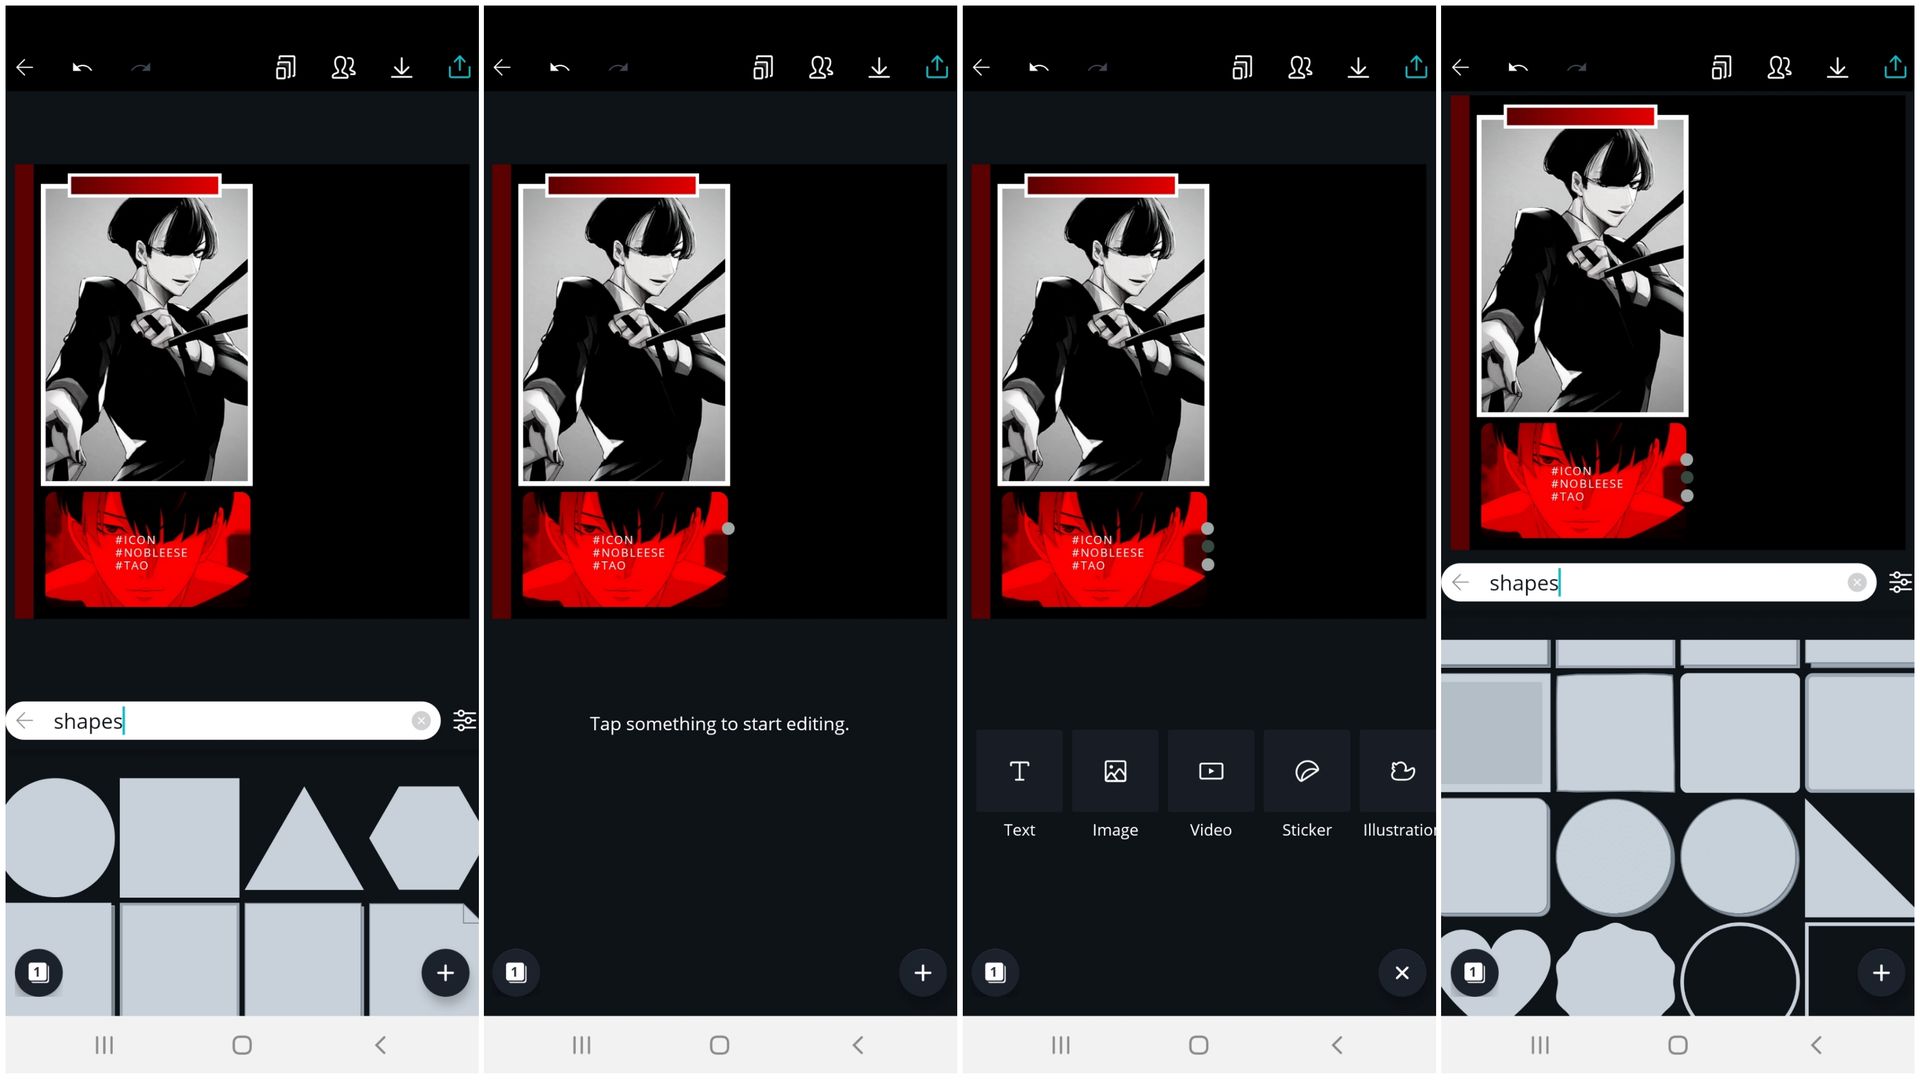
21; search shapes in
illustration and click
on the circle.
22-23; change it's color.
duplicate it two more times
and align it with some spacing.
the middle should a darker
shade of the color of the top
and bottom circles.
24; search shapes in
illustration and click
on the first column
second row.
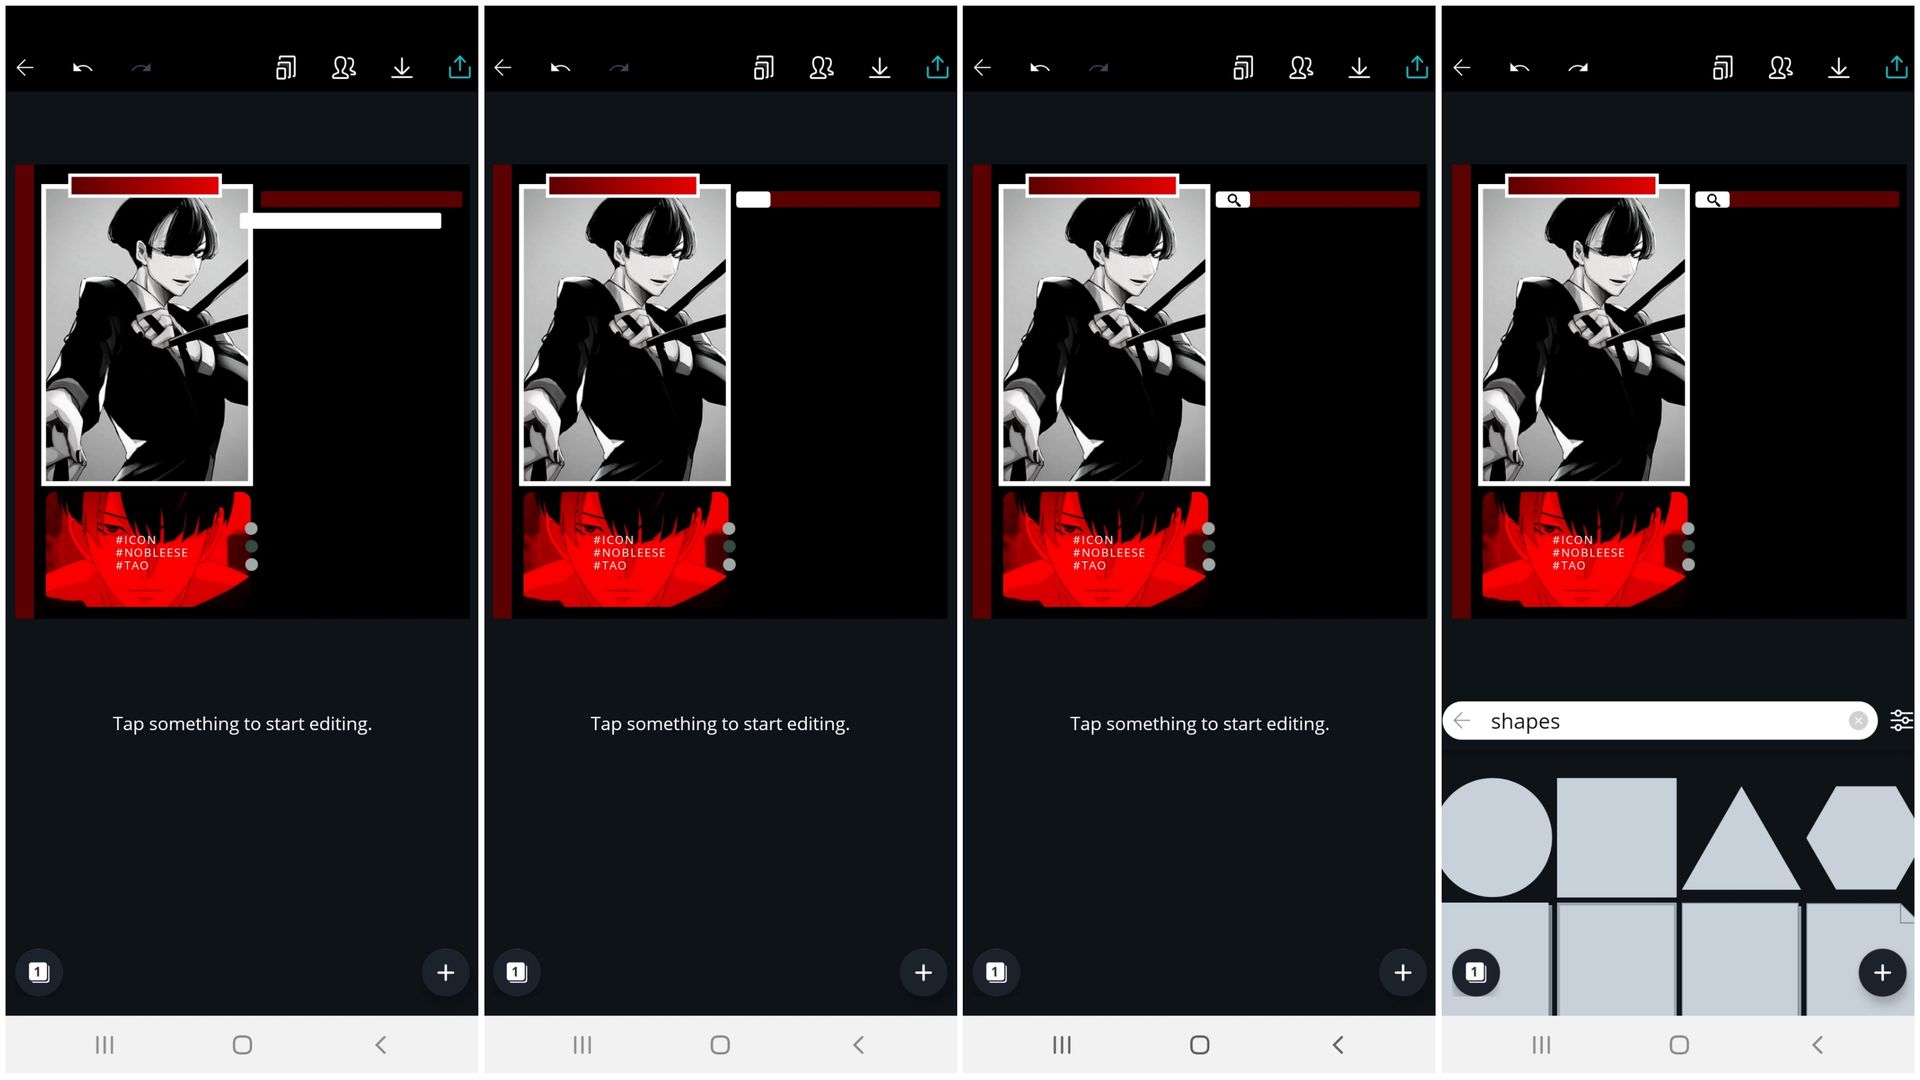
25; make it longer
and shorter. change
it's color then duplicate
it.
26; make the white
one shorter.
27; search for search
in illustration then click
on the first column
second row. ( sorry I
forgot to screenshot :( )
and make the color
black.
28; search on shapes
in illustration then
click on square.
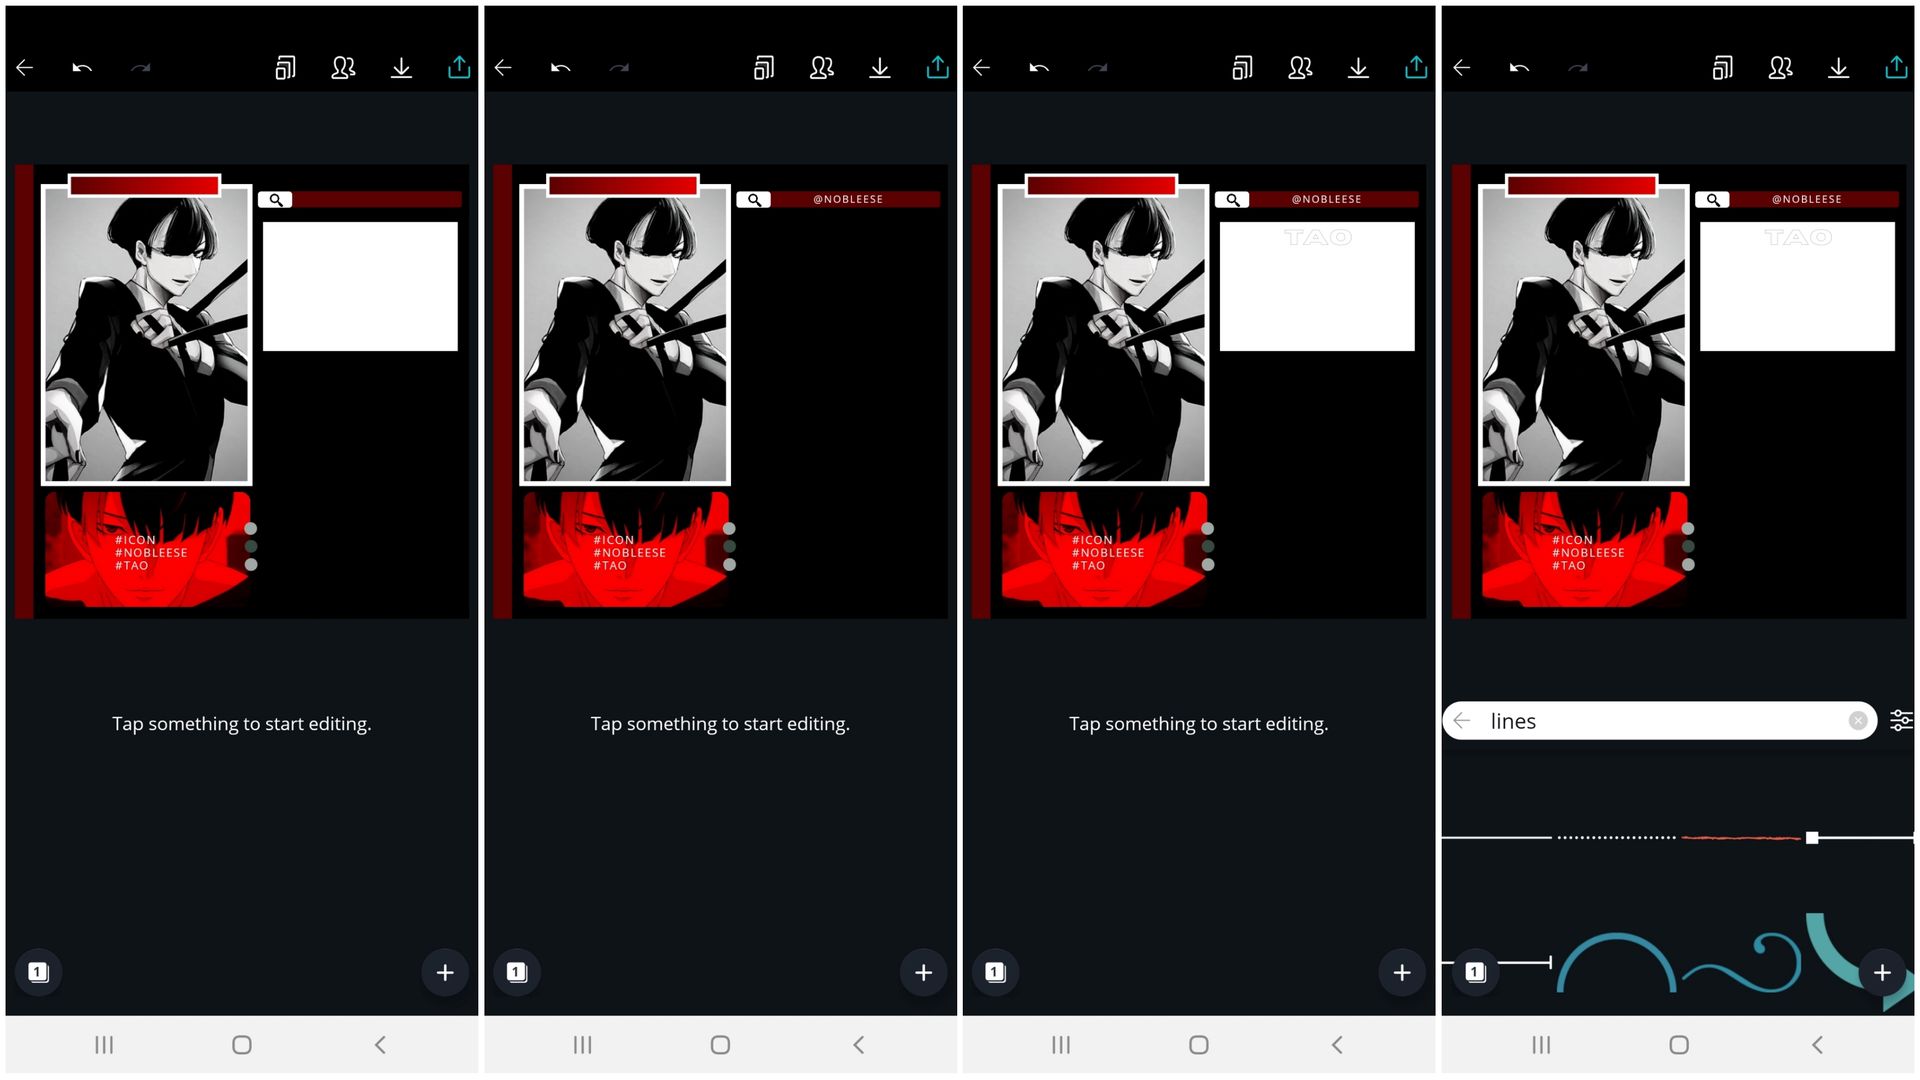
29; pick white as
the color.
30; place whatever
text you want.
( this should be 28,
I forgot to edit it. )
31-32; write whatever text
you want. ( close up so you
can see.) search lines on
illustration then click on
the first column first row.
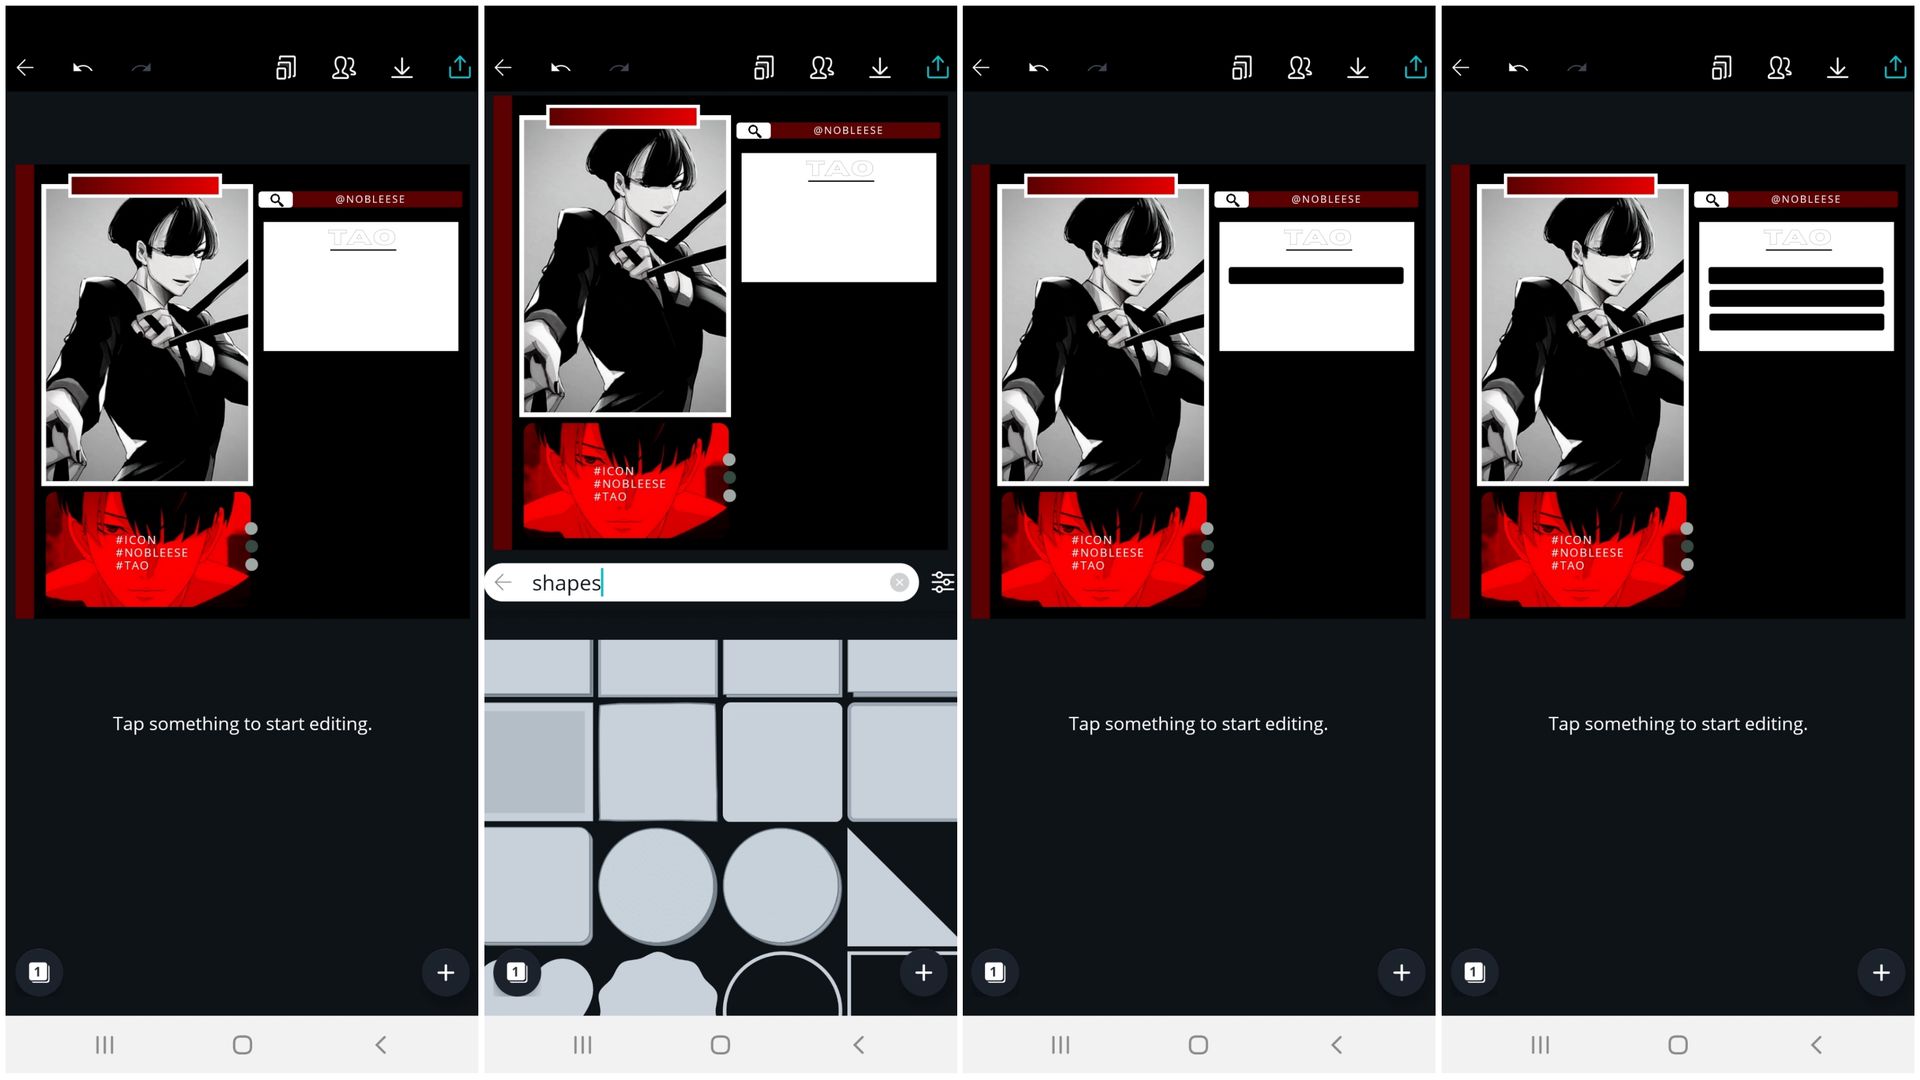
33-34; make it black
then place it under the
text. search shapes in
illustration then click
on the first column third
row.
35; make it longer
and shorter. choose
black for the color.
36; duplicate it two
more times and align
it with spacing.
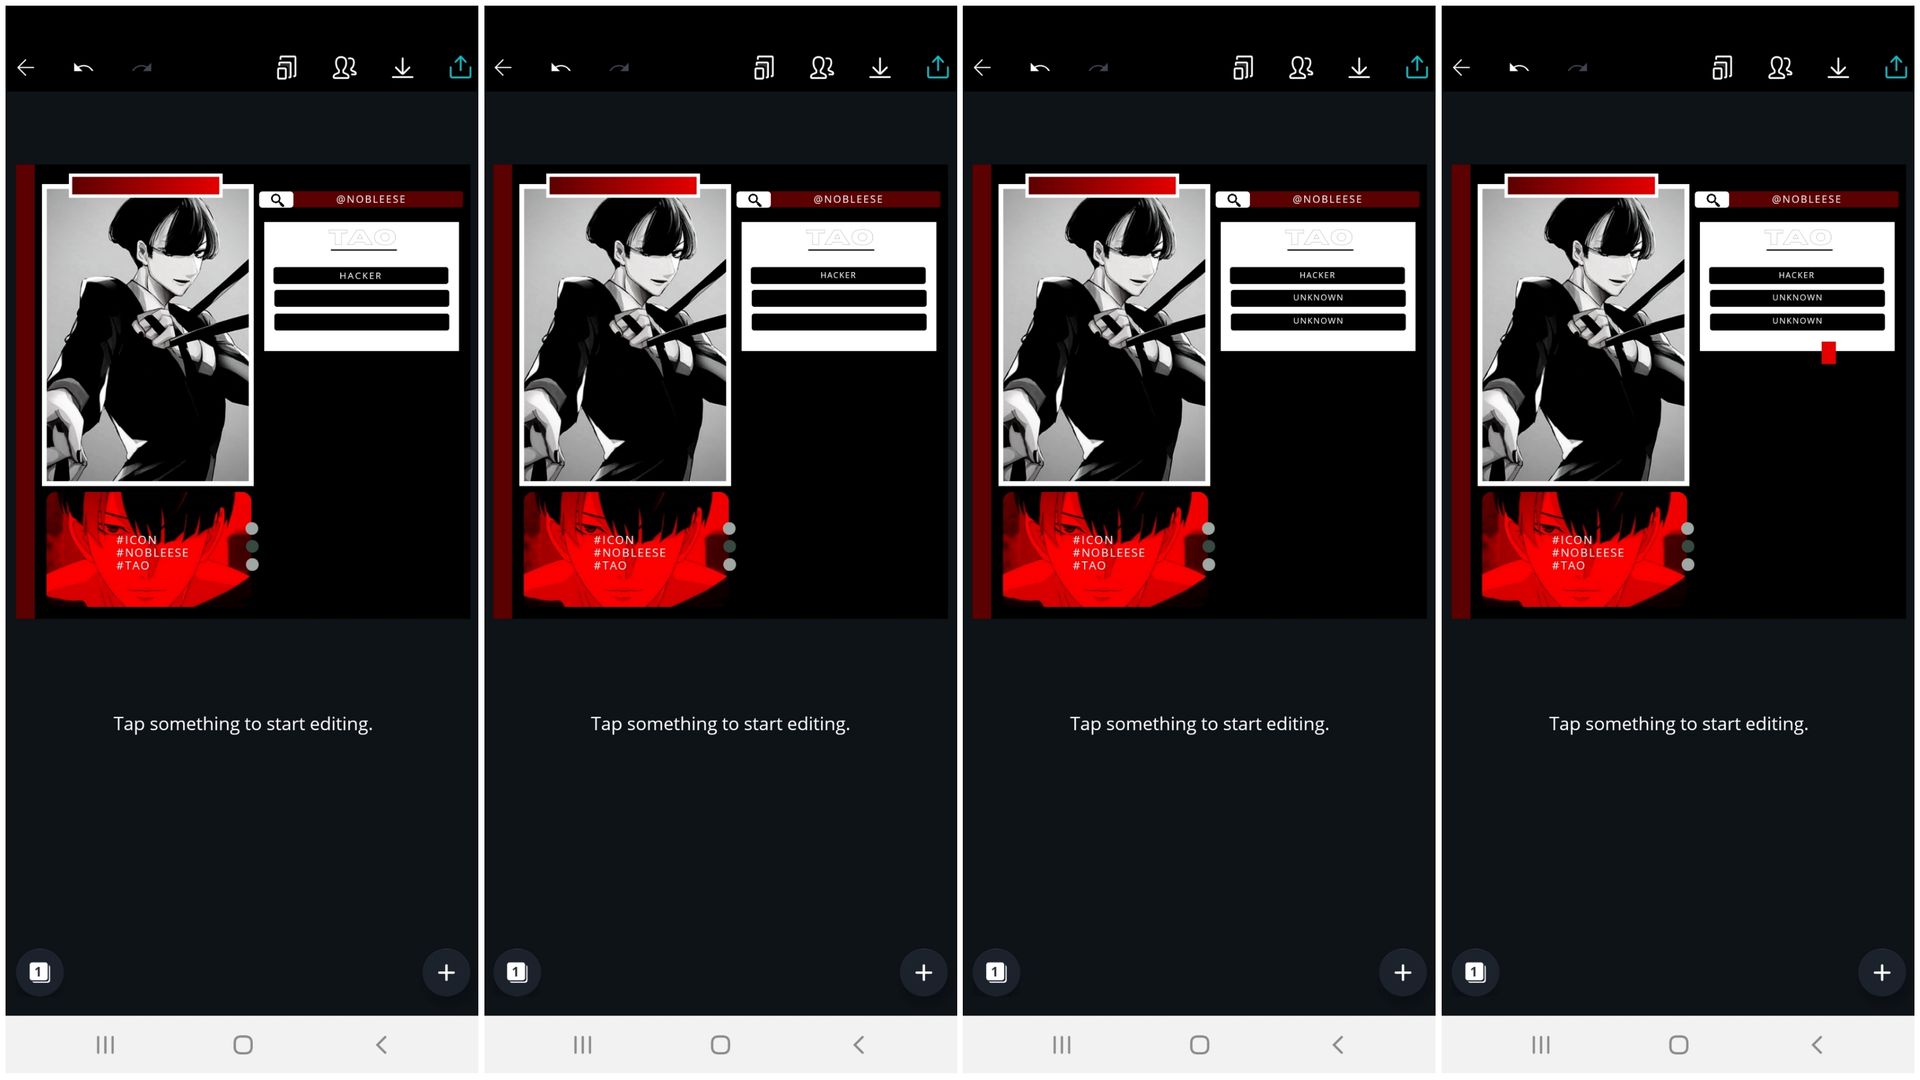
37; put on the character's
profession or whatever
you want to write.
38-39; make it a bit
smaller. duplicate it
two more times and type
what you want to write.
40; search on shapes
in illustration then click
on square. change it's color
and size.
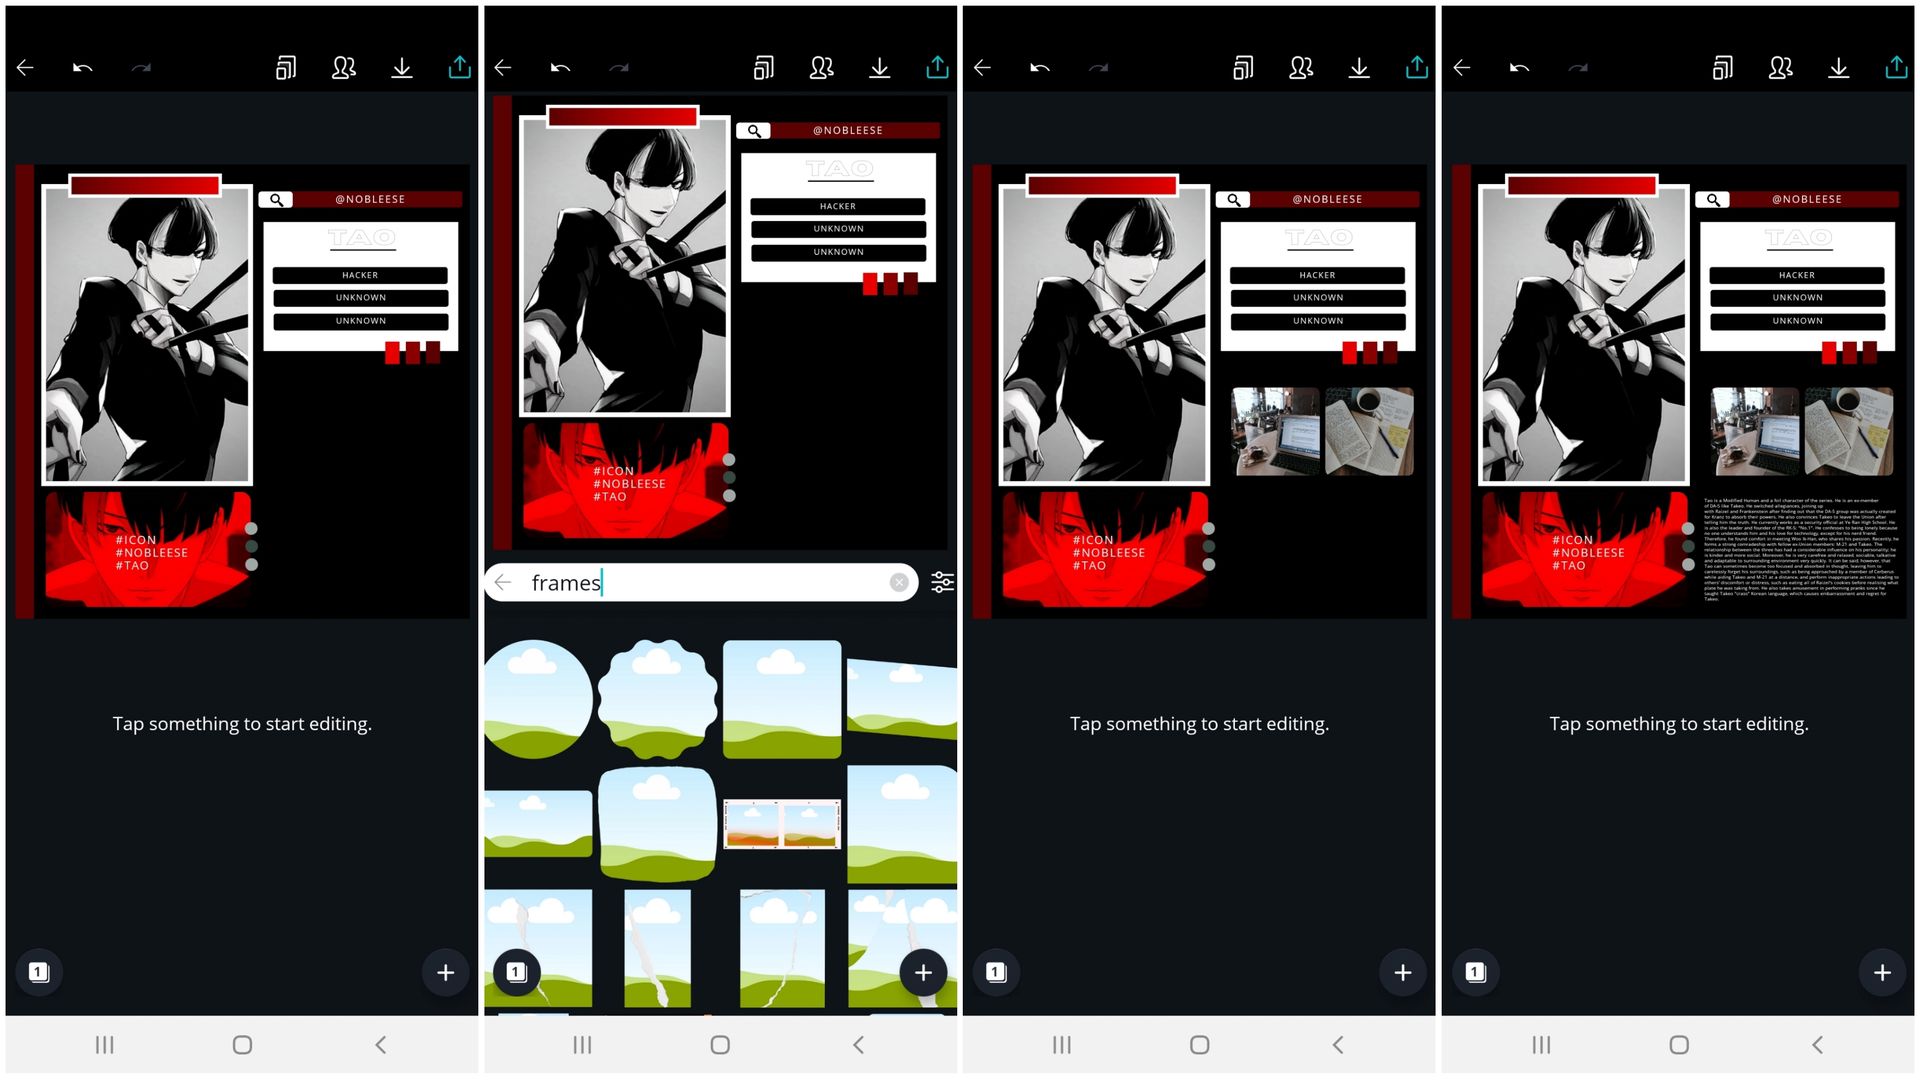
41; duplicate it two
more time and the
middle is darker than
the first one and the last
is the darkest.
42-43; search frames in
illustration then click on
first column third row.
place an aesthetic image
of what the character
likes or whatever you want.
duplicate it and choose
another photo.
44; type on informations
about the character or
whatever you want to write.
━━━━━━━━━
icon
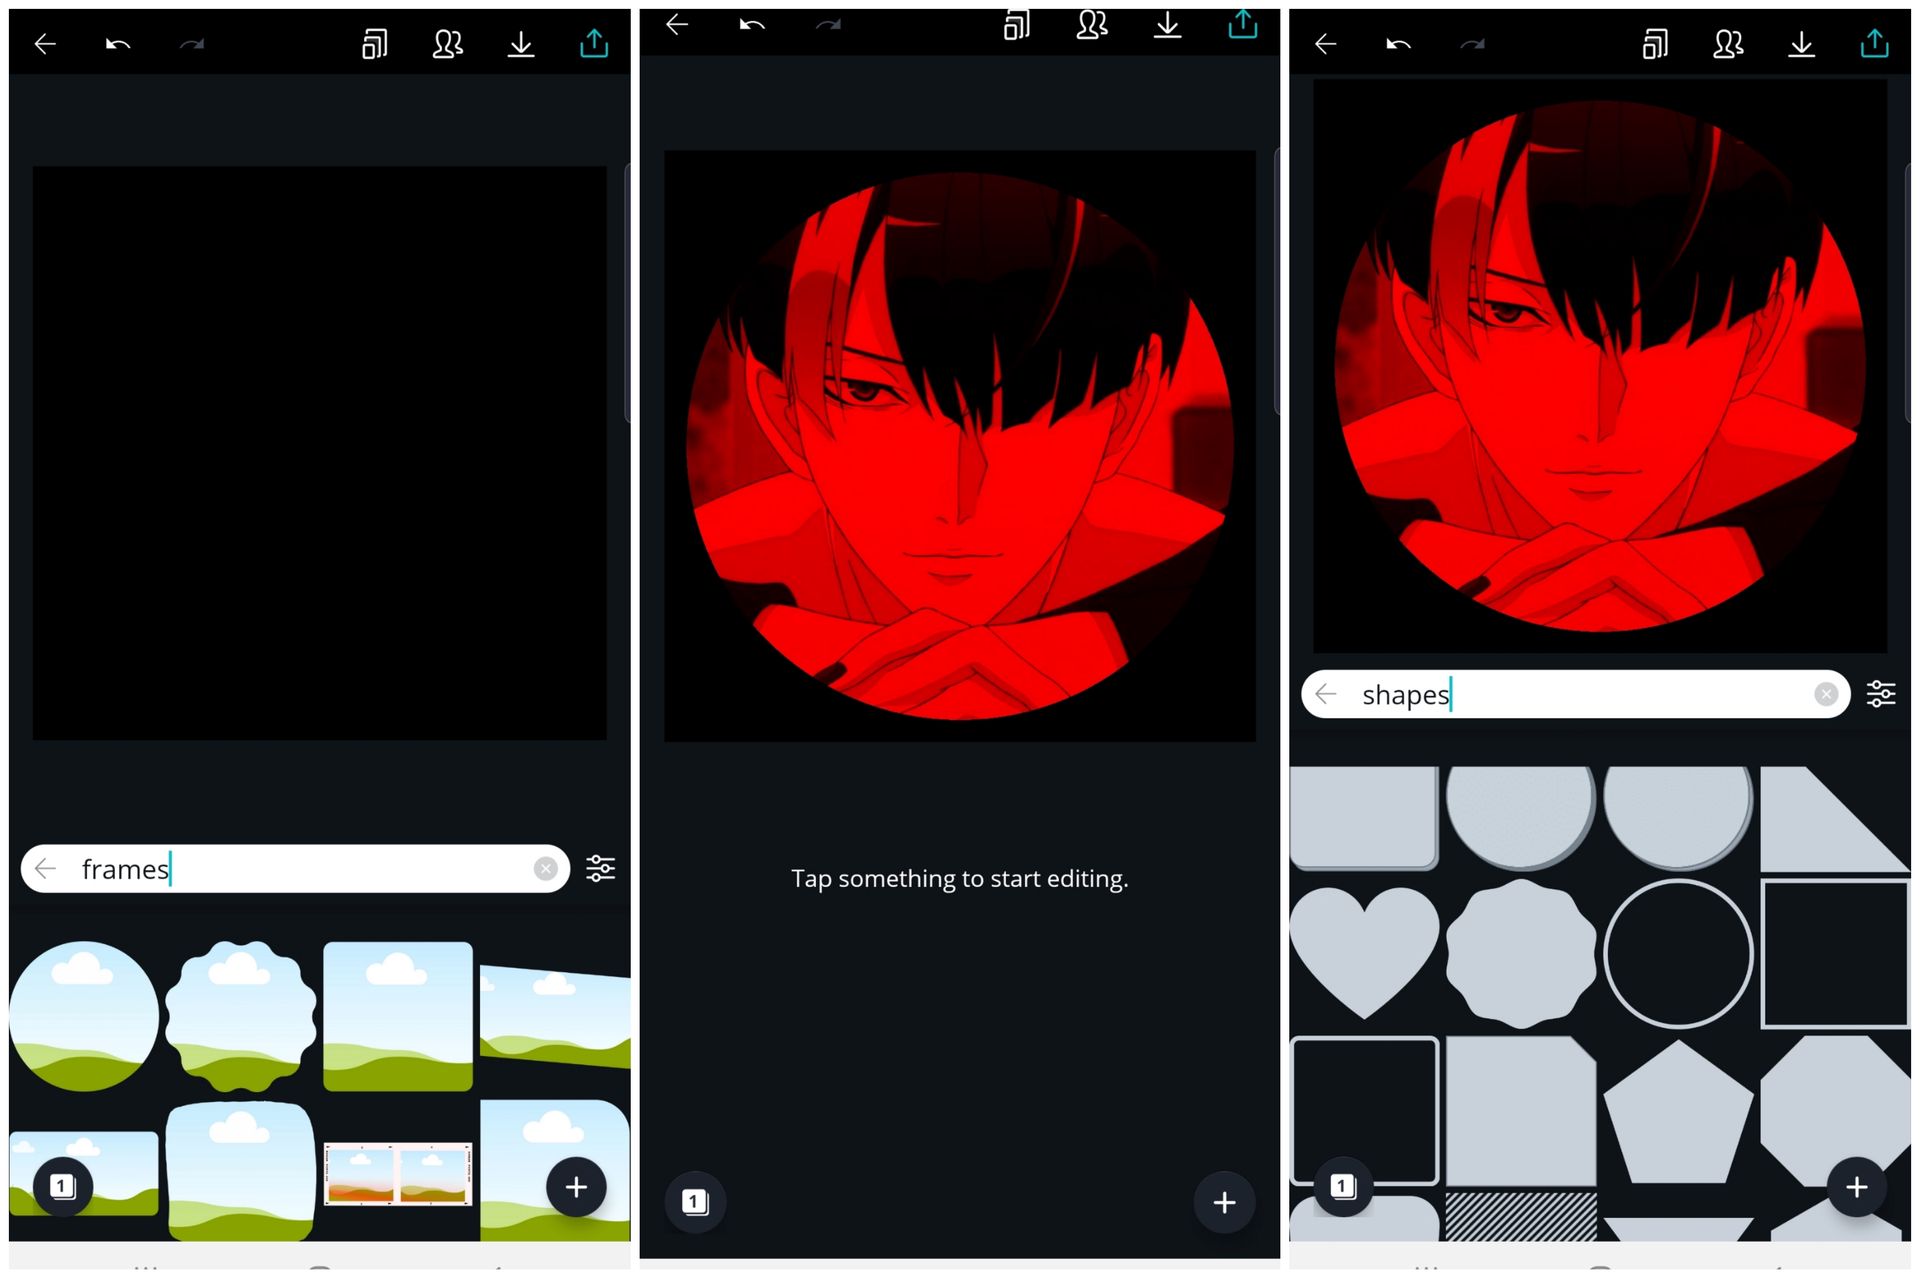
01; search frames in
illustration and click
on the first column
first row.
02; choose the image
you edited on picsart.
03; search shapes in
illustration and click
on the circle border.
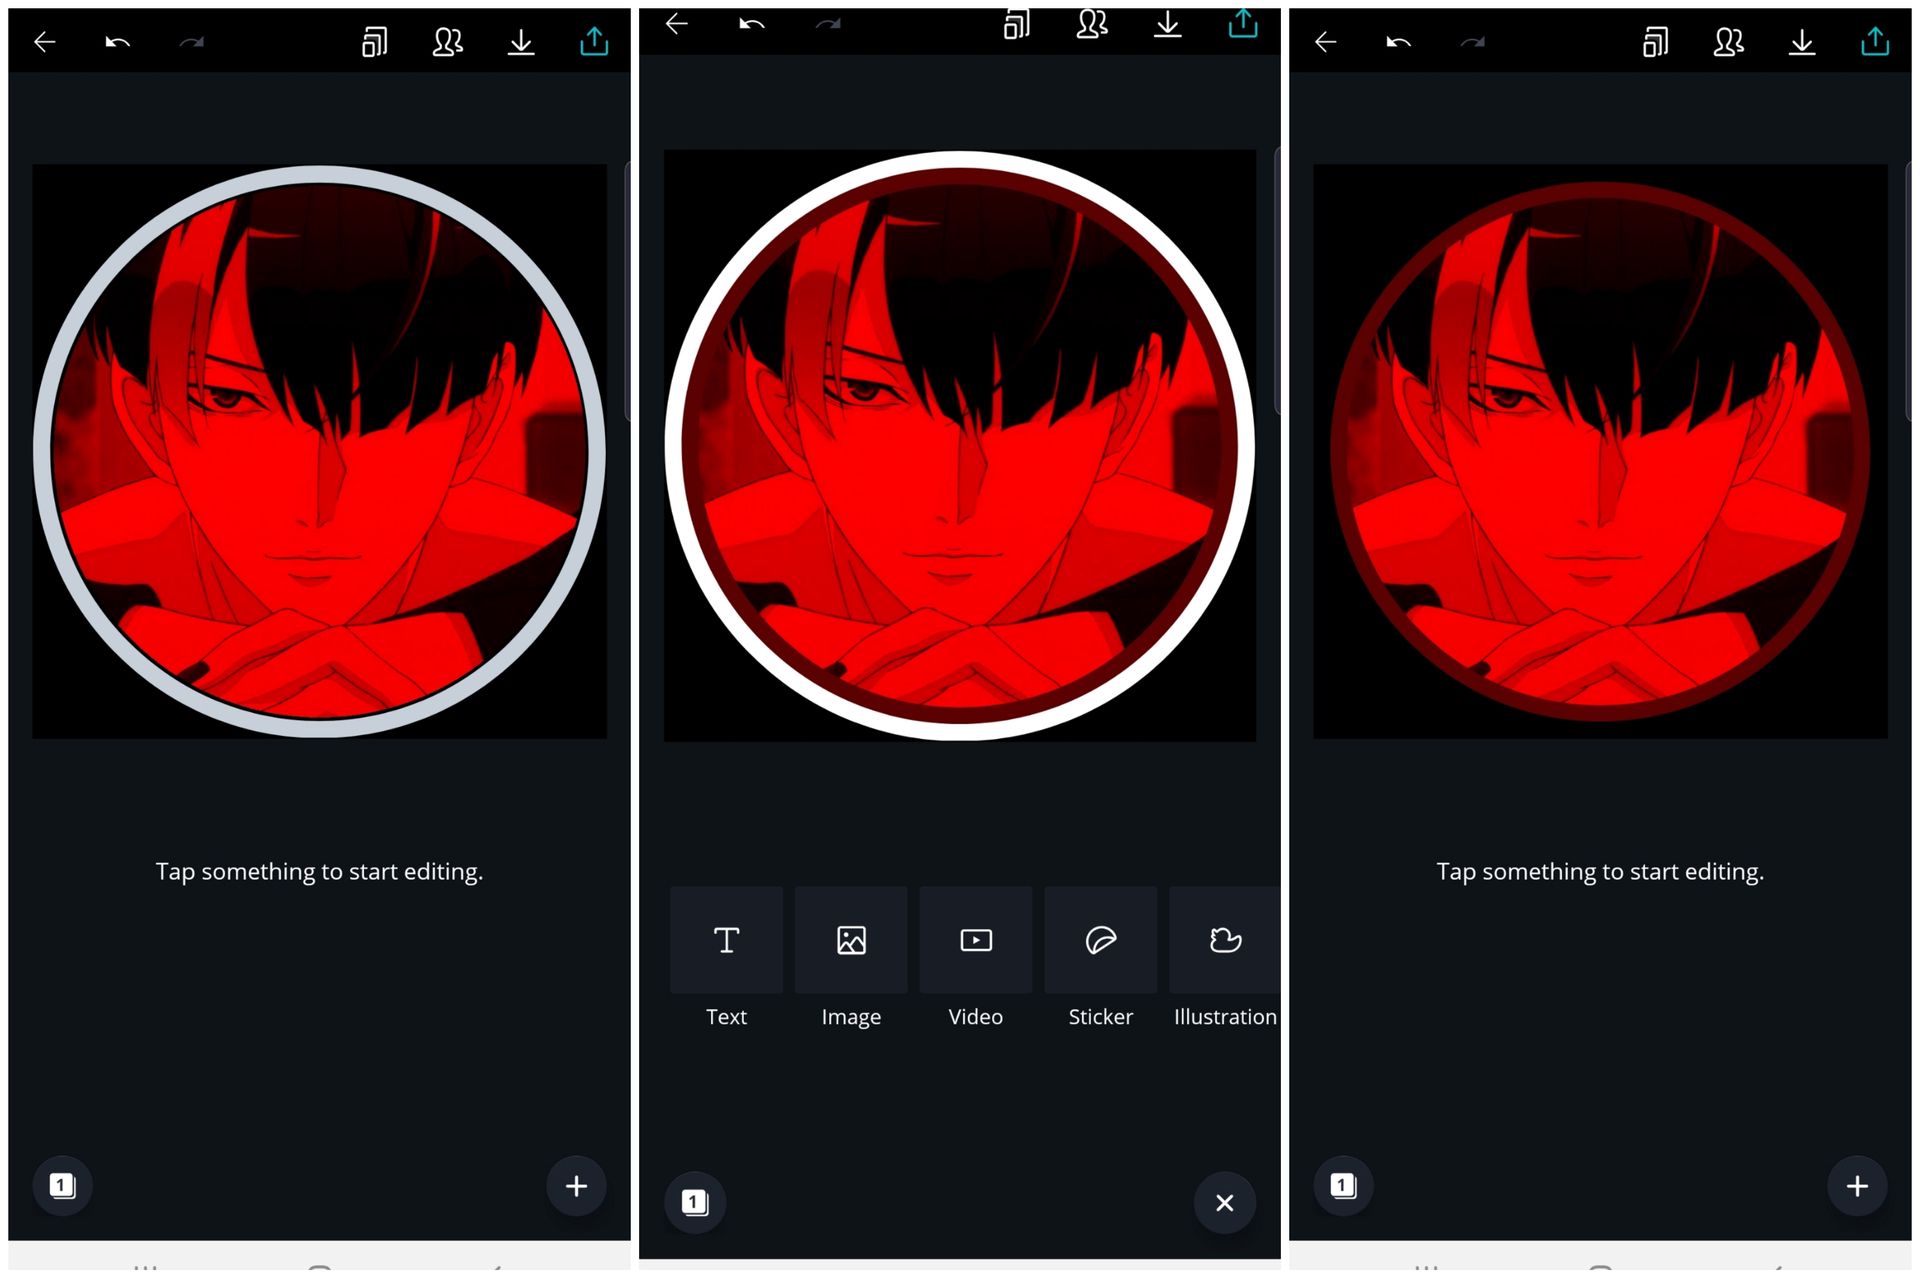
04; place it around
the frame.
05; duplicate it, change
it's color and place
it on the inner part.
06; make the outside
border black.
━━━━━━━━━
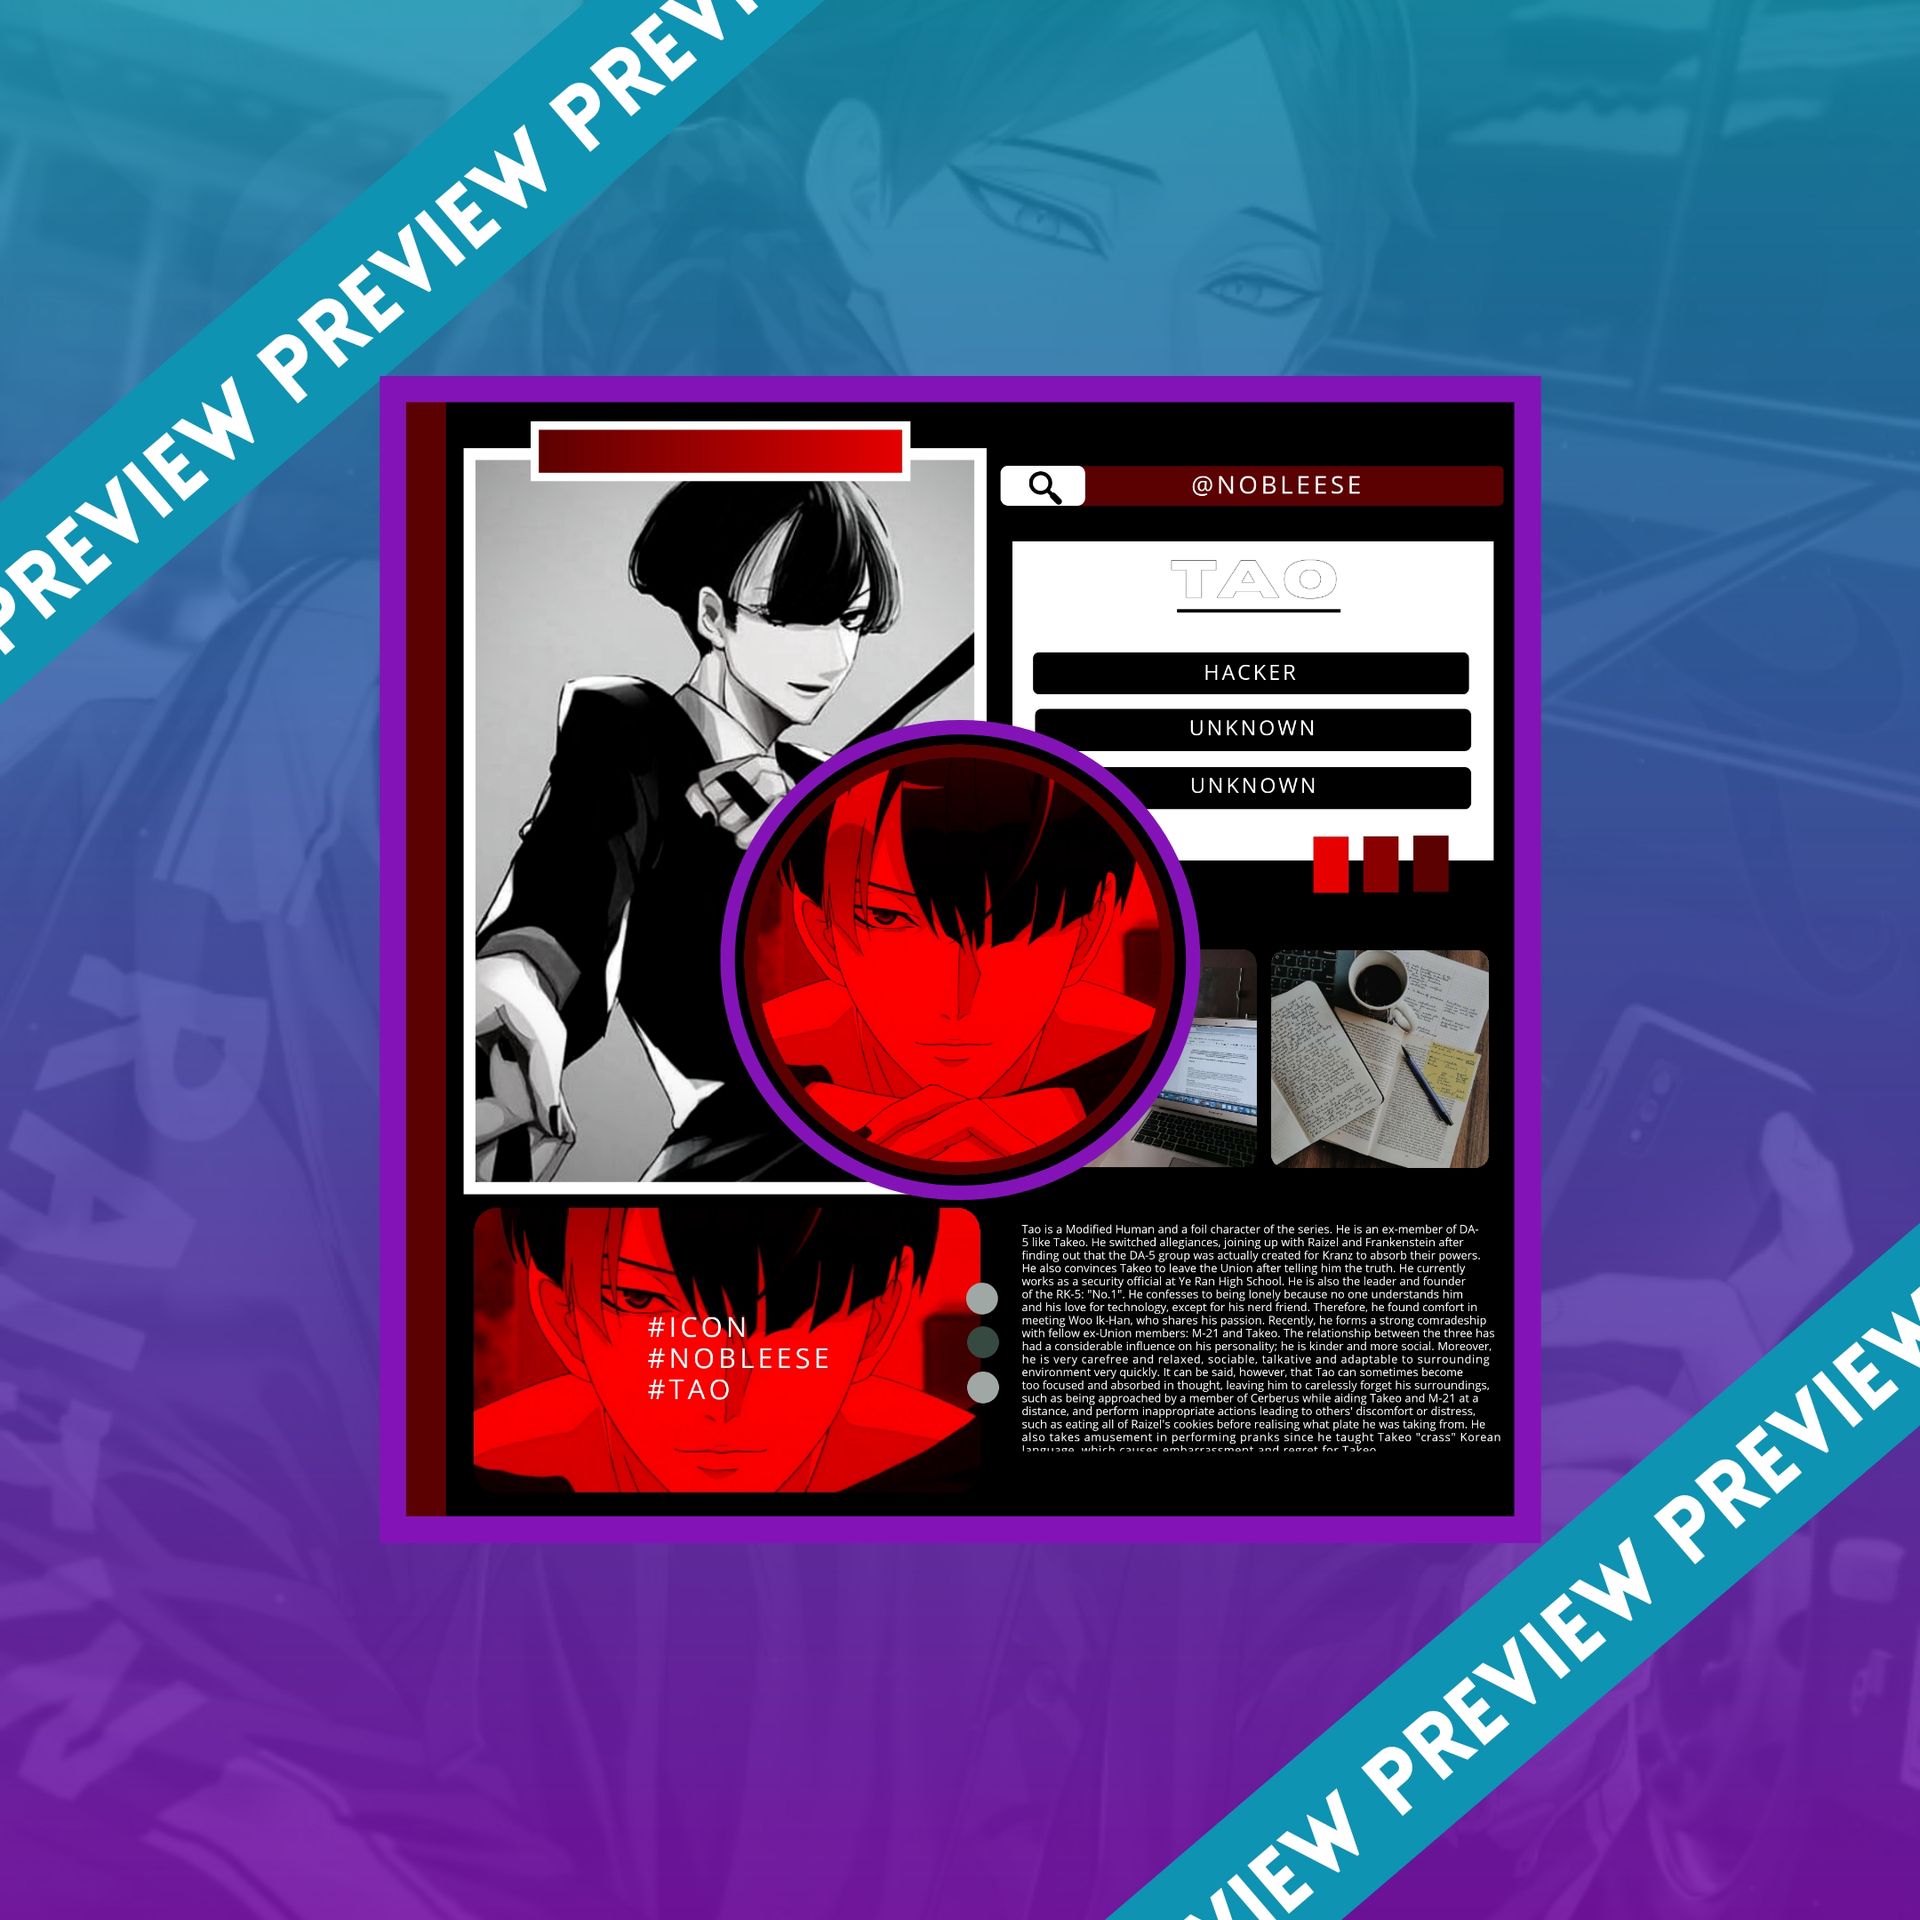
final results:
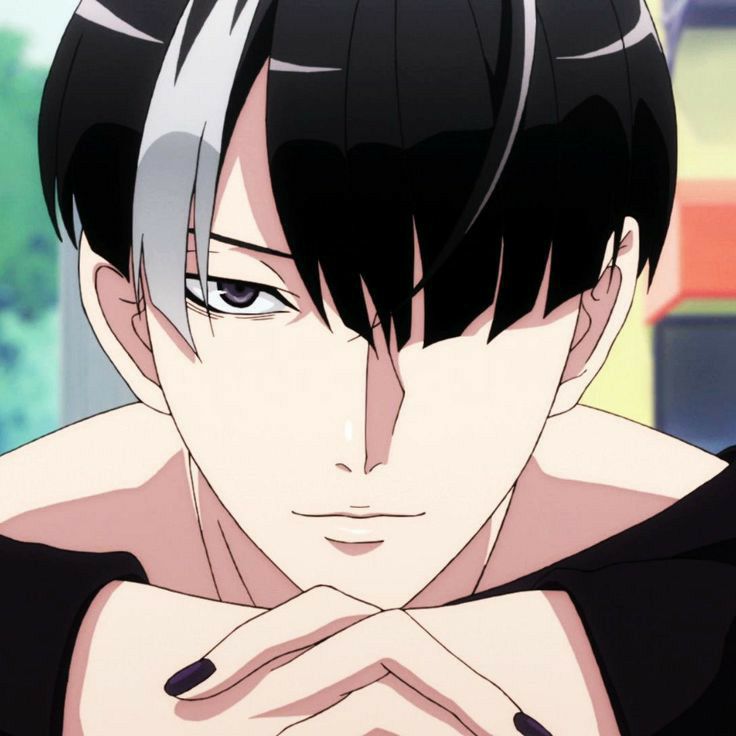
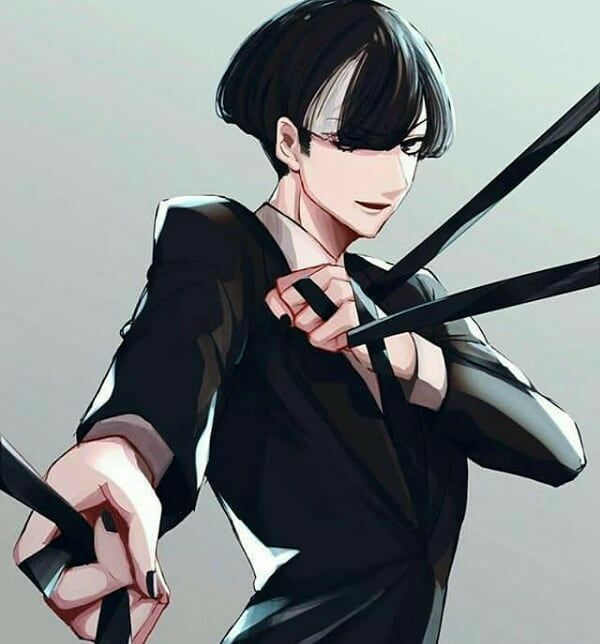
images used:

I'm seriously a bad teacher, I'm sorry if you didn't understand ㅠㅡㅠ.
I hope that this helped.
any questions?

Bạn đang đọc truyện trên: AzTruyen.Top