121. || cast shadow
{ 121. CHAPTER CONTENTS : tutorial }
[ REMINDER : please, from now on out, if you use any template, idea, icon, or anything else from this book, give me credit or whoever I say I got the idea from. Just put my username in the books information or dedicate a chapter to me. Thanks! ]
-*+*-
Superimpose
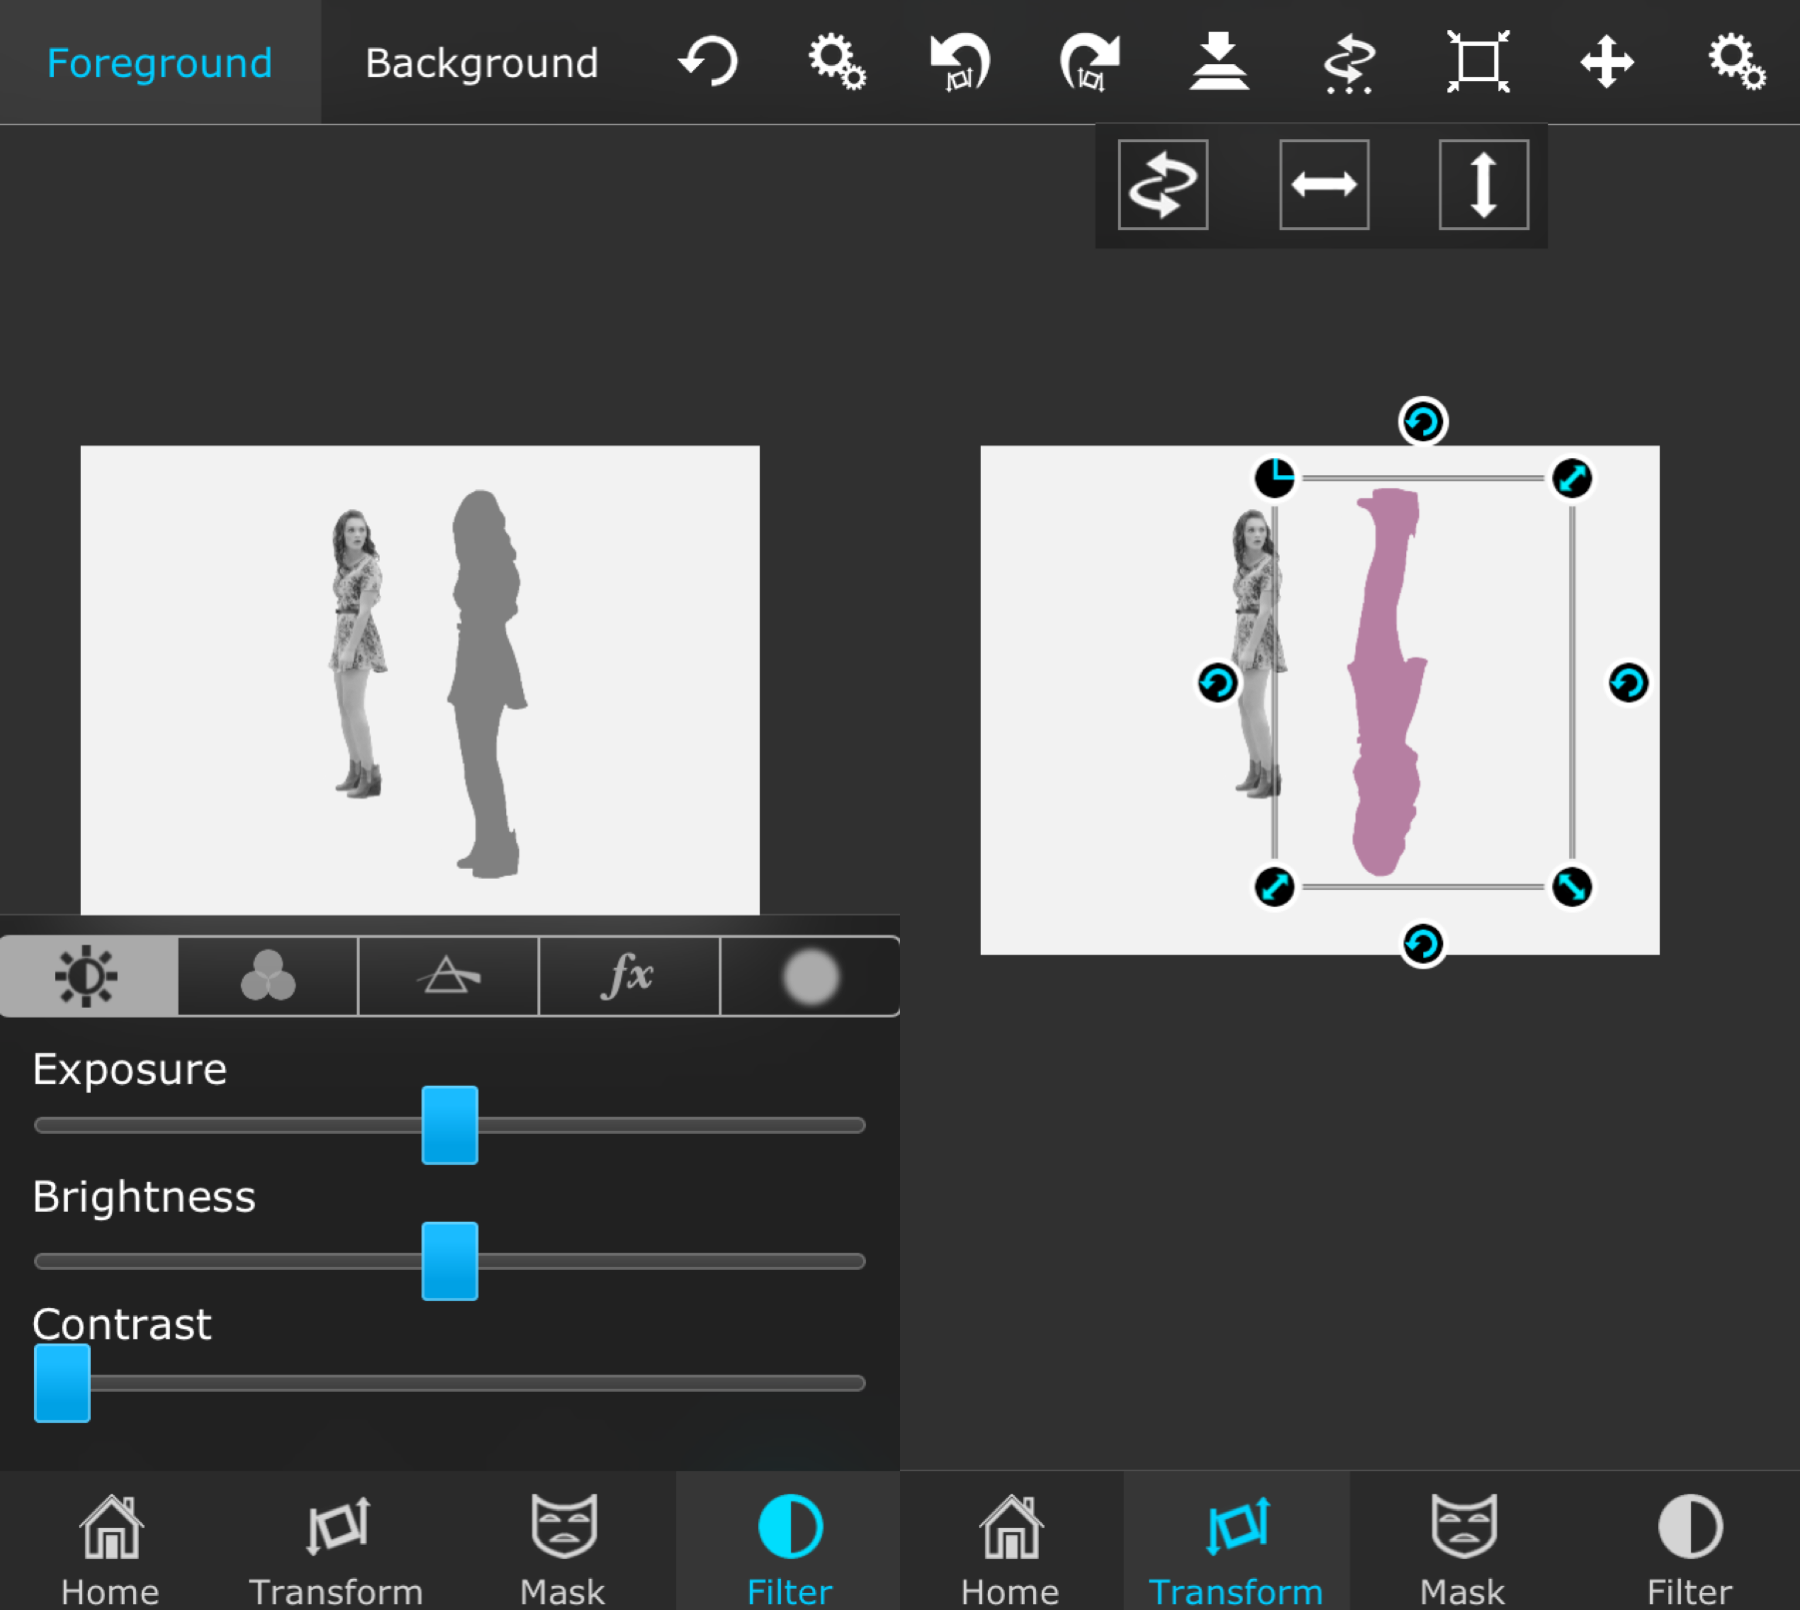
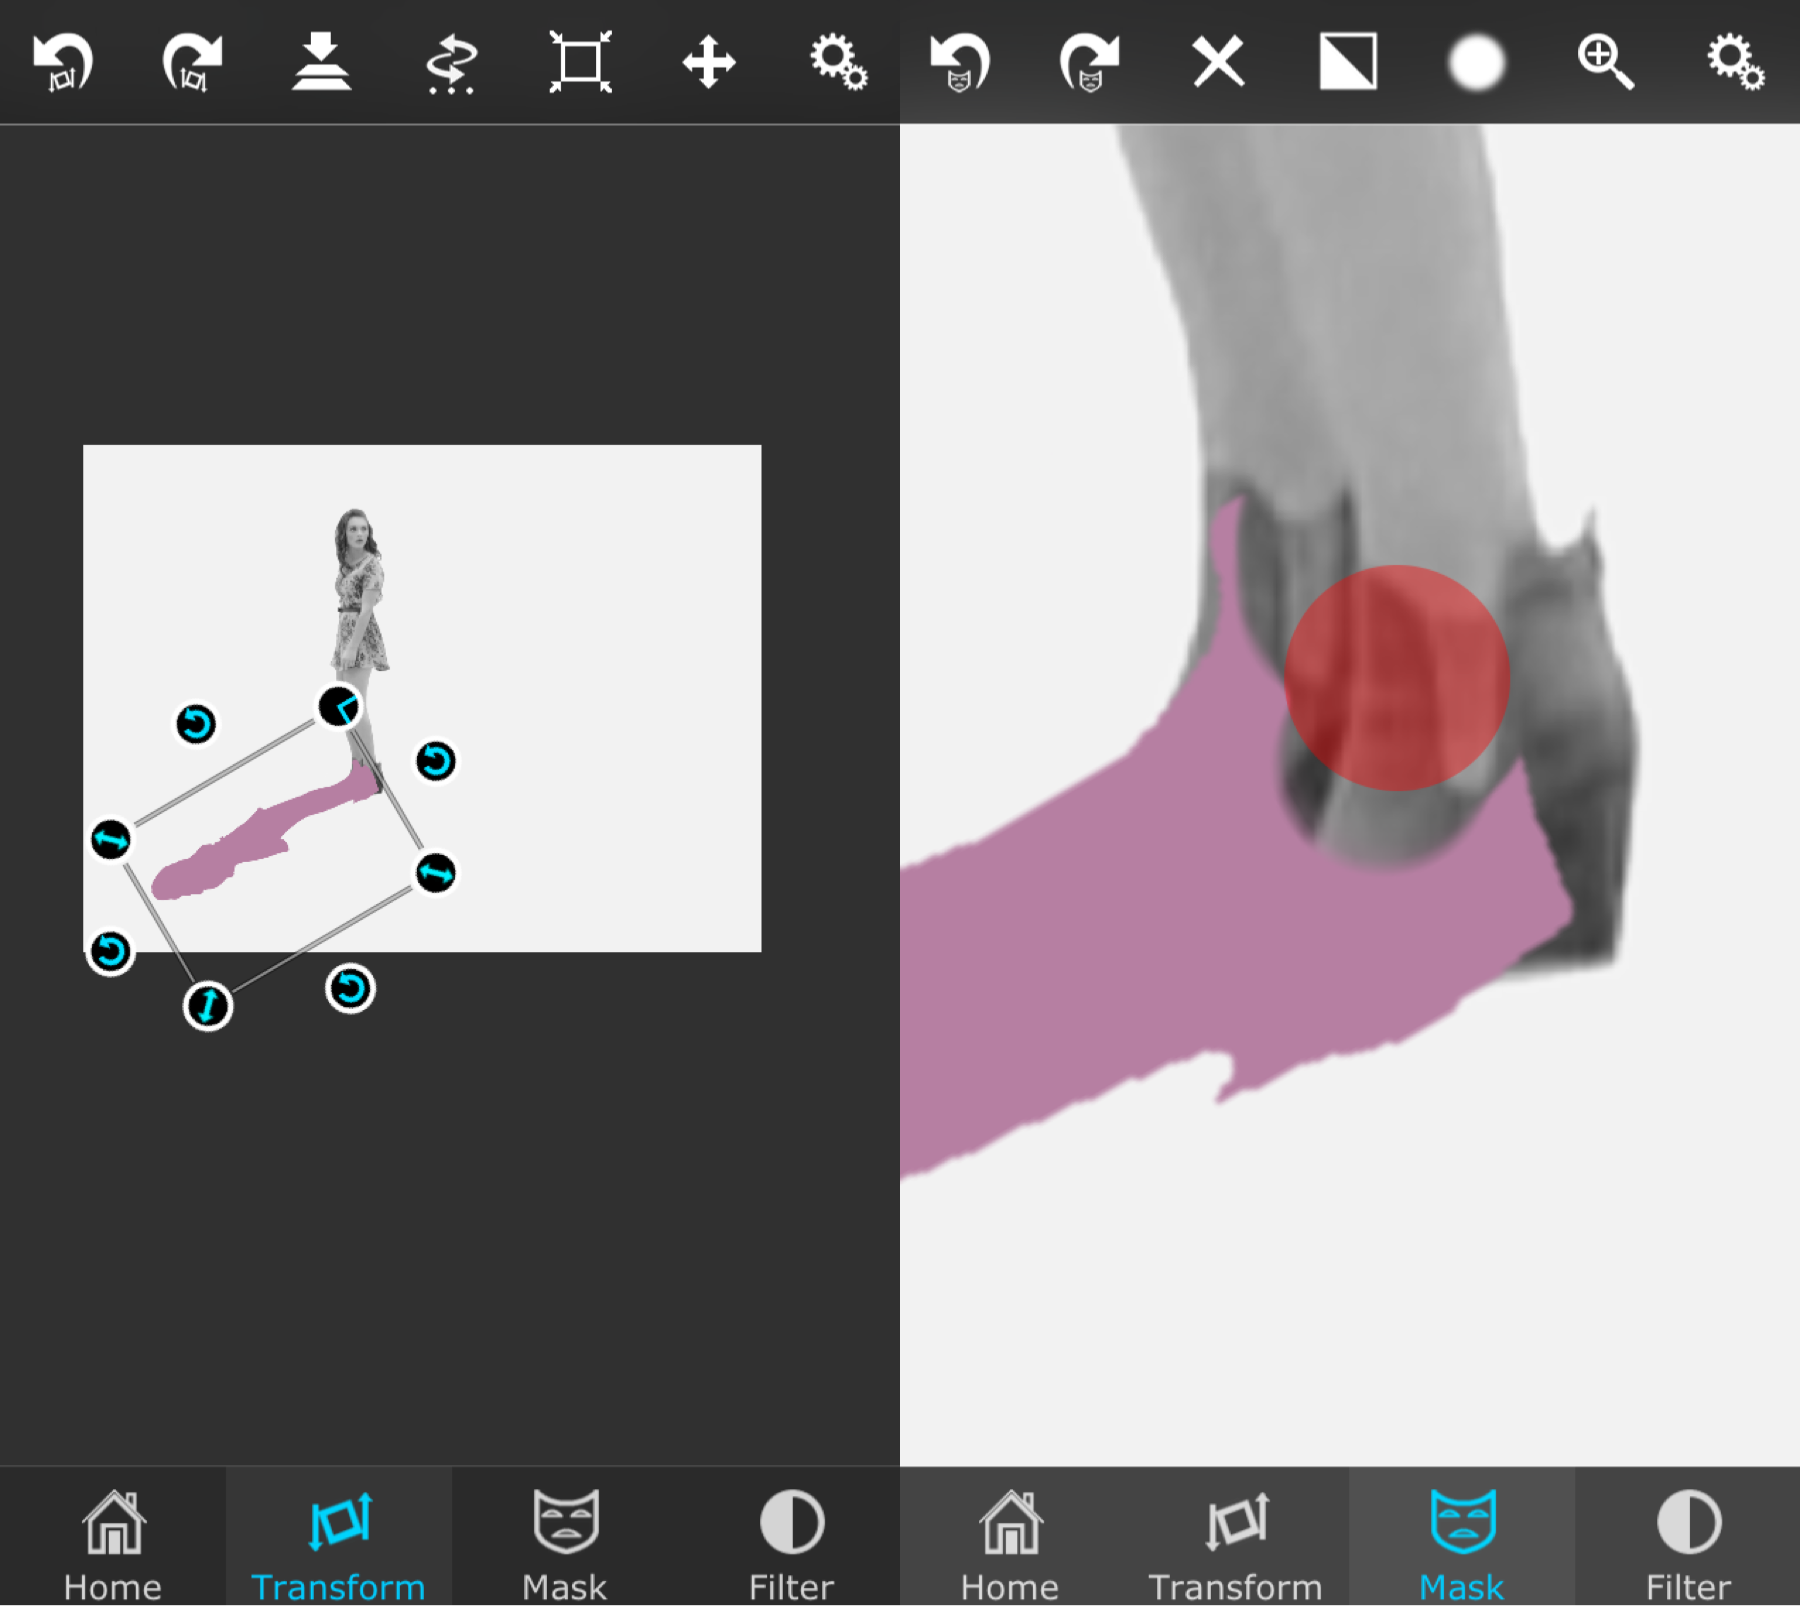
i. Open a background of your choice (I recommend white or a light color) and your PNG as the foreground. Merge it and then upload the same PNG as your foreground again.
ii. Under the filter tab, turn the contrast all of the way down and use the colors to adjust what color you want it to be. Next, go to the transform tab and flip the image by using the arrows at the top of the screen. Move the image to where it overlays the feet slightly.

iii. Zoom in and use the brush under the mask tab to erase the part of the shadow that went over the feet. When you're done, merge and then you're done!

Comments
Like i've stated before, I have no flipping idea how to adjust the contrast like how you do it for this edit in Pics Art, so that's why I don't have a tutorial for it. Sorry, guys.
I'm hoping to post another tutorial today and I'm working on some icons for you guys as well. Oh, and my contest will be ending today at 8:00 Central Time Zone, so have them in by then. I might get the winners and stuff up tonight, but that's not guaranteed since I might be going to a friends later tonight that I just found out about, lmao.
Bạn đang đọc truyện trên: AzTruyen.Top