114. || blending
{ 114. CHAPTER CONTENTS : tutorial }
[ REMINDER : please, from now on out, if you use any template, idea, icon, or anything else from this book, give me credit or whoever I say I got the idea from. Just put my username in the books information or dedicate a chapter to me. Thanks! ]
-*+*-
Another Example

Superimpose
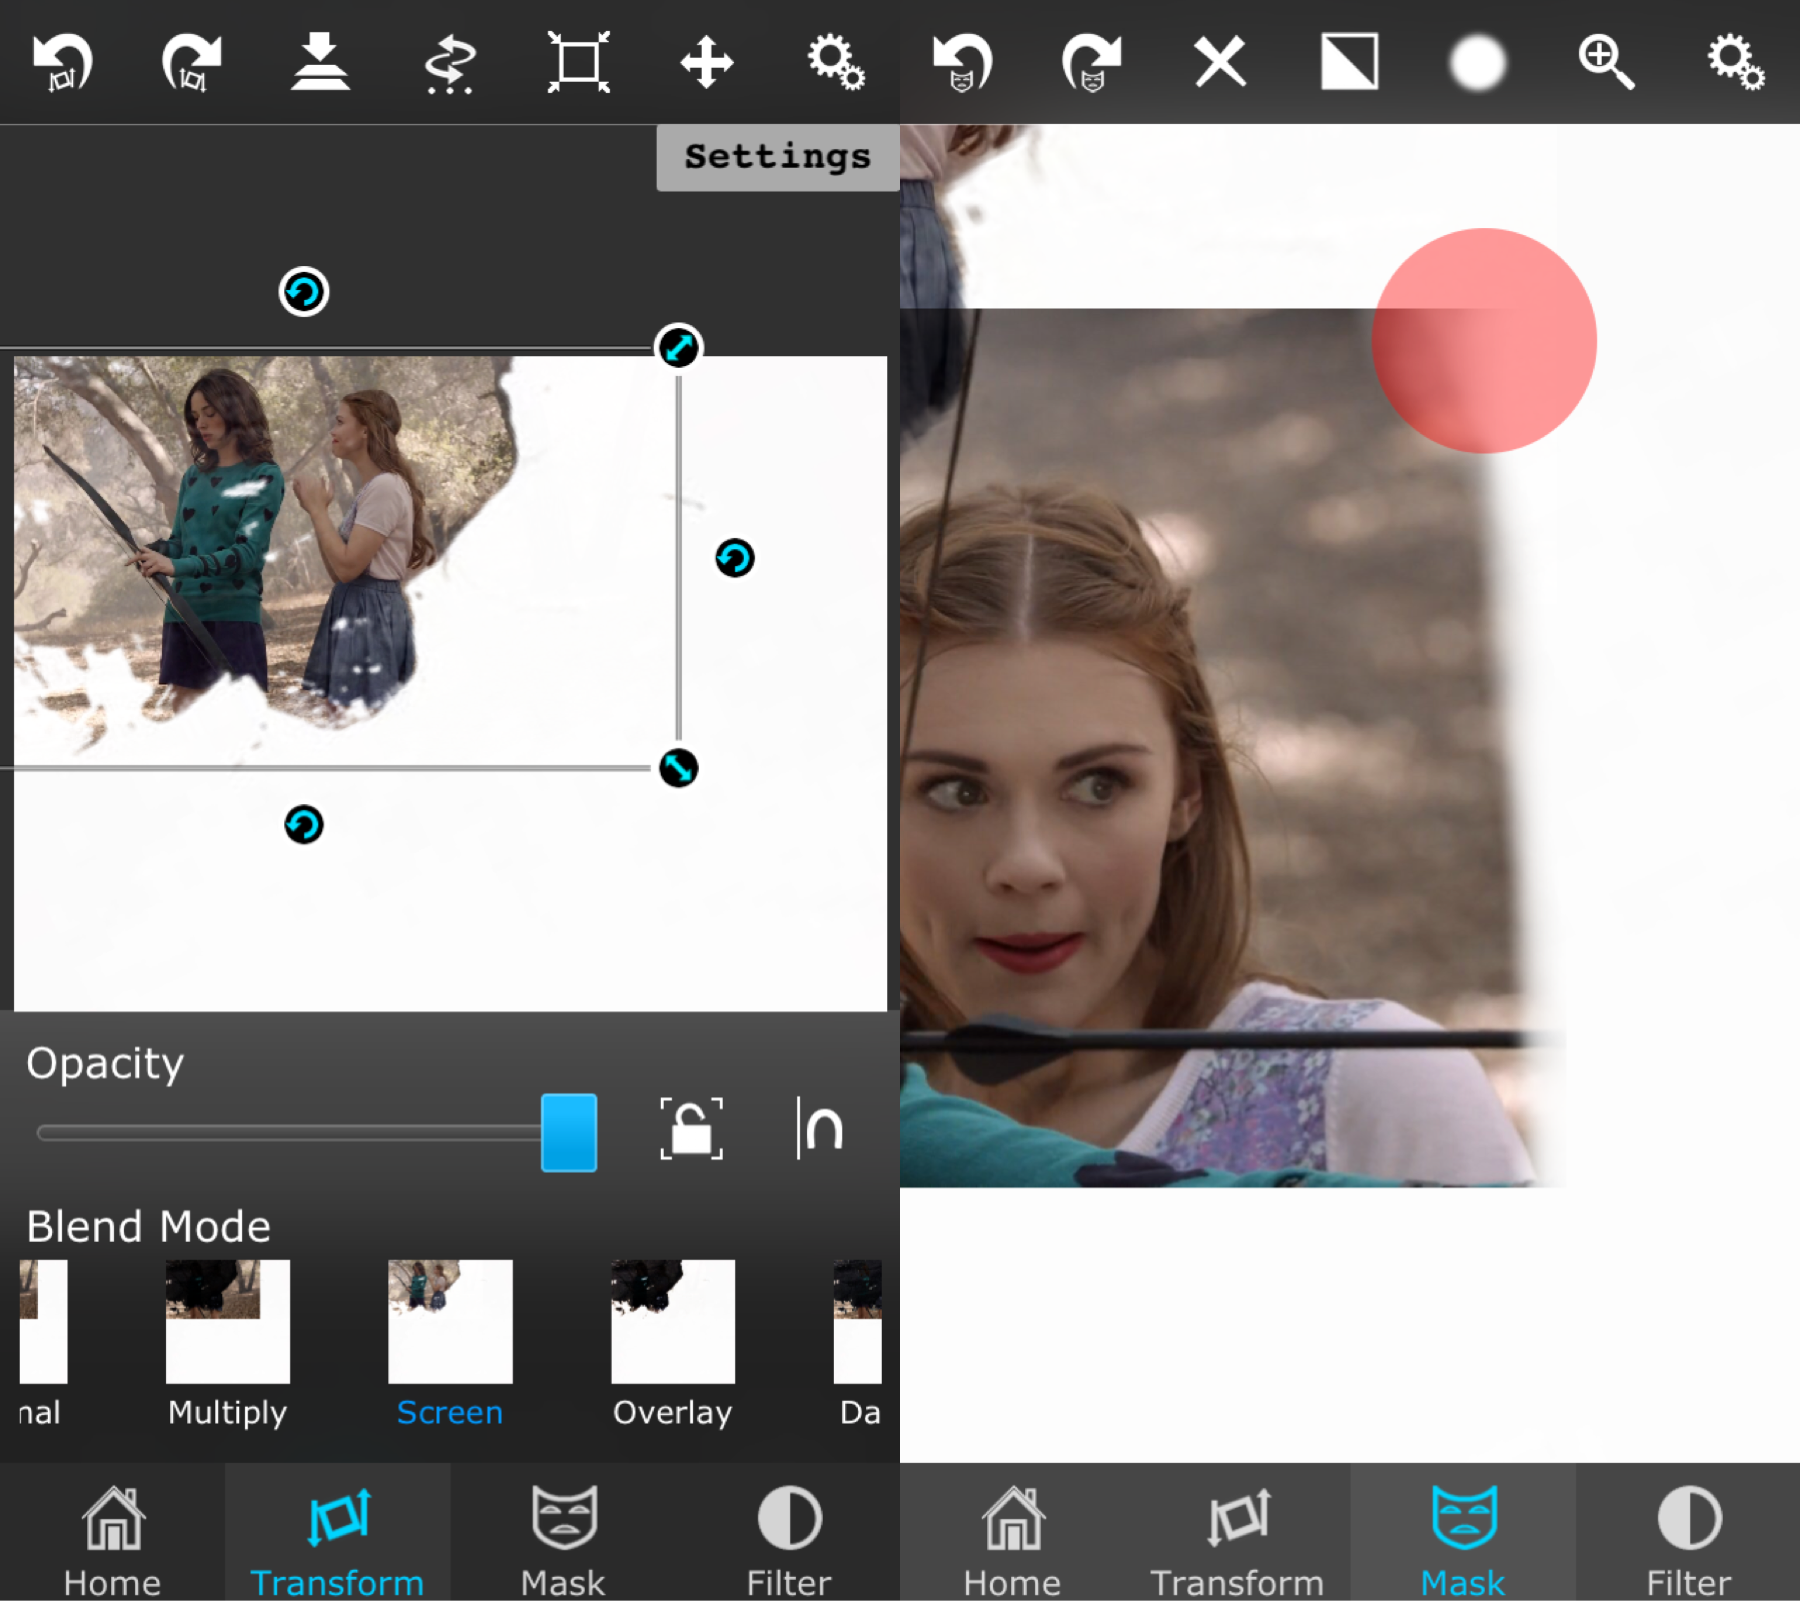
i. Open the image in the add ons as the background and you first image as the foreground. Put the image on screen under the transform tab and place as desired. Merge. (this step is optional)

ii. Open another image as the foreground and place as desired. Use the soft brush on the highest setting to brush around the edges of the image. The goal here is to make it look like it's blending into another image, which is why this is called blending of course. You don't have to use the add on image at all for this, you can just start with an image, erase the edges, and keep going, rather than using that. It's just something I tried out while making this edit. Repeat this until your whole area is covered.
Add Ons

Comments
Someone had requested this for that instagram account, but you can easily interpret this into book covers. Just blend all of the images on a 2:3 sized cover and then add a title. Pretty cool and easy. I also recommend to add a coloring filter over the final product to make it look prettier as well (: I used Polarr.
blending is a skill you have to practice; it's not something you can be good at overnight. You need to have the eye to find good images that will fit together well, and placement and coloring is a big factor as well. Practice with it, and soon you'll be a pro! (:
Bạn đang đọc truyện trên: AzTruyen.Top