twenty three || simple light manip

HIIIIII I MISSED YA'LL
It has been more than one month since I last uploaded my tutorials and it's because I was going through finals but don't worry I'm now free from online school!
I'll try to update whenever I have an idea 👉👈
Anyway, enjoy this tutorial!
----- - --- (❁´◡'❁) --- - -----
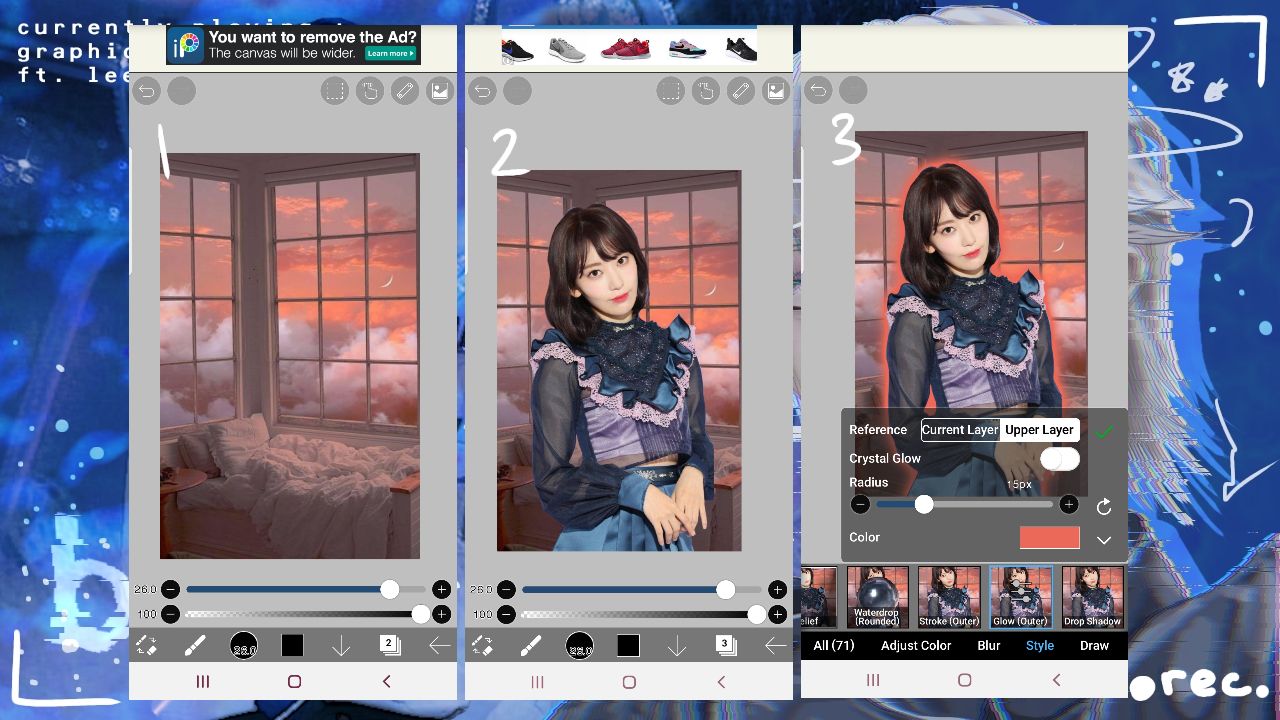
1. Add any picture for your background, preferably a window
2. Add your face claim
3. ADD A NEW LAYER UNDERNEATH the face claim, then go to filter > style > glow (outer), after that, pick a color that suits the color of the background
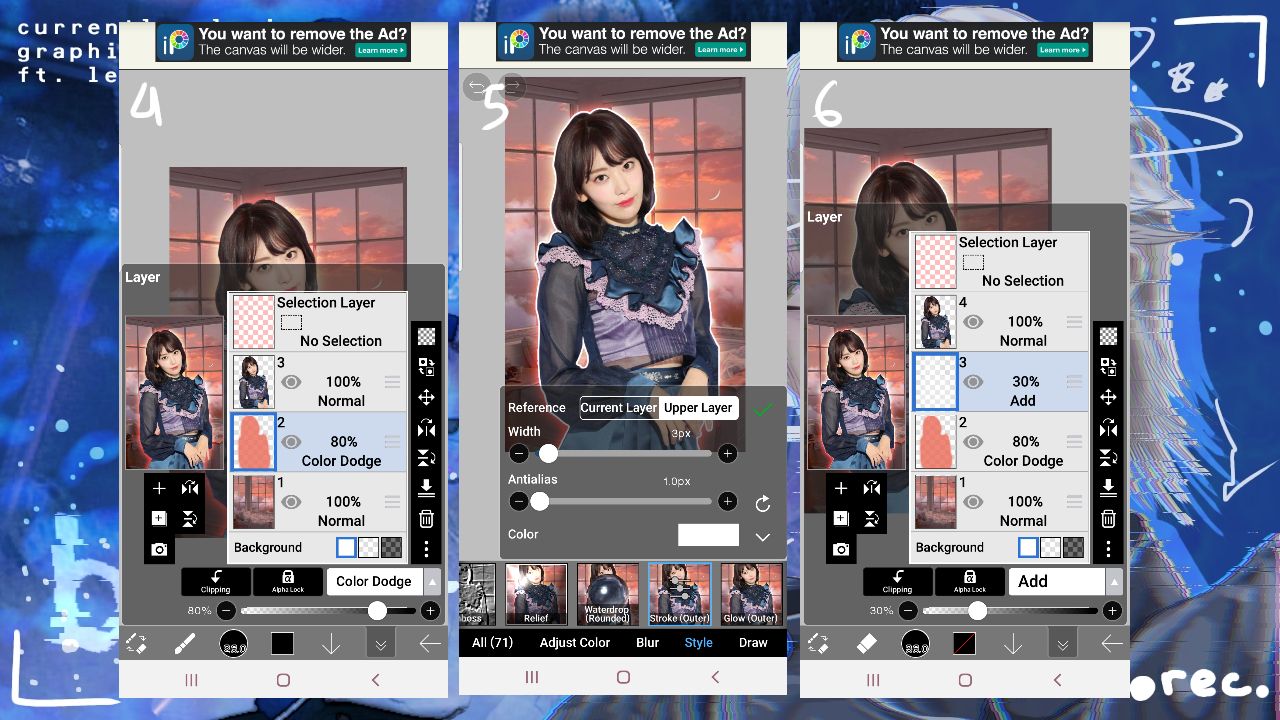
4. Change the blending mode to color dodge and lower the opacity a little bit
5. ADD ANOTHER LAYER UNDERNEATH the face claim, then go to filter > style > stroke, after that, make a super super thin white outline around the person
6. Change the blending mode to Add then lower the opacity quite low (20%-50% ish), now the person will look super shiny and glowy
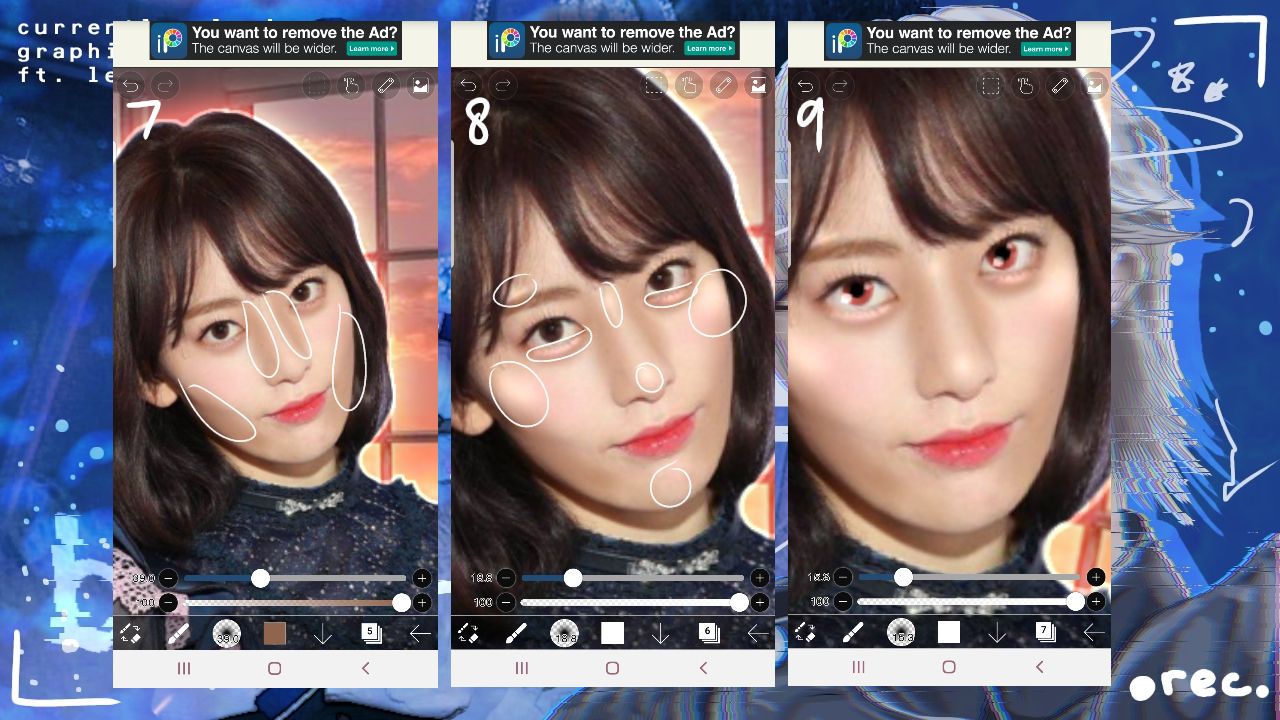
*Retouching timeeee (if you need a detailed tutorial of it check part 68 of my first book for step 7 - 9). Use airbrush for part 7 and 8 btw
7. Contour their cheekbones, nose, and forehead (I didn't contour hers because it was covered by her bangs). For the color, sample her skin color by holding the screen then make it a little bit darker.
8. Next, highlight the circled areas by brushing the area lightly with white (and change the blending mode to Add, just leave the opacity 100%)
9. Change the eye color (go to reference I mentioned above ⏫). To explain it briefly, I colored her eyes with the color I want, then changed the blending mode to Color, then colored in her pupil with black, then added small white circles with lowered opacity.

10. Still with the airbrush, color their cheeks with any color you desire
11. Next, color their lips with any color you want (but make it brighter, because it's important for the next step)
12. Change the blending mode to soft light
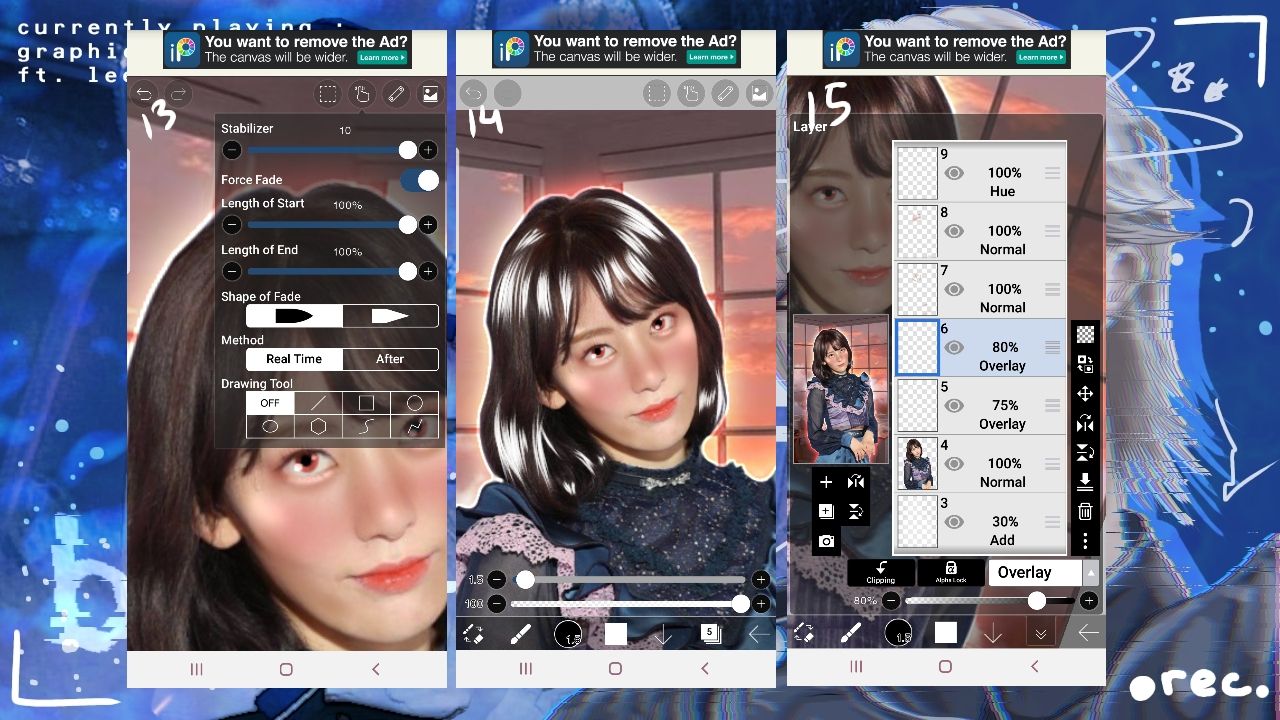
13. Turn on force fade and make both lengths to 100%
14. Using the dip pen brush with a super tiny size, color the shiny areas of their hair with white
15. Change the blending mode to overlay and lower the opacity to your need
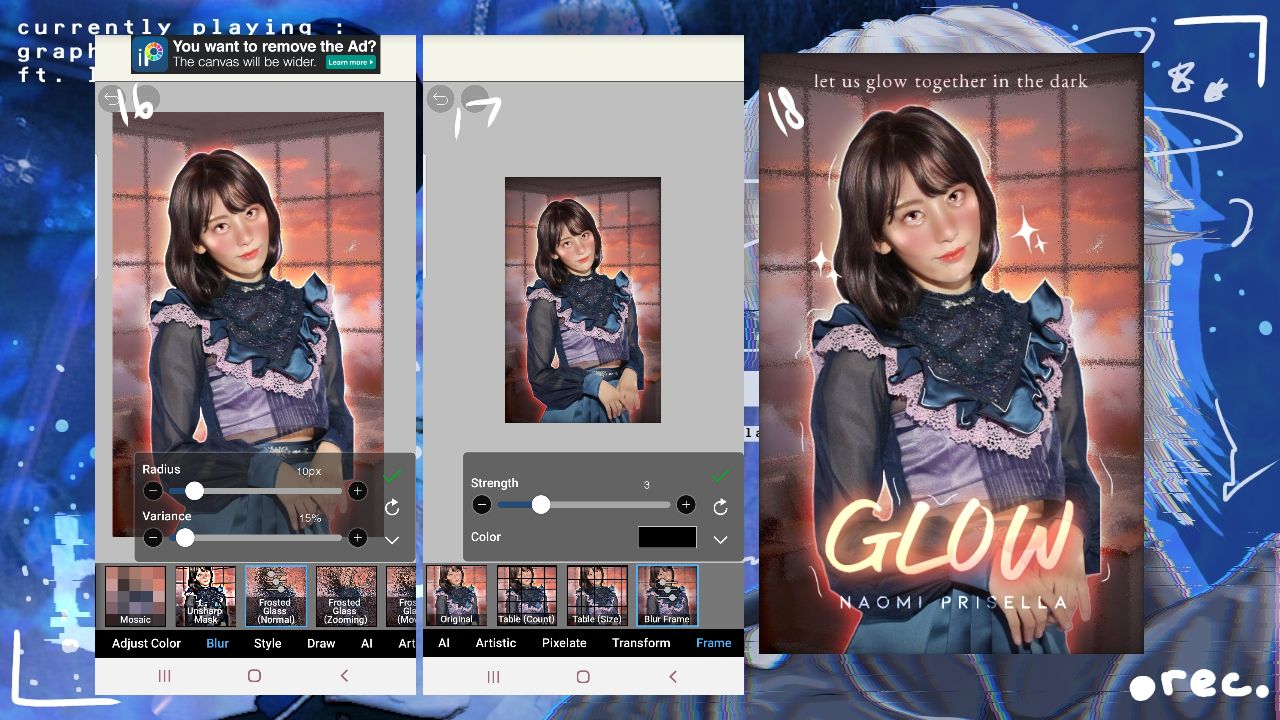
16. Go back to the layer of your background, go to filter > blur > frosting glass (normal), and this filter will make your layer blurry, but more nicer looking(?)
17. ADD A NEW LAYER AT THE TOP, go to filter > frame > blur frame. Set it pretty low to prevent the cover being too bright.
18. Decorate, add your title, and we're done!
----- - --- (❁´◡'❁) --- - -----
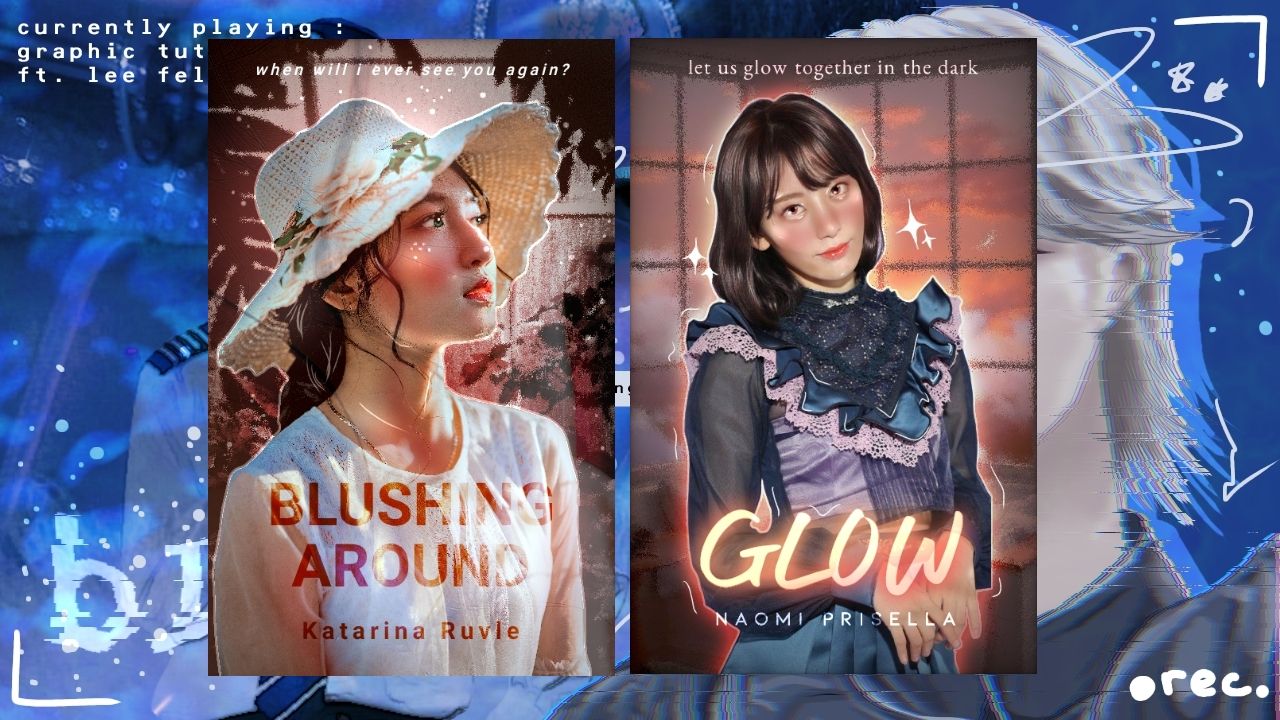
The other example is a cover I made for a big project between me and my friends 👀, we are planning to open a premades shop!
Anyway, how are you guys doing? I'm really sorry for being gone for soooo long, I've just been really busy with school and was in an artblock, but I tried my best replying to as many comments as I can in my free time, they really make my stressful life so much better, I really aprecciate it ❤! And thank you, thank you so much for 260+ followers even though I hadn't updated anything that time 😭
Keep requesting tutorials because I don't have a lot of ideas right now <33
I think that's it, if my mood's well tomorrow, I might include another long update of my life since my mental health is doing SO MUCH BETTER AAAAAAA.
Bye everyone, love you!

Bạn đang đọc truyện trên: AzTruyen.Top