nineteen || vector < nose >
Yes, I am back 🌚
My excuses this time :
- 8 days of midterms
- downloaded Light of Thel and got addicted
- tried to set a proper schedule between homework and gaming
- ditched schedule and Light of Thel for Call of Duty
Thanks to a comment, I was reminded and I'm sorry :')
Oh and thank you thank you thank you so much for 80k reads on my first book and nearly 3k for this book, I can't thank ya'll enough 😭
----- - --- (❁´◡'❁) --- - -----
Requested by Nicoismysenpai !
Here we go :

1. Add a pic of a cute nose 👃
2. Color the whole layer above the picture with the base skin color
3. Turn on force fade and make the both length tp 100%, bc we're gonna make lines sharp enough to cut your enemy's neck
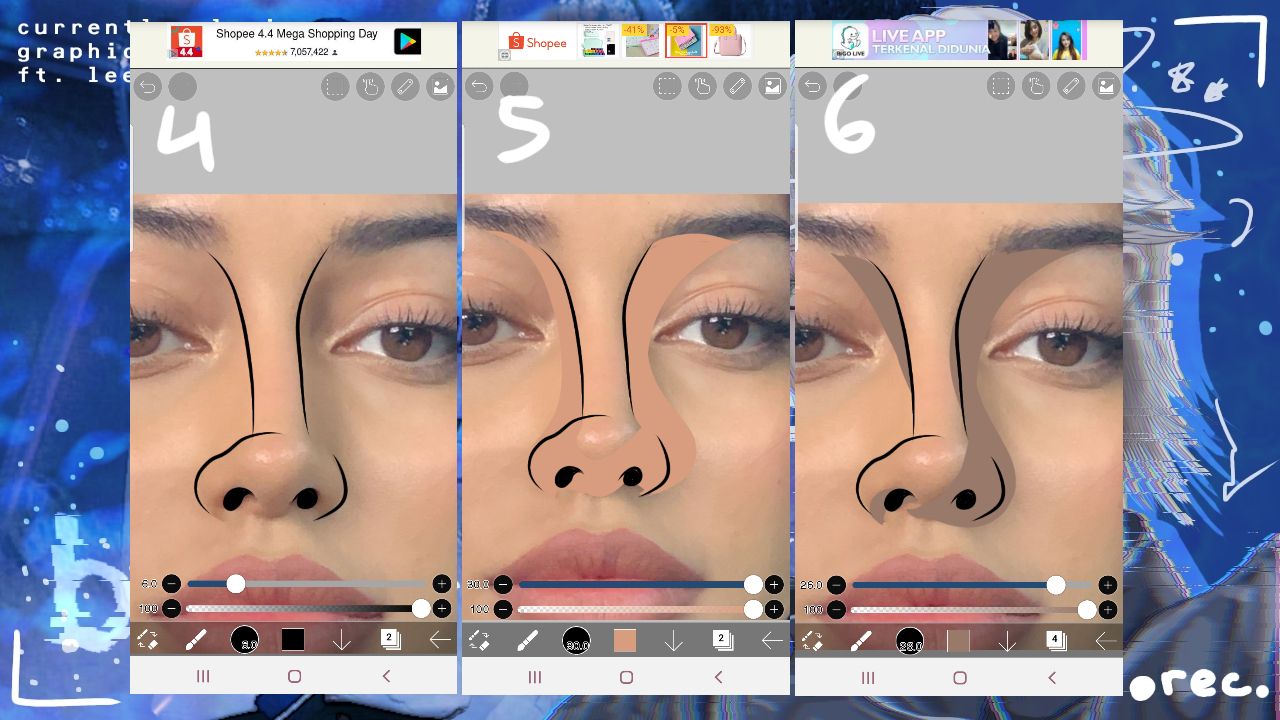
4. With black, outline the basic shape of the nose, don't forget to fill in the nostril
5. Use a color slightly darker than the base color and follow the direction of the shadow. Use longer fluid strokes to make it look neater
6. Then use an even darker color on the layer above the one before

7. Sample the darkest color for the small dark shadows that are in the corners and not that noticeable but do make a whole lot difference
8. Next, use a lighter color and draw a line on the tip of your nose and nose bridge
9. Now -- my favorite -- highlights! With white, follow the shine of the nose
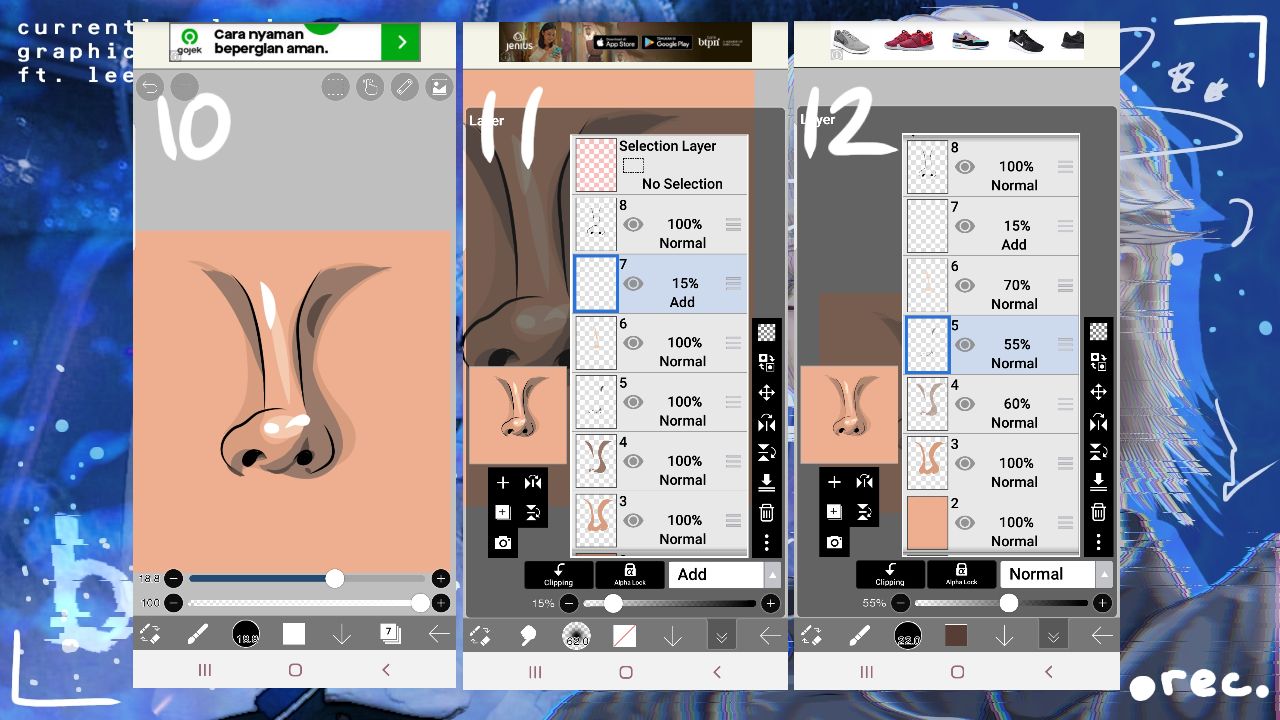
10. When it's all together, here's how it looks ;)
11. Change the blending mode of the white highlight to Add and lower the opacity to give it a translucent natural shine
12. Here's your opportunity to edit the colors, adjust opacity, etc
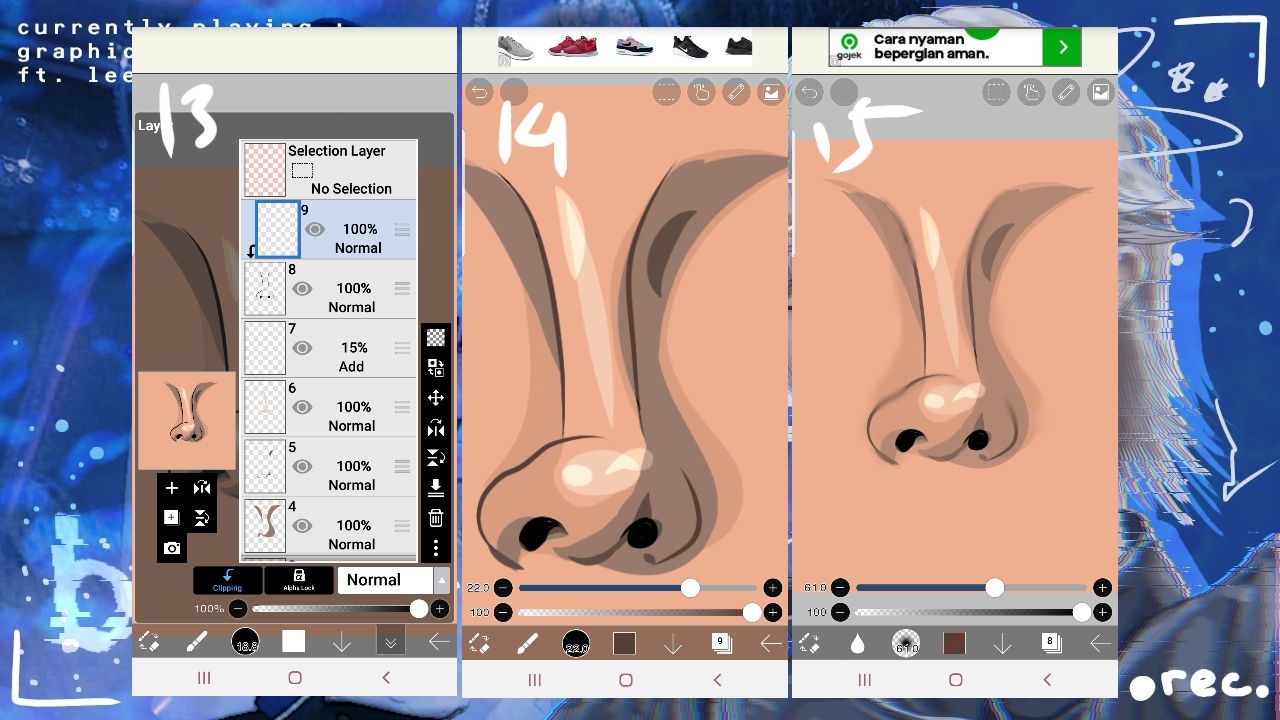
13. Add a new layer and clip it above the black outline, as you can see the black arrow there
14. Fill it with a color slightly darker than the darkest shading so it looks more natural
15. [Zoom in] With the blur tool, blur the edges of the line, you can use the original picture as reference. When you see the line/shadow starting to fade in the original pic, that's where you blur your line
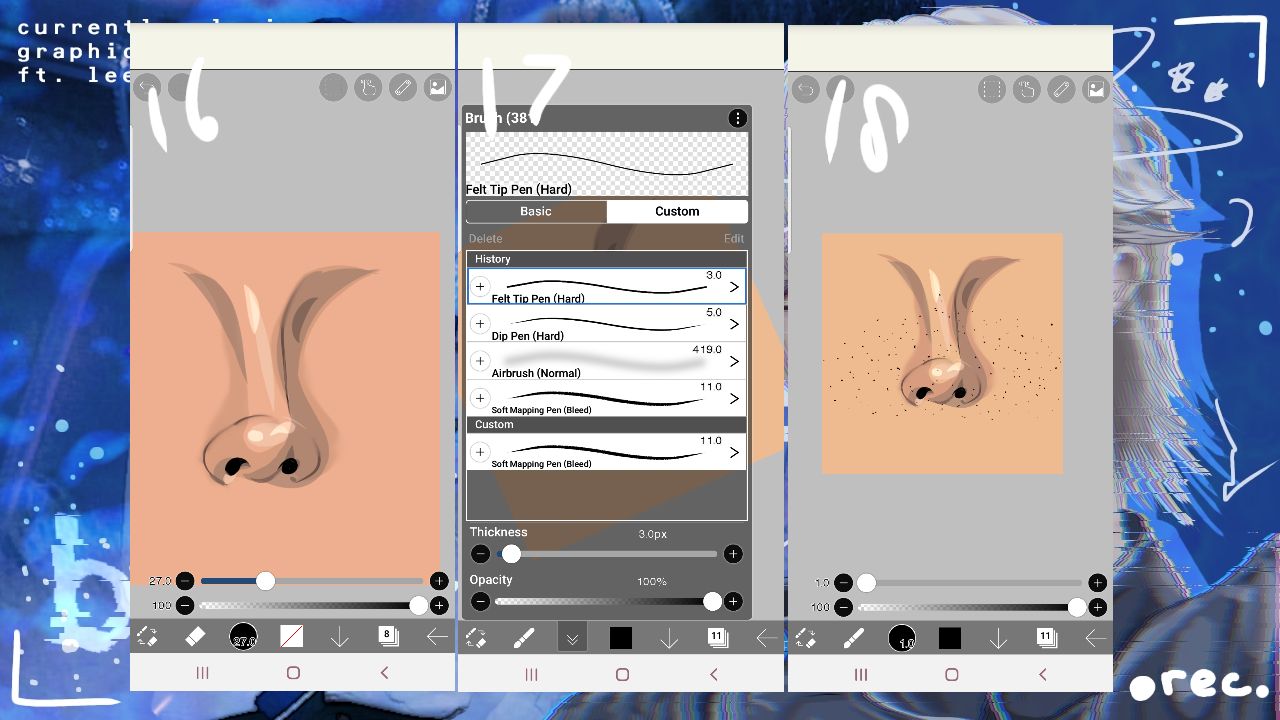
16. Depending on the lighting of the picture, erase the black lines where the surface is bright. For example, the left side of the nose is brighter and has less shadows so I erased the black line to make it look more blended and coordinated. It's totally optional and depends on your illustration
17. We're actually done, but I decided to add freckles! Pick the felt tip pen (hard) and make the brush size reallyyyyyy tiny
18. [Zoom in] now, change the brush sizes between 1.0 - 3.0 and make little dots around the nose, it's easier to make dots with felt tip pen (hard)
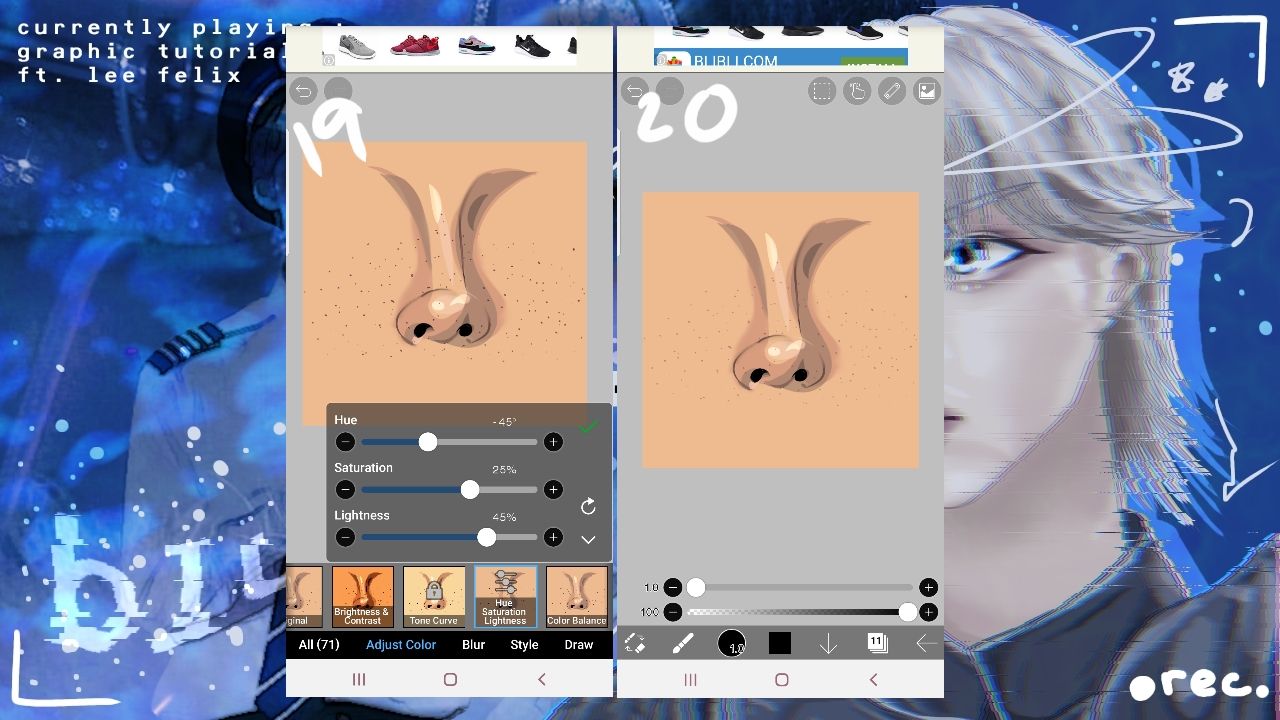
19. Change the color through filter > adjust color > hue/saturation/lightness and make the color of the freckles as similar to the skin tone, just slightly darker
20. Lower the opacity and you have cute freckles ♡
----- - --- (❁´◡'❁) --- - -----
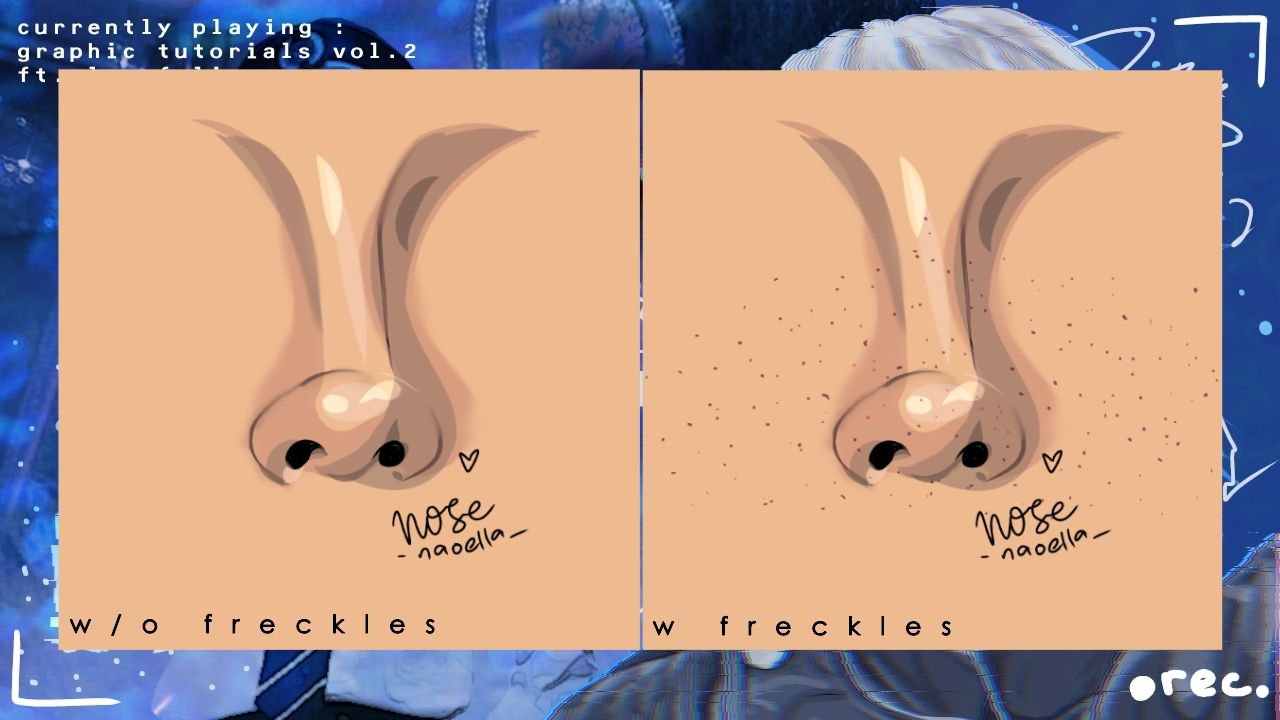
----- - --- (❁´◡'❁) --- - -----
Ayyy we're done! Again, I'm so sorry for not uploading for nearly a month. I'm still trying to keep a consistent schedule but I end up procrastinating all the time. I know I'm not a robot and I need breaks but still, I feel like a clown 🤡
Anyways, have a good day/night and see you next time ♡♡♡
*I'll fix typos and mistakes tomorrow
Bạn đang đọc truyện trên: AzTruyen.Top