eighteen || vector < lips >
Hi, again!
----- - --- (❁´◡'❁) --- - -----
This is the first vector tutorial of this book! It's been a while since I made one (around 3 months ago), so I decided to make one and here's the tutorial for it.
In the first book, I've already explained :
- hair
- eyes
- skin + nose
- clothing
- misc, i.e. layout, background, tips, etc
I did have a tutorial on making face vectors, but I didn't really explain in detail on the lips, and I just realized someone requested a tutorial on glossy lips a long, long time ago so... here you go...? 👁👄👁
Disclaimer : this tutorial is only for detailed, close up shots on lips; if you are vectoring a whole face you can use fewer colors if it confuses you, and check 'face vector part 1 & 2' in my first book for the tutorial.
----- - --- (❁´◡'❁) --- - -----
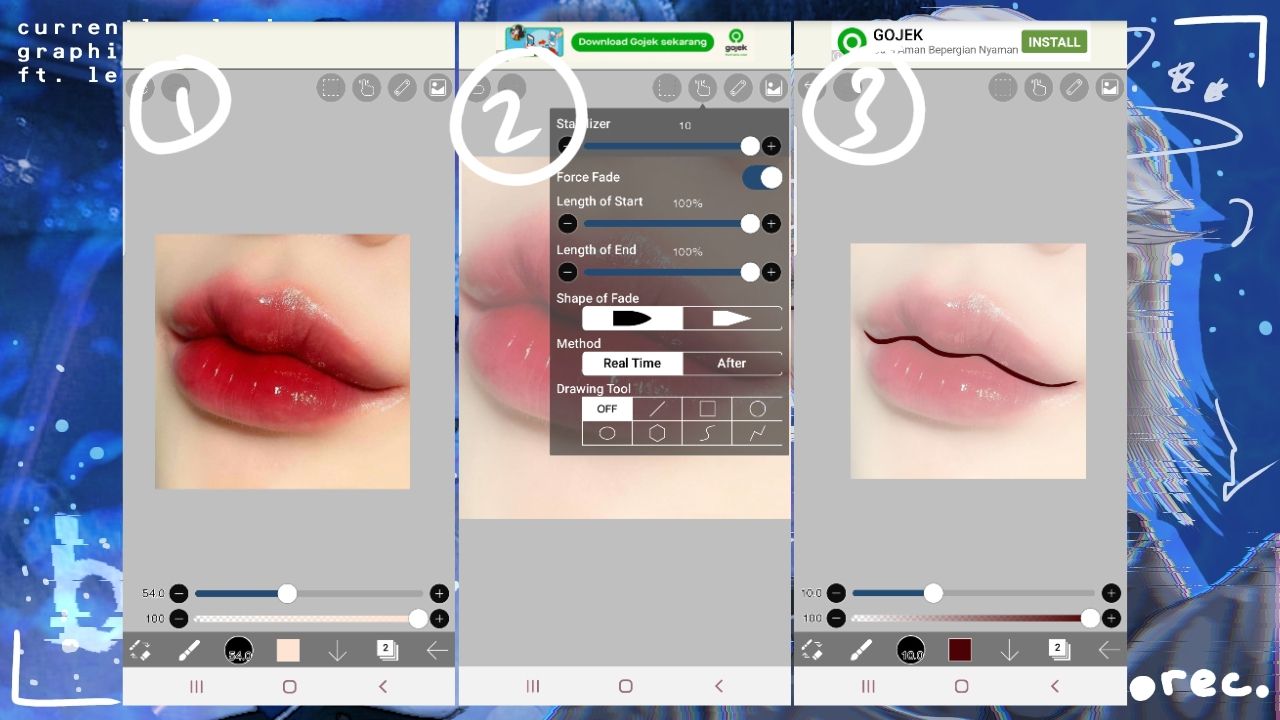
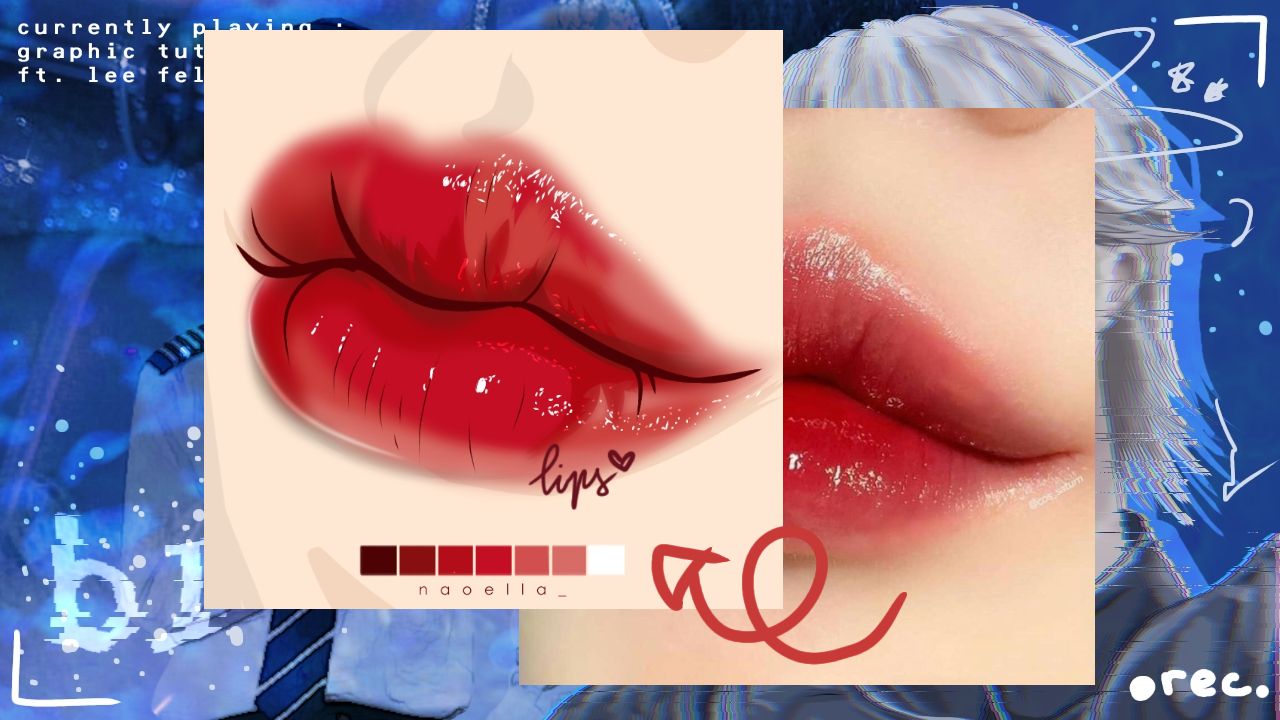
1. Add your pic of some nice lips
2. Turn on force fade and set both of the length(s) to 100%
3. Draw a line in the middle of the bottom and top lip
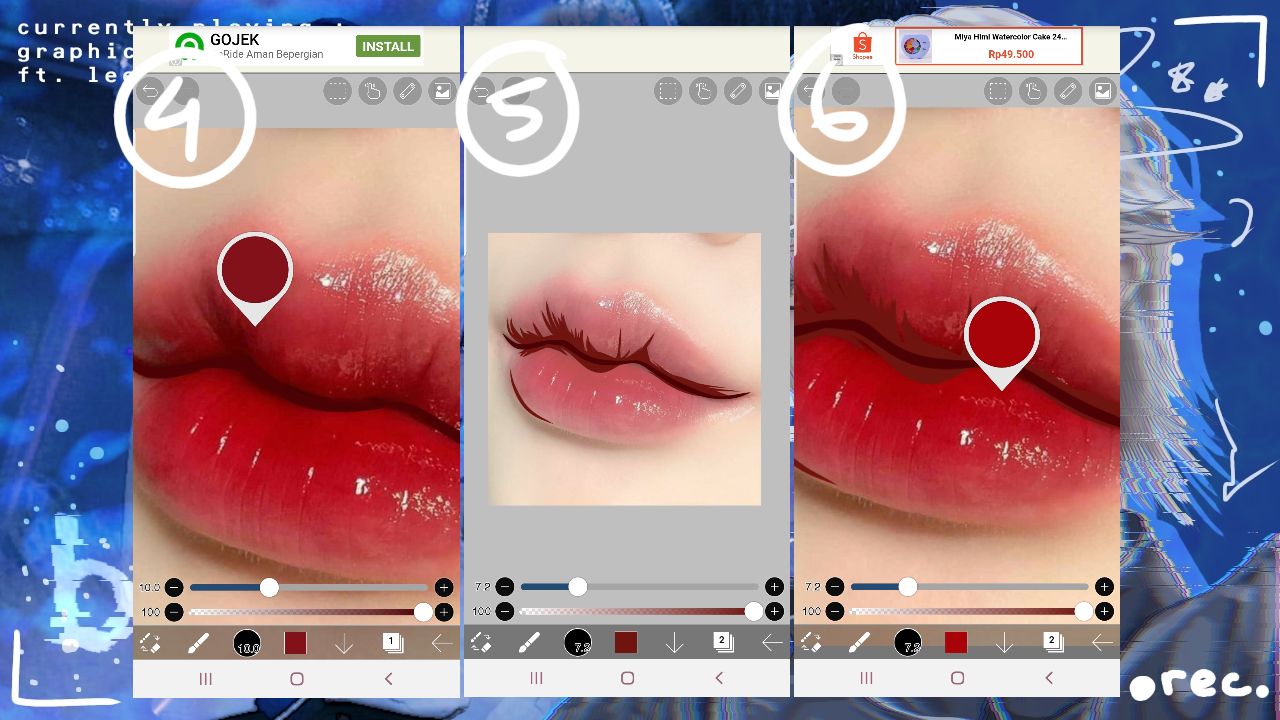
4. Hold the darker part of the lips until it samples the color
5. Follow the direction of the color of the image carefully, lower the opacity to make it easier
6. Sample a lighter color
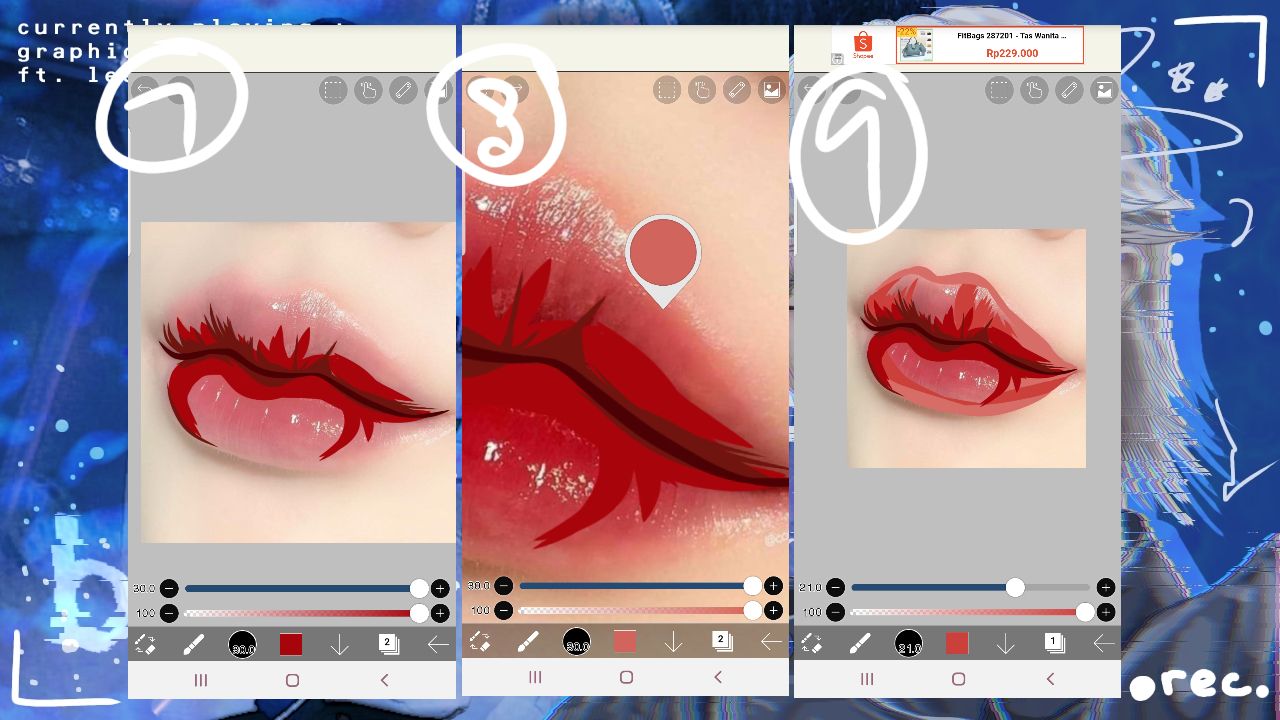
7. Again, follow the color of the lip
8. Sample another color
9. Follow the direction of the lip
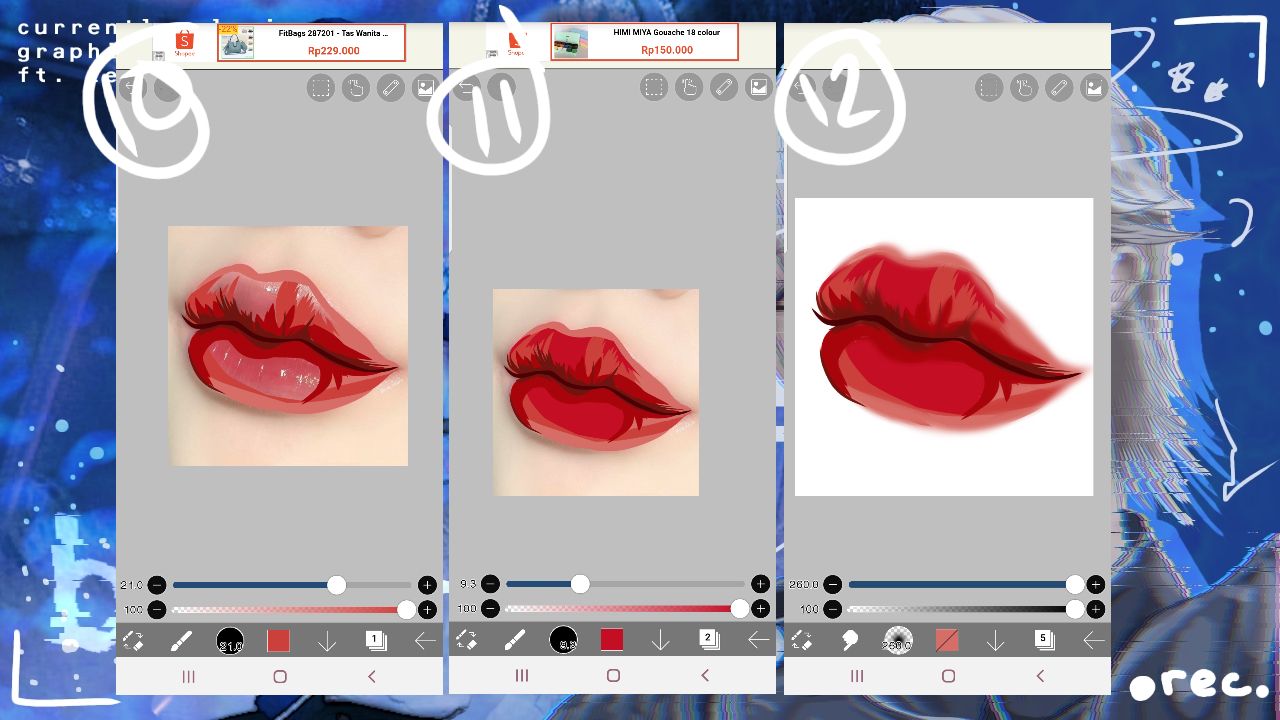
10 - 11. Repeat those steps until you manage cover the whole lips
12. With the smudge tool, slowly blur the edges so it seems like the lip fades into the skin
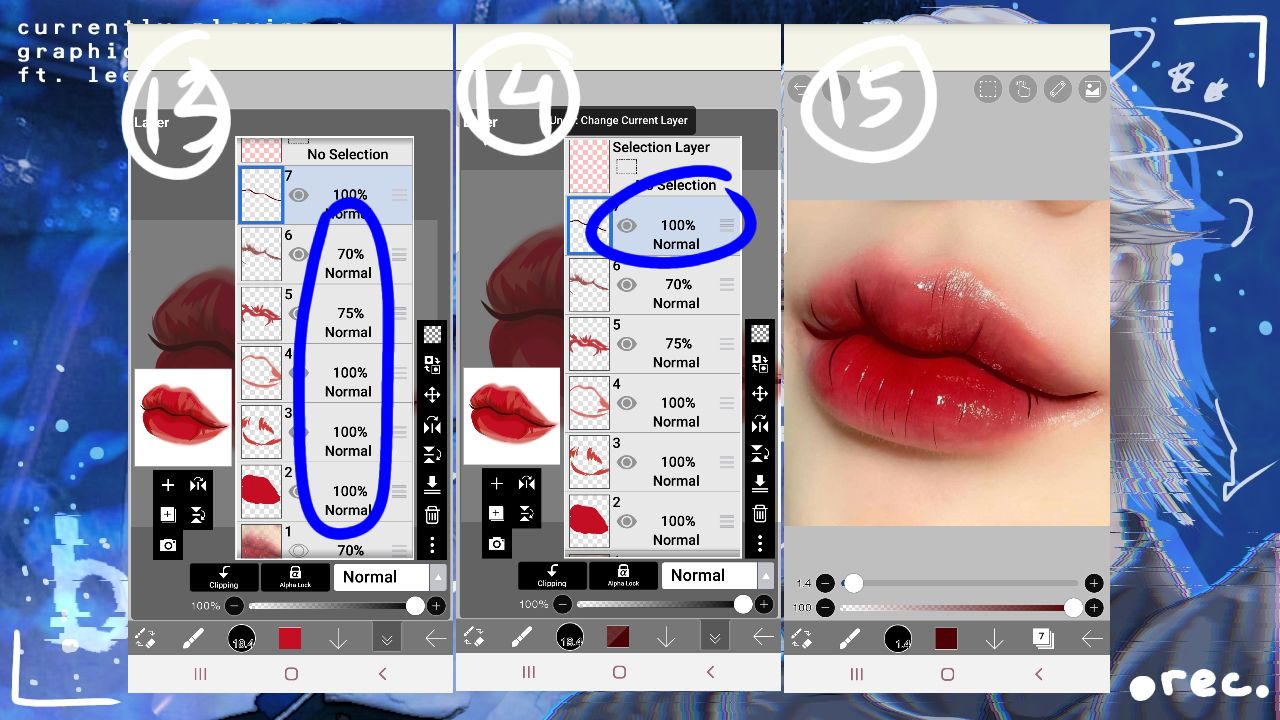
13. Change the opacity if needed
14. Go back to the layer of the first line we drew
15. Draw the creases of the lips
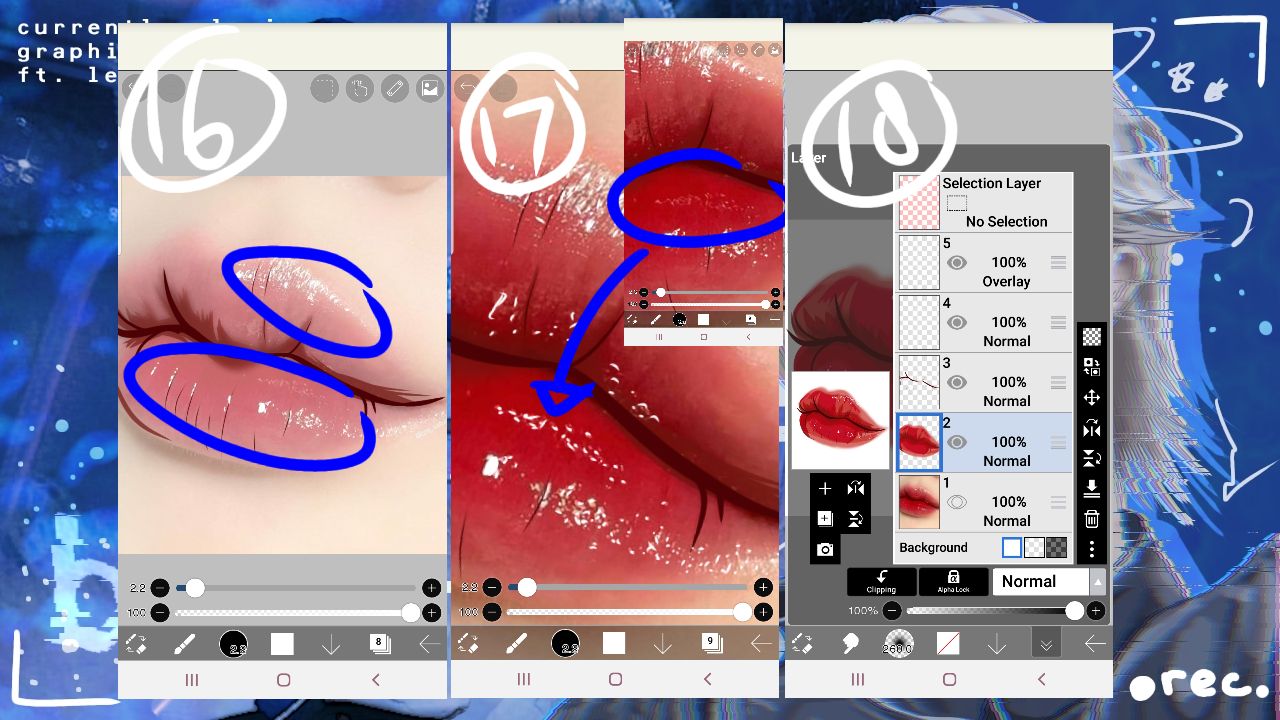
16. Next, imitate the shiny gloss of the lips with white
17. On a new layer, draw white on the part of the lips that are not as glossy as step 16
18. Change the blending mode of that layer to overlay, then merge all of the layers (except the gloss and the dark line) together
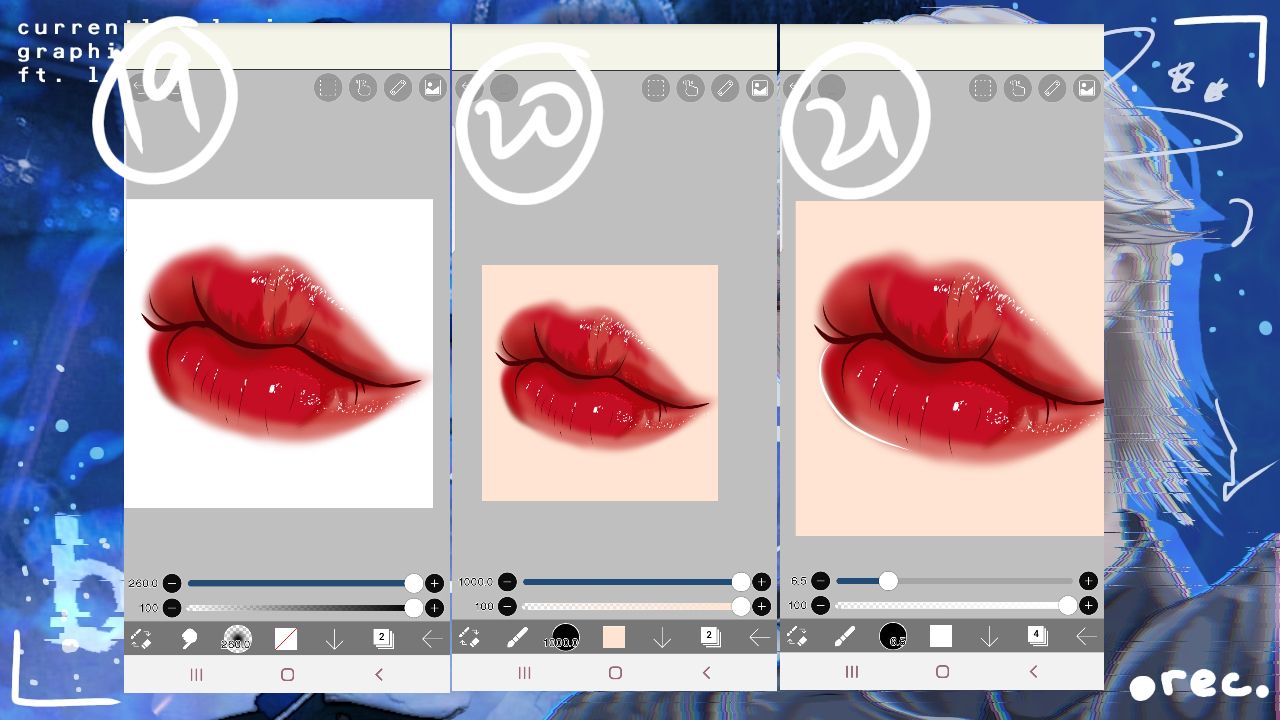
19. I smudged the edges again, making it neater
20. [Optional] you can finish here, but I decided to add the skin color at the back
21. Draw a white line at the bottom corner of the bottom lip (zoom in to see)
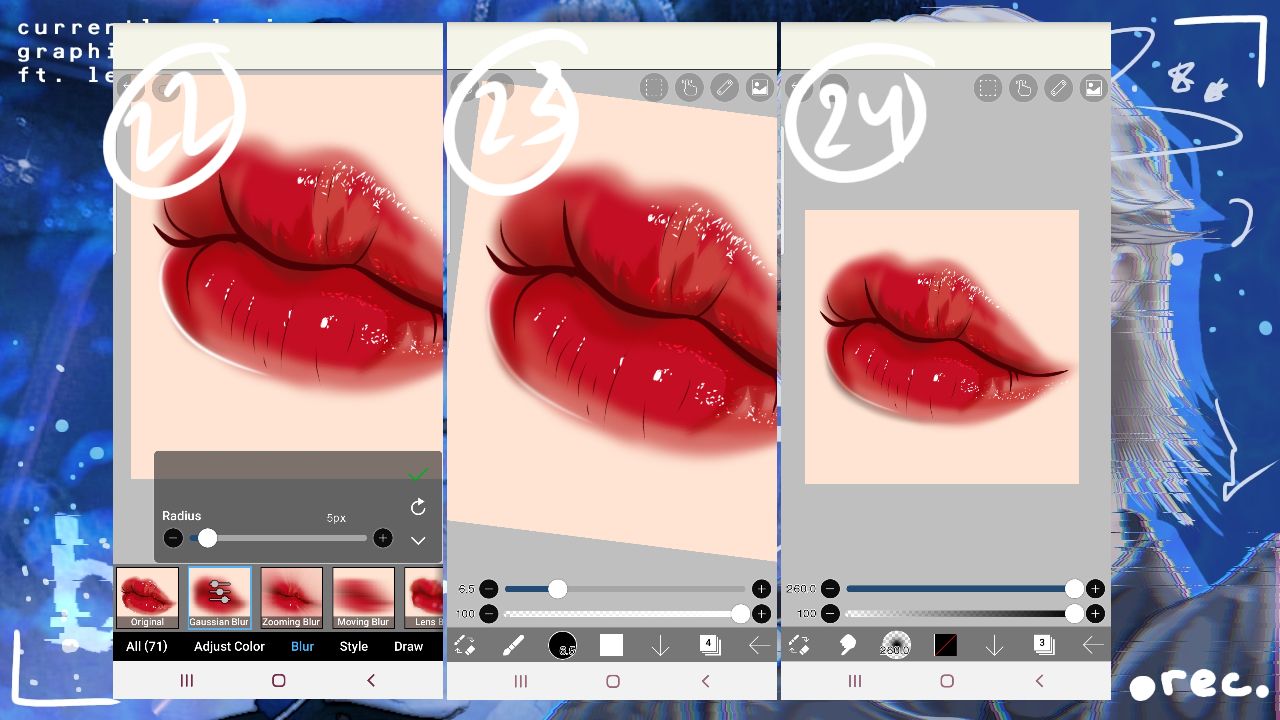
22. Blur the line with filter > blur > gaussian blur
23. Lower the opacity
24. I added a makeshift shadow by drawing a black line underneath the white line and smudging it, done!
----- - --- (❁´◡'❁) --- - -----
Hope you enjoyed this tutorial ♡
If there is anything you don't understand, please ask away!
Edited : if you can't do it the first time/too confusing, just keep practicing! It takes months, years, to learn vector art so don't give up ♡, start with the basics from my first book and we'll get there -- we all still have a lot to learn.
----- - --- (❁´◡'❁) --- - -----
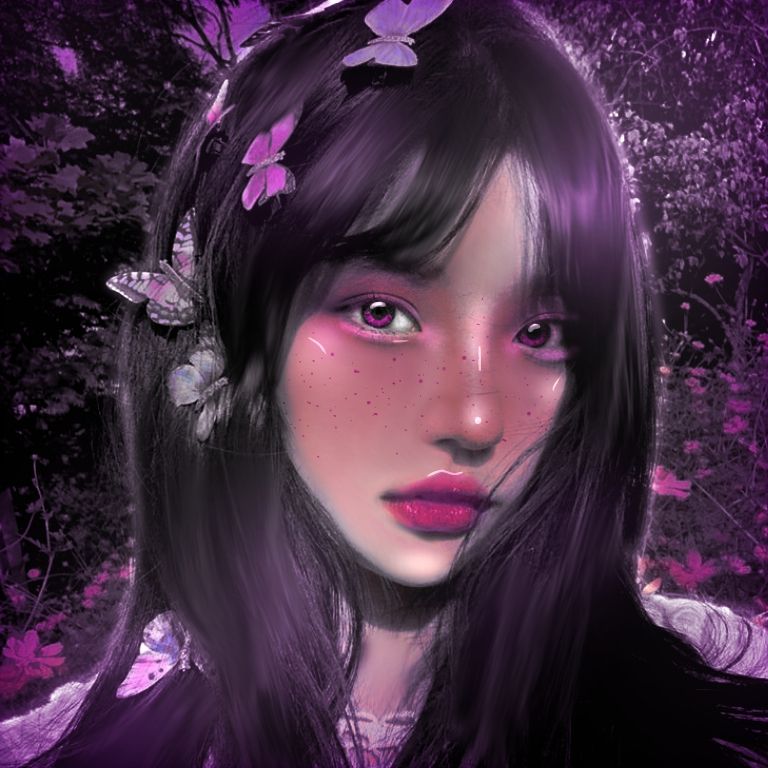
Sidenote, new profile pic :
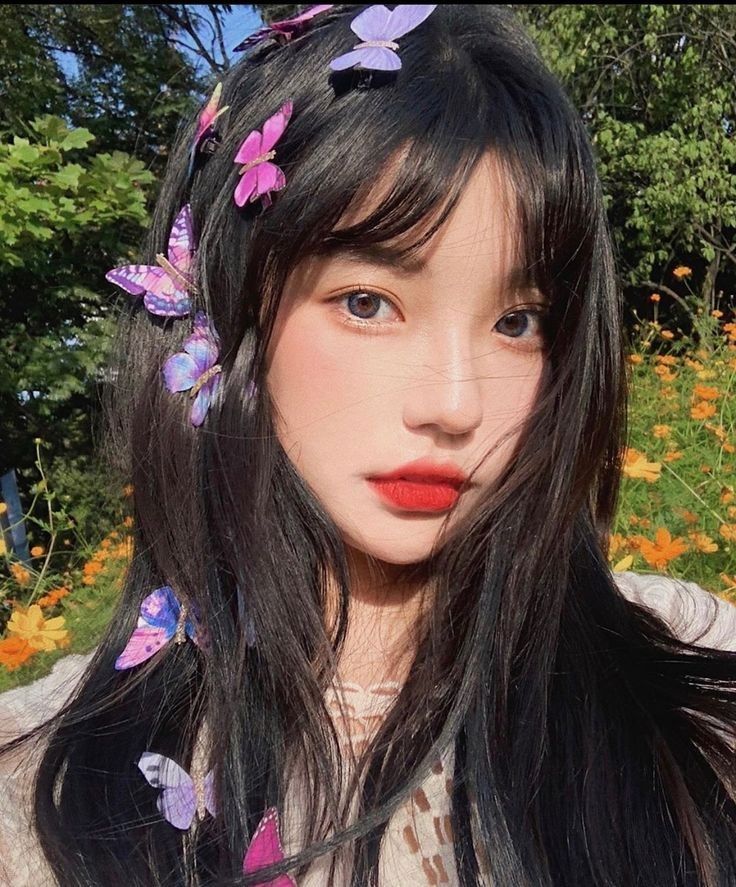
Original pic :
----- - --- (❁´◡'❁) --- - -----
See you next time, ly.
----- - --- (❁´◡'❁) --- - -----
Bạn đang đọc truyện trên: AzTruyen.Top