⠀⠀𝑡𝑢𝑡𝑜𝑟𝑖𝑎𝑙 | 𝑔𝑖𝑓 𝑏𝑎𝑛𝑛𝑒𝑟𝑠.
This tutorial was requested by MARVELMAZETEEN.
Most of my requests are gif banners. Hopefully today I can help you guys make some GIFs on your own!
Also I apologise the screenshots I've taken will look a bit dark but you should be able to see everything clearly.
So here's the end product:
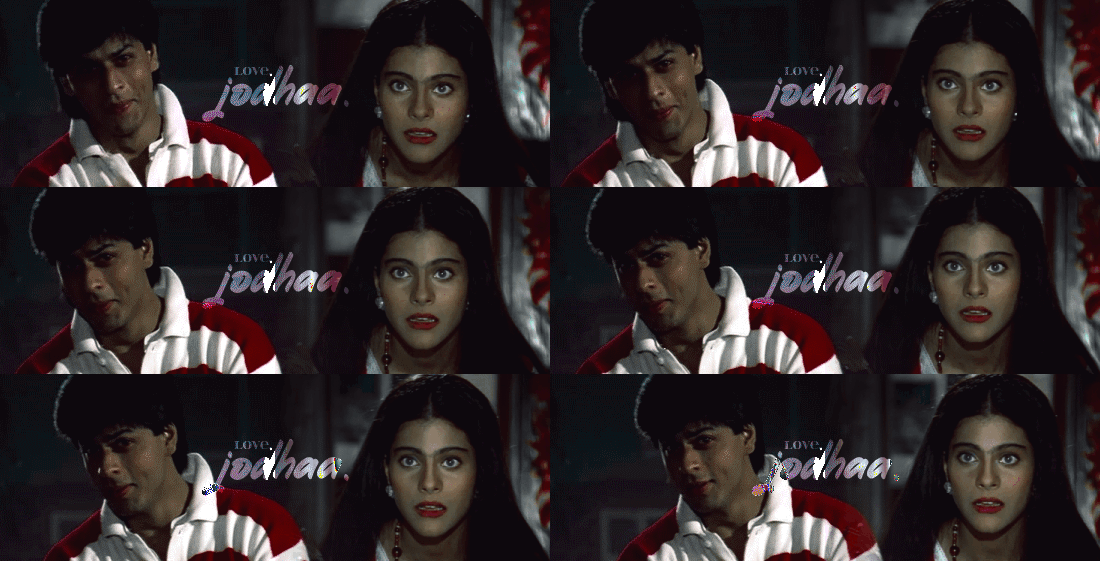
Aptly inspired by Diwale Dulhania Le Jayenge, I made this gif in about half an hour. Depending on how much you want to manipulate the gif, it may take longer. Today however I will just be focusing on how to create a gif in this format, with two faceclaims side by side. If you guys would like a tutorial on colouring and such, let me know.
Firstly, gather your resources. I primarily get my GIFs from Tumblr or Pinterest. A good place for fonts is dafont; you have access to hundreds of zip files there.
Now once you have found your resources, load them onto your editing software. I use photopea; it's a free, online editing software that's nearly identical to photoshop. I use it primarily on my phone as it's more comfortable for me, but you may prefer using a laptop or computer.
When the screen loads, select the option to start a new project. You will then be taken to a screen where you will have to enter the dimensions of your canvas. This is usually how I set up my canvas;
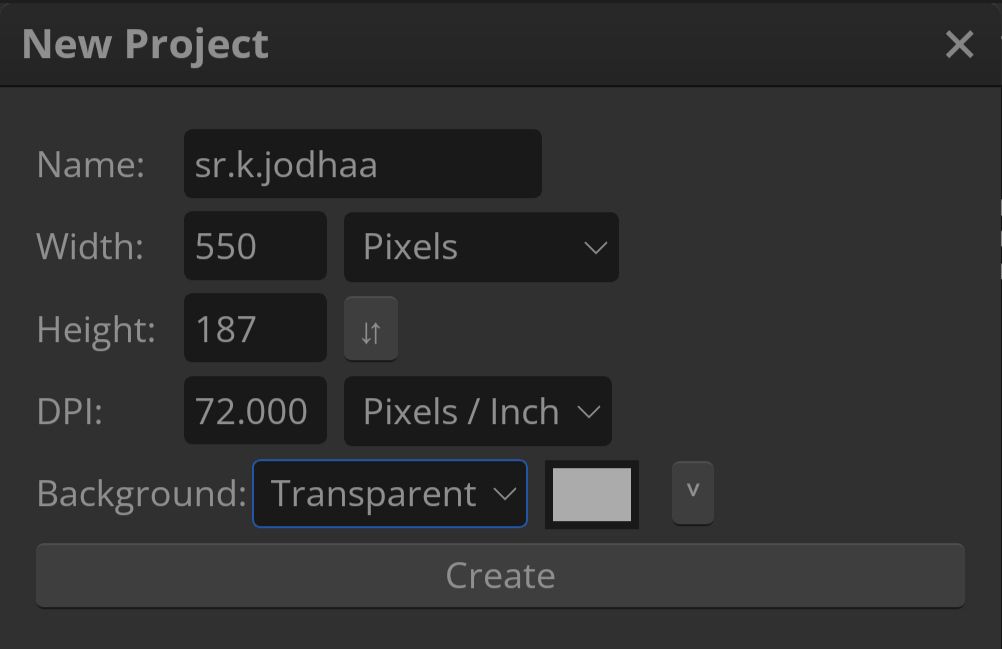
Honestly I can't quite remember how I got these dimensions, but they have worked so far [EDIT: I now also use 550 x 150]. Adjust if you need to, but this might be beneficial as a guide.
Press "Create", and you canvas should load.
To insert your files, go to "File" < "Open". Load your GIFs and your zip files. The GIFs should come up on separate tabs to your main canvas.
What you then want to do is resize each gif so that it fits onto the canvas. You can do this by going to "Image" < "Image size". When you've done that, you can select the vertical layers button on the right side of the screen;
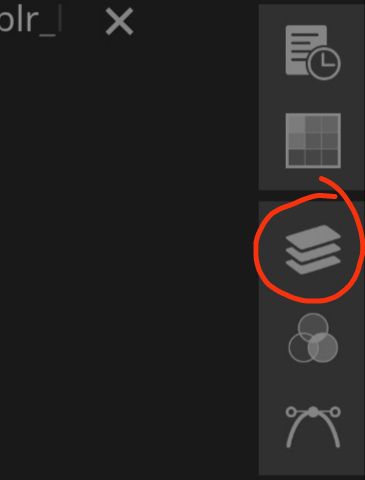
Select the GIF FOLDER, and drag over to the canvas tab. Make sure this is the entire folder and not just a single frame. This should copy and paste the GIF onto the canvas. Do this for both GIFs and readjust them to get this;
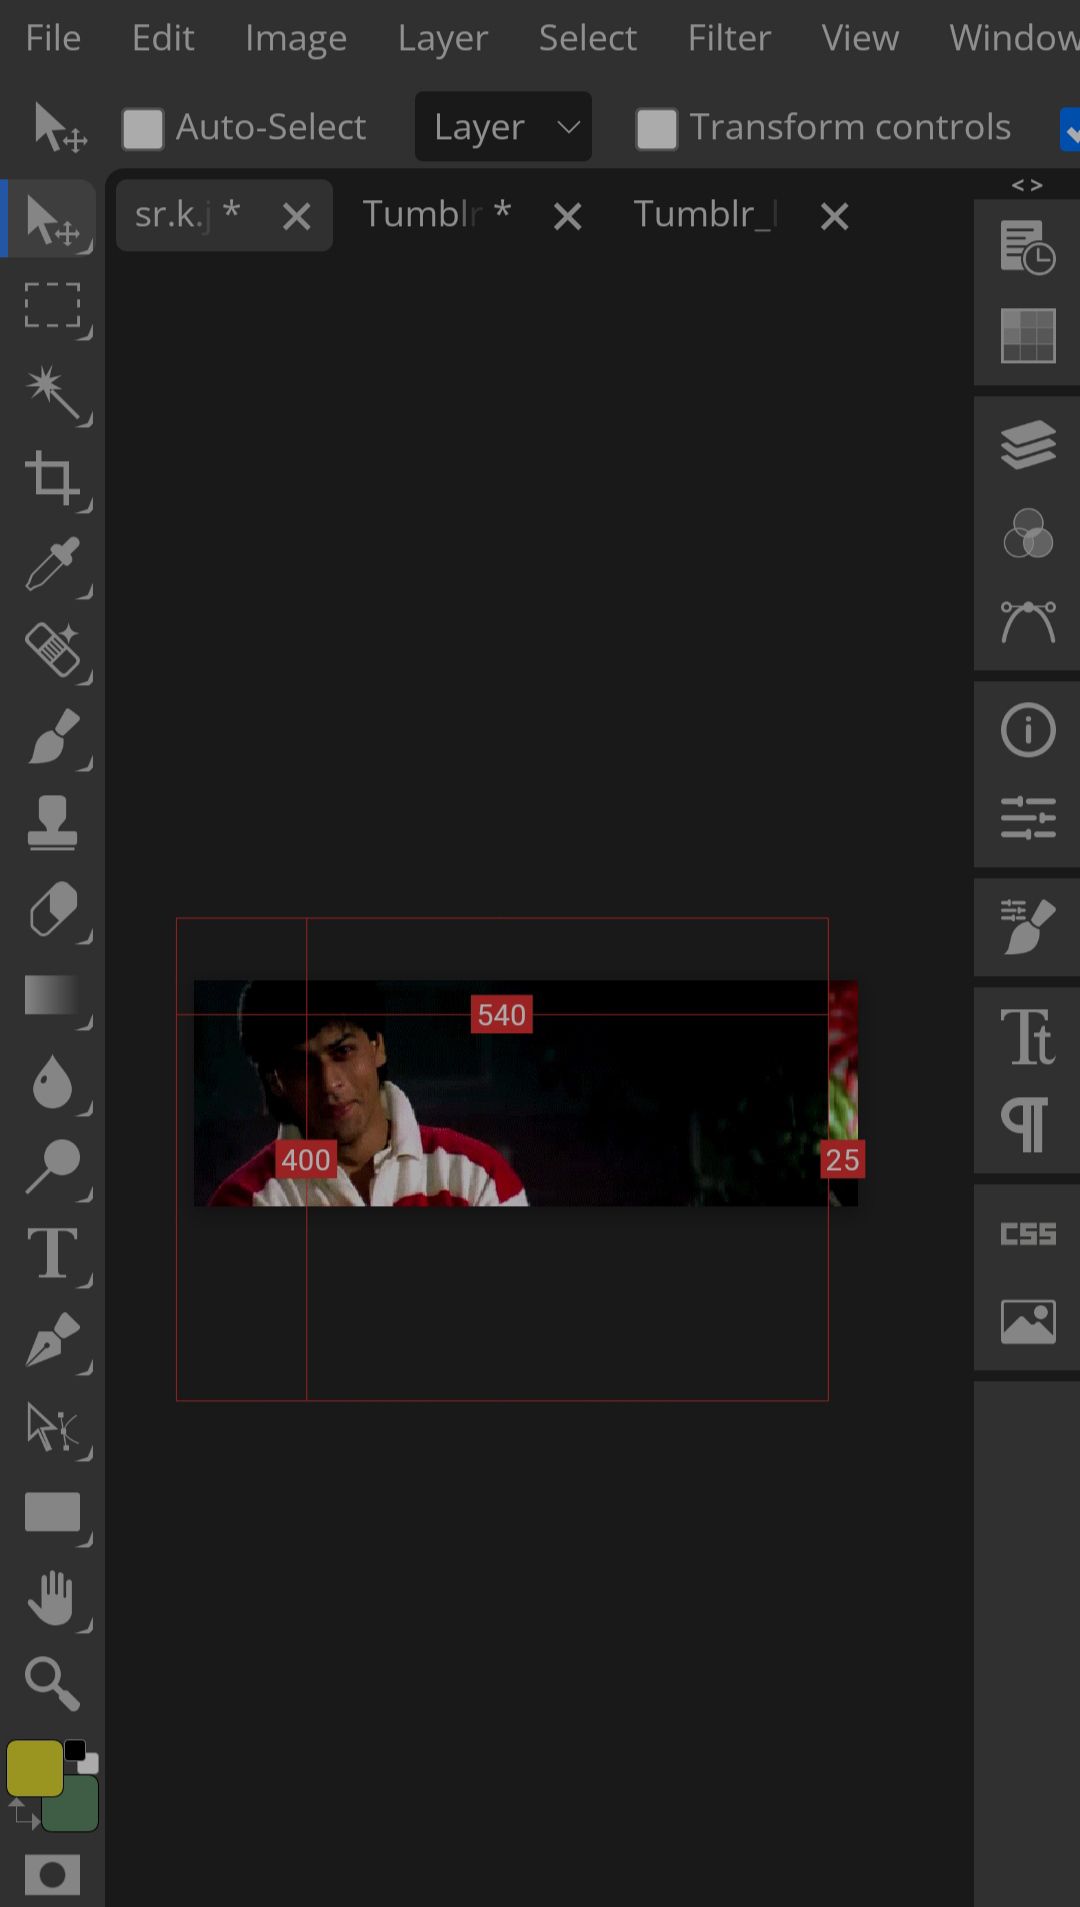
The gifs should overlap so you can blend them together. [NOTE: The GIFs do not always have to the extent displayed above. They need to be overlapping to ensure that blending can happen, and so you don't have empty space between the two of them, but don't worry too much about it].
Now, you are ready for the fun part; blending. Press the horizontal layers button
Click on the GIF folder that is on the top.
Select the horizontal bar "Layer" < "Raster Mask" < "Add (Reveal All)".
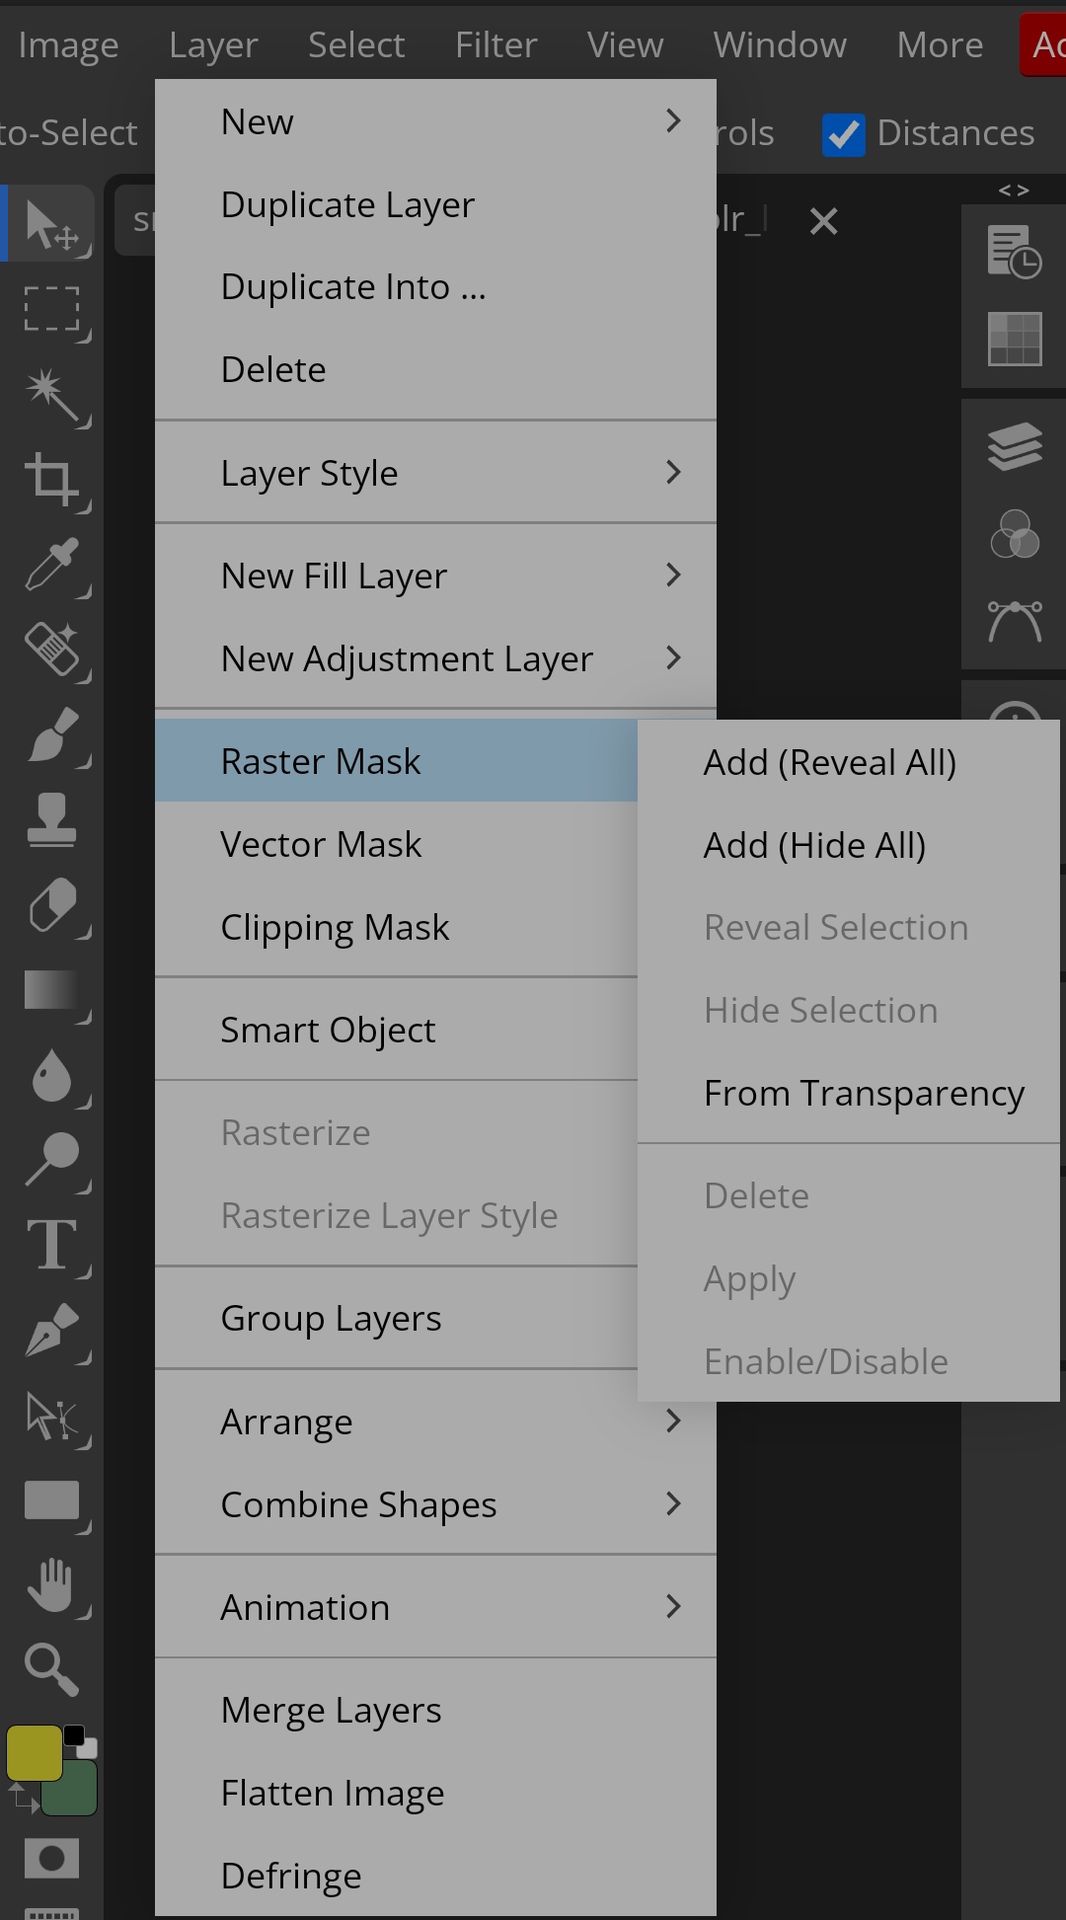
It should look like this when the Raster Mask has loaded;
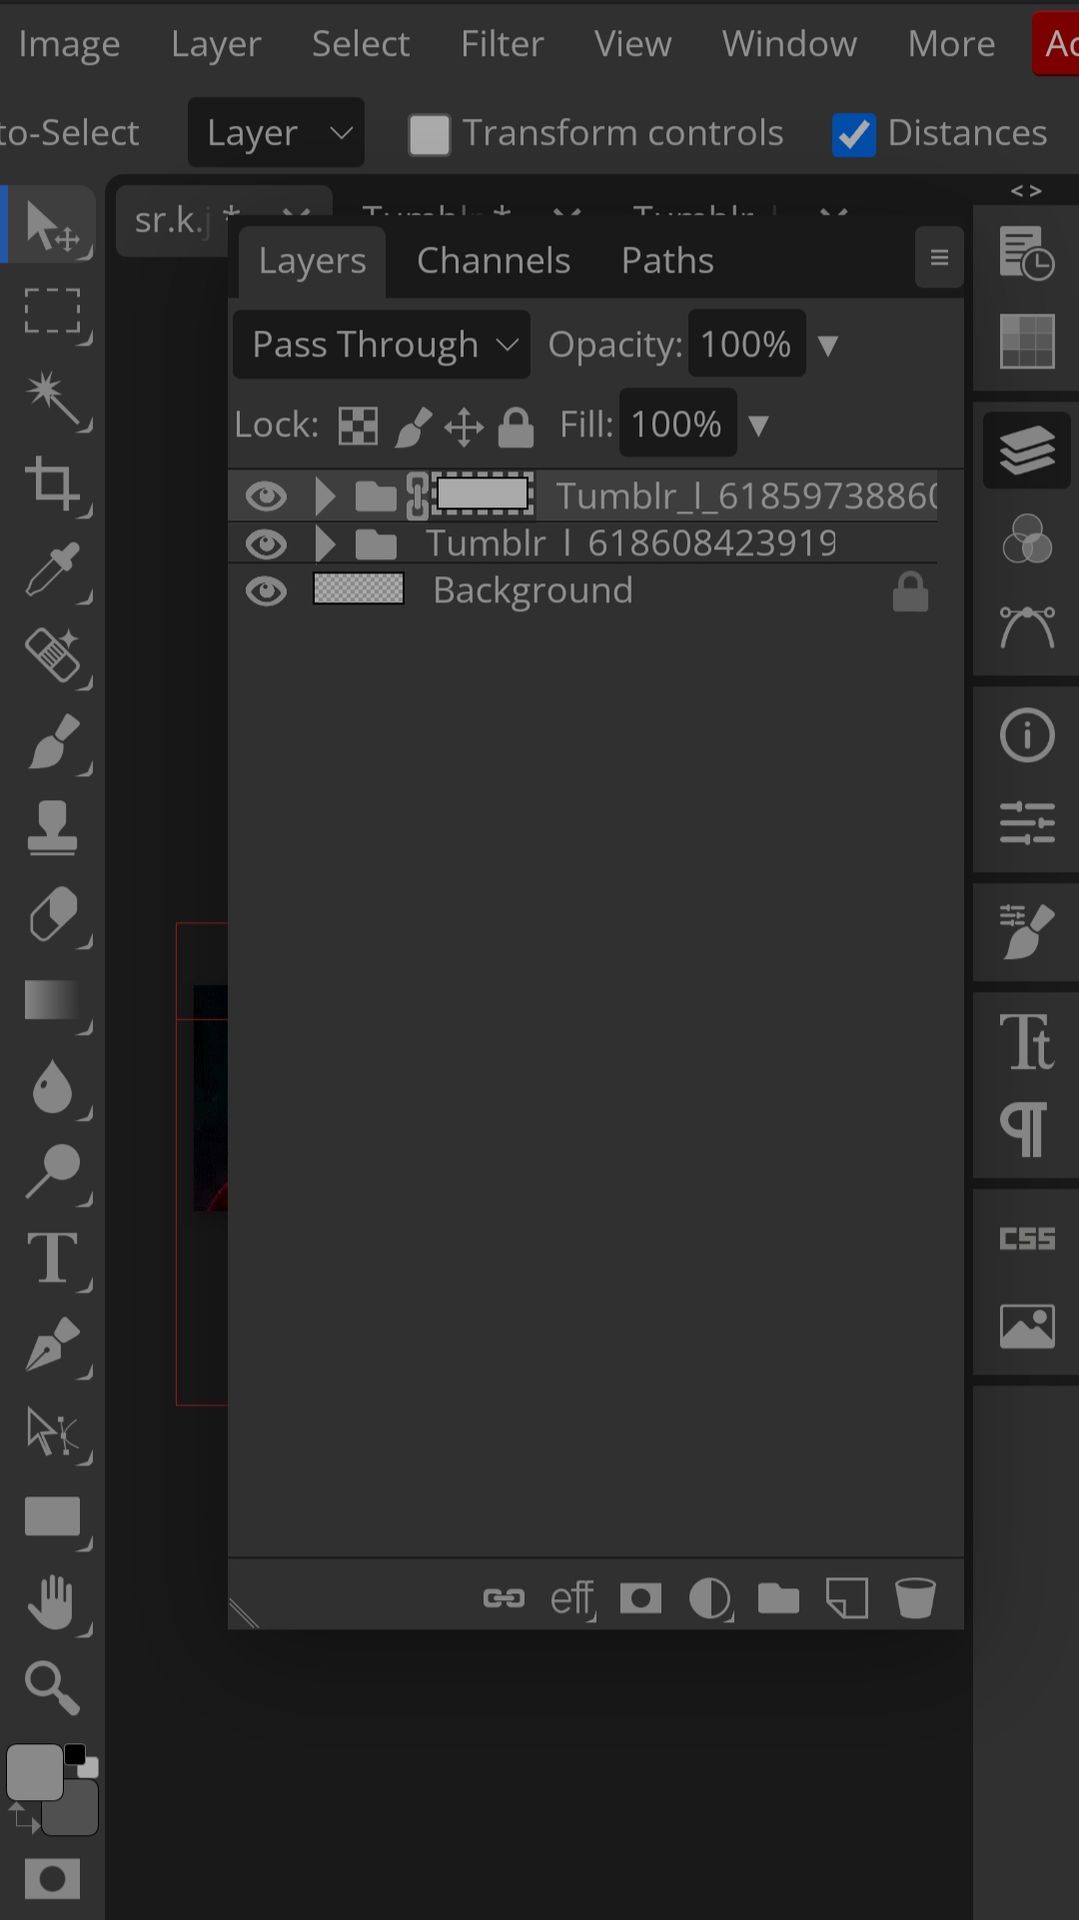
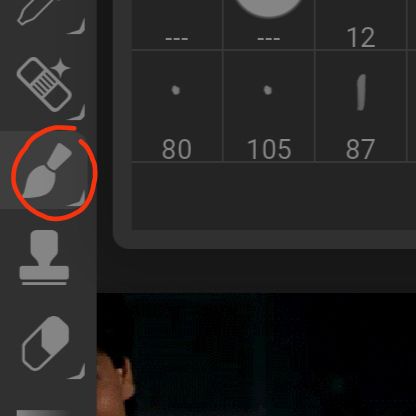
Now, you want to press the paintbrush icon on the left side of the screen.
You should then adjust the paintbrush size. For this particular GIF, I used this size;
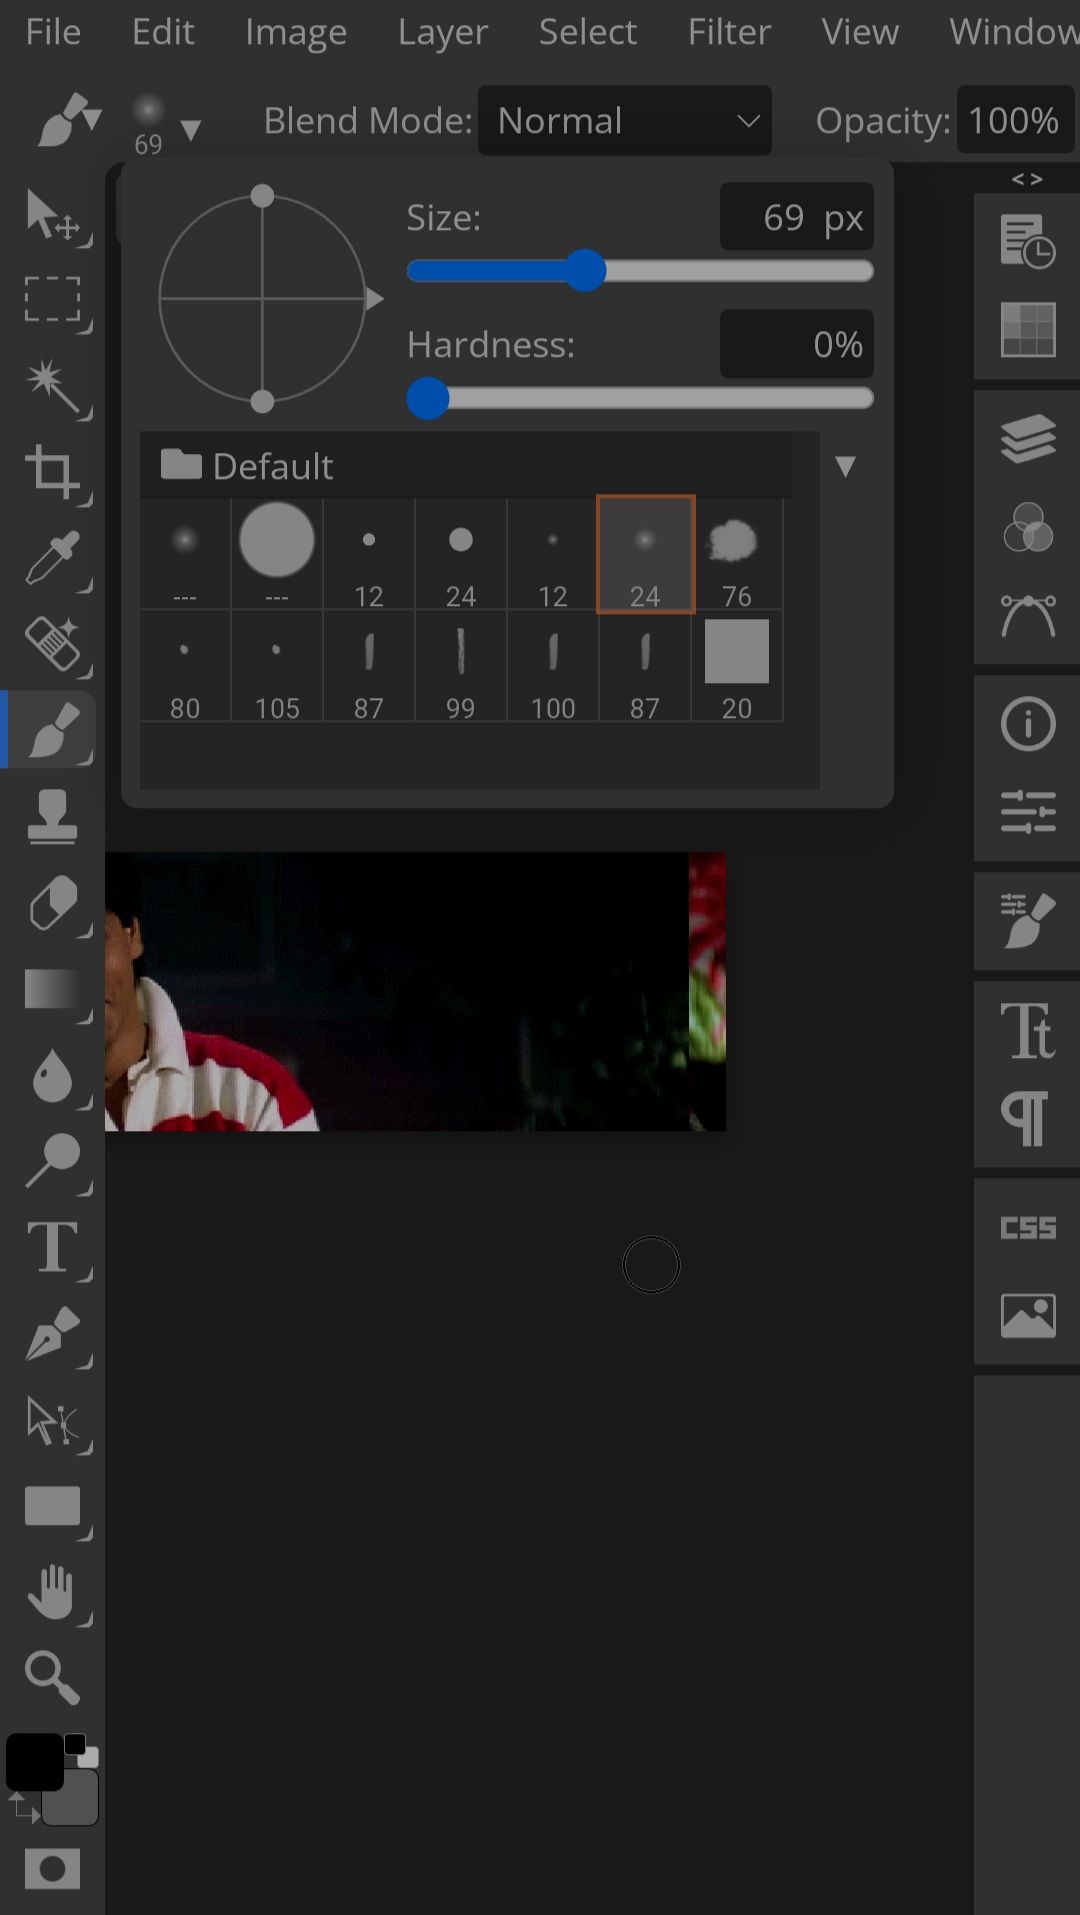
However, I usually use a smaller paintbrush. I would say the range between 30-65 is quite normal for me.
Now, before you start erasing, you must ensure one thing.
Your paint brush colour is black. If it is not black, the erasure will only slightly opaque the GIF rather than erase it. You can ensure this by using the function at the bottom of the left of the screen;
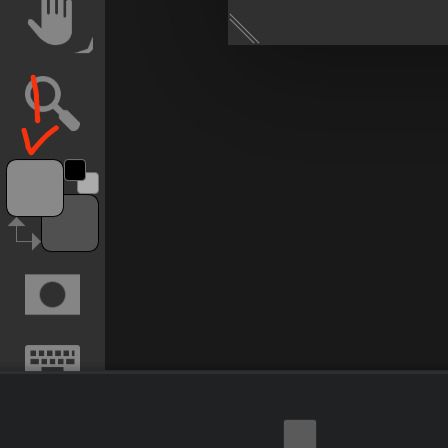
Ensure that the top square is black.
Now you have done that, you can start blending!
I usually start with the opacity of the brush at 100%. In order to blend the GIFs seamlessly, I decrease the opacity as I get closer to the edge of the bottom GIF. For example, I will do one stroke at 100%, the next at 80%, the next at 60%, and so on and so on. This isn't always what I do. You'll have to take in consideration the size of either GIFs, and whether or not the colours of the GIFs blend together well (this can also be solved by editing colours, but that's for another day). But for this particular GIF, that is what I did.
After this, I go in and I edit my gif, adding fonts, editing the colours and so on and so fourth. It is only then that I merge the GIF.
THIS IS THE MOST IMPORTANT PART OF THE TUTORIAL! DO NOT SKIP THIS!
If you do not do this step, instead of having these GIFs be side by side, they will play one after another with blank spaces to their sides.
Go to "Layer" < "Animation" < "Merge".
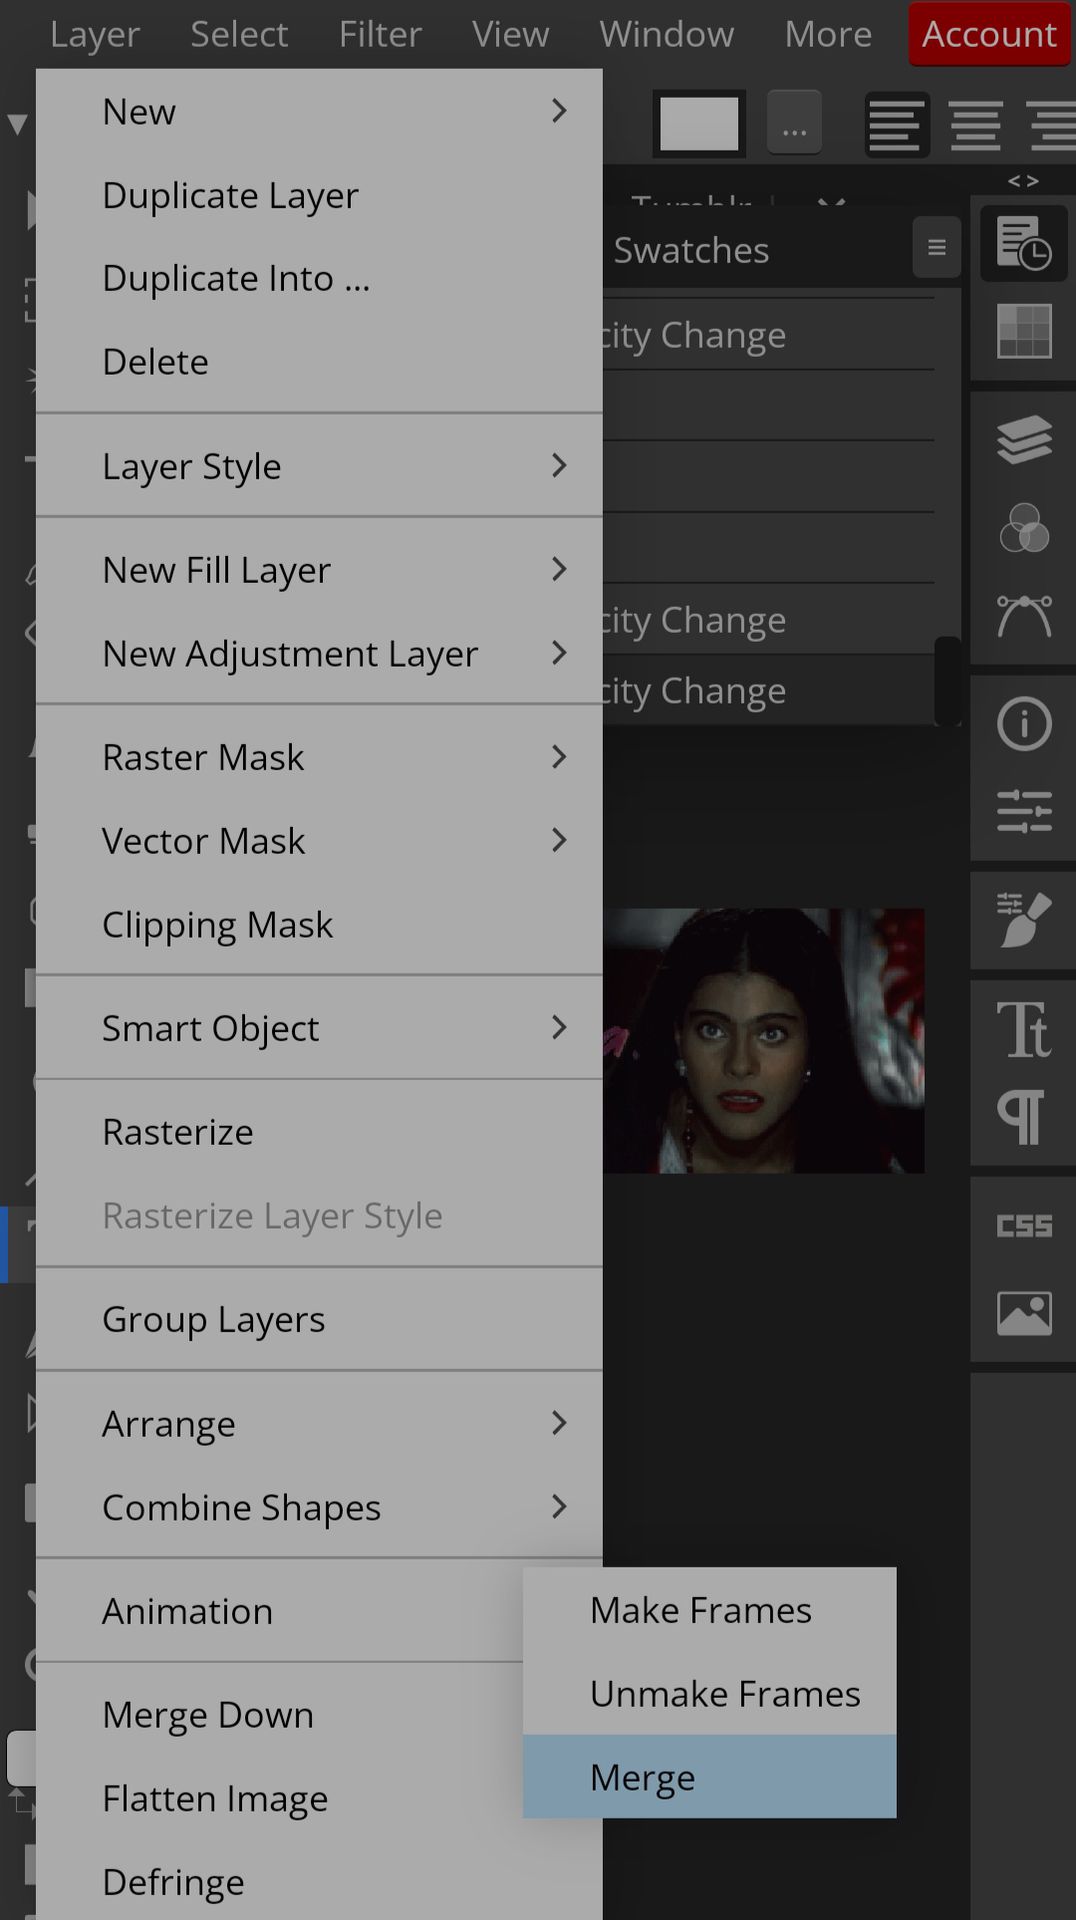
It will take a second, but after that, in the horizonal layer tab, there will only be one GIF instead of two. You should then check how the GIF appears.
"File" < "Export as..." < "GIF"
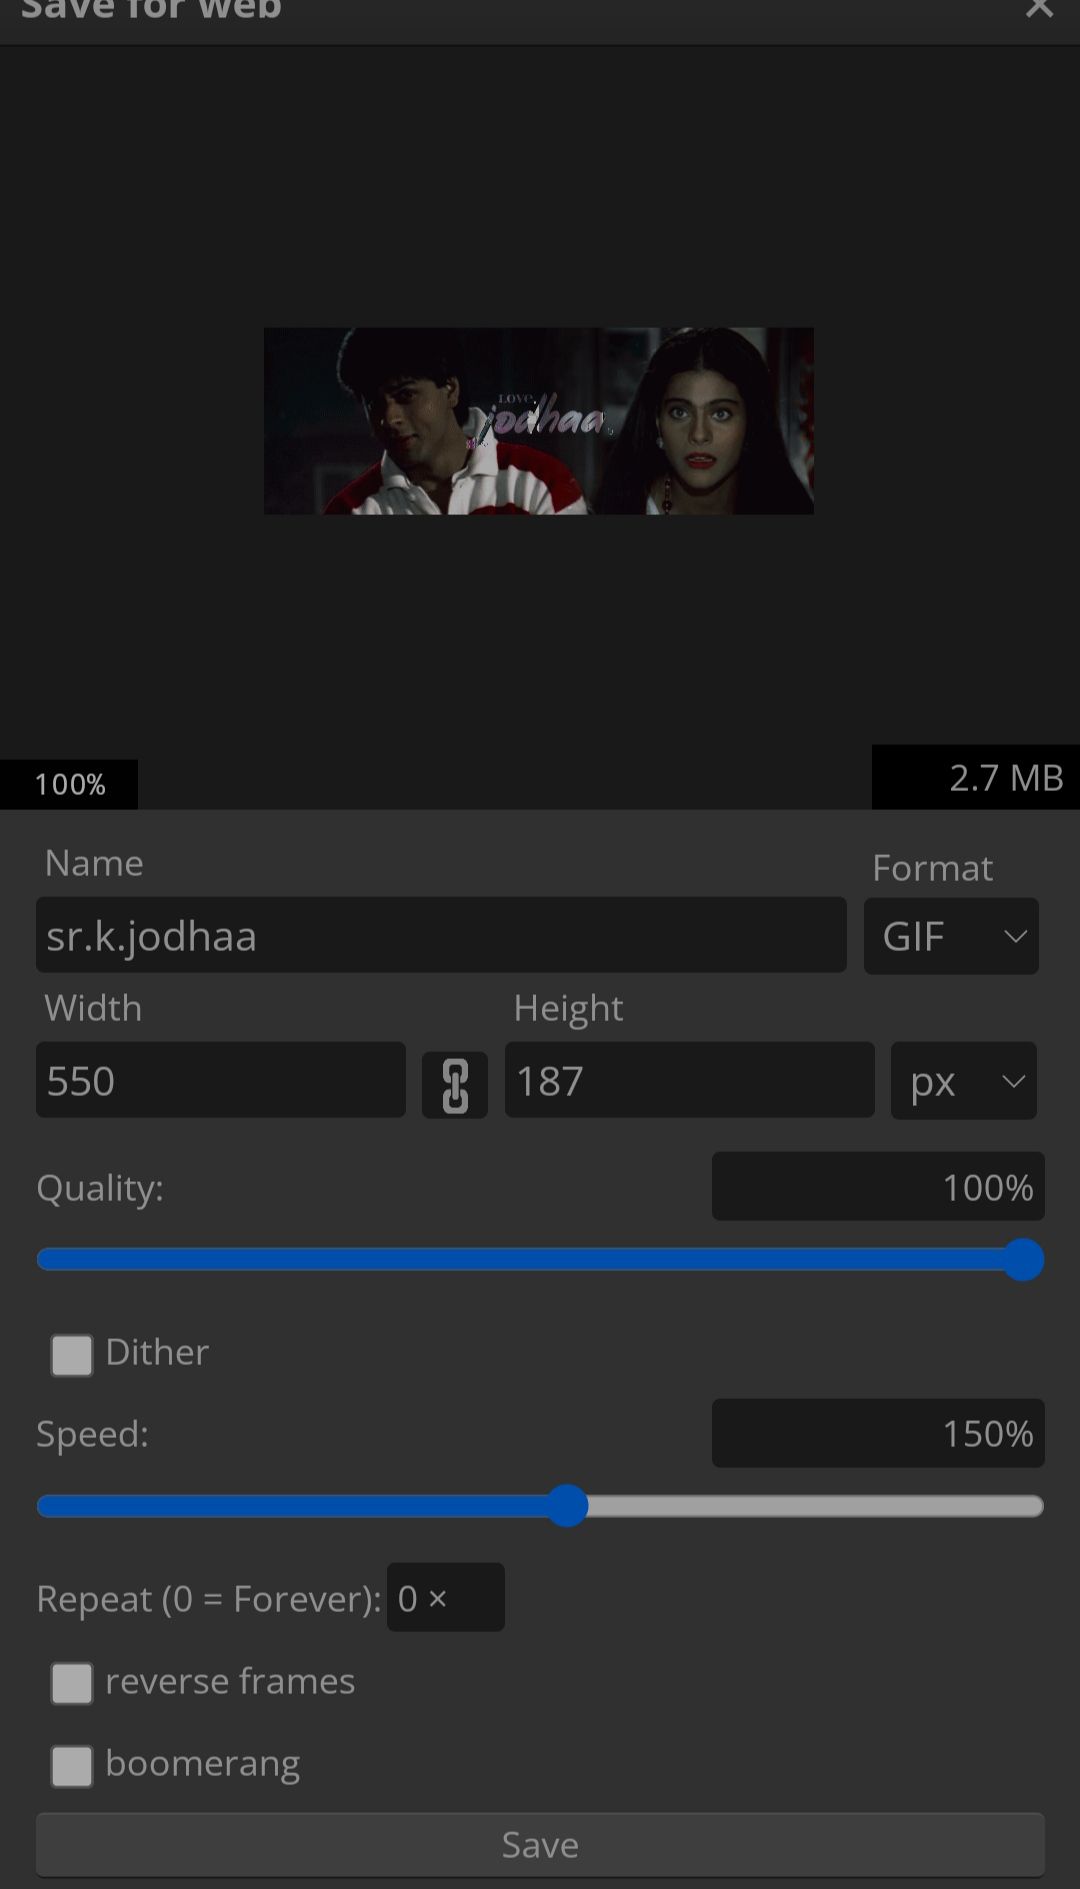
Check first that your GIF runs smoothly and that both sides cut off at the same time. If not, you will have to go back and delete a few frames. Also check if the GIF is under 3MB, otherwise wattpad will not be able to load it. Finally, adjust the speed of the GIF, either speeding it up or slowing it down.
Then, there's nothing to do but to press "Save"!
I hope you liked this tutorial. It's an interesting experience for me, and I'd love to do it again. If you have any further questions, feel free to ask me in the comments. And if you want anymore tutorials, do request! Thanks for your time lovelies, have a nice day! Xx
Bạn đang đọc truyện trên: AzTruyen.Top