[09] zombie effect
This one is long and borderline hard. STICK WITH ME. You can do it.
(Probably not for beginners, but hey, give it a shot!)
s t e p - o n e :
Open a new image on Pixlr Editor. Make it any dimension, if you're making a cover use the size 512x800. Make the background black.
s t e p - t w o :
Open a new image as layer and select your image of your person. I suggest getting a transparent. If you don't, erase all of the background. Make sure the face is very visible. That is where all of the main editing will be.
s t e p - t h r e e :
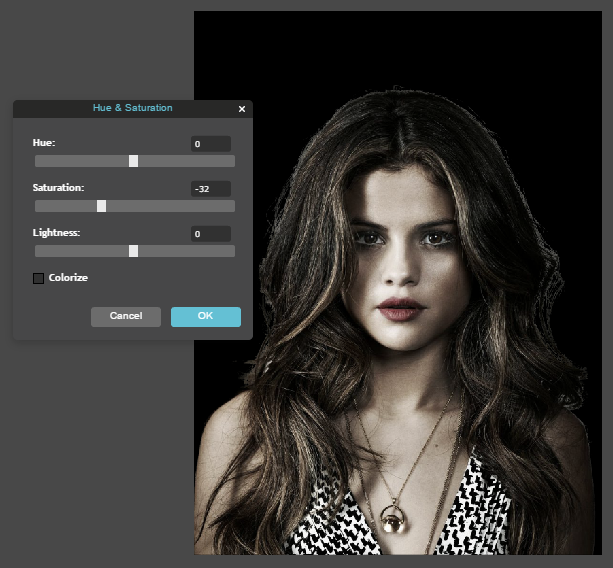
Go up to "Adjustment" and select "Hue & Saturation". Drag the Saturation down until it's between -25 and -50. Eyeball it, you want the skin color to match that of a dead person.
s t e p - f o u r :
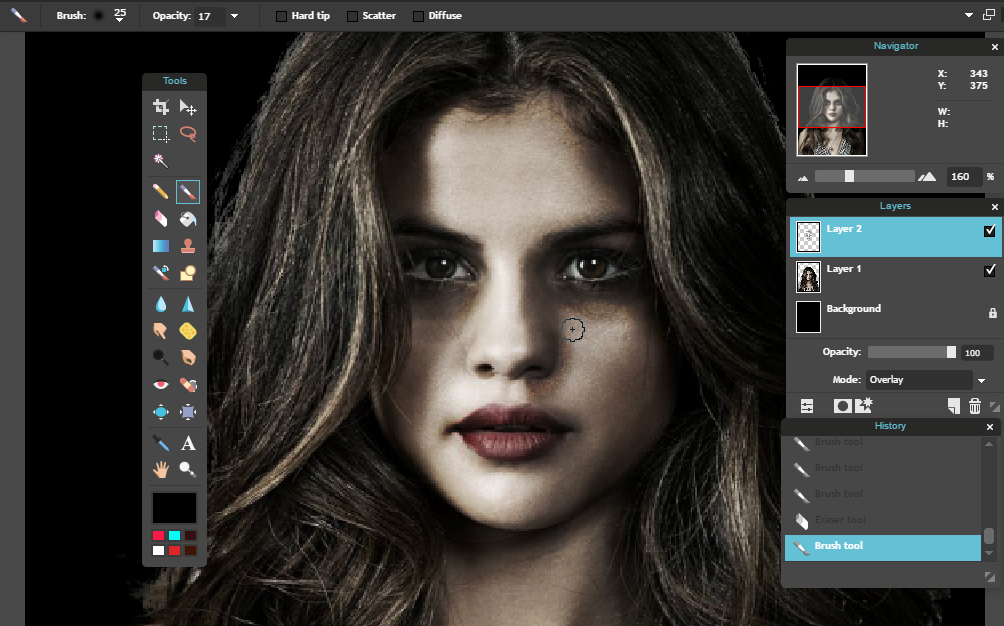
Create a new layer. Change the mode to "Overlay".
Select the brush tool and change the color to black. Lower the Opacity to about 17. Zoom in on the face and begin coloring all of the edges/lines on the face - like under the eyes, the shape of the nose, lips, hairline, jawline, etc.
s t e p - f i v e :
Create a new layer.
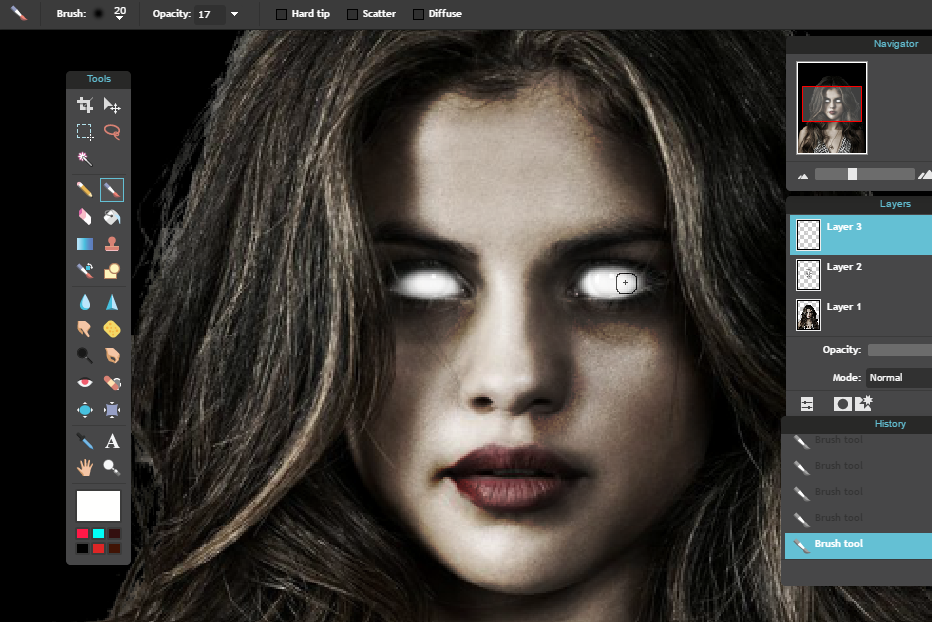
Click on the Brush tool again. Change the color to white.
s t e p - s i x :
Zoom in and color in the eyes. Stay in the lines.
s t e p - s e v e n :
Create a new layer. Change the Mode to "Overlay".
Select the Brush tool again and change the color back to black. Repeat what you did in step four - color in all of the edges/lines again so they are darker.
s t e p - e i g h t :
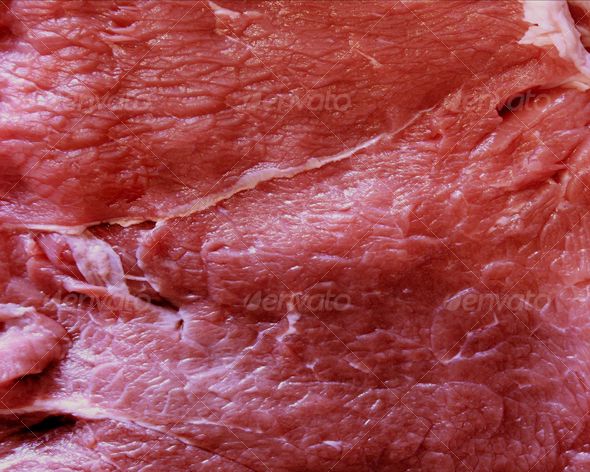
Open up a meat texture as a new layer. (Gross) but you want it to be kinda stringy. Make sure it is covering the face. This is the one I am using ;
s t e p - n i n e :
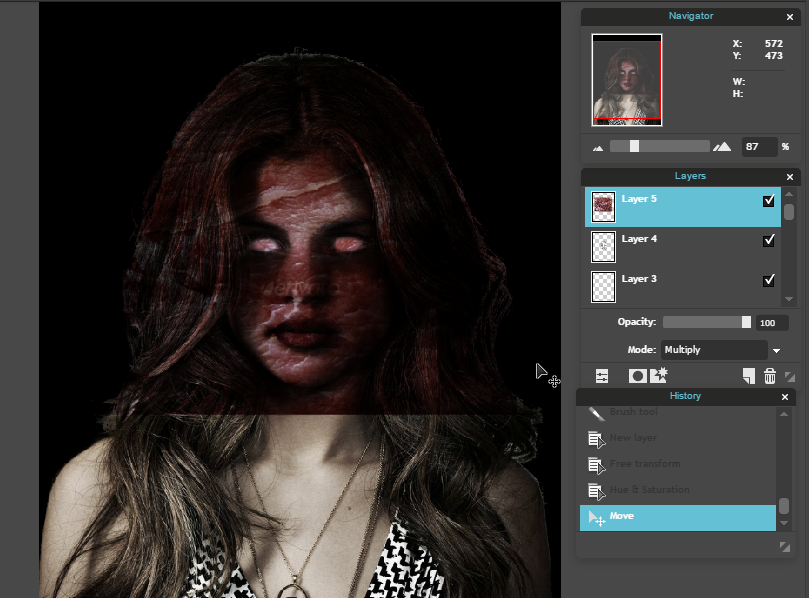
Change the mode to Multiply. Go up to "Adjustment" and select "Hue & Saturation". Lower the Saturation to about -40 to -60. This is where you should be :
s t e p - t e n :
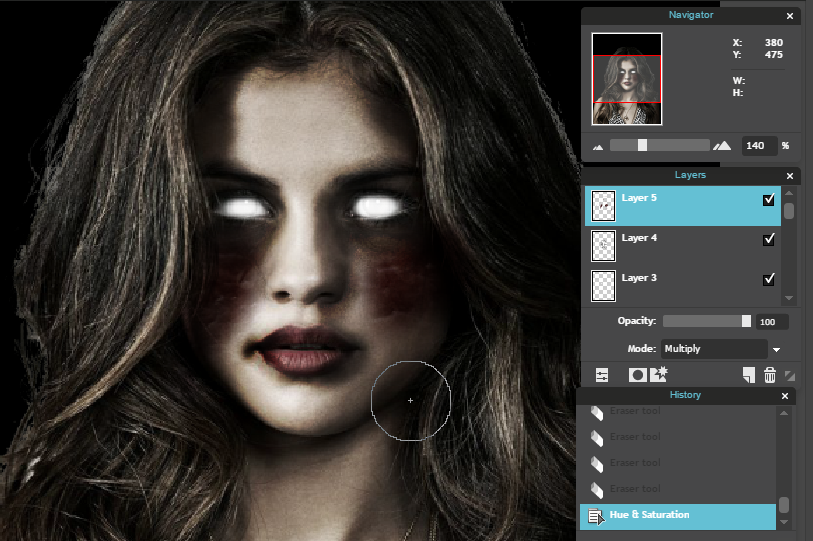
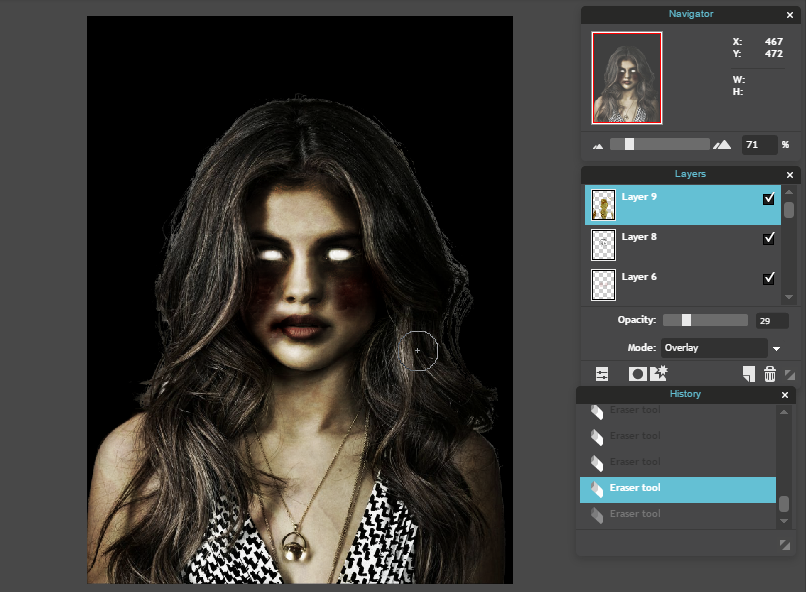
Erase the texture until you have a few spots of it in your desired area, as shown below.
s t e p - e l e v e n :
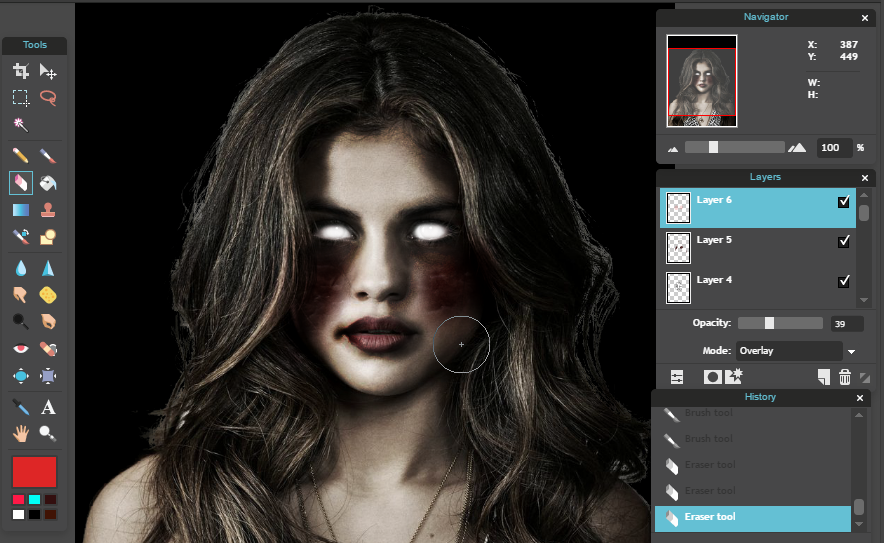
Create a new layer. Select the Brush tool and change the color to a shade of red - mine looks like a salmon color. The Brush Opacity should still be at around 17.
Color over those spots you've just created. It does not have to be perfect. Change the Mode to "Overlay" and lower the layer Opacity.
Lastly, go up to "Adjustment" and select "Hue & Saturation" and lower the Saturation to about -40 to -50.
s t e p - t w e l v e :
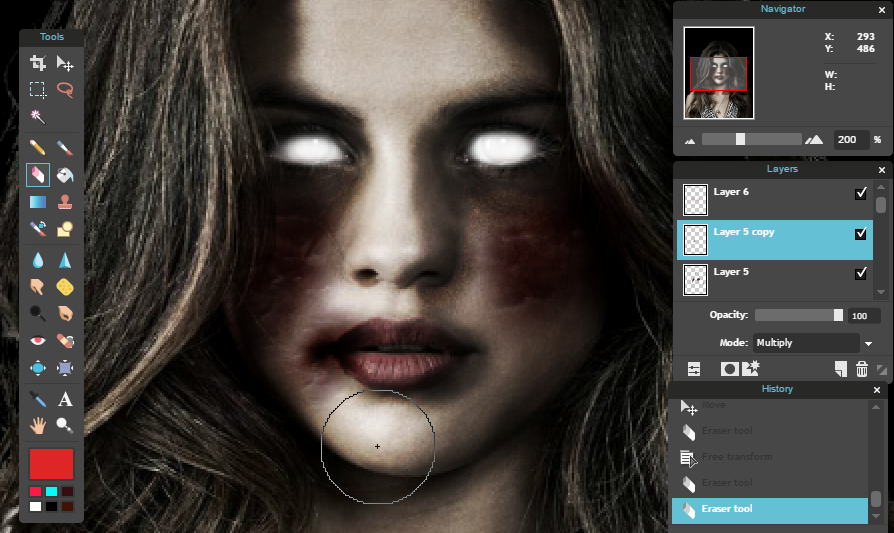
Go back to the layer with the meat texture. If you haven't already put a portion of it next to mouth, do this now. Duplicate the layer and place a part of it on the corner of the mouth. Erase the extra.
s t e p - e l e v e n:
Create a new layer. Make sure it is on top of all of the other layers so far. Change the Mode to "Overlay".
Select the Brush tool and change the color back to black. Opacity should still be around 17. Repeat what was done before - color in the edges/lines. This time try to also go around those meat texture patches a bit.
s t e p - t w e l v e :
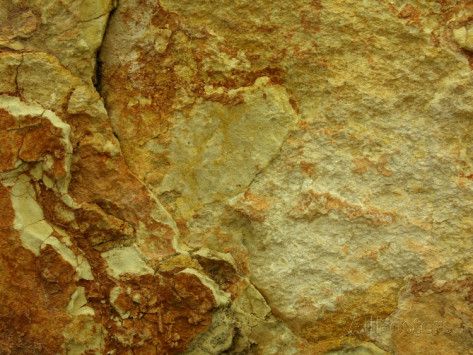
Open a rock texture as a new layer. You want it to be a sort of yellow/orange shade. Make sure it is covering the face and all skin that is showing. This is the one I am using ;
s t e p - t h i r t e e n :
Change the Mode to "Overlay" and lower the Opacity to around 30.
Erase the areas around the skin.
s t e p - f o u r t e e n :
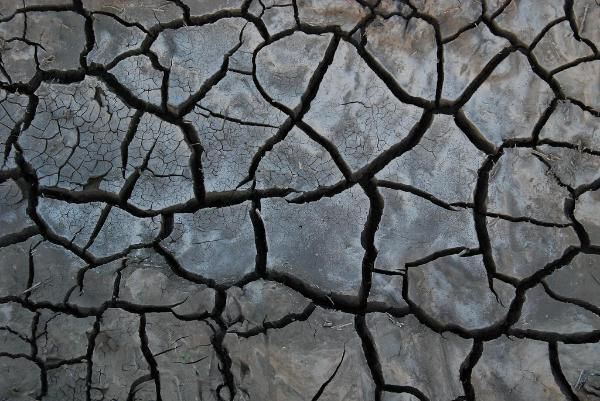
Open a Cracked Earth texture - you want it to be more of a gray-ish color with dark lines. Make sure it's covering the face.
Change the layer Mode to "Multiply".
This is the one I will be using ;
s t e p - f i f t e e n :
Erase until you have a few cracks around the areas where the meat texture is or wherever you want. Go up to "Adjustments" then select "Brightness and Contrast" and make the Contrast 100 so it's darker.
(I only used one of the cracks)

s t e p - s i x t e e n :
Go down to the original picture of your person. Duplicate the layer.
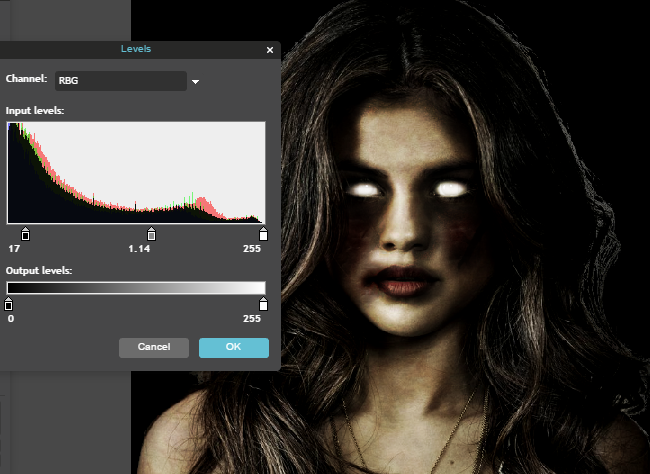
Go up to "Adjustment" and select "Levels". Play with them until it looks good to you.
s t e p - s e v e n t e e n :
Duplicate the layer again.
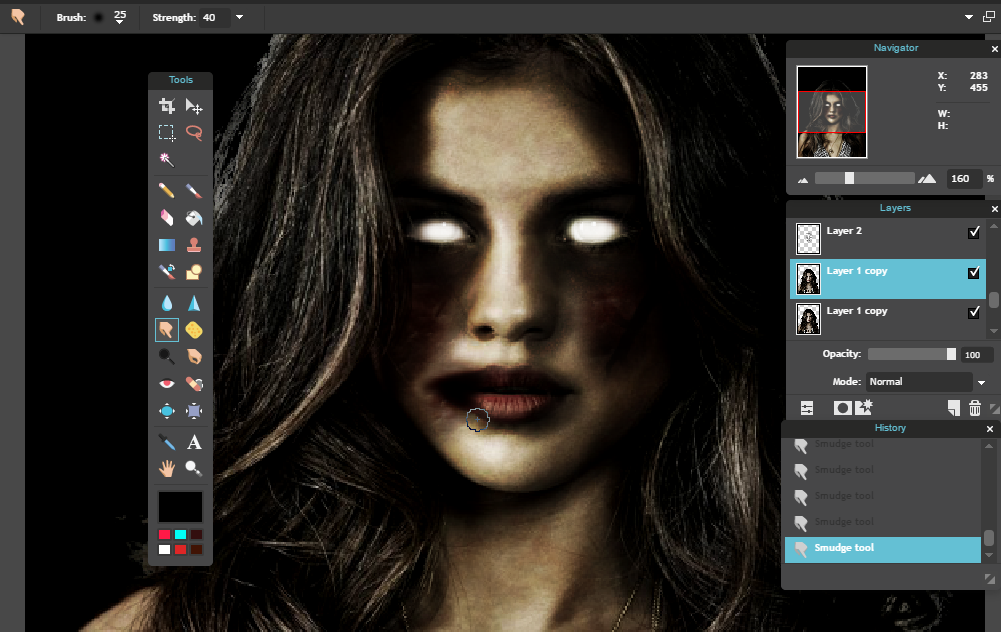
Select the Smudge tool. Go to the side of the mouth where you placed the meat texture. The crease on the side of the lips should be dark. Drag out the smudge tool to create something that looks like an opening to the mouth - as shown below.
s t e p - e i g h t e e n :
If the hair of your person does not blend in with the black background:
Create a new layer. Make sure it is above ALL of the layers.
s t e p - n i n e t e e n :
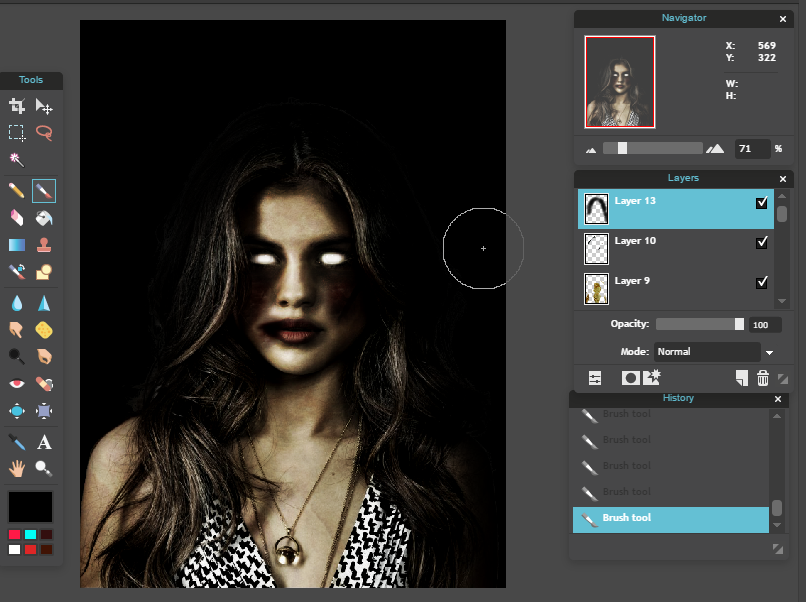
Go to the Brush tool. Make sure the color is black. Change the size to around 200.
Color in the edges of the hair until it's blended really well. The Opacity of the brush does not matter. I kept mine at 17 and just clicked multiple times until it was dark enough.
s t e p - t w e n t y :
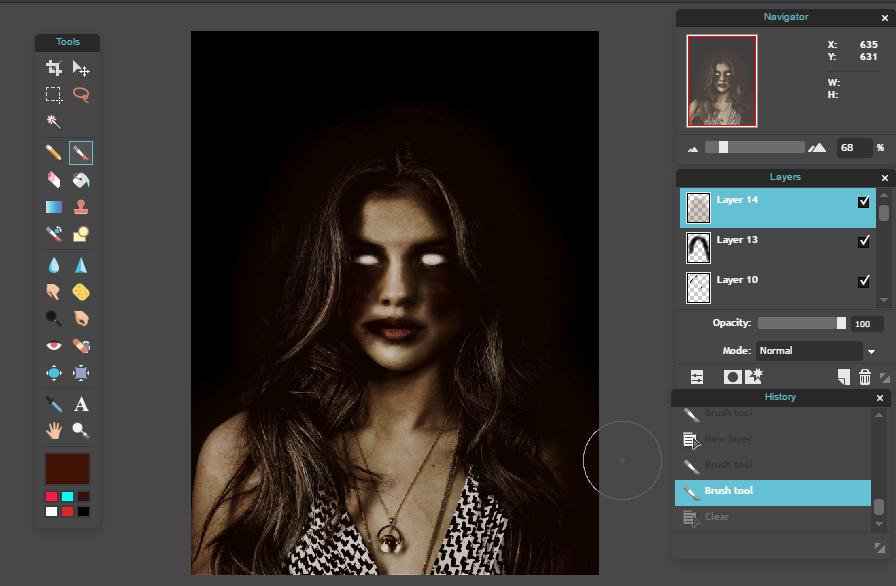
Create a new layer. Go to the Brush tool and change the color to a shade of brown. Color in the entire person.
s t e p - t w e n t y - o n e :
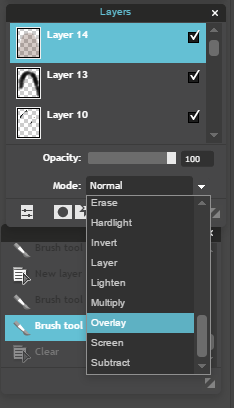
Change the Mode to "Overlay".
s t e p - t w e n t y - t w o :
Now, if you would like to keep the eyes a bright white (which is the typical zombie look), you are done! You can always find the white layer and lower the opacity so that the original eye color shows through.
If you want to change them to a darker color (closed eyes): Create a new layer. Go to the Brush tool and change the color to black. Change the Opacity to around 90.
Zoom in and color in the eyes.
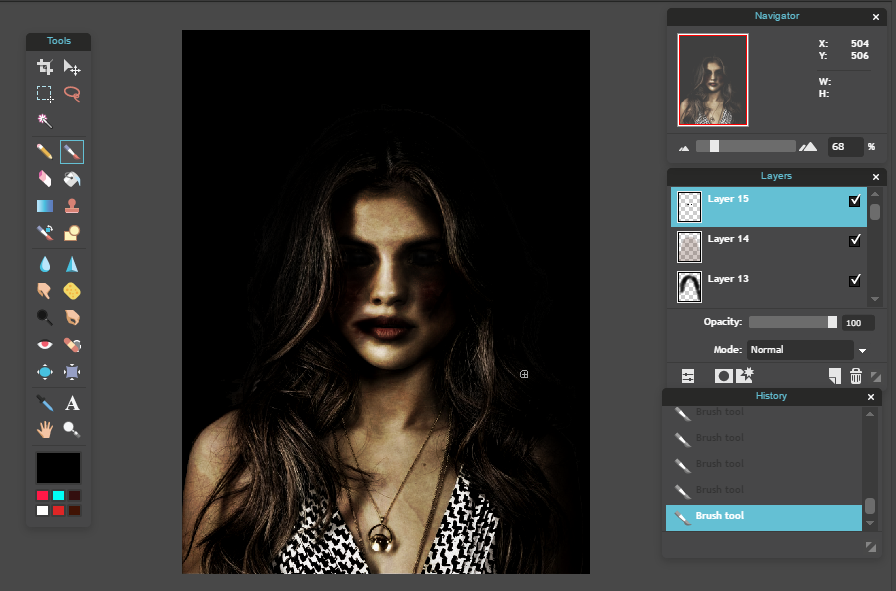
You're done! That was a lot of stuff, I know. You do not need to do anything exactly how I did - make it your own!
*If you did this and posted it, tag me so I can see how yours turned out!
Bạn đang đọc truyện trên: AzTruyen.Top