24》Beveled Text
Beveled texts. They're so pretty and are definitely worth the time fawning over, aren't they? But only Photoshop users can make it, right? No. I've seen tons of questions on how a certain graphic designer has made their fonts so beautiful and metallic. However, I've figured out a trick (those people who haven't got Photoshop like me ^-^), inspired by Pennywithaney's GIMP tutorial. (Seriously though, that tutorial is very helpful if you're a GIMP user. Go check it out if you are a GIMP user.) This time, I've modified this version to be easier and for it to be done on Pixlr Editor.
This tutorial is simplified and is quite easy, but you need to be familiar with the options and tools on Pixlr Editor. If you have any questions, feel free to comment them on this chapter and I'll try my best to help you! ^-^ Here, I will show you how create these text effects in Pixlr Editor, like in these three examples:



First Text Effect
Step 1: Start with a layer of grey text. I'm using the font STHeiti for this tutorial.
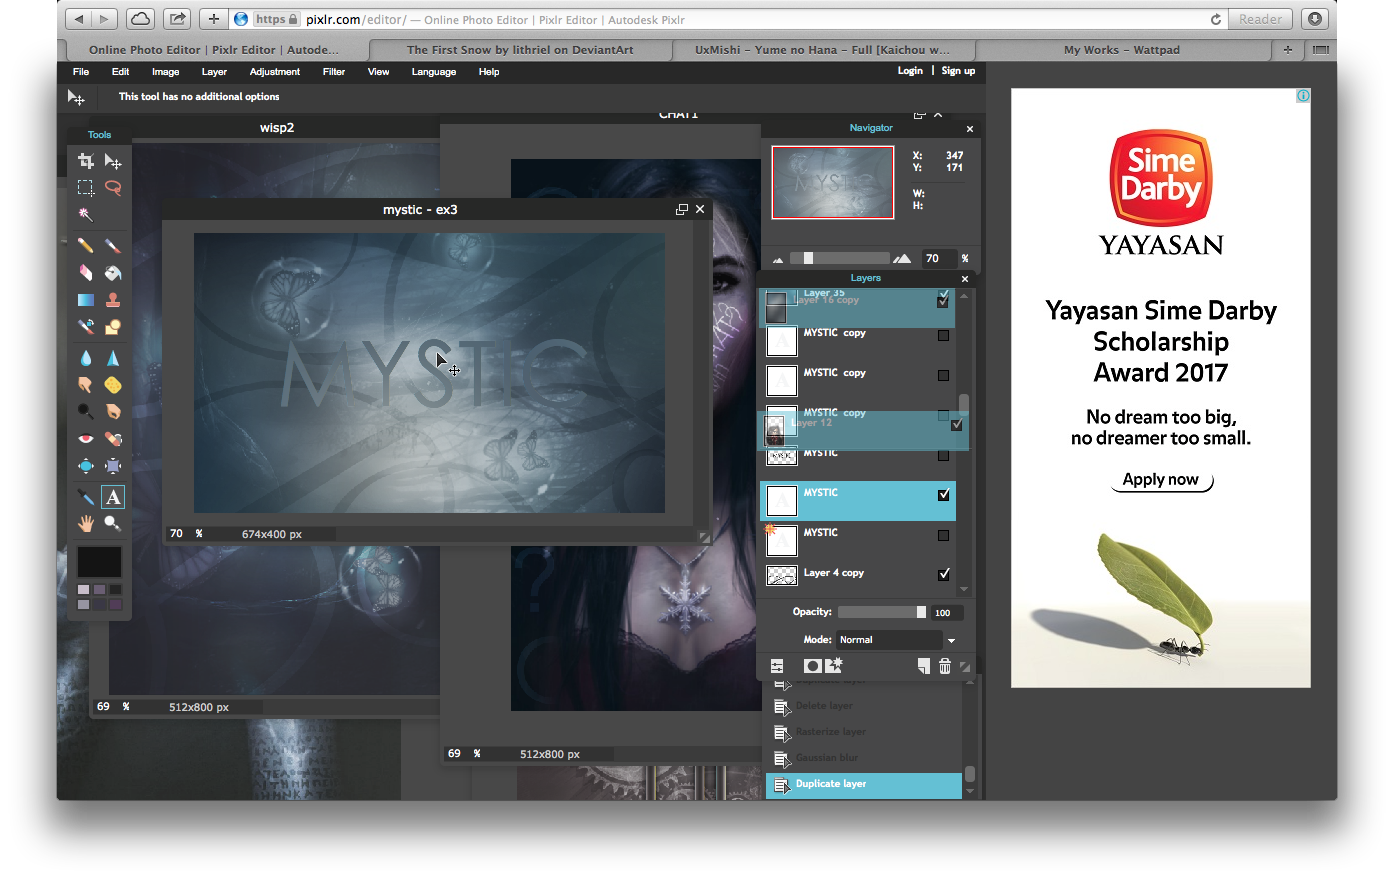
Step 2: Duplicate a layer of the text and change the colour into a black colour. Rasterize the layer and apply the filter 'Gaussian Blur' to achieve that blurry effect below.
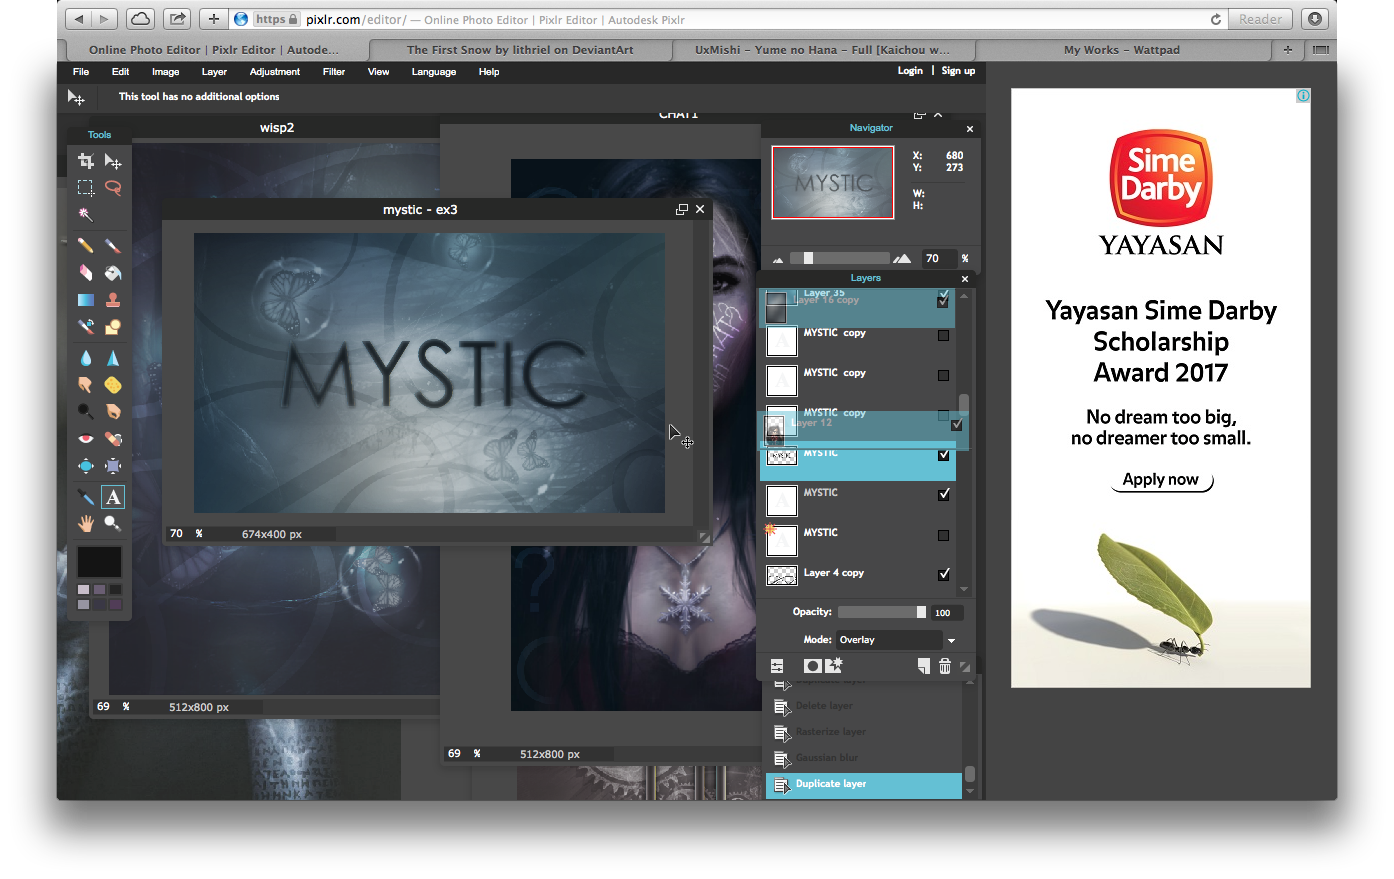
Step 3: Duplicate the layer again and change it to white. Do this as many times as you see fit and make sure the layer setting is set to overlay.
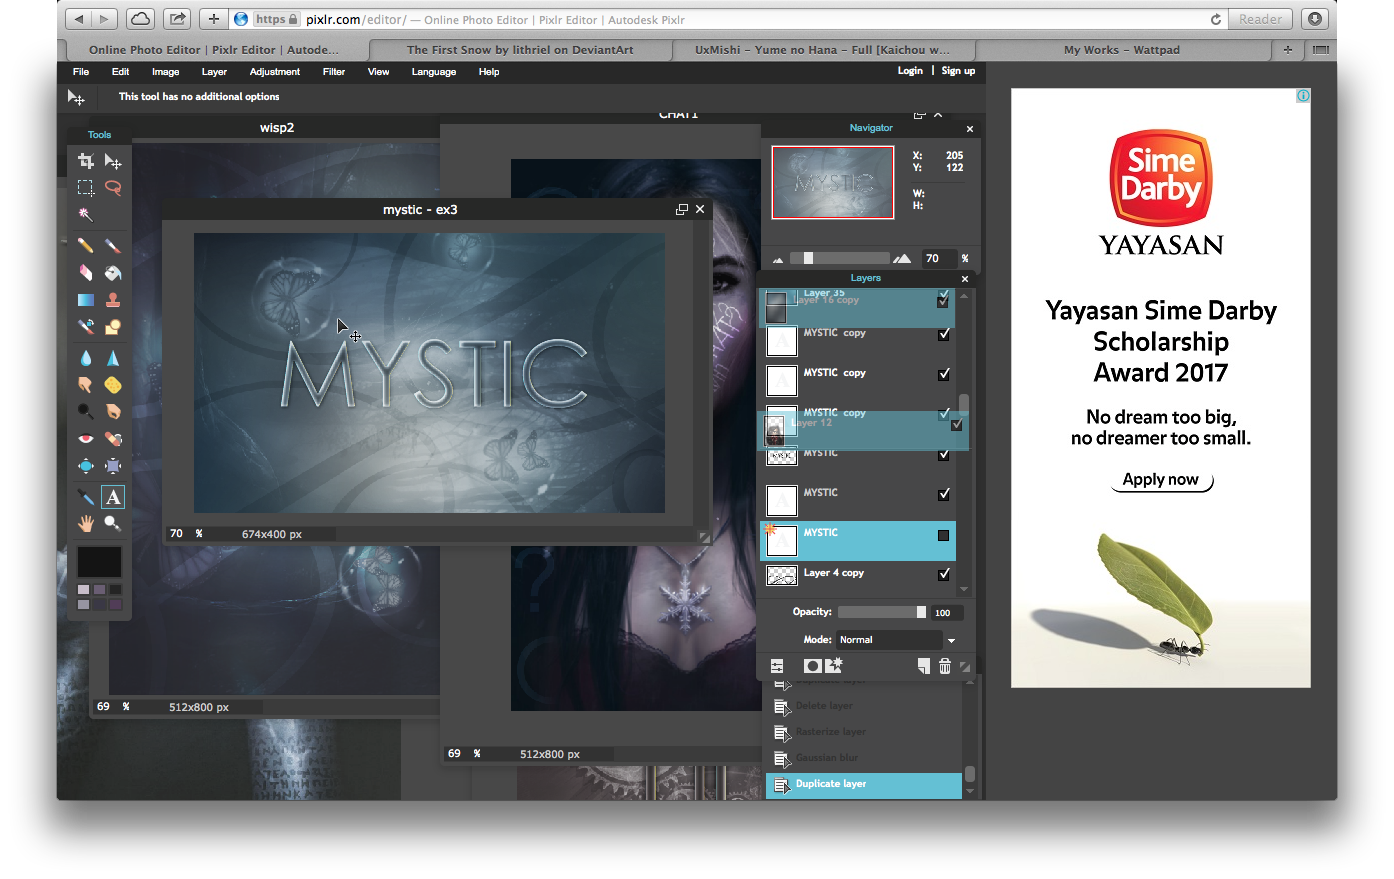
Second Text Effect
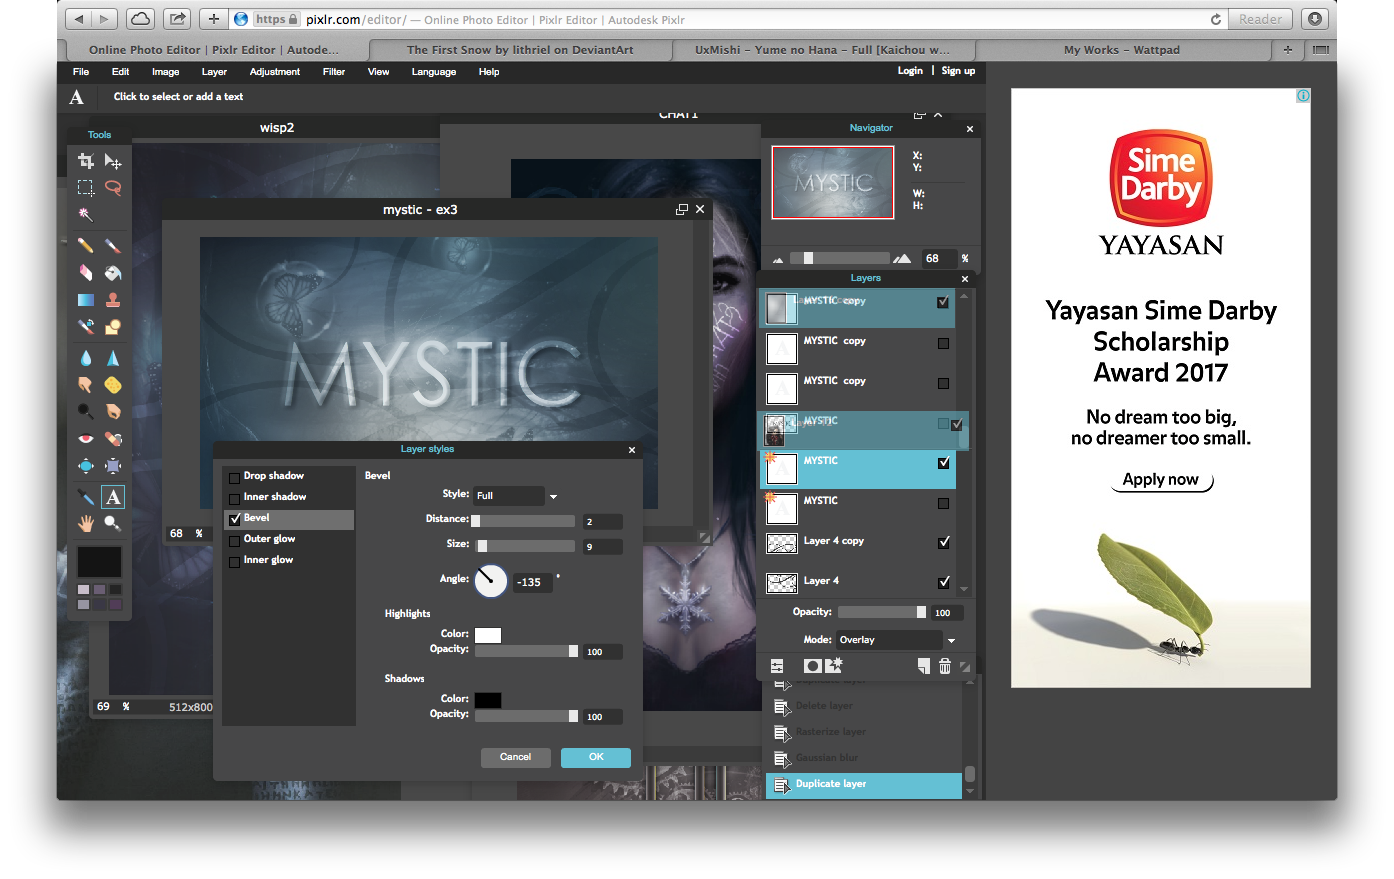
Step 1: Start with a white layer of text, then click on that little box with a star on the Layers to open the layer styles. Under 'Style', pick the option 'Full'.
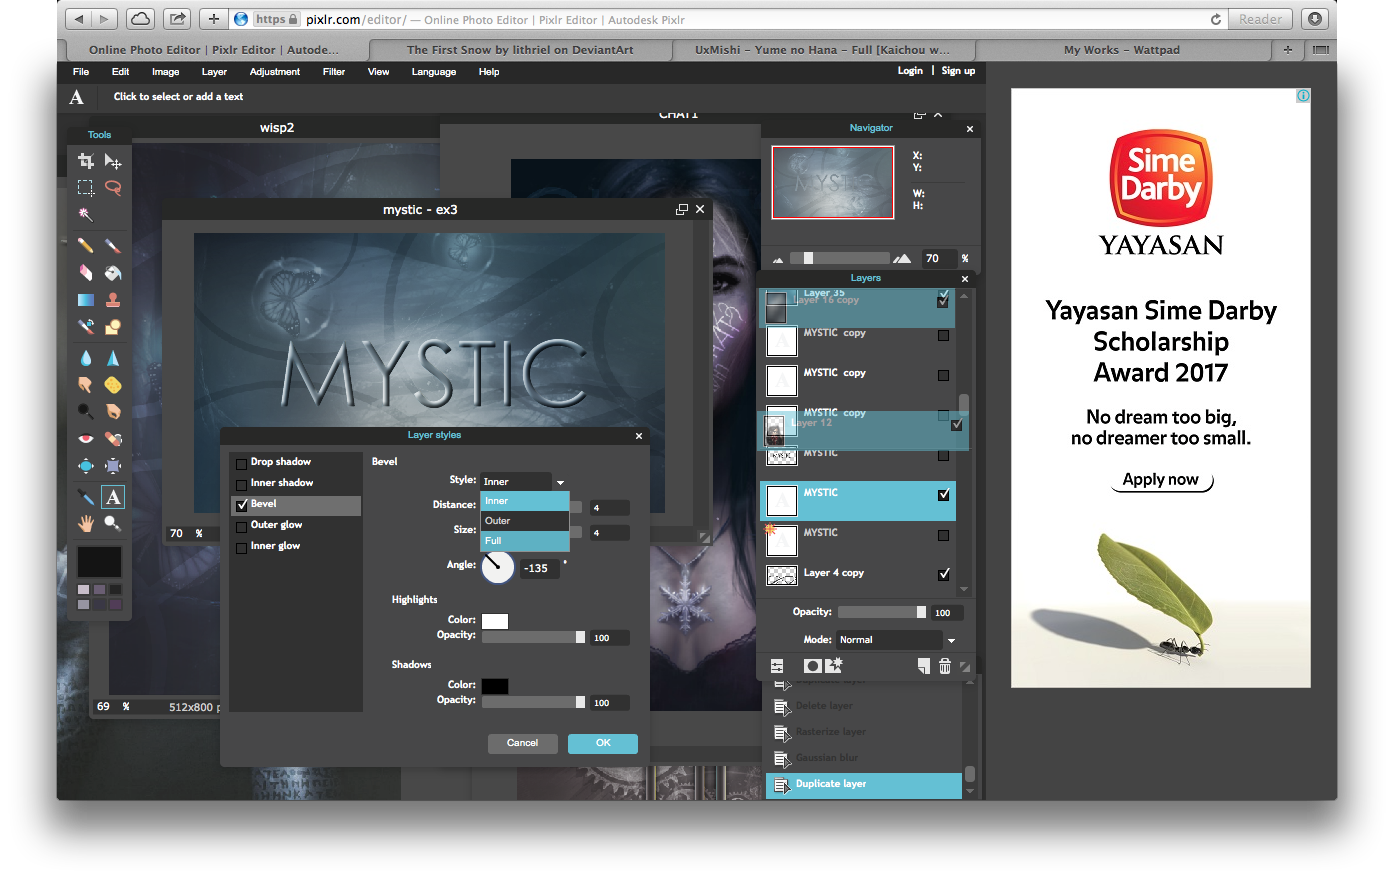
Step 2: Adjust the size and distance, play around with them and you'll get different effects.
Third Text Effect
Step 1: This is a cheat bevel to make it look like a Photoshop one. To make the effect, I repeated the steps as I did in the first text effect. I started with a grey layer and duplicated it, made that text black, and used the filter Gaussian Blur on the black layer. I then duplicated two more layers (white coloured text) and changed the layer settings to overlay.

Step 2: Using the bevel option again, I'm using the bevel style 'Inner' this time. The preset will make it look like this.
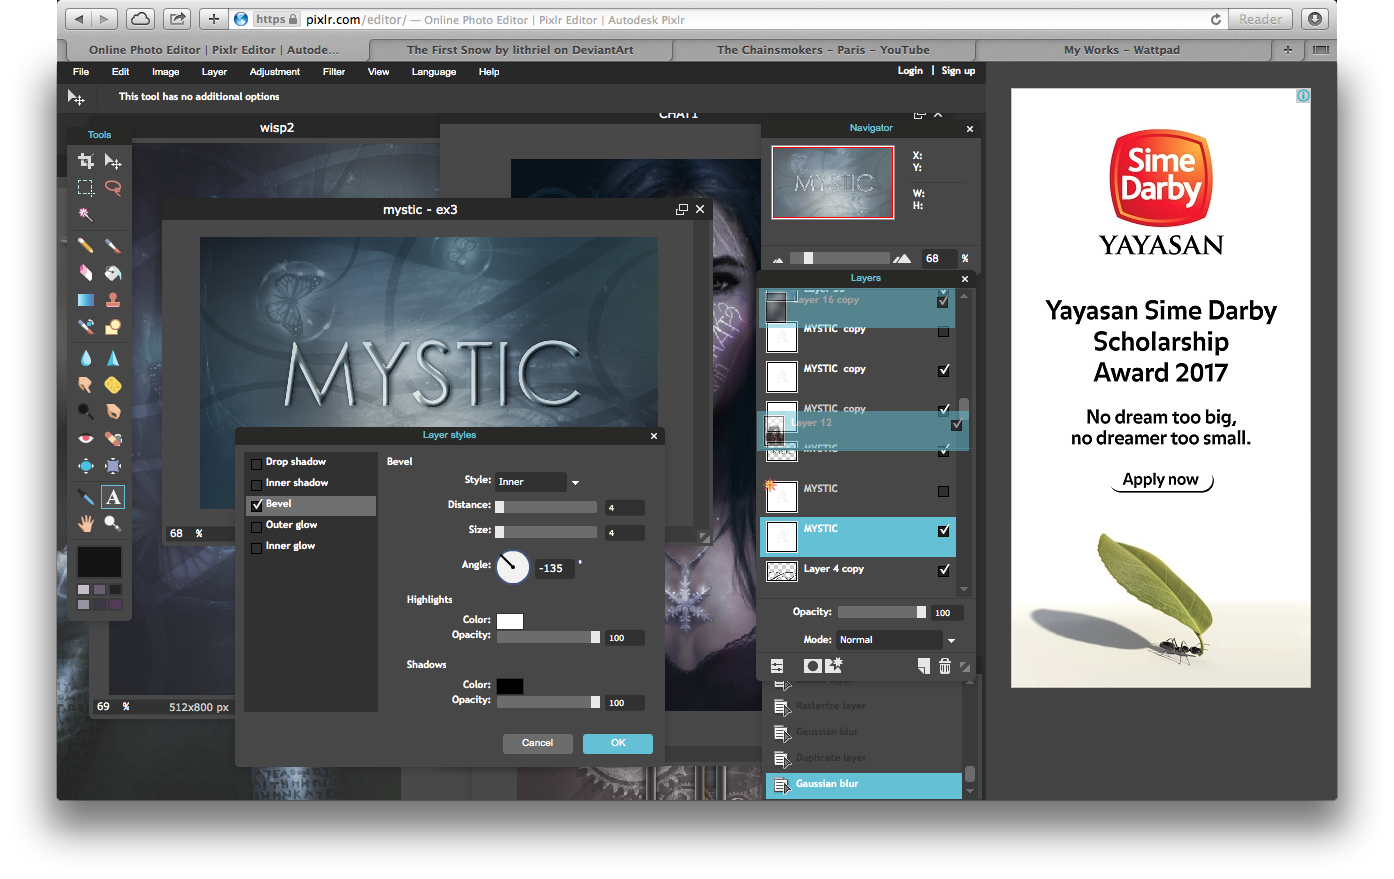
Step 3: Make the adjustments to your liking, and then you're done! If you'd like to make it look clearer, just click on the 'Outer Glow' option and change it to your preferred colour, opacity, hardness and size.

Again, if you have any questions, just comment down below! I hope this tutorial helped. (btw, don't say I didn't warn you about knowing the basic controls of pixlr) XD.
Tutorial by iridescity-
Bạn đang đọc truyện trên: AzTruyen.Top